How to Deploy Axual Connect
This guide shows you how to prepare the governance values Axual Connect needs, install its chart, confirm what the chart created, and switch Axual Connect on for an instance in Self-Service.
Type |
How-to guide |
Goal |
Get Axual Connect running for an instance and available to App Owners in Self-Service. |
Audience |
Platform Operator with Helm access to the cluster, plus a Tenant Admin account for the final step. |
When to use |
Use this guide only when maintaining an existing Axual Connect installation. New installations use Kafka Connect. |
|
Axual Connect is deprecated. See Why Kafka Connect replaces Axual Connect for the deprecation timeline. New installations deploy Kafka Connect instead, which gives each tenant its own cluster rather than one cluster shared by every tenant on the instance. See How to Deploy a Kafka Connect Cluster to install it, or Migrating from Axual Connect to Kafka Connect to move an existing installation across. |
Axual Connect is a runtime component, installed at stage 5 of The installation order, once the streaming and governance layers exist.
Prerequisites
Confirm the following before you begin.
Access and permissions required
You need the following access and permissions:
-
Helm access to the namespace the platform runs in.
-
A Tenant Admin account in Self-Service, for the final step.
-
Access to the Axual chart registry.
Resources that must exist before starting
The following must already exist:
-
A working Axual Platform installation, deployed with the Helm charts. See Installation and Configuration of Axual Platform.
-
A HashiCorp Vault configured for Axual Connect. Do this first: the governance values below reference the AppRole it creates. See How to Set Up Vault for Axual Connect.
Enable Connect in the governance values
Platform Manager does not talk to Axual Connect until the values name the cluster and supply credentials for it, and Platform UI hides the Connect screens until you switch them on. Both changes go in the governance values.
Add the Connect block to Platform Manager. The username and password must match the basicAuth values in the Axual Connect chart values, or Platform Manager’s calls are rejected.
platform-manager:
  config:
    axual:
      # Connect Configuration
      connect:
        # -- Enable Connect Support
        available: true
        # -- Must match the basicAuth values in the Axual Connect chart values
        instanceConnectCredentials:
          <TENANT>-<INSTANCE>:
            authorizer: "basic"
            username: "<CONNECT_USERNAME>"
            password: "<CONNECT_PASSWORD>"
    # Connectors Vault Configuration, a sibling of `axual`, not a child of it
    connectorVault:
      enabled: true
      instances:
        <TENANT>-<INSTANCE>:
          uri: "http://axual-governance-platform-manager-vault:8200"
          roleId: "<CONNECT_ROLE_ID>"
          secretId: "<CONNECT_SECRET_ID>"
          certChainKeyName: "certificate.chain"
          privateKeyName: "private.key"
          connectorsPath: "connectors"
Replace every <VALUE> placeholder with your own value before applying the file. The roleId and secretId come from the Vault AppRole created in the prerequisites, and <TENANT>-<INSTANCE> is the tenant and instance short names joined by a hyphen, for example axual-dev.
|
Both blocks are indentation sensitive. available and instanceConnectCredentials are children of connect, and connectorVault sits under config beside axual rather than inside it. Every key these two blocks accept is listed in Connect Configuration. To keep the passwords and AppRole IDs out of the governance values, see How to Store Component Credentials in a Kubernetes Secret.
Then switch the Connect screens on in Platform UI:
platform-ui:
  config:
    connectEnabled: true
Install the chart
Prepare the Axual Connect values, then install the chart from the Axual registry.
Click to open axual-connect-values.yaml
axual:
  tenant: &tenant "<tenant-short-name>"
  instance: &instance "<instance-short-name>"
  environment: "<environment-short-name>"
  applicationId: "_<application-short-name>"
  applicationVersion: "1.0.0"
  # Do not use Discovery API, but static configs
  staticConfig:
    tenant: *tenant
    instance: *instance
    cluster: "<cluster-name>"
    # If connect is running in the same Kubernetes cluster we can just use the internal service url as well.
    bootstrapServers: "bootstrap-kafka.<domain>:443"
    schema.registry.url: "https://apicurio.<domain>"
    enable.value.headers: "false"
    group.id.resolver: "io.axual.common.resolver.GroupPatternResolver"
    group.id.pattern: "{tenant}-{instance}-{environment}-{group}"
    topic.resolver: "io.axual.common.resolver.TopicPatternResolver"
    topic.pattern: "{tenant}-{instance}-{environment}-{topic}"
    transactional.id.resolver: "io.axual.common.resolver.TransactionalIdPatternResolver"
    transactional.id.pattern: "{tenant}-{instance}-{environment}-{transactional.id}"
  tls:
    clientEnabled: true
    serverEnabled: false
    automatedKeystores: true
    createClientKeypairSecret: false
    clientKeypairSecretName: "axual-connect-cert-secret"
    clientKeypairSecretCertName: "tls.crt"
    clientKeypairSecretKeyName: "tls.key"
    createTruststoreCaSecret: false
    truststoreCaSecretName: "my-external-ca"

  basicAuth:
    enabled: true
    username: "axual"
    password: "password!"

persistPlugins:
  enabled: false
  createPersistentVolume: false

downloadPlugins:
  enabled: true
  artificateBaseUrl: "https://stpaxualconnect.blob.core.windows.net"
  connectPluginsFile: "dizzl-0eafdac8/dizzl-axual-connect-plugins-2.0.0.tgz"
  commonResourcesFile: "dizzl-0eafdac8/dizzl-axual-connect-common-2.0.0.tgz"
  resourcePath: "/usr/share"
  resources:
    requests:
      cpu: 100m
      memory: 128Mi
    limits:
      memory: 2Gi

configurationOverrides:
  "plugin.path": "/usr/share/plugins"
  "plugin.discovery": "SERVICE_LOAD"


# Vault Configuration
vault:
  address: "http://axual-governance-platform-manager-vault.axual.svc.cluster.local:8200"
  authMethod: APPROLE
  approleRoleId: "987d4b9f-a0b7-ac36-afab-6ab1f597e149"
  approleSecretId: "20b5bfaa-7d97-a0c2-fcfb-6f8f43718533"
  ssl:
    verify: true
  secretProvider:
    enabled: true
    class: io.axual.utilities.config.providers.VaultConfigProvider
  keystoreProvider:
    enabled: true
    class: io.axual.utilities.config.providers.VaultKeyStoreProvider
    truststorePassword: notsecret
    certificateChainKeyname: certificate.chain
    privateKeyKeyname: private.key

# Init Resouce Configuration
keystoreProvider:
  resources:
    requests:
      cpu: 100m
      memory: 128Mi
    limits:
      memory: 256Mi

kafkaInitContainer:
  # -- Enable topic and ACL creation
  enabled: true
  # If connect is running in the same Kubernetes cluster we can just use the internal service url as well.
  bootstrapServers: "SSL://bootstrap-kafka.<domain>:443"
  # -- min.isr of topics used to store connect state/offset/config
  minIsr: "1"
  # -- Replication factor of topics used to store connect state/offset/config
  replicationFactor: "1"
  # -- Principal common name used to produce and consume from connect state/offset/config topics (should match the one on axual.tls.clientKeystore)
  principal: "User:CN=Connect client"
  tls:
    # -- Existing Keypair secret name
    keypairSecretName: "server-cert-secret"
    # -- Existing Keypair key name
    keypairSecretKeyName: "tls.key"
    # -- Existing Keypair certificate name
    keypairSecretCertName: "tls.crt"
    # -- Existing Truststore secret name
    truststoreCaSecretName: "my-external-ca"
    # -- Existing Truststore certificate name
    truststoreCaSecretCertName: "ca.crt"
  # -- The [resource requirements](https://kubernetes.io/docs/concepts/configuration/manage-resources-containers/) for this container.
  resources:
    requests:
      cpu: 100m
      memory: 128Mi
    limits:
      memory: 256Mi

# configuration values for RoutingKafkaAppender
routedLogging:
  # indicates if we add the routing Kafka appender to the Logback config
  enabled: false
  # indicates if we take Axual environment in consideration when routing connector logging
  suppressEnvironment: false
  pattern: '%d{yyyy-MM-dd HH:mm:ss.SSS} [%thread] %-5level %logger{36} %msg'
  enableHostnameVerification: true
  debugMode: false

securityContext:
  { }

additionalWorkerConfig:
  { }

podLabels: {}

connect-vault:
  enabled: true
  ui:
    enabled: true
    serviceType: "LoadBalancer"
    externalPort: 8200
  server:
    dataStorage:
      storageClass: "hostpath"
  injector:
    enabled: false
To keep the basic auth credentials out of the values file, store them in a Kubernetes Secret with the keys username and password, in the kafka namespace. Write each value to a file first, with no trailing newline, so neither reaches your shell history:
kubectl create secret generic connect-basic-auth -n kafka \
  --from-file=username=./username --from-file=password=./password
rm ./username ./password
Then name the Secret in axual.basicAuth.secretName and leave username and password out. The chart reads both from the Secret when secretName is set. The Vault AppRole IDs take the same approach through vault.secretName, described in How to Set Up Vault for Axual Connect.
axual:
  basicAuth:
    enabled: true
    secretName: connect-basic-auth
Install the chart from the Axual registry, with the values file you prepared. Take the chart version from Axual Connect 0.2.1 Helm Readme, which is generated from the chart and states the version it documents.
helm upgrade --install axual-connect \
  oci://registry.axual.io/axual-charts/axual-connect \
  --version <CHART_VERSION> \
  --namespace kafka \
  -f axual-connect-values.yaml
Confirm what the chart created
Check the release status before moving on to Self-Service, because a failed release is easier to read here than as a missing option in Self-Service.
helm status axual-connect -n kafkaExpected output reports the release as deployed:
NAME: axual-connect
LAST DEPLOYED: Fri Nov 20 16:36:51 2020
NAMESPACE: kafka
STATUS: deployed
REVISION: 5
TEST SUITE: None
NOTES:
This chart installs Axual Connect
The chart creates six resources:
-
A Deployment named
<TENANT>-<INSTANCE>-axual-connect, holding the Axual Connect pods. -
A Service named
<TENANT>-<INSTANCE>-axual-connect, which is how clients reach the Connect REST endpoint. -
Secrets holding the sensitive data the pods read.
-
A ConfigMap holding the rest of their configuration.
-
A Persistent Volume that persists the connect plugins and common resources.
-
A Persistent Volume Claim, which is how the pods mount that volume.
Verify the worker is running
A deployed release still needs checking. Confirm the pod is up, then that the Connect API answers and has loaded the plugins you expect, before registering anything in Self-Service.
Check the pod first:
kubectl --namespace kafka get pods -l app.kubernetes.io/name=axual-connectThe Connect API is deliberately not exposed publicly, so reach it through a port-forward. The port is set in your values.yaml, and kubectl describe service <TENANT>-<INSTANCE>-axual-connect reports it.
kubectl --namespace kafka port-forward service/<TENANT>-<INSTANCE>-axual-connect 8083:<PORT>
curl -s http://localhost:8083/connector-plugins | jq '.[].class'
Expected output is a list of plugin class names. That single response confirms three things at once: the worker started, its API is reachable, and the plugins in the download archive unpacked.
An empty list means the worker is running but loaded no plugins, which is a download or archive problem rather than a deployment one. See How to Install Connect Plugins. If the pod never reaches Running, or the API does not answer, Troubleshoot an Axual Connect Deployment covers collecting the Deployment spec, pod events and logs.
Enable Axual Connect on the instance
App Owners cannot create a Connect application until the instance points at the Connect endpoint. Set that in Self-Service, as a Tenant Admin.
-
Log in to Self-Service at
https://platform.<DOMAIN>/login/<TENANT>;. -
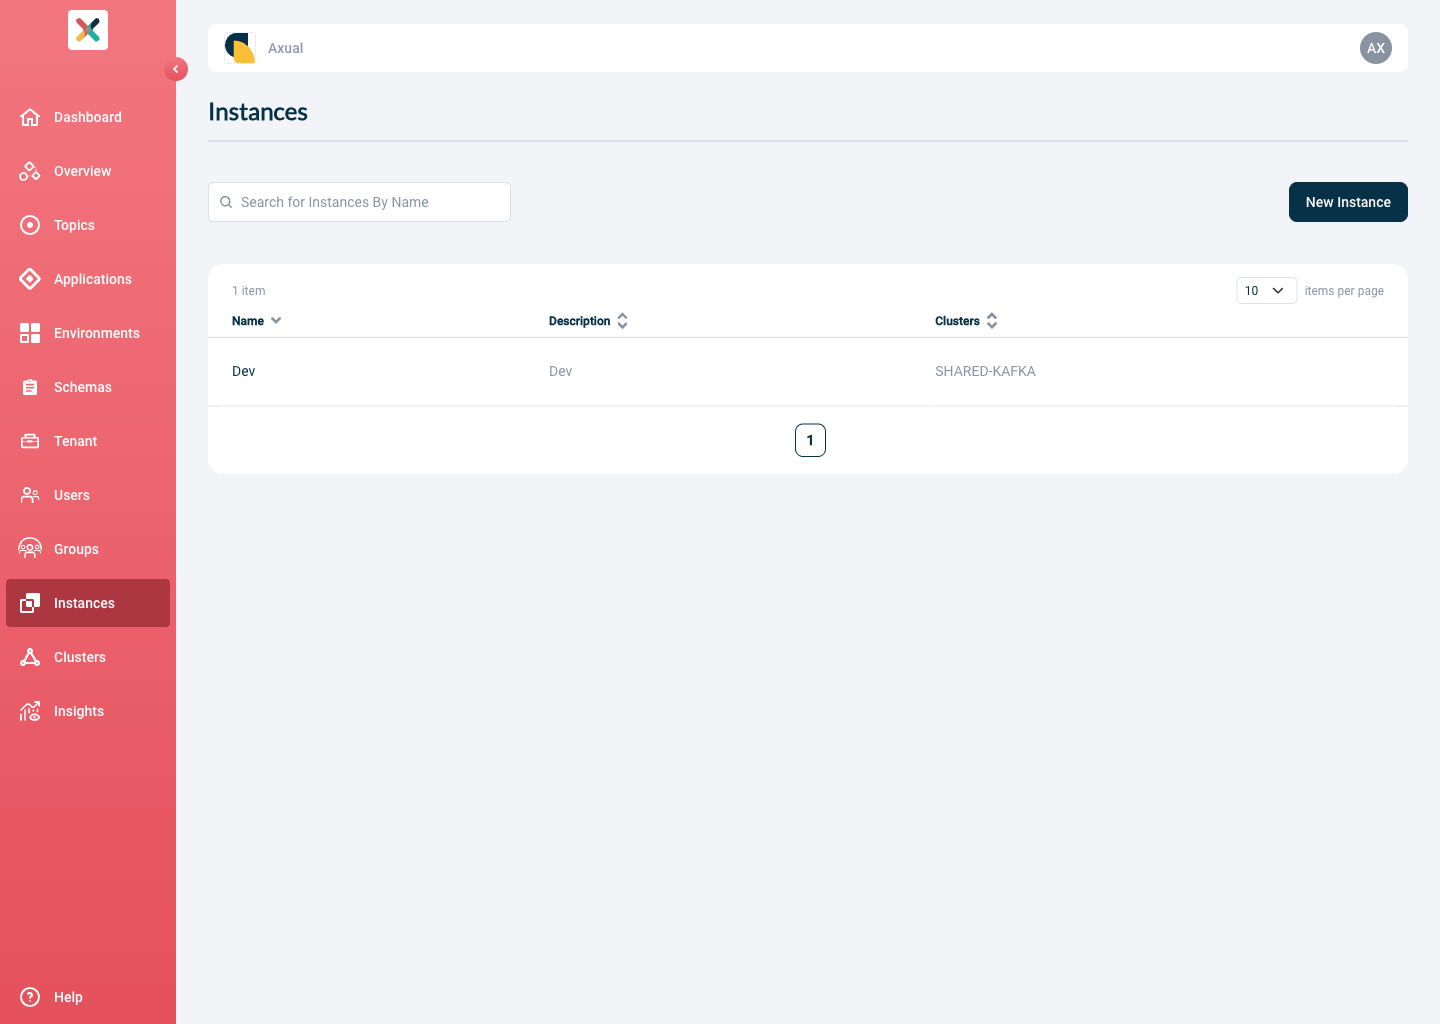
Go to the Instances page.
-
Select
<TENANT>-<INSTANCE>and open the edit form. -
Enable Axual Connect.
-
Set Connect URL to
https://platform.<DOMAIN>:11000/. -
Click Update Instance at the bottom right.
Axual Connect is now available on the instance, and App Owners can create a Connect application in Self-Service.
If the instance does not save, or Connect stays unavailable after saving, Troubleshoot an Axual Connect Deployment covers the Platform Manager and Axual Operations Manager side of the connection.
What to do next
The installation has no connector plugins beyond what the chart’s default download location provides. Continue with How to Install Connect Plugins, which adds plugin JARs to the cluster.
When a worker or a connector fails instead, Troubleshoot an Axual Connect Deployment covers what to check.