Enabling Flink for an Instance
This guide shows you how to enable Flink for an Instance, register a Flink Cluster, and manage that cluster’s lifecycle.
Type |
How-to guide |
Goal |
Enable Flink for an Instance and register a Flink Cluster so application owners can deploy Flink applications. |
Audience |
Tenant Admin, a user who can configure an Instance’s settings. |
When to use |
Use this guide when adding Flink support, or a Flink Cluster, to an existing Axual Instance. |
Prerequisites
To enable Flink for your Instance, you will need the following:
-
Flink switched on in Axual Governance, which adds the
Flink Supporttoggle to the Instance form. A Platform Operator does this with How to Enable Flink in Axual Governance. -
a Ververica Platform deployment reachable from Platform Manager
-
The URL of the Ververica REST API
-
The workspace, namespace, and deployment target names configured in Ververica
-
An operator-managed, namespace-scoped API token for that deployment target
-
-
a Schema Registry (must be a Confluent-compatible endpoint) reachable from Ververica, used to resolve AVRO schemas for tables
Configuring the Instance
Once the above is ready, the Tenant Admin is able to configure Flink for any Instance that is part of their Tenant.
-
Go to the Instances page
-
Select the Instance for which you are enabling Flink Support and open the edit Instance form
-
Under
Flink Support, enable theFlink Supporttoggle -
Click
Update Instancebutton
Now the Tenant Admin is able to register the Instance Cluster’s Flink Cluster.
Registering a Flink Cluster to the Instance Cluster
Currently, an Instance Cluster supports at most one Flink Cluster.
-
Open the Instance overview page for the Instance configured above.
-
From the Flink section of the page select the Instance Cluster for which you want to register a Flink Cluster. Click
View clusters -
Click
+ Register Flink Cluster -
Fill in the metadata:
-
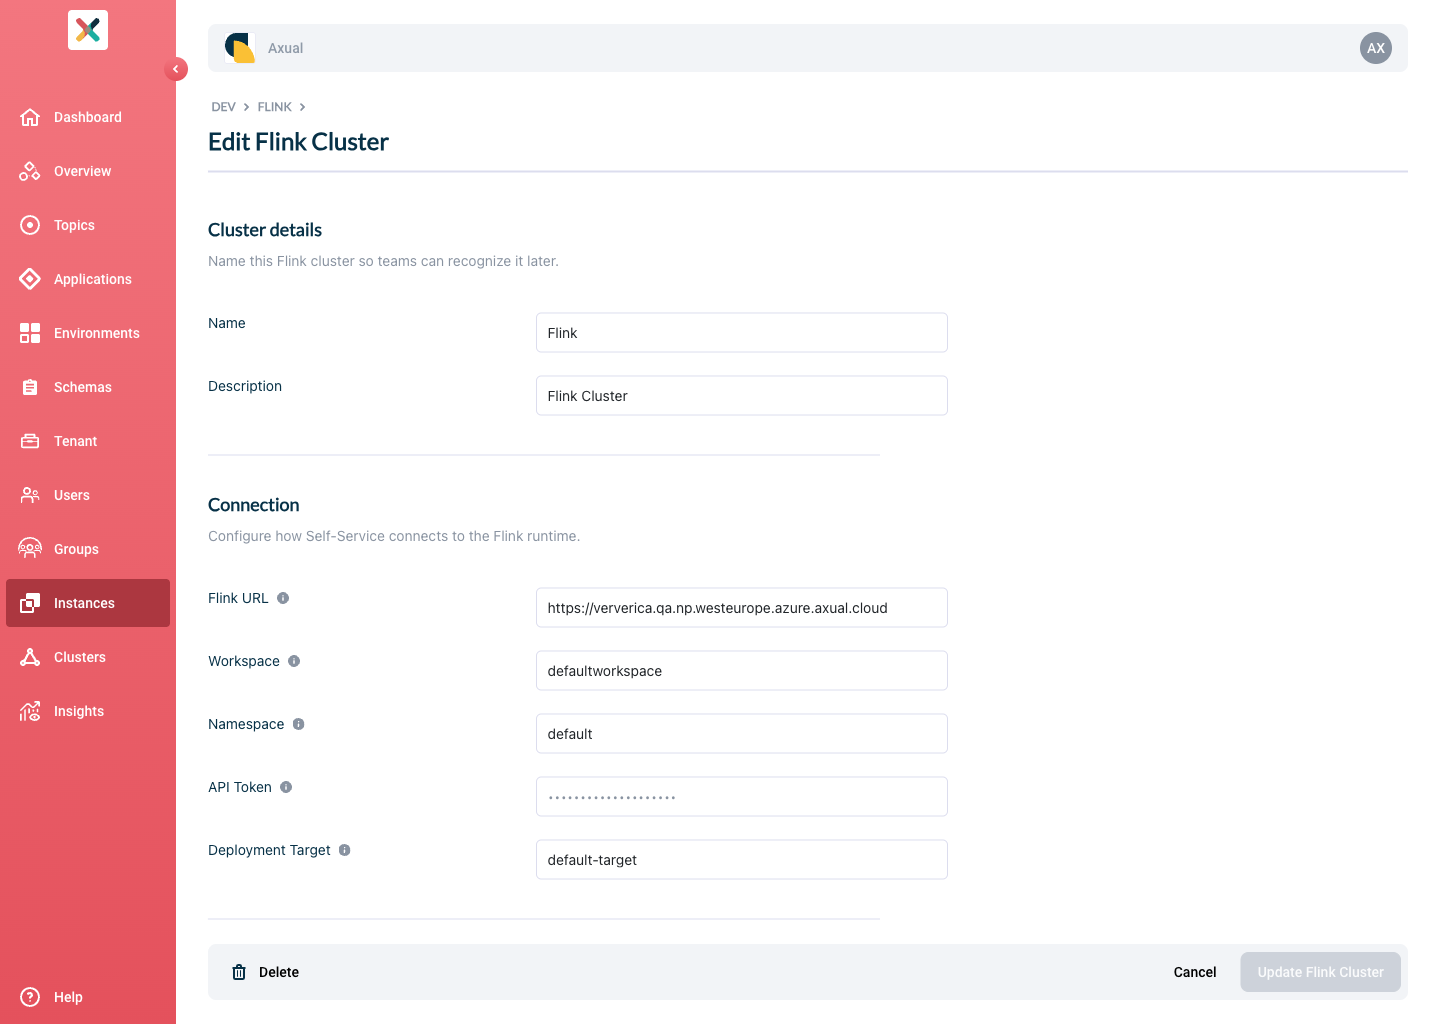
Name: use a name to refer to your cluster.
-
Description: provide a description for your cluster.
-
-
Fill in the Ververica connection info:
-
Flink URL: the URL of the Ververica Platform REST API.
-
Workspace: the Ververica workspace that owns the namespace below.
-
Namespace: the Ververica namespace this cluster deploys into.
-
Deployment Target: the Ververica deployment target used for new Flink deployments.
-
API Token: the namespace-scoped API token provisioned by the Axual Operator. This value is write-only and cannot be retrieved after saving.
-
-
Fill in the Schema Registry info:
-
Schema Registry Endpoint: the Confluent-compatible Schema Registry endpoint used to inject table schemas at deploy time.
-
-
Click
Register Flink Clusterbutton.
Self-Service validates the provided input against Flink before saving, and trims stray leading/trailing whitespace from every field.
| Registration is rejected if the Instance Cluster already has a Flink Cluster registered. Delete the existing one first if you need to point at a different Flink deployment. |
Flink support is now available for the Instance. You can start developing Flink applications.
Editing a Flink Cluster
Once a Flink Cluster is registered, the Tenant Admin can update its configuration.
-
Open the Instance overview page for the Instance that owns the cluster.
-
From the Flink section of the page select the Instance Cluster. Click
View clusters -
Click the name of the Flink Cluster, then click
Edit Flink Cluster -
Change the fields you need to update. API Token is write-only, so it loads as an empty field: leave it empty to keep the current value in Vault, or enter a new value to replace it.
-
Click
Save Changesbutton
| Every update to a Flink Cluster is recorded in the Audit History, with the old and new value of each changed field. |
Deleting a Flink Cluster
A Tenant Admin can remove a Flink Cluster that is no longer needed, once no Flink application deployment still targets it.
-
Open the Instance overview page for the Instance that owns the cluster.
-
From the Flink section of the page select the Instance Cluster. Click
View clusters -
Click the name of the Flink Cluster you want to delete to open its detail page.
-
Click
Delete. -
Review the confirmation dialog:
-
If no Flink application deployment targets in the cluster, click
Deleteto confirm. -
If one or more Flink application deployments still target the cluster, in any deployment state, the dialog lists each one by application name and environment. The
Deletebutton in the dialog stays disabled until you remove every listed deployment. The platform does not stop or remove deployments on your behalf.
-
| Deleting a Flink Cluster cannot be undone. |
| Cluster deletion is recorded in the Audit History. |
Known Limitations
Flink support in Self-Service has the following hard limits:
-
At most one Flink Cluster per Instance Cluster.
-
Flink applications support SASL (Simple Authentication and Security Layer) authentication to Kafka only. Certificate authentication (mTLS) and OAuth are not available.
-
Parallelism is fixed at 1 per Flink application; it is not user-configurable.
-
Only
CREATE TEMPORARY TABLEis supported; there is no persistent Kafka catalog. -
Stop/Resume uses Flink checkpoints only; savepoint-based stop/resume is not supported.
-
Flink itself does not support the Apicurio SerDe natively; it only uses the Confluent-compatible Schema Registry endpoint to inject table schemas.
-
Flink applications only support AVRO schemas; when connecting to a JSON or Protobuf topic, they use the RAW format instead.