Enable KSML Support for an Instance
-
Login to your Tenant in the Self Service
-
Go to the Instances page
-
Select the Instance for which you are enabling the KSML Support and open the edit form
-
Under
KSML Support, click on theConfigure KSML Provisionerlink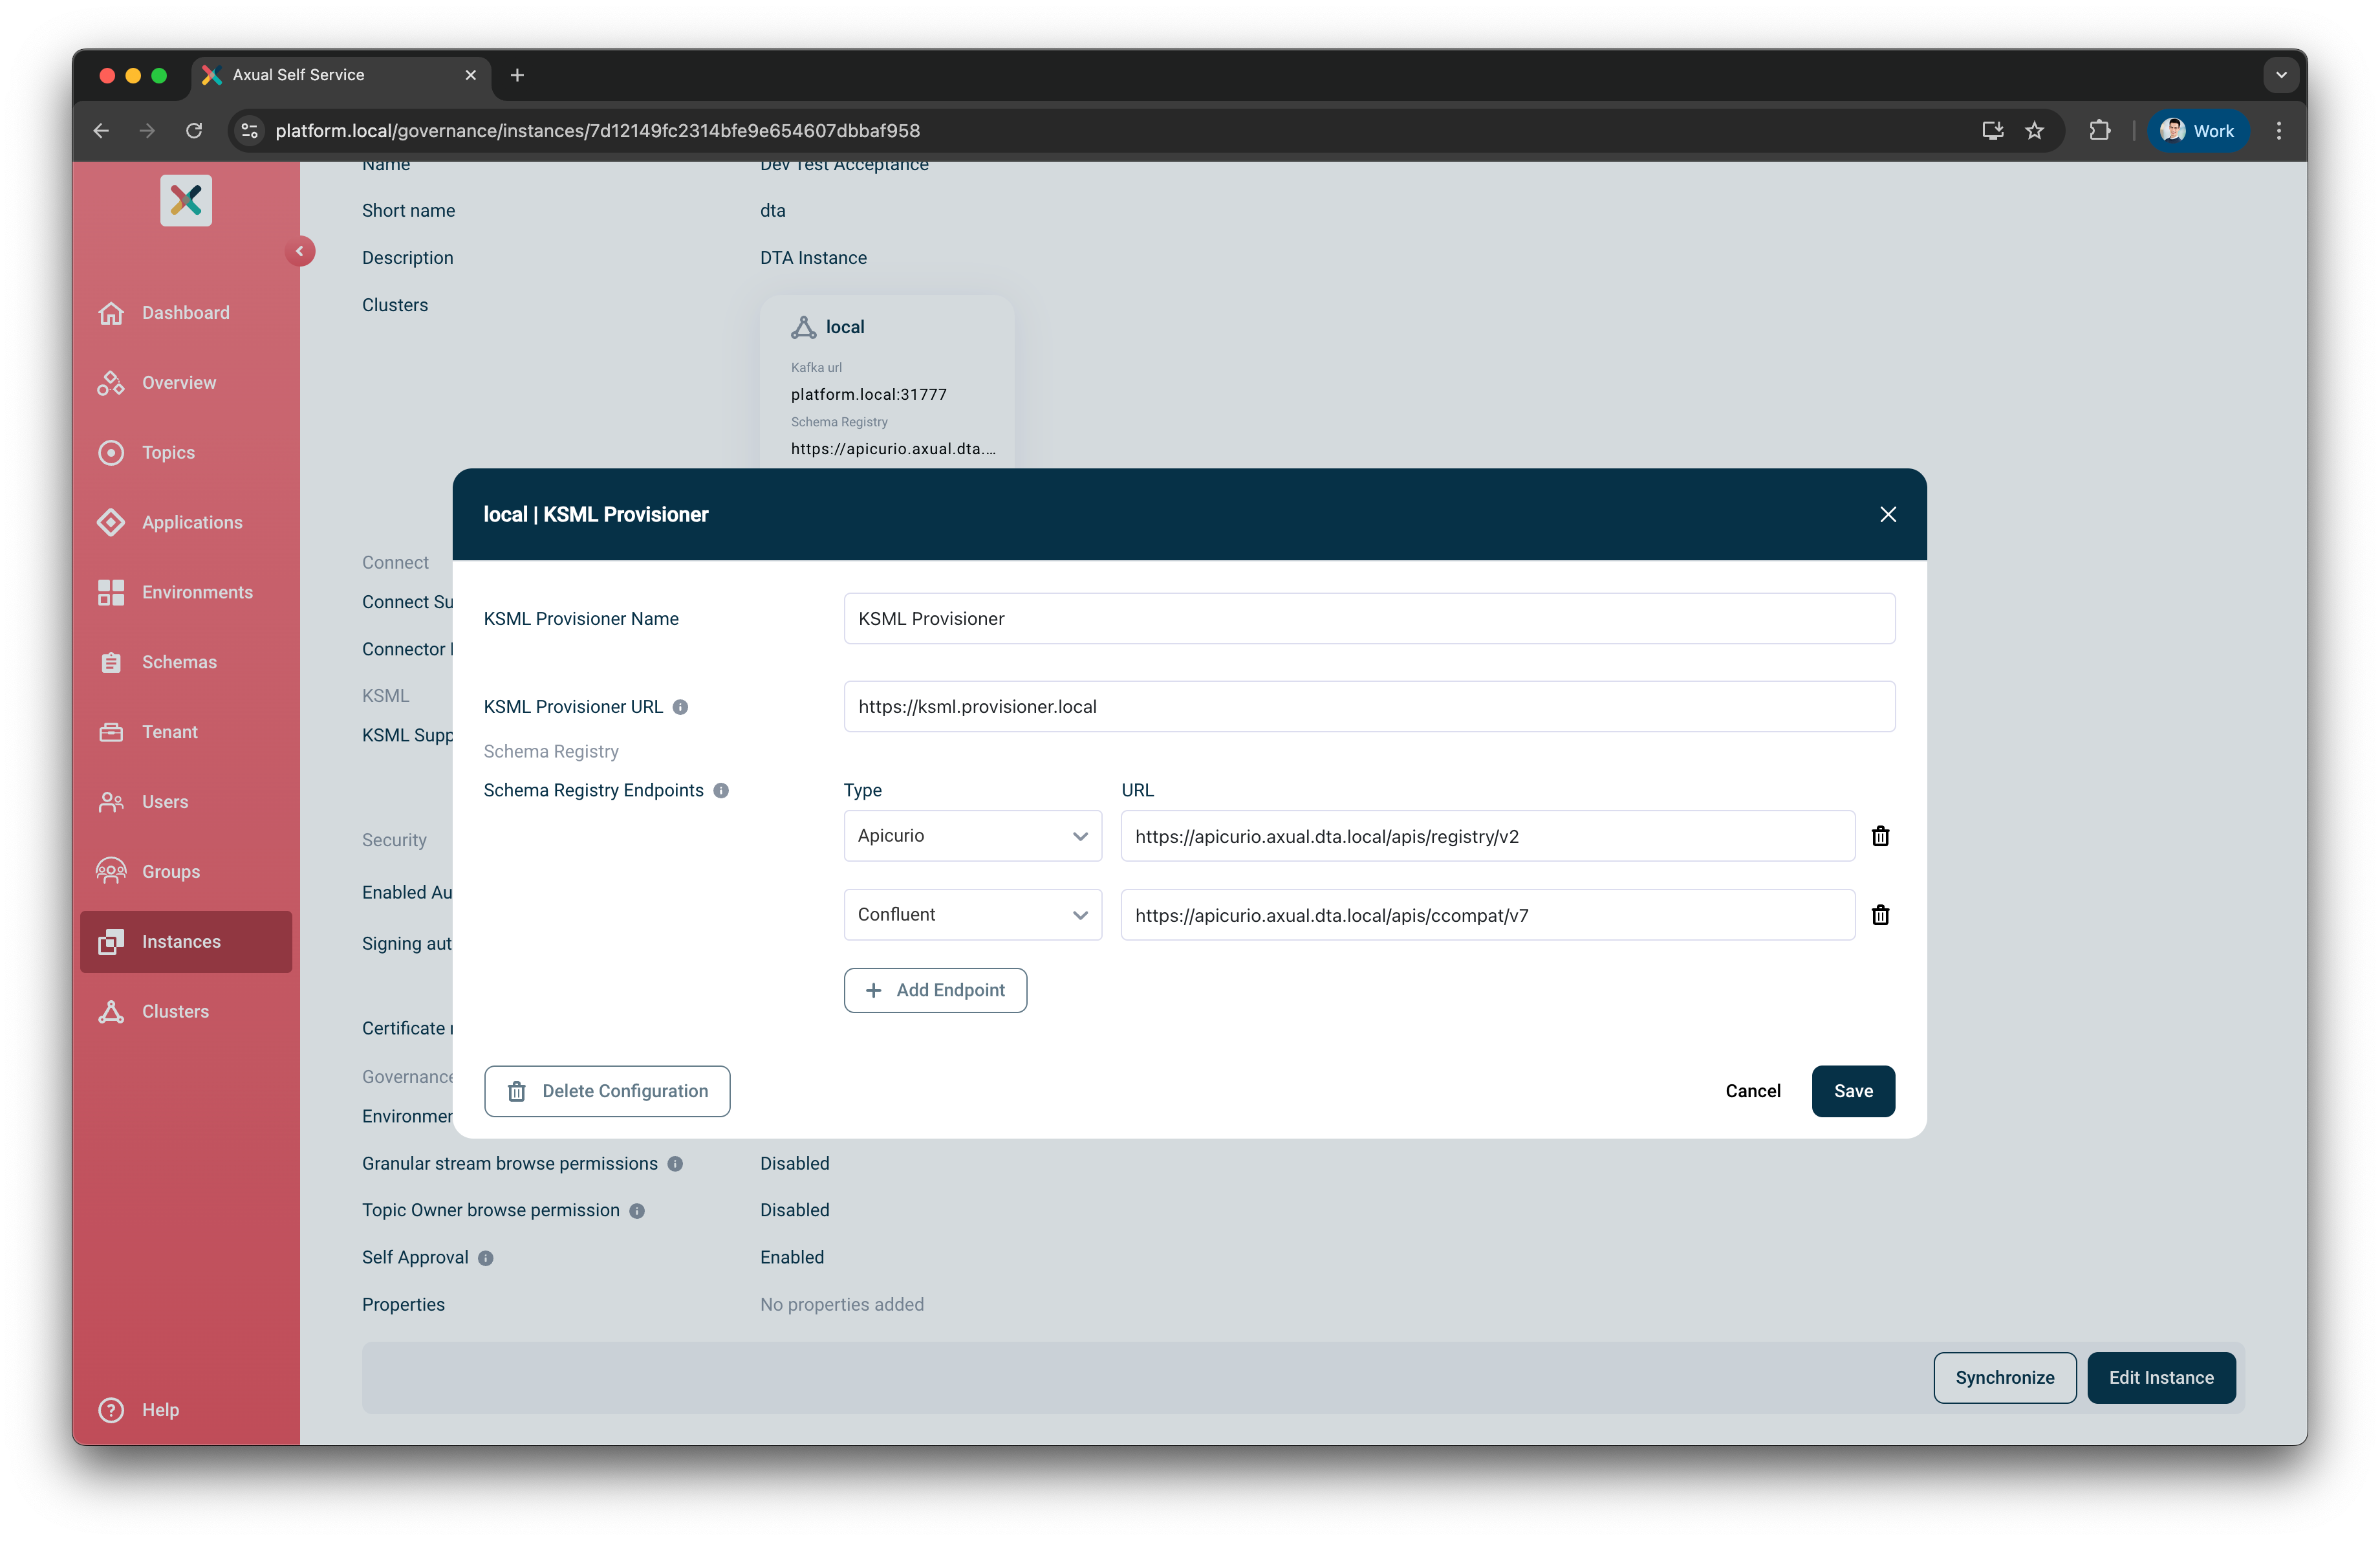
-
Fill in the following fields:
-
KSML Provisioner Name – This is the display name that will appear when configuring the KSML application.
-
KSML Provisioner URL – Provide the Kubernetes service name of your KSML Provisioner (e.g., https://[service-name]-ksml-provisioner:8000/).
-
Schema Registry Endpoints – (Optional) You may provide up to two Schema Registry types and their corresponding URLs. Those guarantee that the correct configuration is forwarded to the KSML Provisioner when working with schema-based serializers/deserializers.
-
-
Click Save button
Congratulations! KSML support is now available! You can now start developing KSML applications.
Optional configurations
The platform provides default settings that allow you to start using KSML immediately without any additional configuration. However, depending on your operational requirements, you may want to customize certain aspects of how KSML Applications are deployed and managed.
The following configurations are optional but give greater control over KSML Application Deployments: