Users and Roles
Authentication & Authorization
Self-Service supports different means of authentication for users.
We support OAuth2, SAML, LDAP and other protocols via Keycloak.
This means the user can use its own corporate credentials to get access. As soon as the user has logged in, authorization is done by Self Service by a combination of a RBAC (Role-Based Access Control) and ABAC (Attribute-Based Access Control) system.
Roles & Permissions
In a DevOps culture, applications, topics, schemas and environments are maintained by the teams responsible for those entities. That is exactly why ownership of resources in Self Service is based on a group (team).
The AUTHOR permissions are always necessary to create a resource and assign an owner.
Default Roles
By default, whenever a user logs in to the Self-Service for the first time, the user receives by default the following roles:
-
Application Author
-
Environment Author
-
Topic Author
Application Permissions
When a user has Edit permissions on an Application, the user has the following additional permissions:
Topic Permissions
When a user has Edit permissions on a Topic, the user has the following additional permissions:
Viewing Topic Messages
Access to the messages of a topic is granted based on the following permissions:
-
If you are a topic owner: you can see the messages on topics you own
-
If you are a tenant admin: you can see the messages on any topic in any environment
-
If you are an application owner of a connected application: you can see the messages on any topic, in authorized environments
Environment Permissions
When a user has Edit permissions on an Environment, the user has the following additional permissions:
Schema Permissions
When a user has Edit permissions on a Schema, the user has the following additional permissions:
-
Upload a new version of the existing Schema
-
Transfer ownership of an existing Schema to another group
-
Delete the existing Schema or its Schema Version
Other Resources
The most frequently modified resources such as Applications, Topics, Environments have now been covered. There are additional resources that are not visible for most users, but can be administered as well, such as:
-
Instance
-
Cluster
-
Group
Tenant permissions
For administering any resource within a tenant, the role "Tenant admin" has been created. This role is intended for people managing the Self Service installation within a company. Anyone with the role Tenant admin has admin permissions for all resources mentioned above, including some additional resources:
-
Users: assign roles, modify, delete users
-
Groups: create, modify and delete groups
-
Tenant: modify the Tenant Profile, such as Admin contacts, logo
Users
Editing A User
-
Click the Users menu item
-
Click on a user to visit the User’s detail page
-
Click the Edit User button and you see the below page:
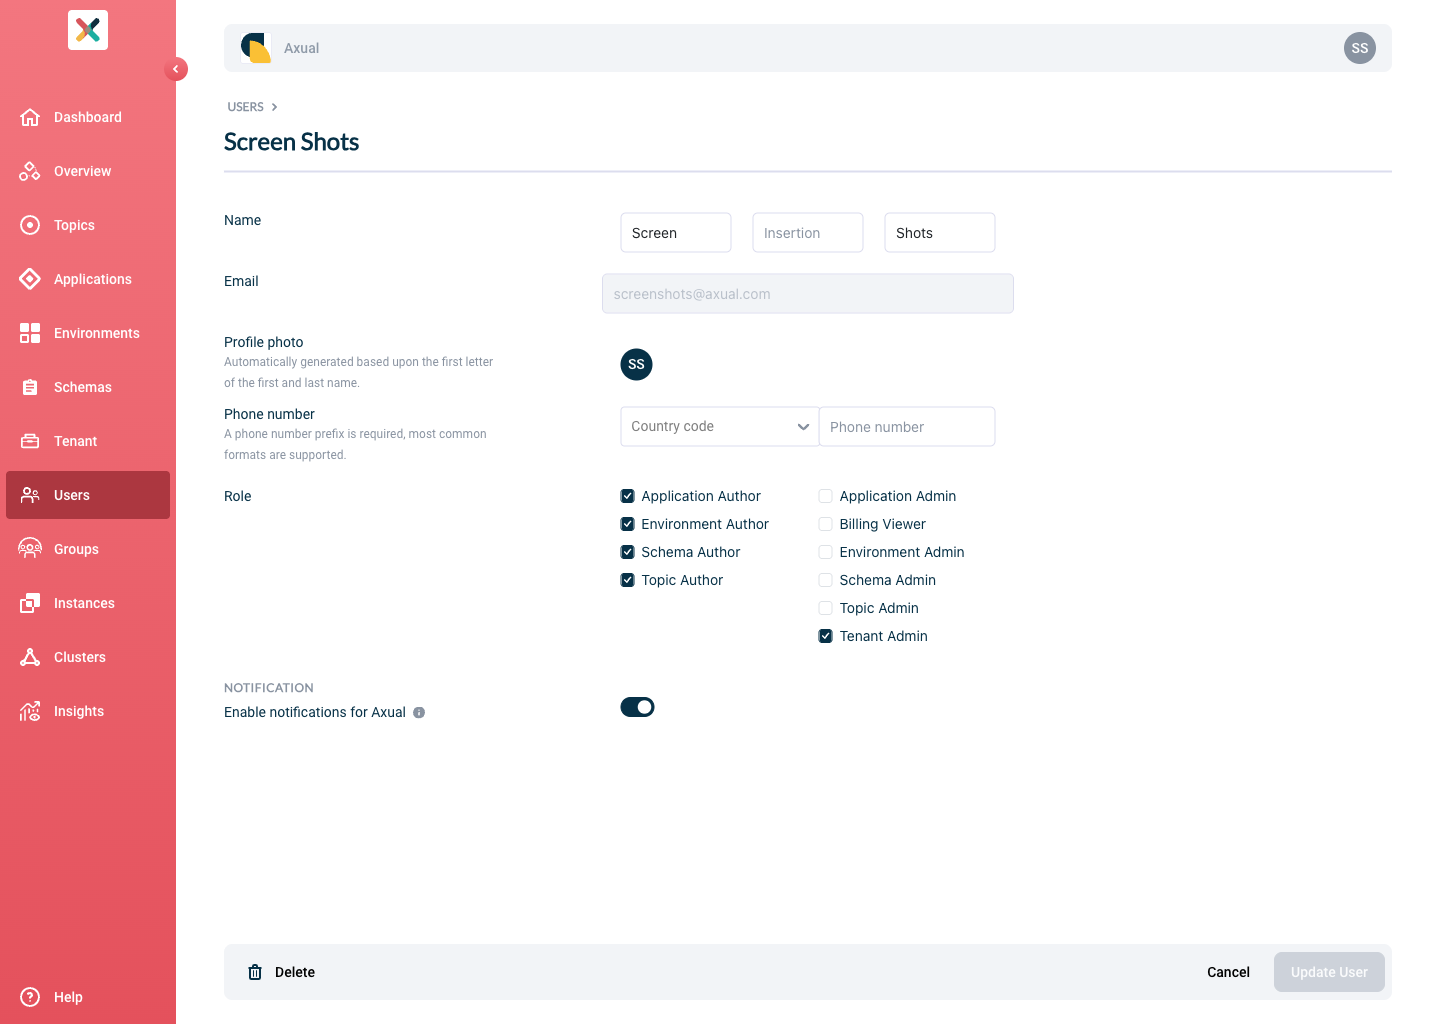
-
Filling or changing any information you need and clicking the Update User button updates the user’s information.
Disable User Notifications
| This setting is only available when Tenant admin has enabled notifications |
-
Go to the User’s detail page
-
Click the Edit User button and you see the below page:
-
Toggle Enable notifications for Axual to disabled.

-
Click on the Update User button. On the bottom right
| By default, notifications for the user are enabled. If notifications are disabled, the user will stop receiving emails about various events related to the owned applications and topics, even if the notifications are enabled in tenant notification settings. |