Managing KSML Applications
Creating KSML Applications
-
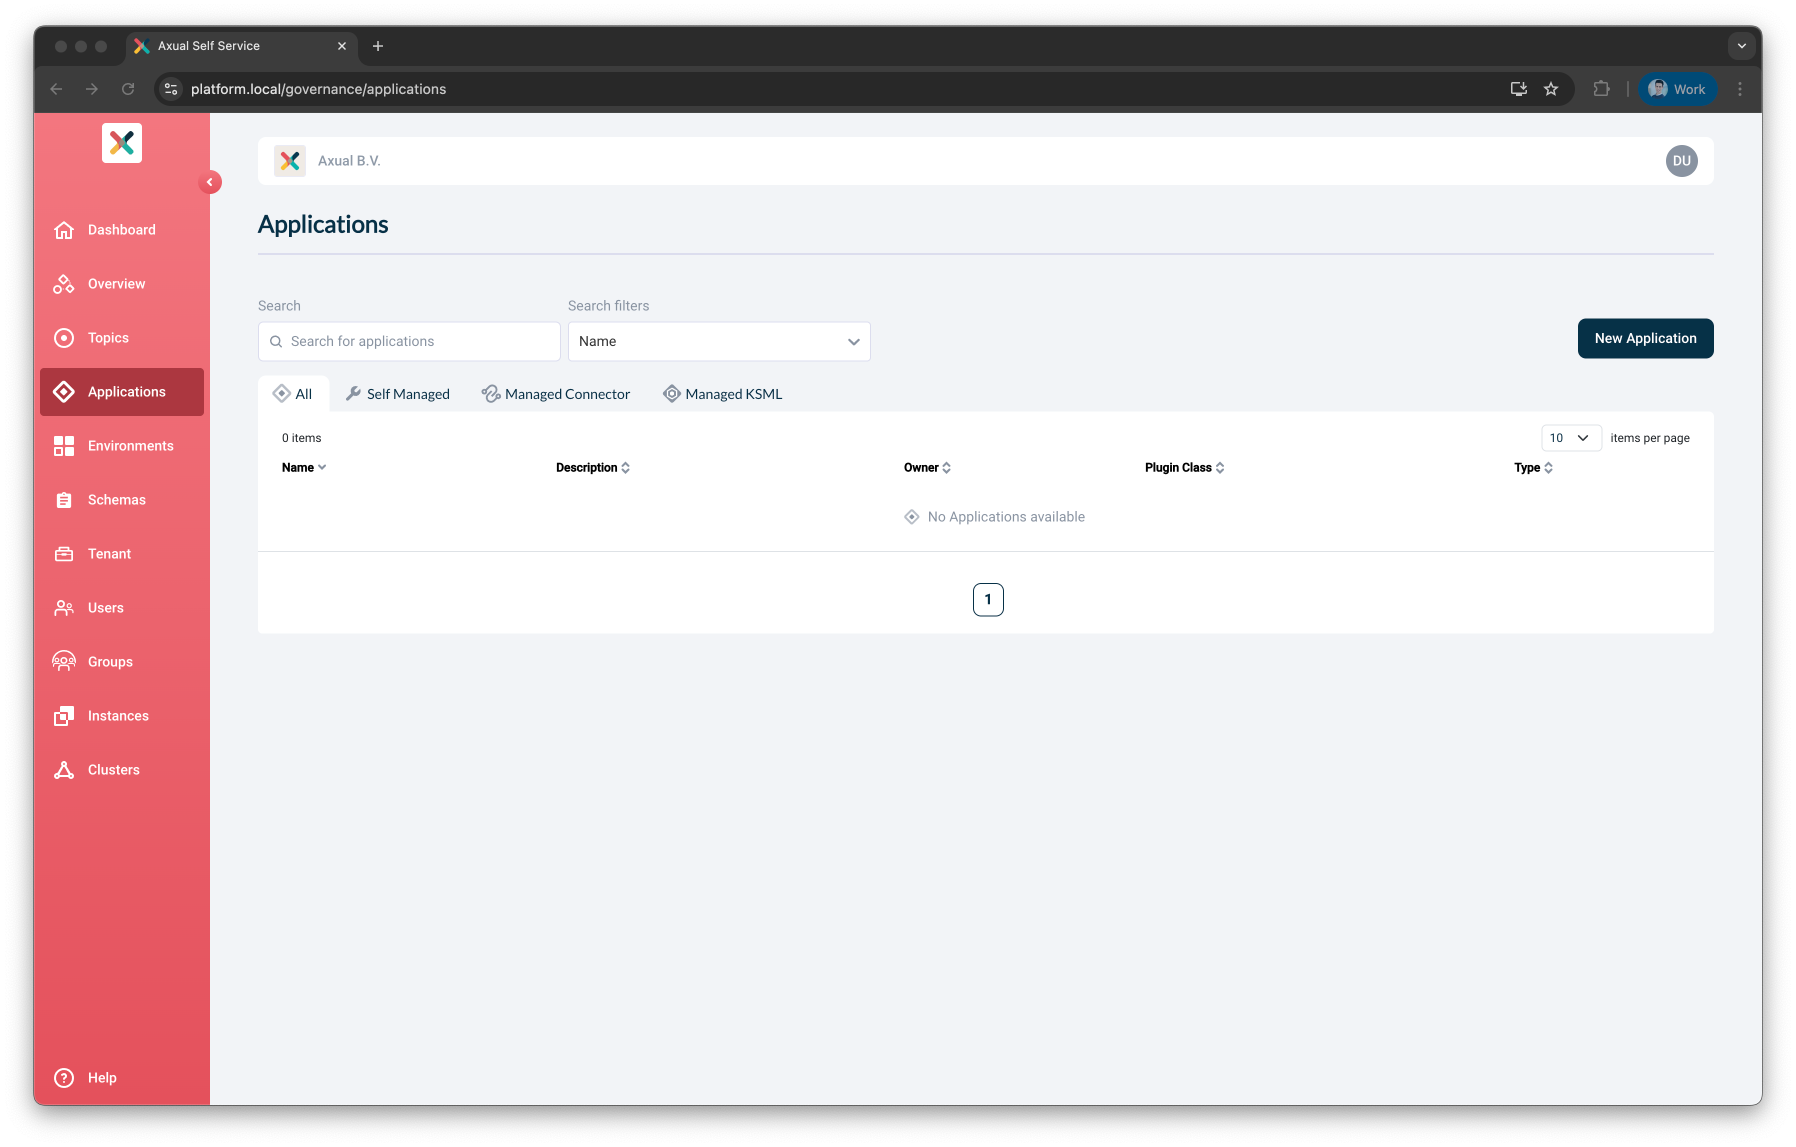
Open the "Applications" page in the Self-Service portal
-
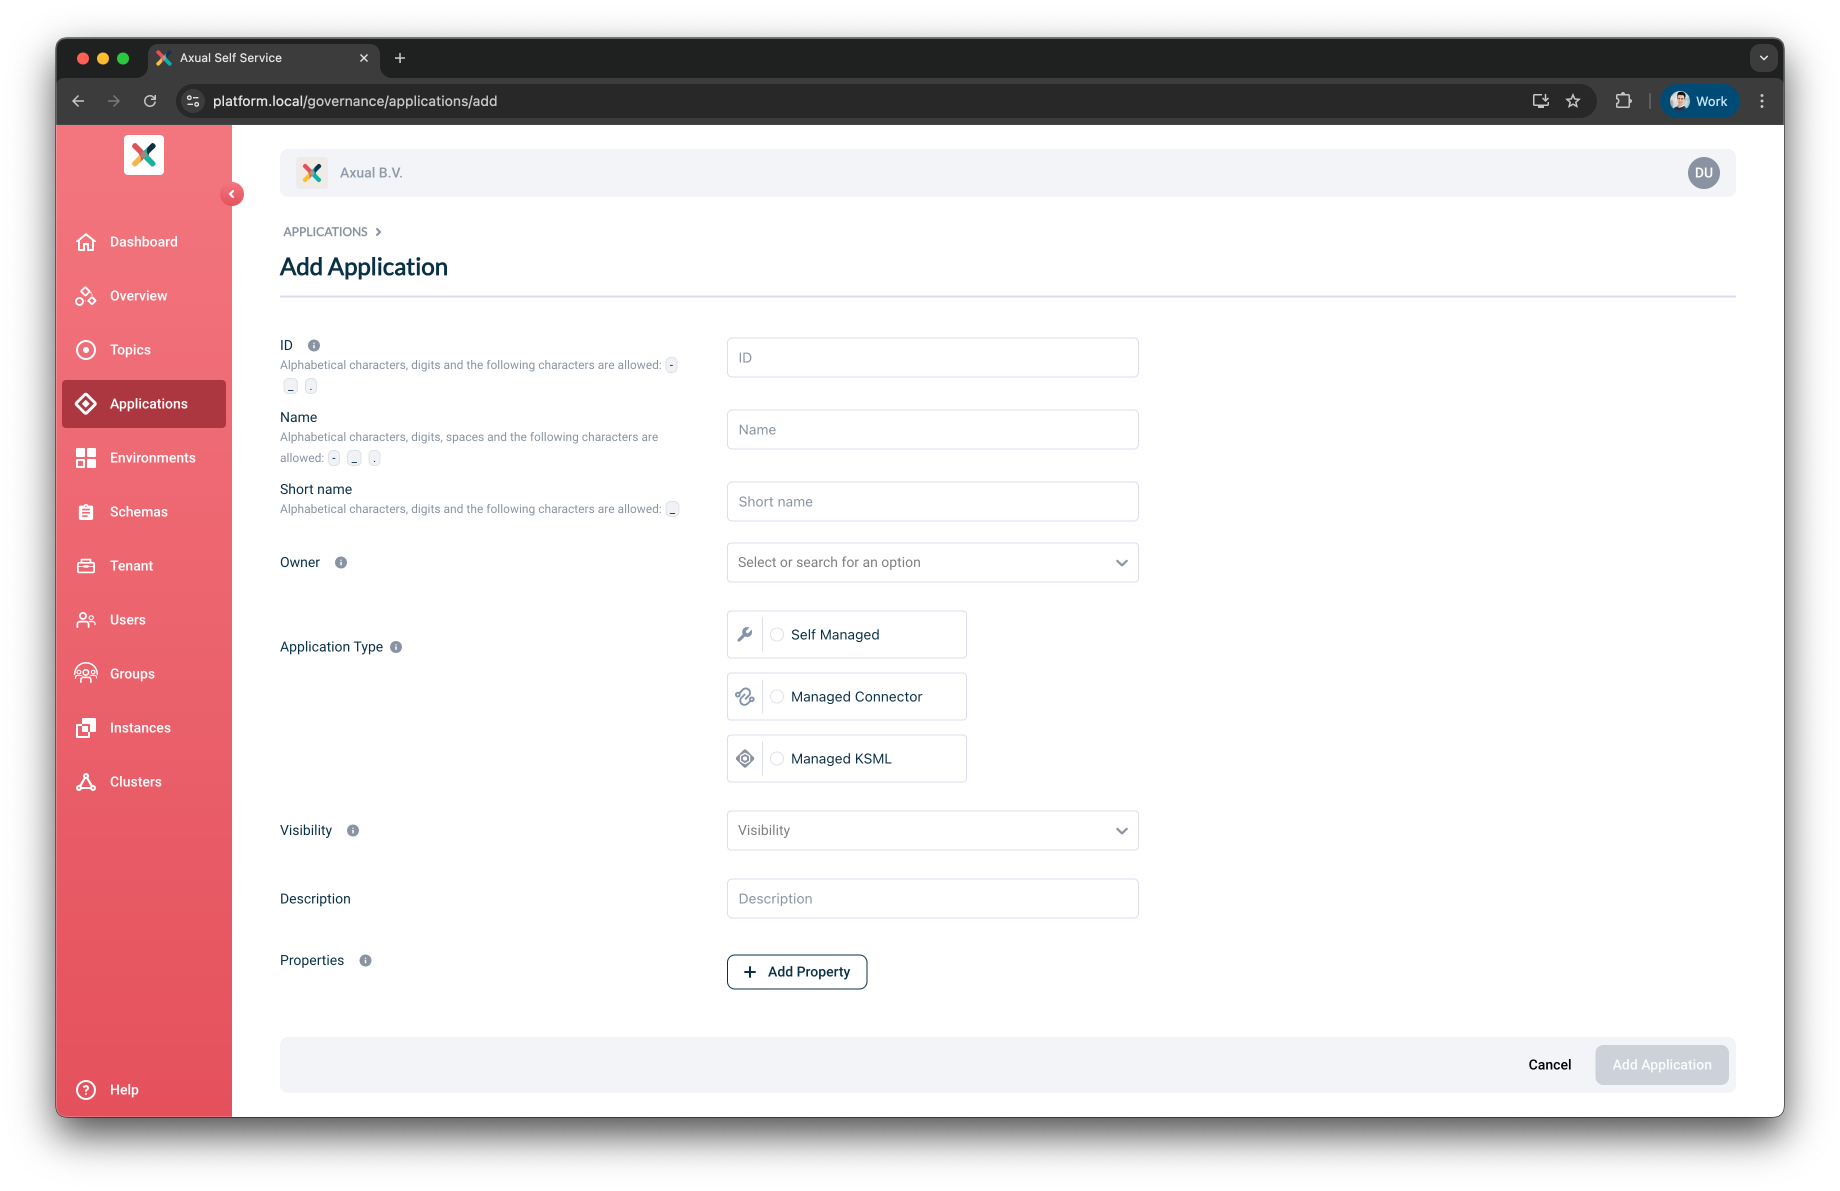
Click the New Application button. This window will open
-
Fill the required information in the form:
-
Owner: All members of the selected group will be authorized to edit this KSML Application.
-
Visibility: Controls read access. Public applications are readable to the entire organization.
Private applications are only visible to their owners. -
Description: A short summary describing the purpose of this application.
-
Click the Add Application button in the bottom-right of the screen.
Upon creating the KSML Application in the Self-Service portal, you will be directed to the application detail page.
Here you can "instantiate" this KSML Application onto multiple environments.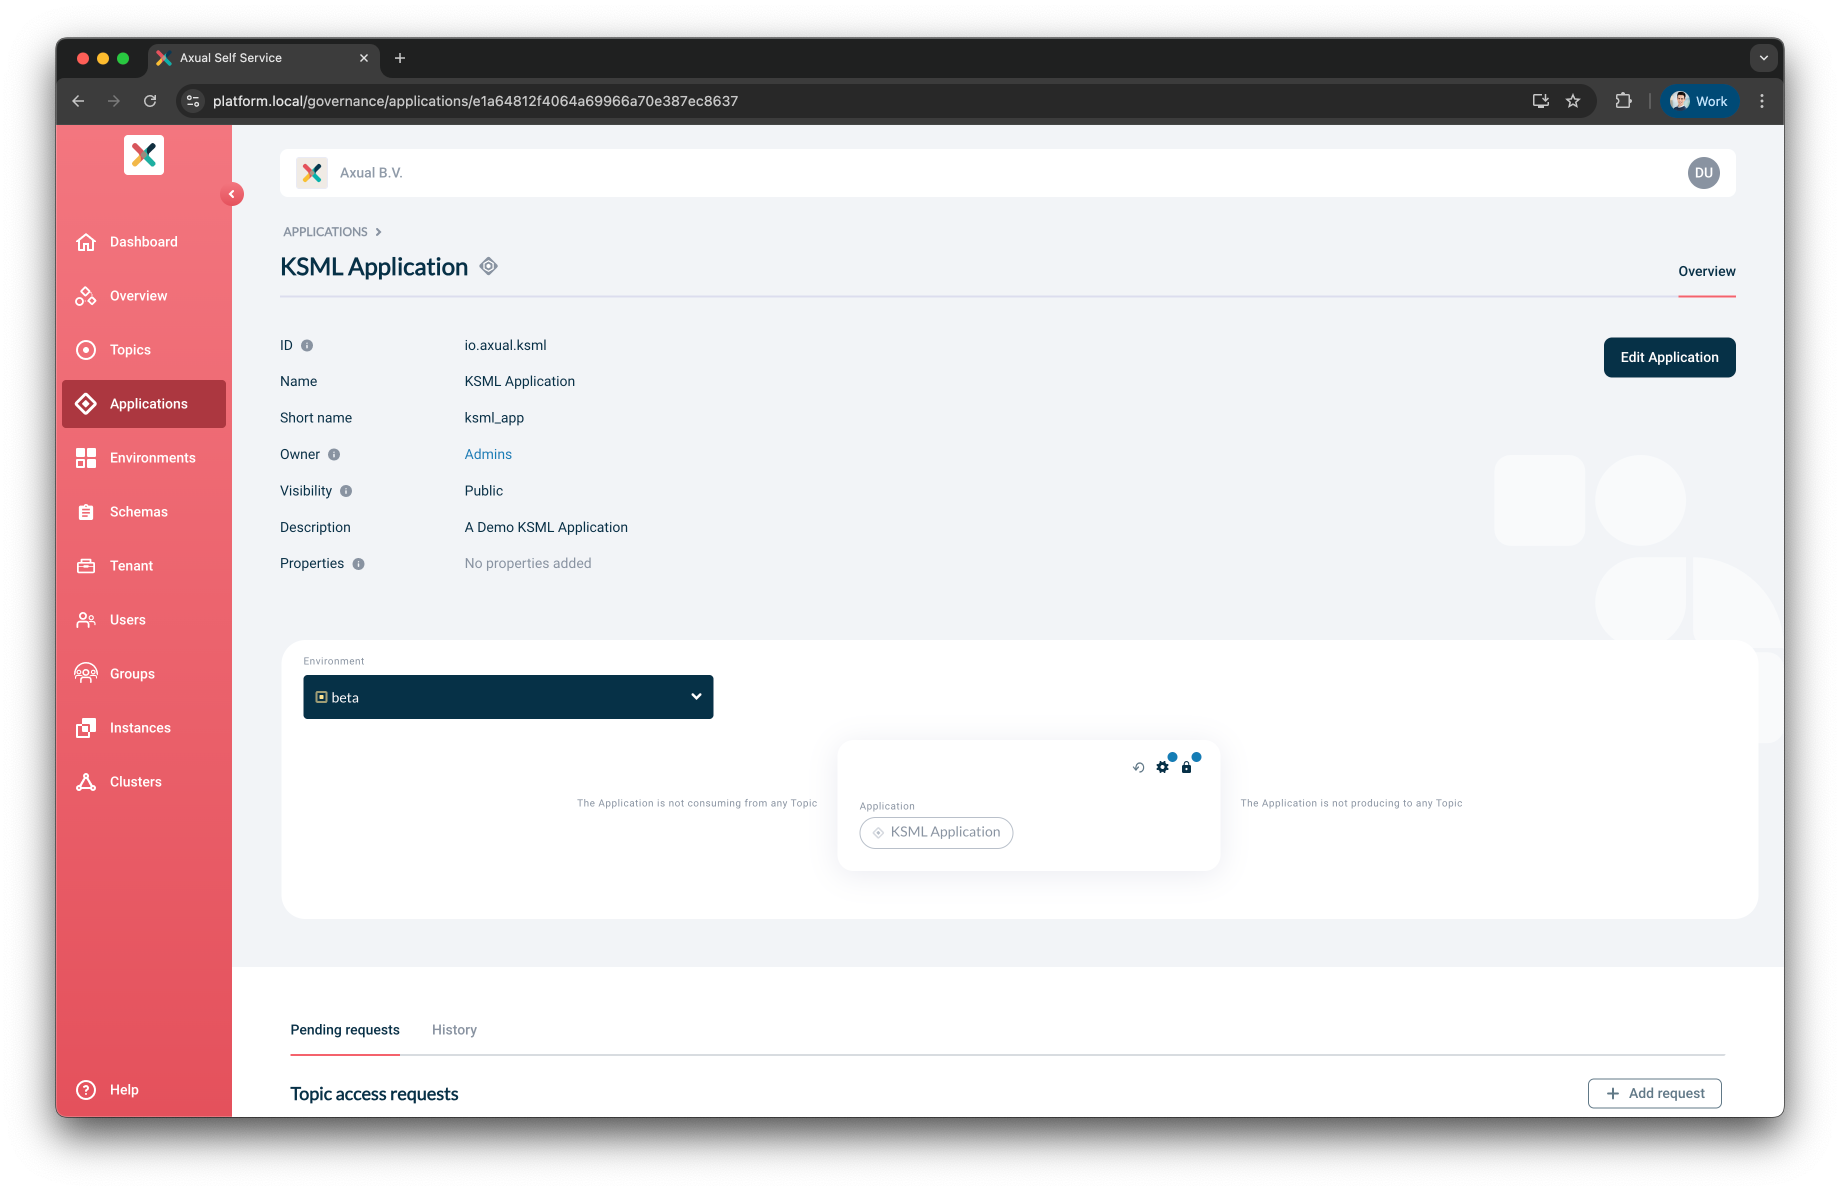
Configuring and starting KSML Applications
A KSML Application needs two sets of configuration for every environment in which it’s deployed:
-
Configuration: Includes the KSML YAML definition and deployment configurations.
-
Authentication: The means to authenticate and authorize the Application against the Kafka cluster. Can be either user-provided certificate and private key PEM files or generated SASL credentials depending on the Instance Cluster Configuration.
A blue indicator is shown if the Security or KSML Definition Configuration is not yet provided. |
Configuration
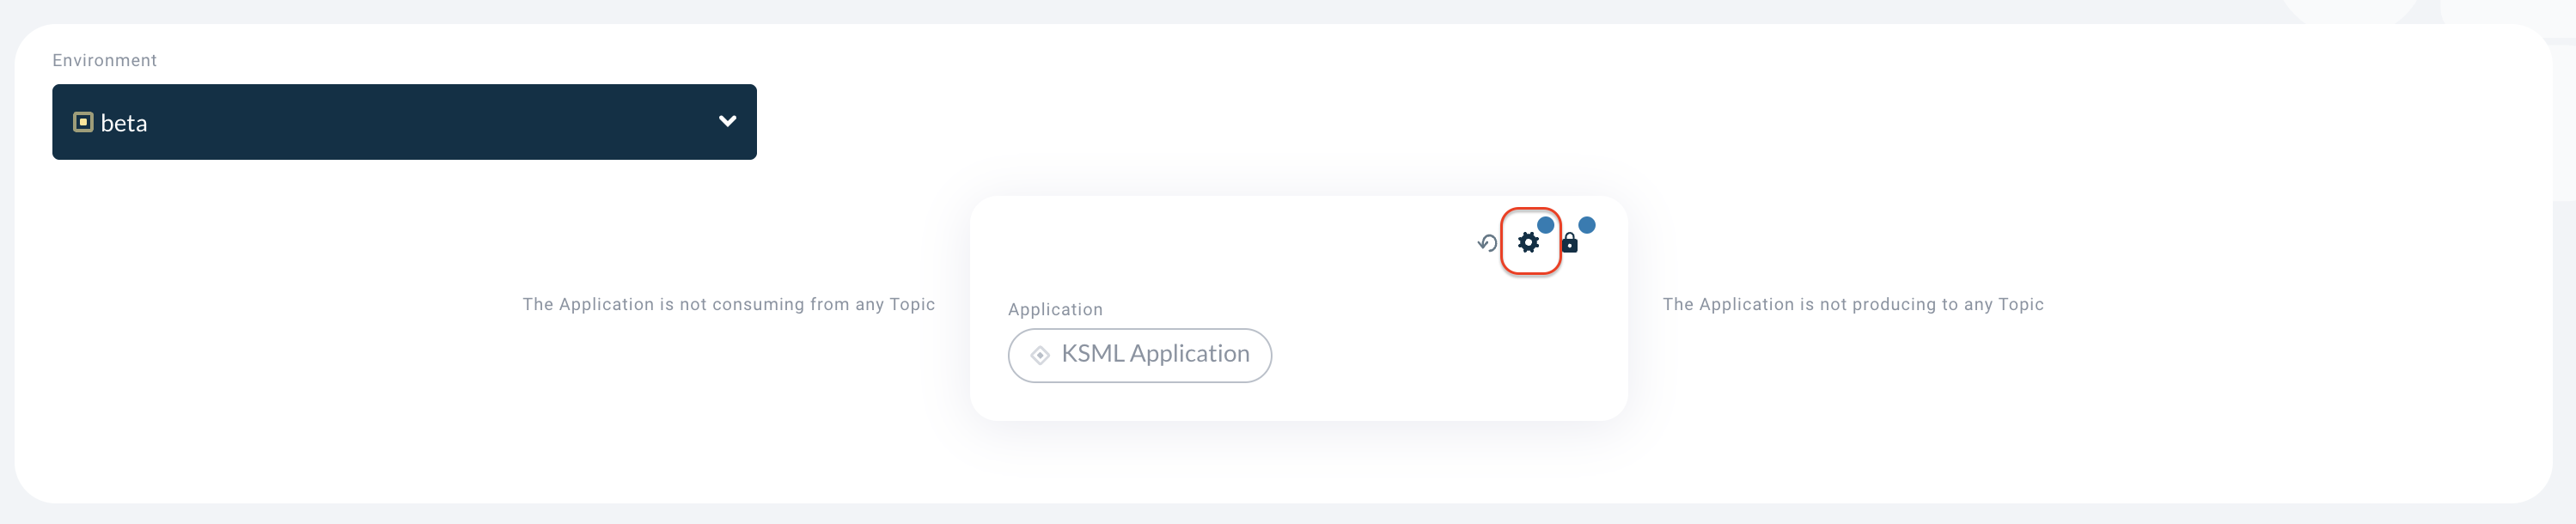
To configure the application, Click on the Gear icon in the application box (hovering on the button will show the text 'Configuration'). This opens the Configuration modal, which contains two tabs: KSML Definition and Deployment:
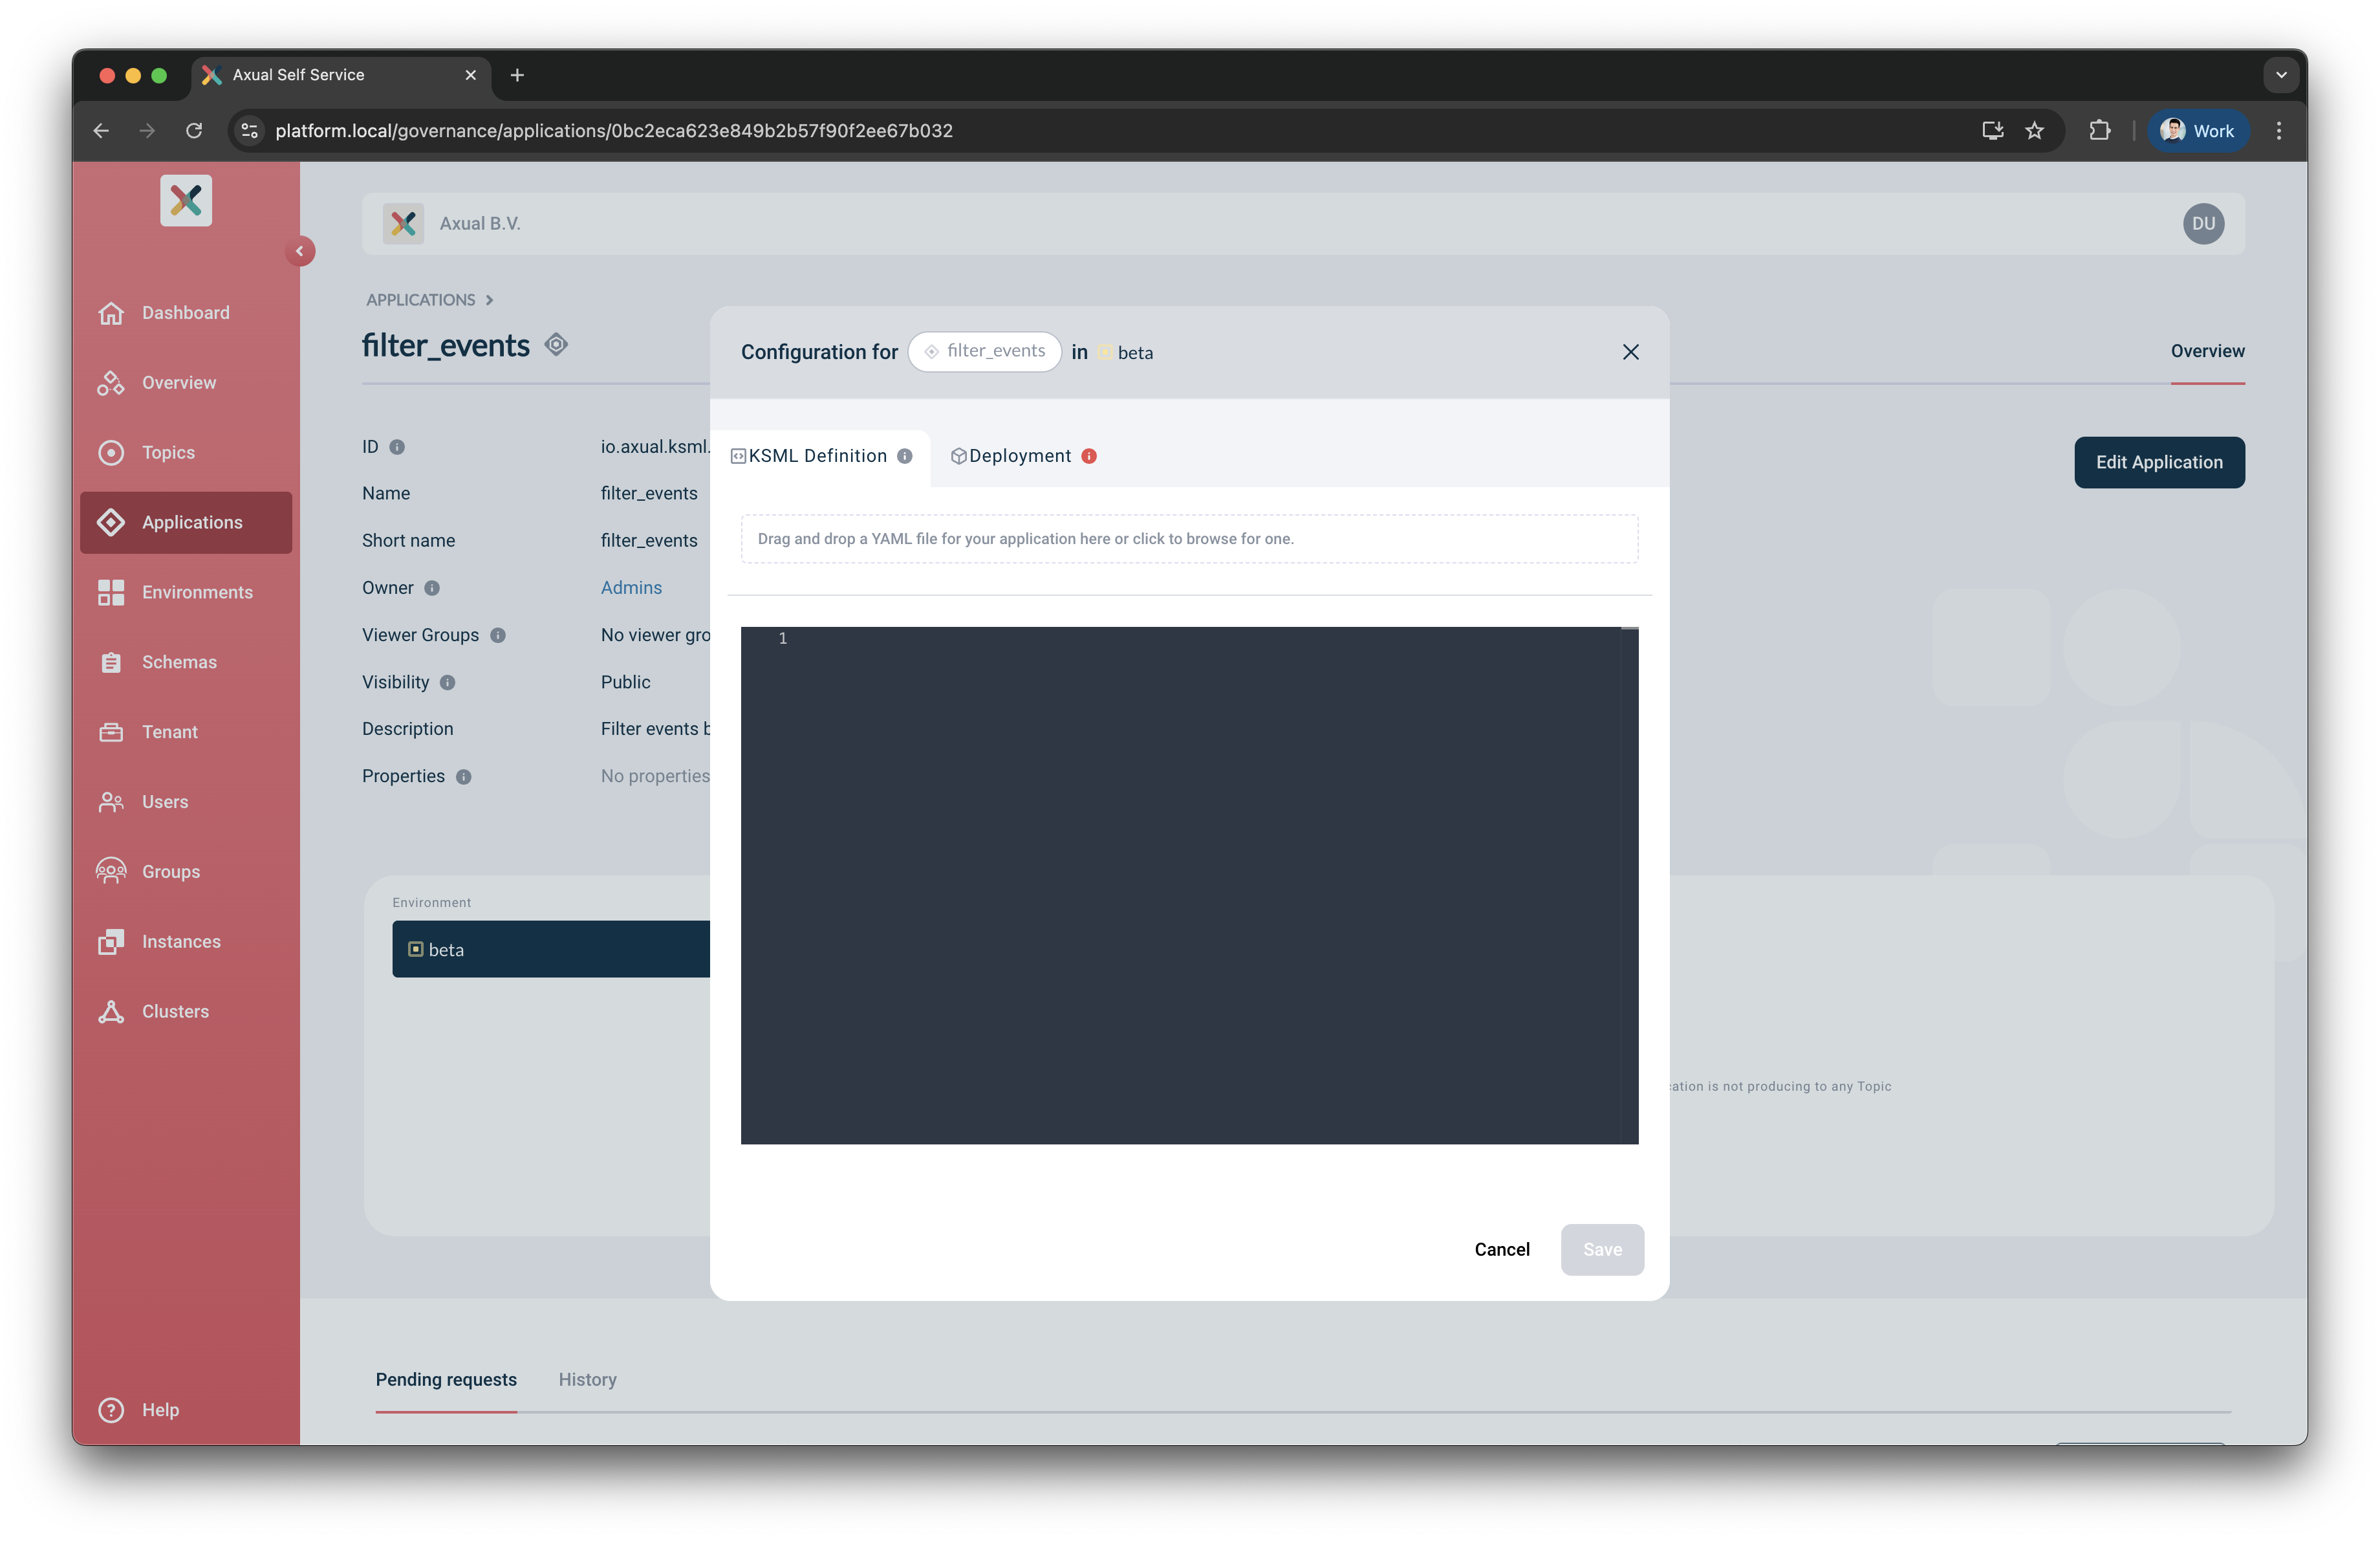
KSML Definition
In this tab, you can provide the KSML Application Definition in one of two ways:
-
Type directly into the editor inside the modal.
-
Drag and drop an existing YAML file into the modal.
Deployment
In this tab, you can configure the runtime settings for your application, including:
-
Deployment Size
-
Automatic Restart
Deployment Size
This setting allows you to select the CPU and memory profile for your application. Configure it from the Deployment tab in the Configuration modal.
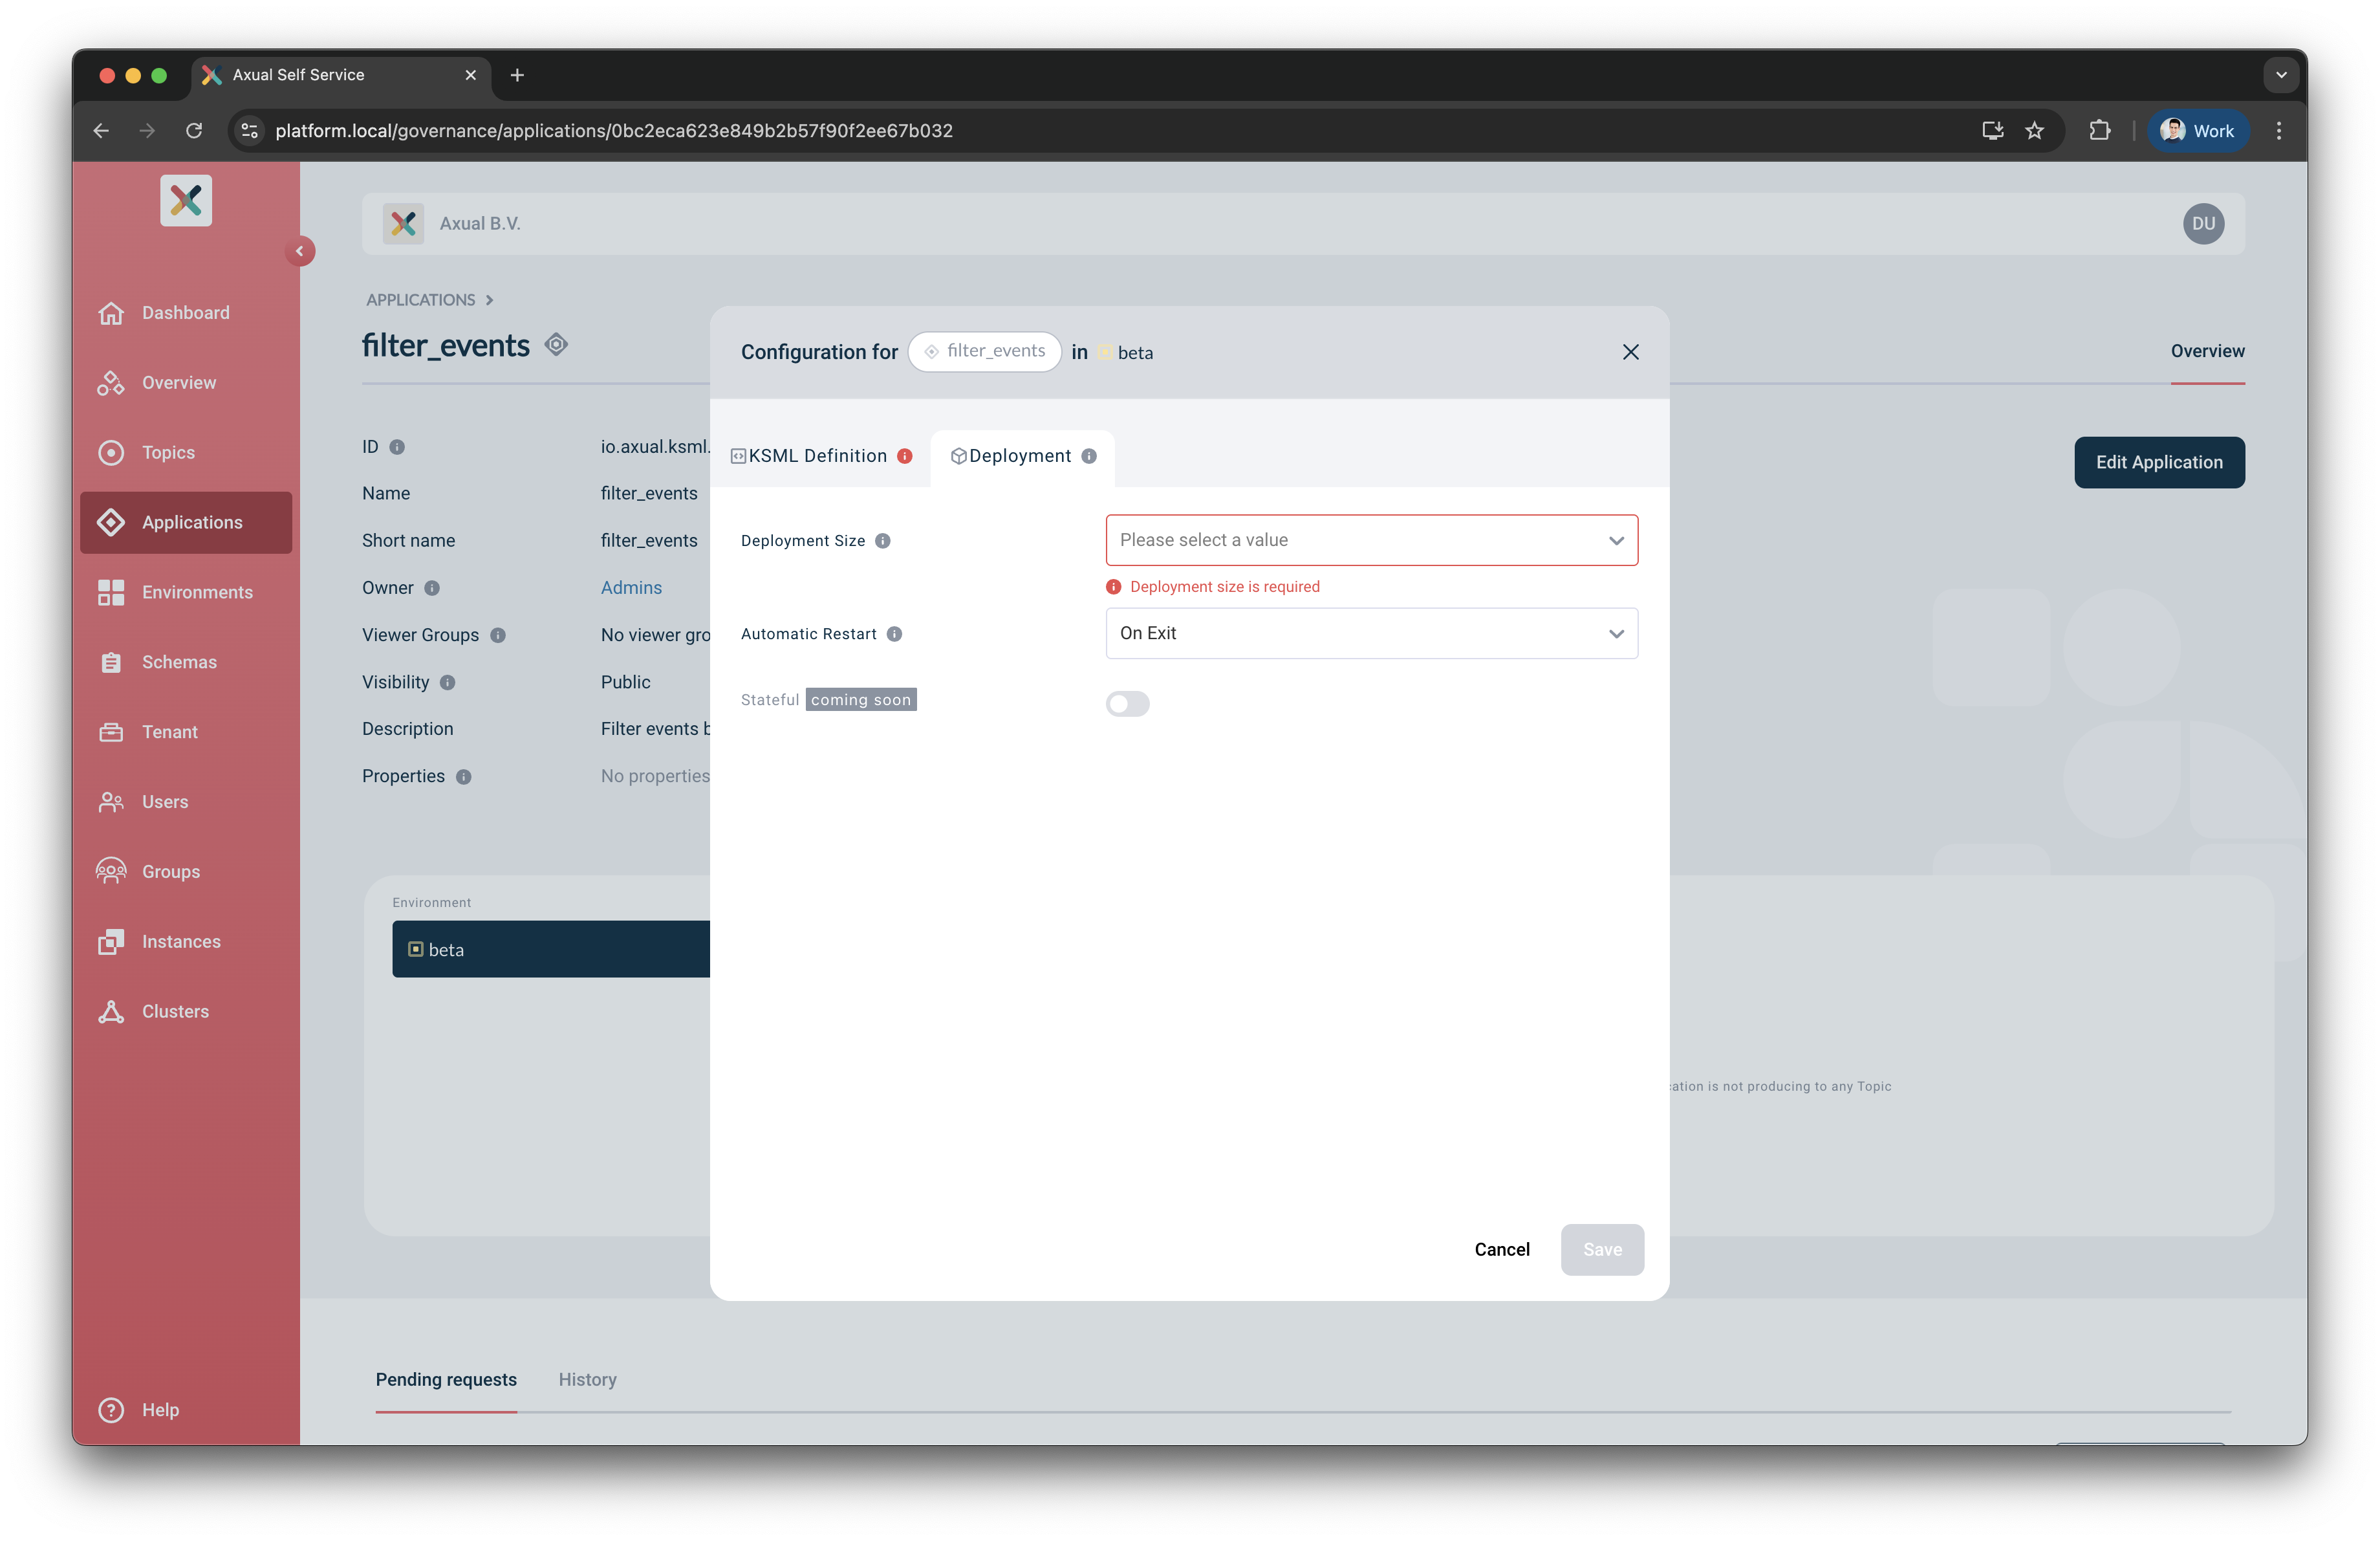
If no deployment size is configured, a red indicator will appear at the top of the tab, along with a warning message. |
Select your preferred deployment size from the dropdown, or leave it unchanged to use the default setting.
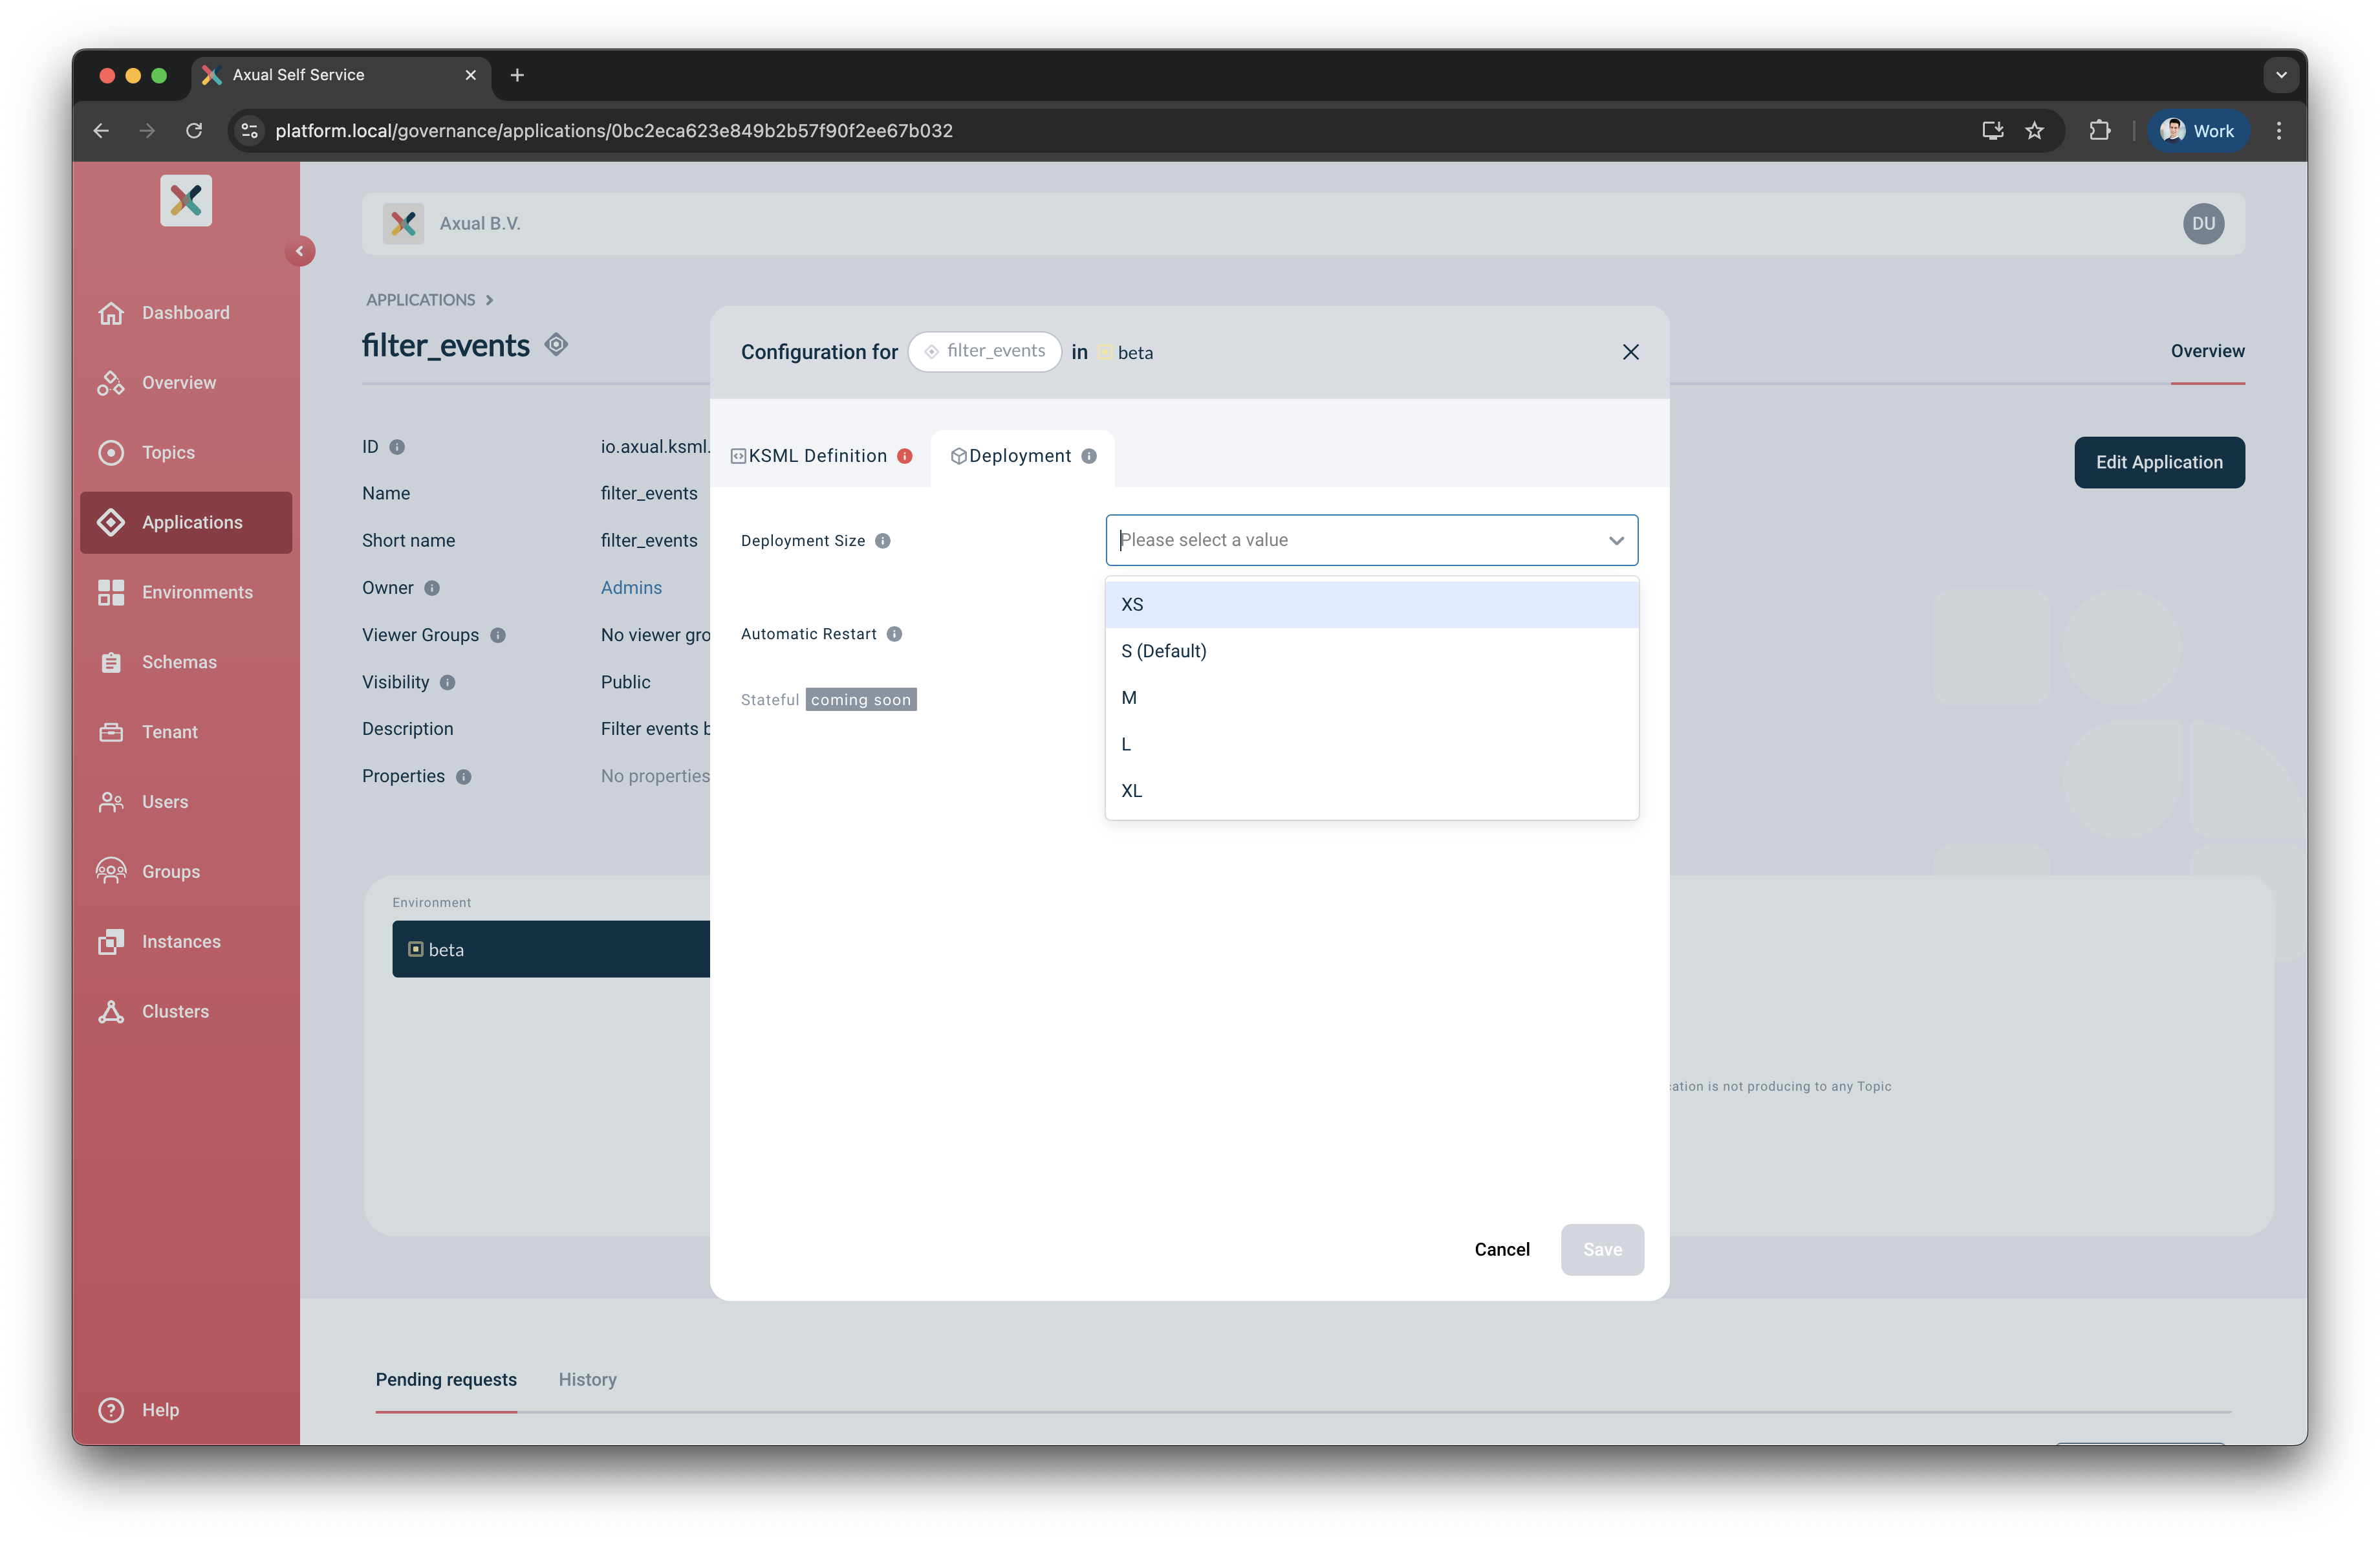
Click Save when done.
|
If you start the application without selecting a deployment size, it will run using the default profile, shown as (Default) in the dropdown list. |
Automatic Restart
This setting determines the approach taken by the provisioner in case the application exits.
The two options are On Exit (default) and Never.
-
On Exitresults in a KubernetesStatefulSetresource deployed; this is typical for any streaming application that by definition needs to always be running. -
Neverresults in a KubernetesJobresource deployed; this has a completion state and should be picked if it is unnecessary for this application to be restarted (e.g., a Generator application that produces a given number of messages).
Stateful
This option is coming soon in a future release. It is about Persistent Volumes that will be attached to the deployment and will help restore the underlying Kafka Streams Application’s state in case of restarting the Application. When using this new feature, the Application will be able to restore its state since it will be persisted on a PV.
Till that time you can enable the logging parameter in your KSML definition, more configuration can be find here
Security configuration
|
Use the authentication method that matches your Kafka Cluster configuration. |
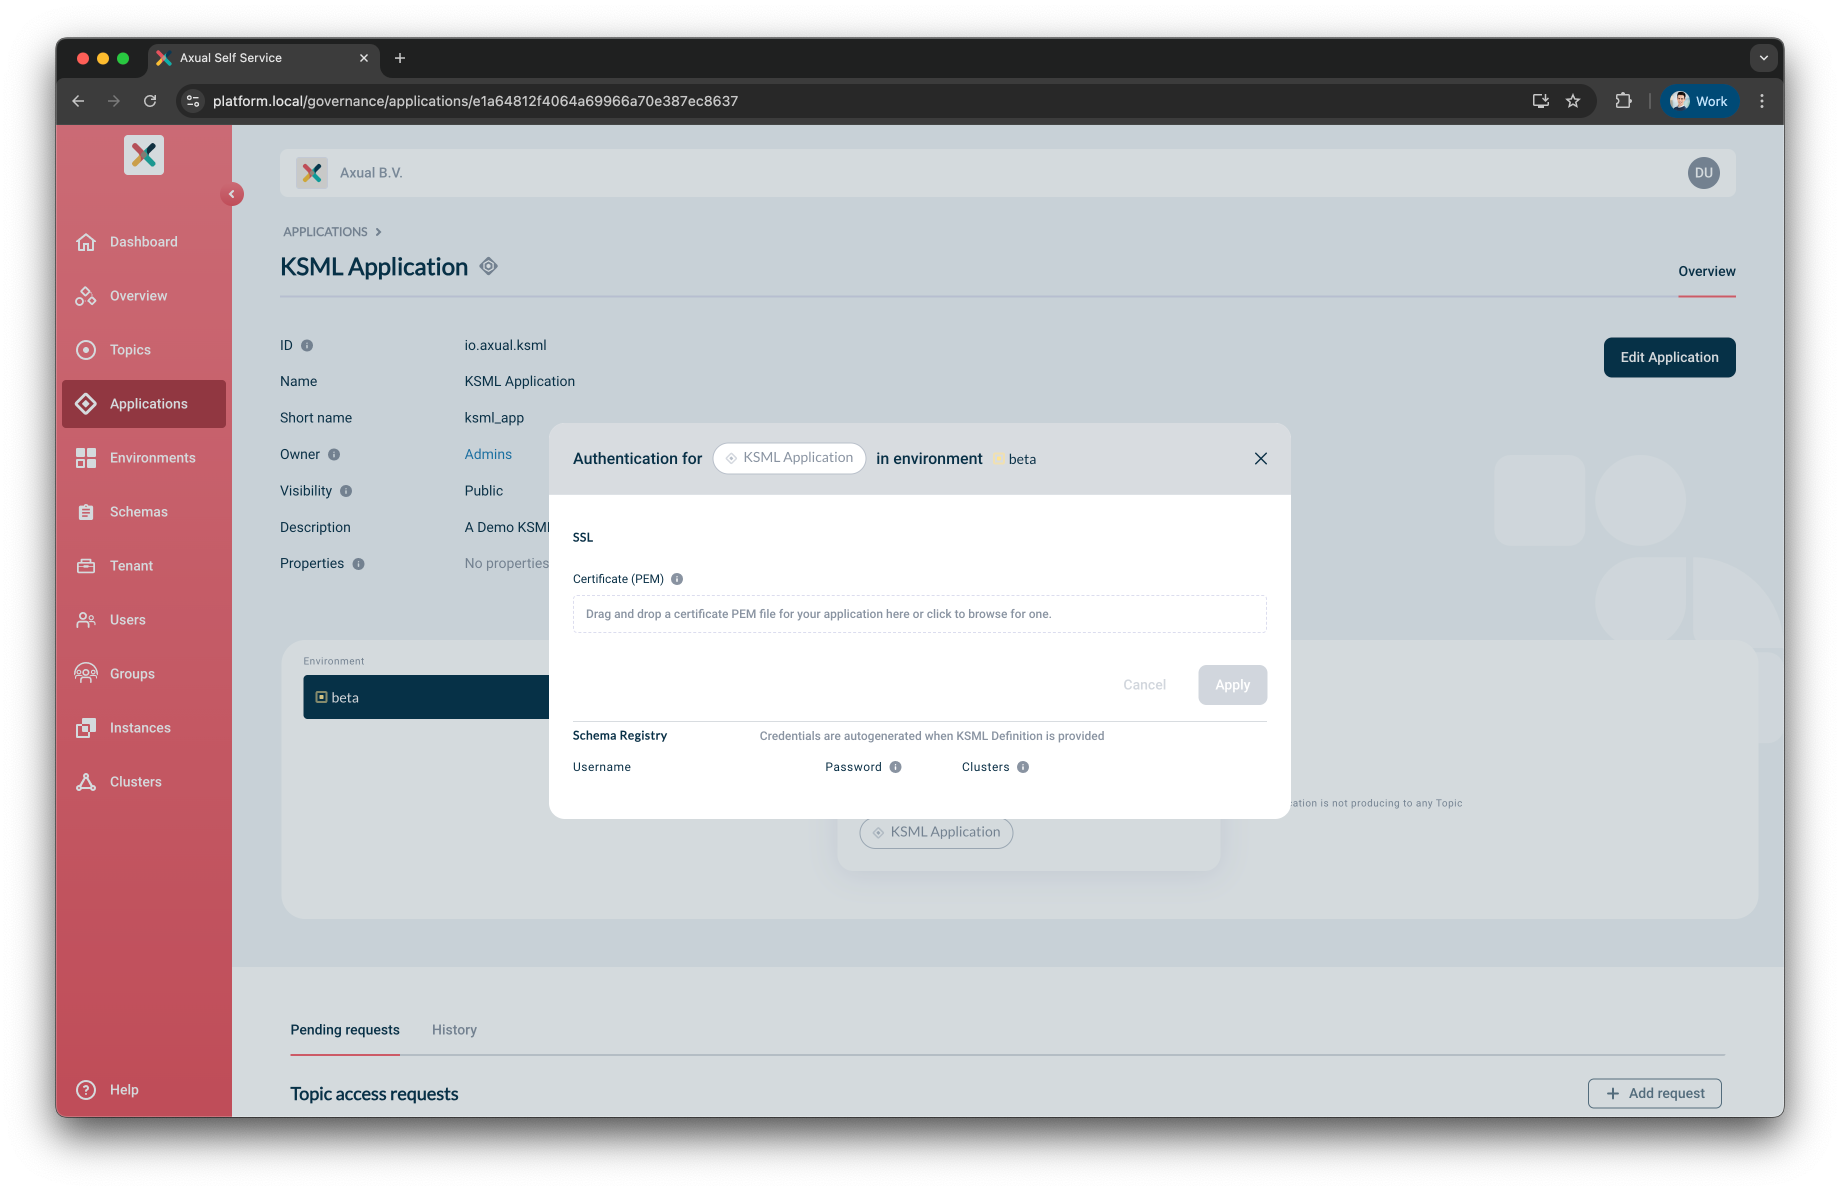
Using mTLS
The certificate and private key are used to authorize the KSML-Application against kafka when accessing the topics. At least one certificate and private key must be configured for every environment this application intends to use.
-
The certificate must be
X.509formatted and contained within aPEMfile. Ideally, it should contain the whole certification chain. -
The private key must be
pkcs8formatted and contained within aPEMfile.
| If your key material is currently in JKS format, you can extract the certificate and private key using a tool such as Keystore Explorer. |
Considering you have both these files available, let’s configure the KSML Application’s security:
-
From the environment dropdown, select the environment for which you want to configure the certificate and private key.
-
Click on the Padlock button in the application box (hovering on the button will show the text 'Authorization'). The following window will show up:
-
Upload the Certificate file your Application will use in this environment.
The window will indicate the certificate was successfully uploaded and request you follow-up with a private key. -
Upload the private-key file that matches the certificate.
The private key will not be displayed on the screen. You will only see whether it was successfully uploaded or not. The window will indicate the private key was successfully uploaded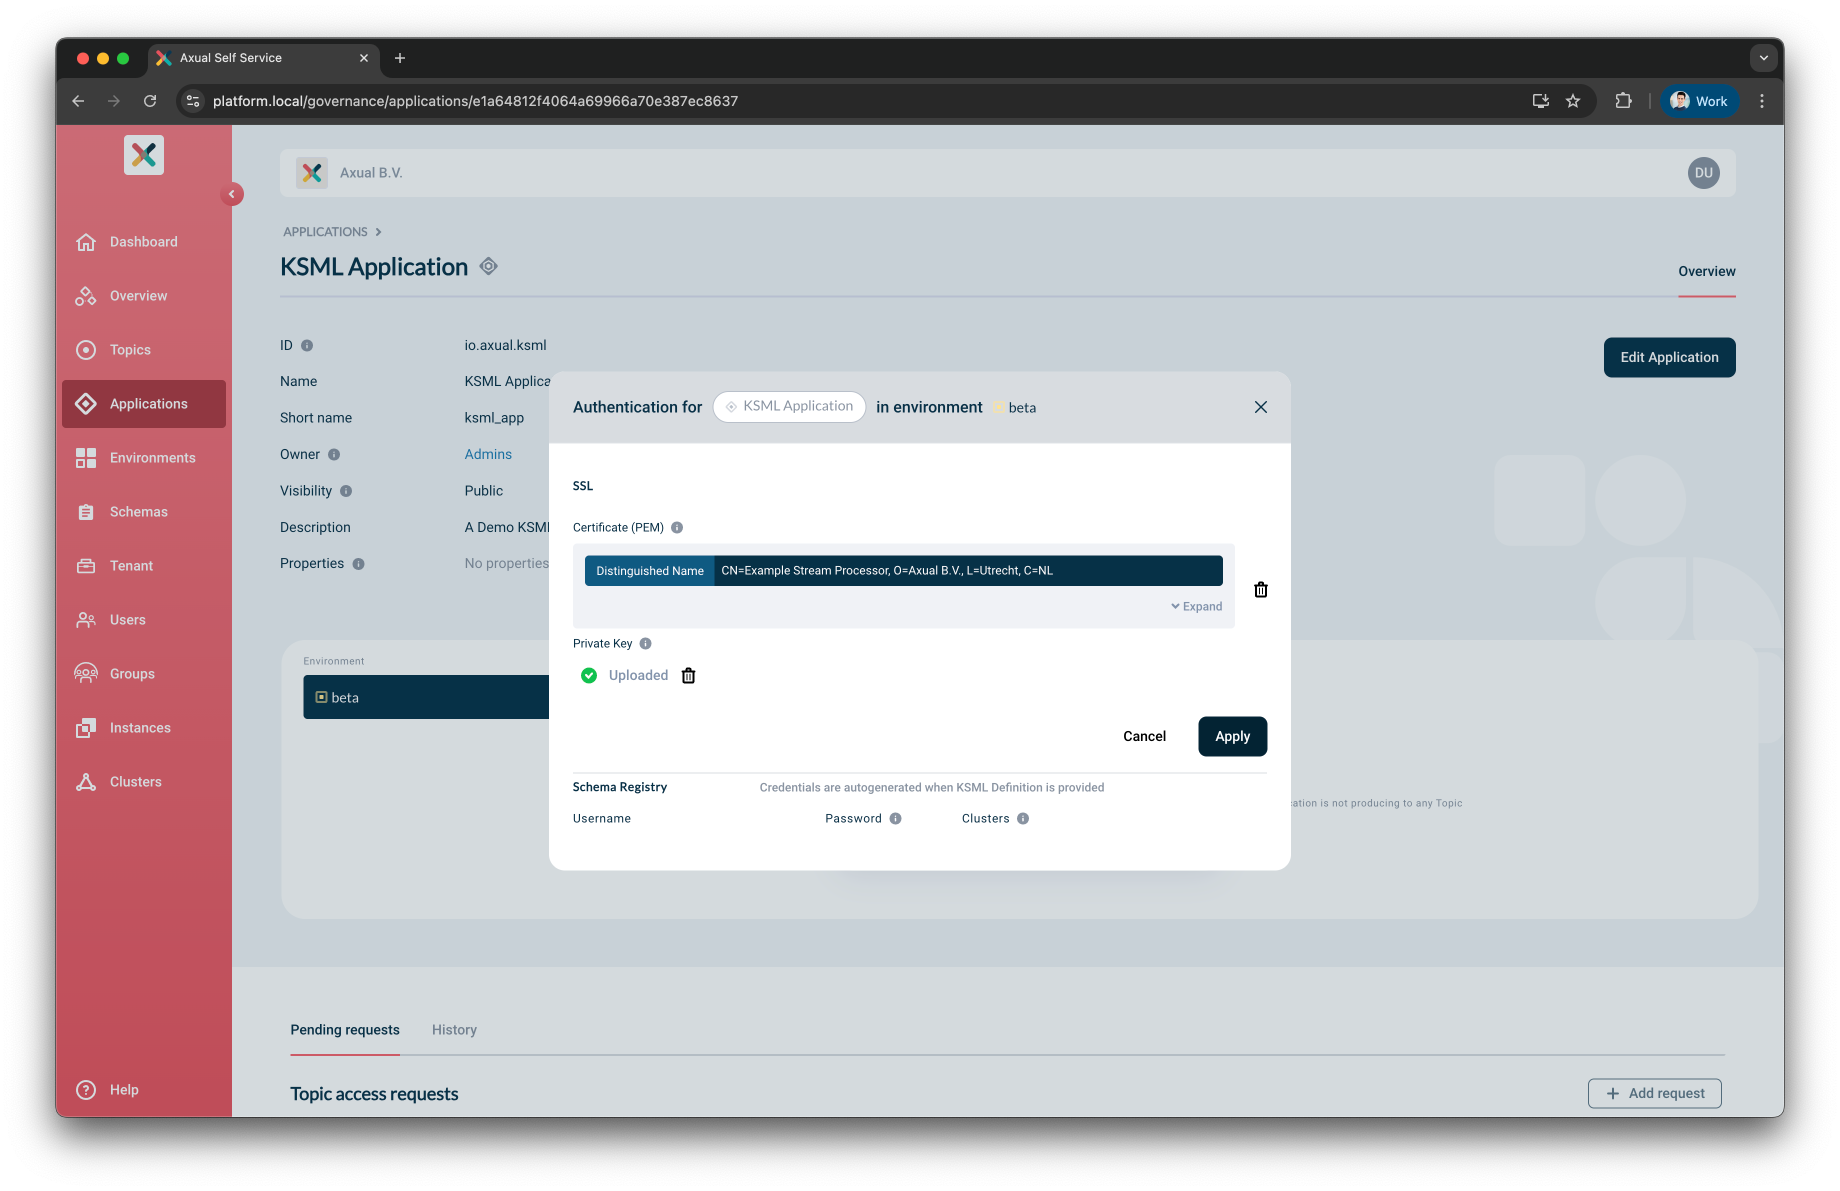
-
Click Apply
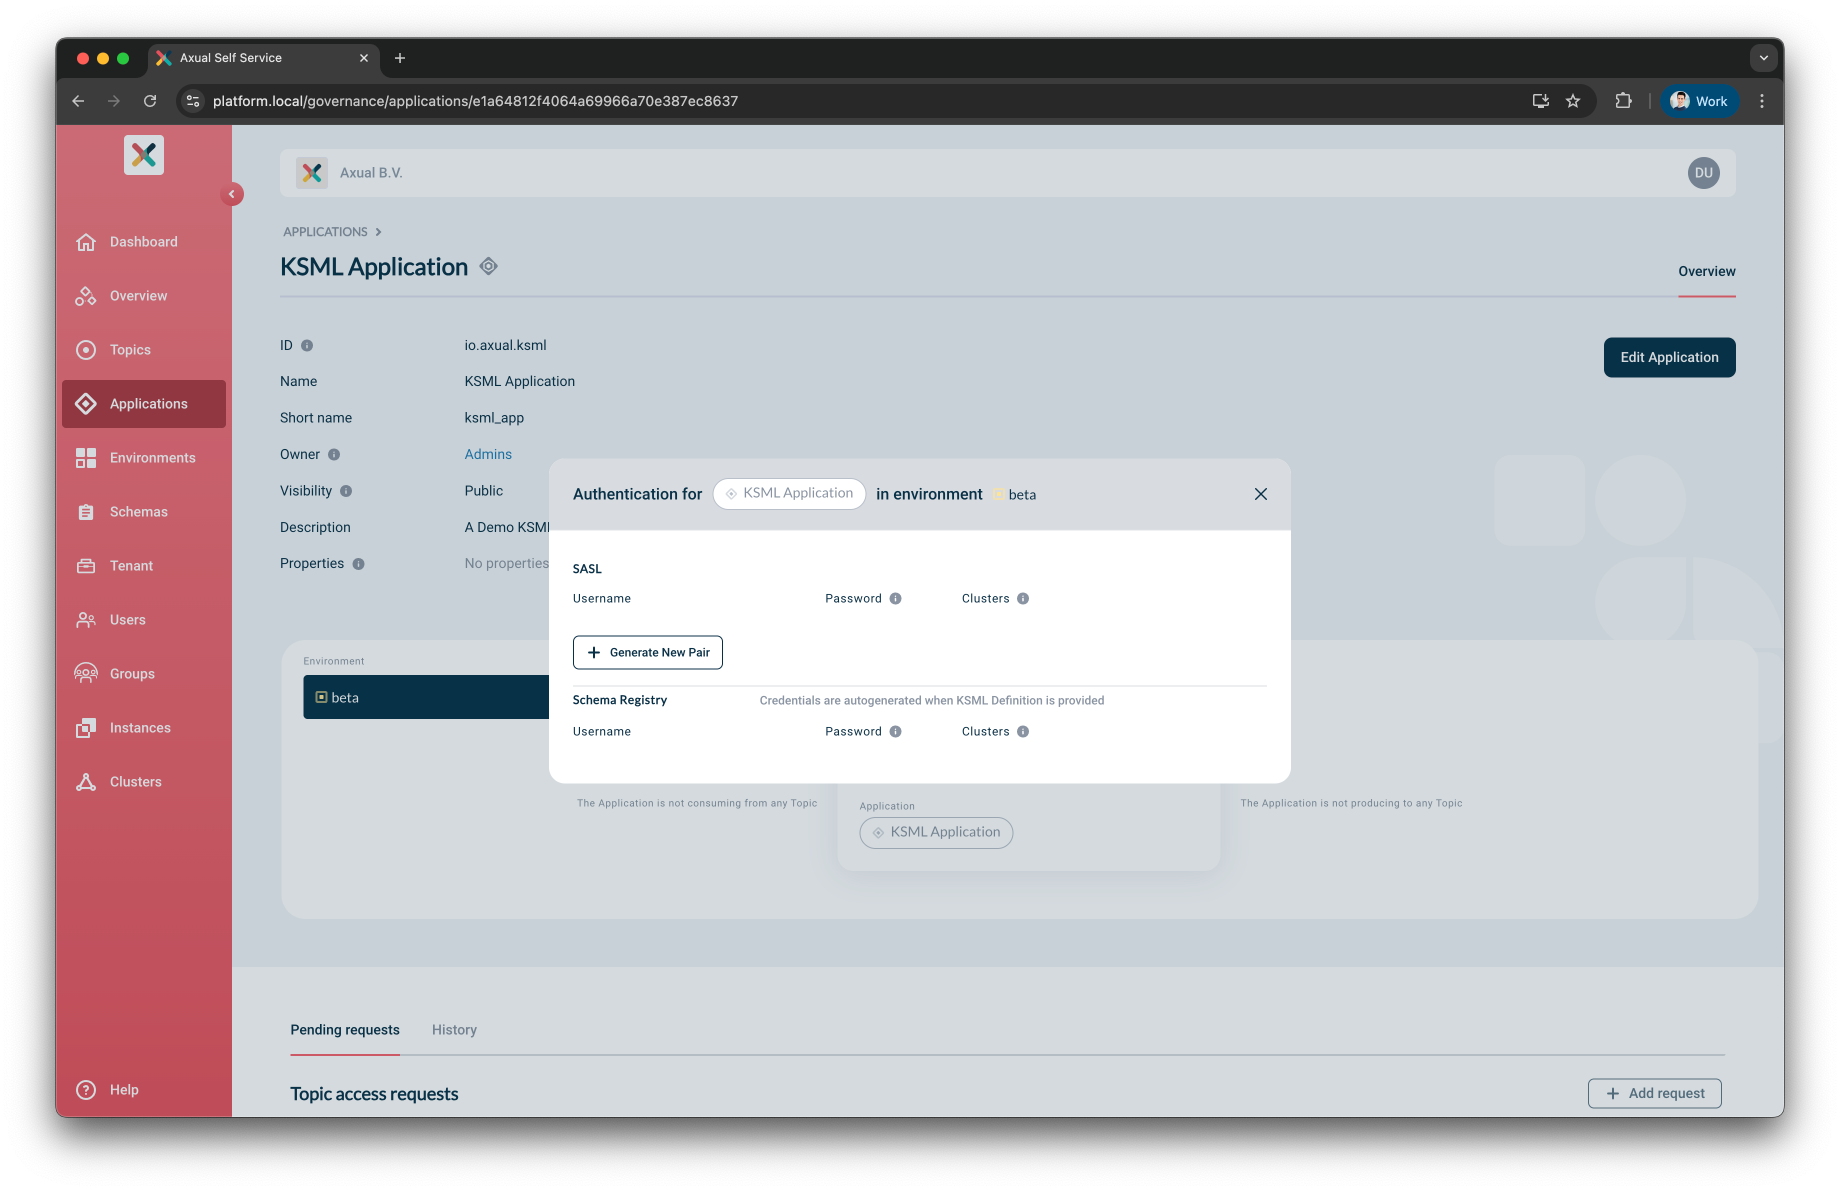
Using SASL
-
From the environment dropdown, select the environment for which you want to configure sasl authentication.
-
Click on the Padlock button in the application box (hovering on the button will show the text 'Authorization'). The following window will show up:
-
Click the Generate Pair button in the SASL section
-
Credentials will be generated and will appear above the button. Only the username is shown

Requesting Topic Access
Your KSML Application needs to be authorized to produce/consume a kafka topic before it can be started.
Follow the docs to grant it access.
Application Lifecycle
Applications are helm installed on the Kubernetes cluster where the Instances configured Provisioner runs. Their status is polled when the user opens the Application overview and reflected on the Application card.
Available KSML Application Actions
The following actions are available to the Application owner for Applications:
| Application action | Effect | Affected Kubernetes Resources |
|---|---|---|
|
Deploy the KSML application on k8s |
|
|
Undeploy the KSML application on k8s |
|
Start
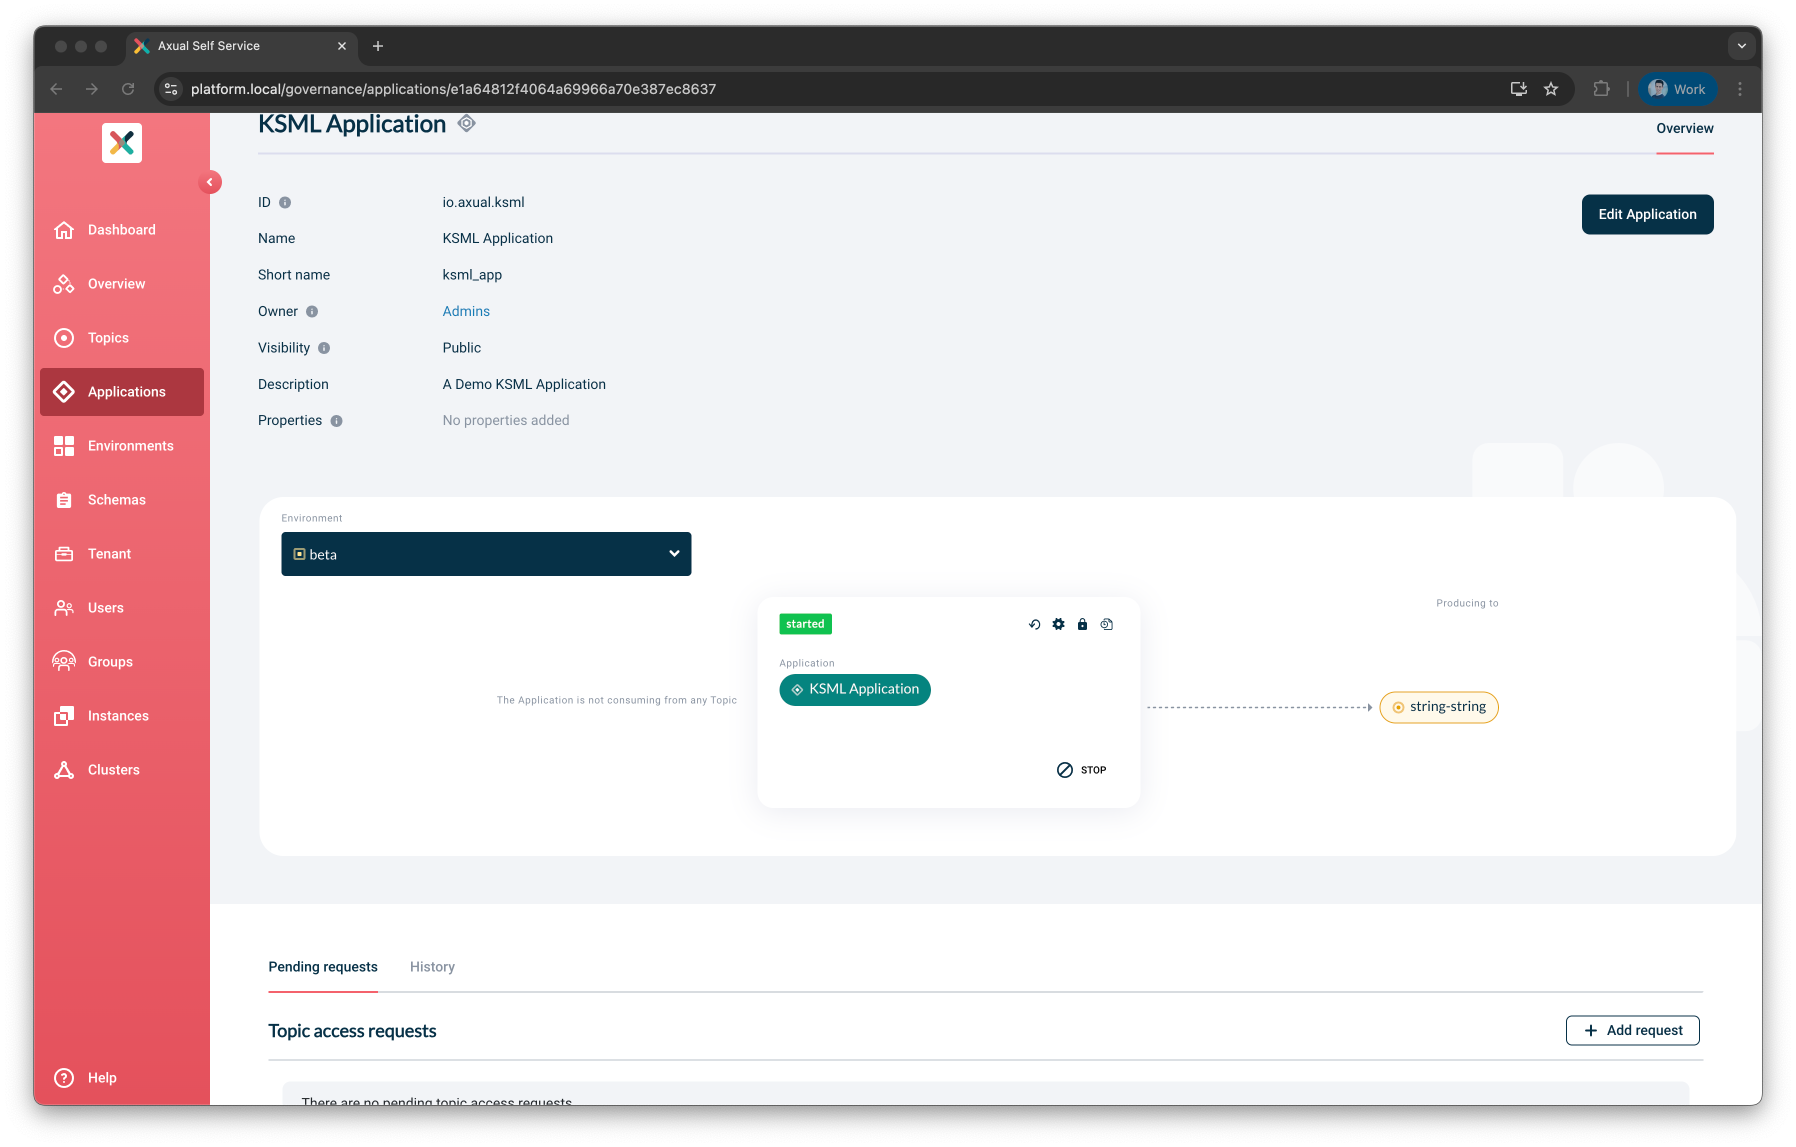
When the Application is properly configured, START becomes enabled.
Clicking it results in helm deploying the KSML definition you have provided on Kubernetes, after which, as long as the Self-Service page remains open, the status of the Application is polled.
Within seconds, if all goes well the status of the deployment should eventually change to RUNNING.
The result is a pod initializing with the KSML definition you have provided.
If the status changed to FAILED, you can observe the Application through the logging (see below).
Viewing KSML Logging
As soon as you have started your KSML application, you can consult the KSML Application logs to get a deeper insight into the status of the application beyond the status indicator.
On the KSML Application card, click on the "Logs" button. The following screen shows.
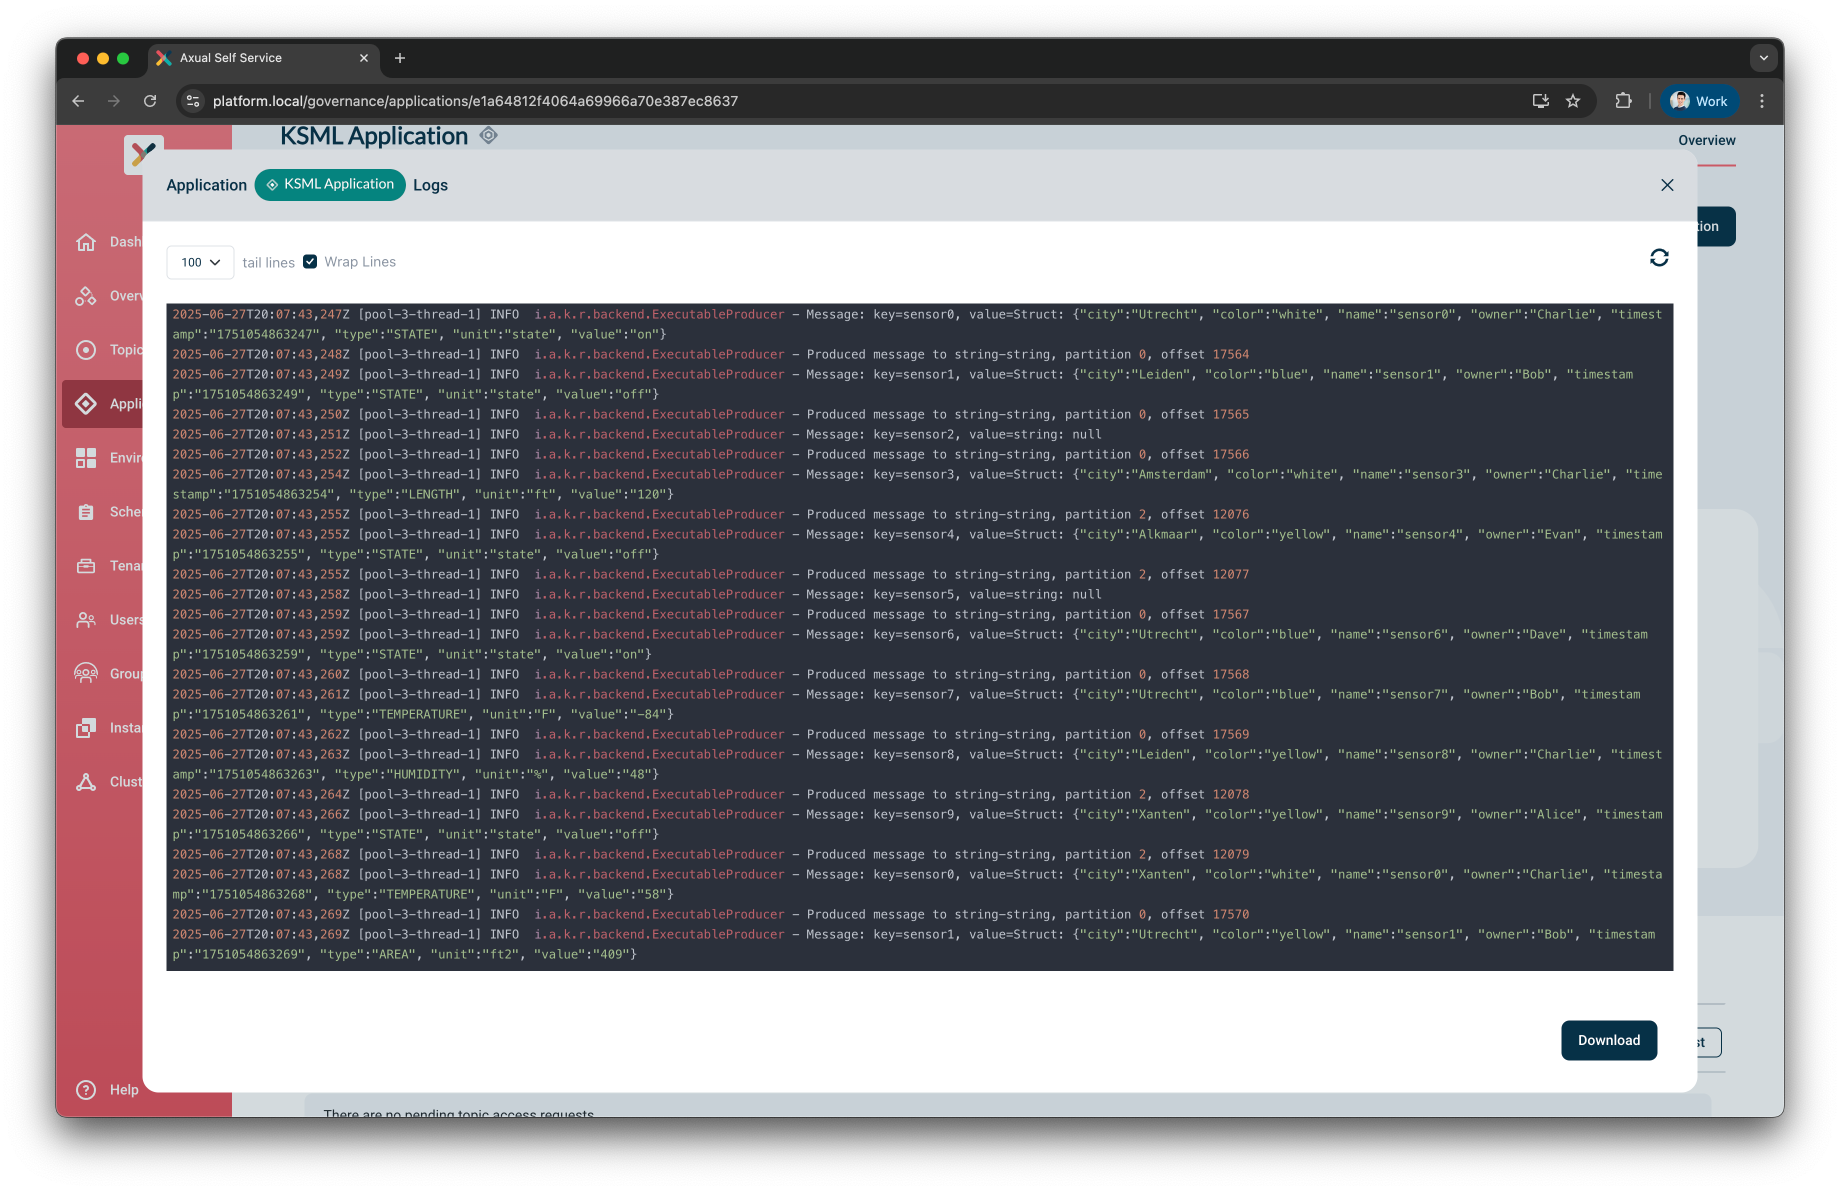
Log contents can be refreshed or downloaded
by hitting the top right Refresh Logs icon or the bottom right Download button respectively.
Stop
Stopping the application can be done by clicking the button on the Application card, resulting in the started pod being un-deployed.
Deleting A KSML Application
Follow the docs to remove the application.
| Deleting the KSML Application results in all KSML deployments being stopped on all environments. |
Status Mapping
Self-Service keeps polling the provisioner for the status of the Deployment as long as the Application Overview page is open.
The status on the Application card can be one of Running, Starting, Failing or Complete.
Based on the Automatic Restart setting provided the conditions for those statuses are different.
| Setting | Status | Condition |
|---|---|---|
On Exit |
|
StatefulSet is running with ReadyReplicas matching Replicas |
|
Replicas or ReadyReplicas do not yet match expectations |
|
|
StatefulSet is failing and pod is restarting |
|
Never |
|
Job Running with multiple replicas (1 succeeded) |
|
Replicas or ReadyReplicas do not yet match expectations |
|
|
Pod in CrashLoopBackoff state |
|
|
All Jobs successfully completed |