Create Self-Service Resources
Once you have started all the governance components and successfully configured them, it’s time to access the Self-Service to create the Axual Resources.
Sign up and register Organization
These steps are used to create the Tenant and User in the Axual Self-Service.
This user will get TENANT_ADMIN role,
so they will be able to create all the mandatory resources of the organization.
-
Access the Local login page and press the
RegisterbuttonThe URL is <self-service.host>/login/local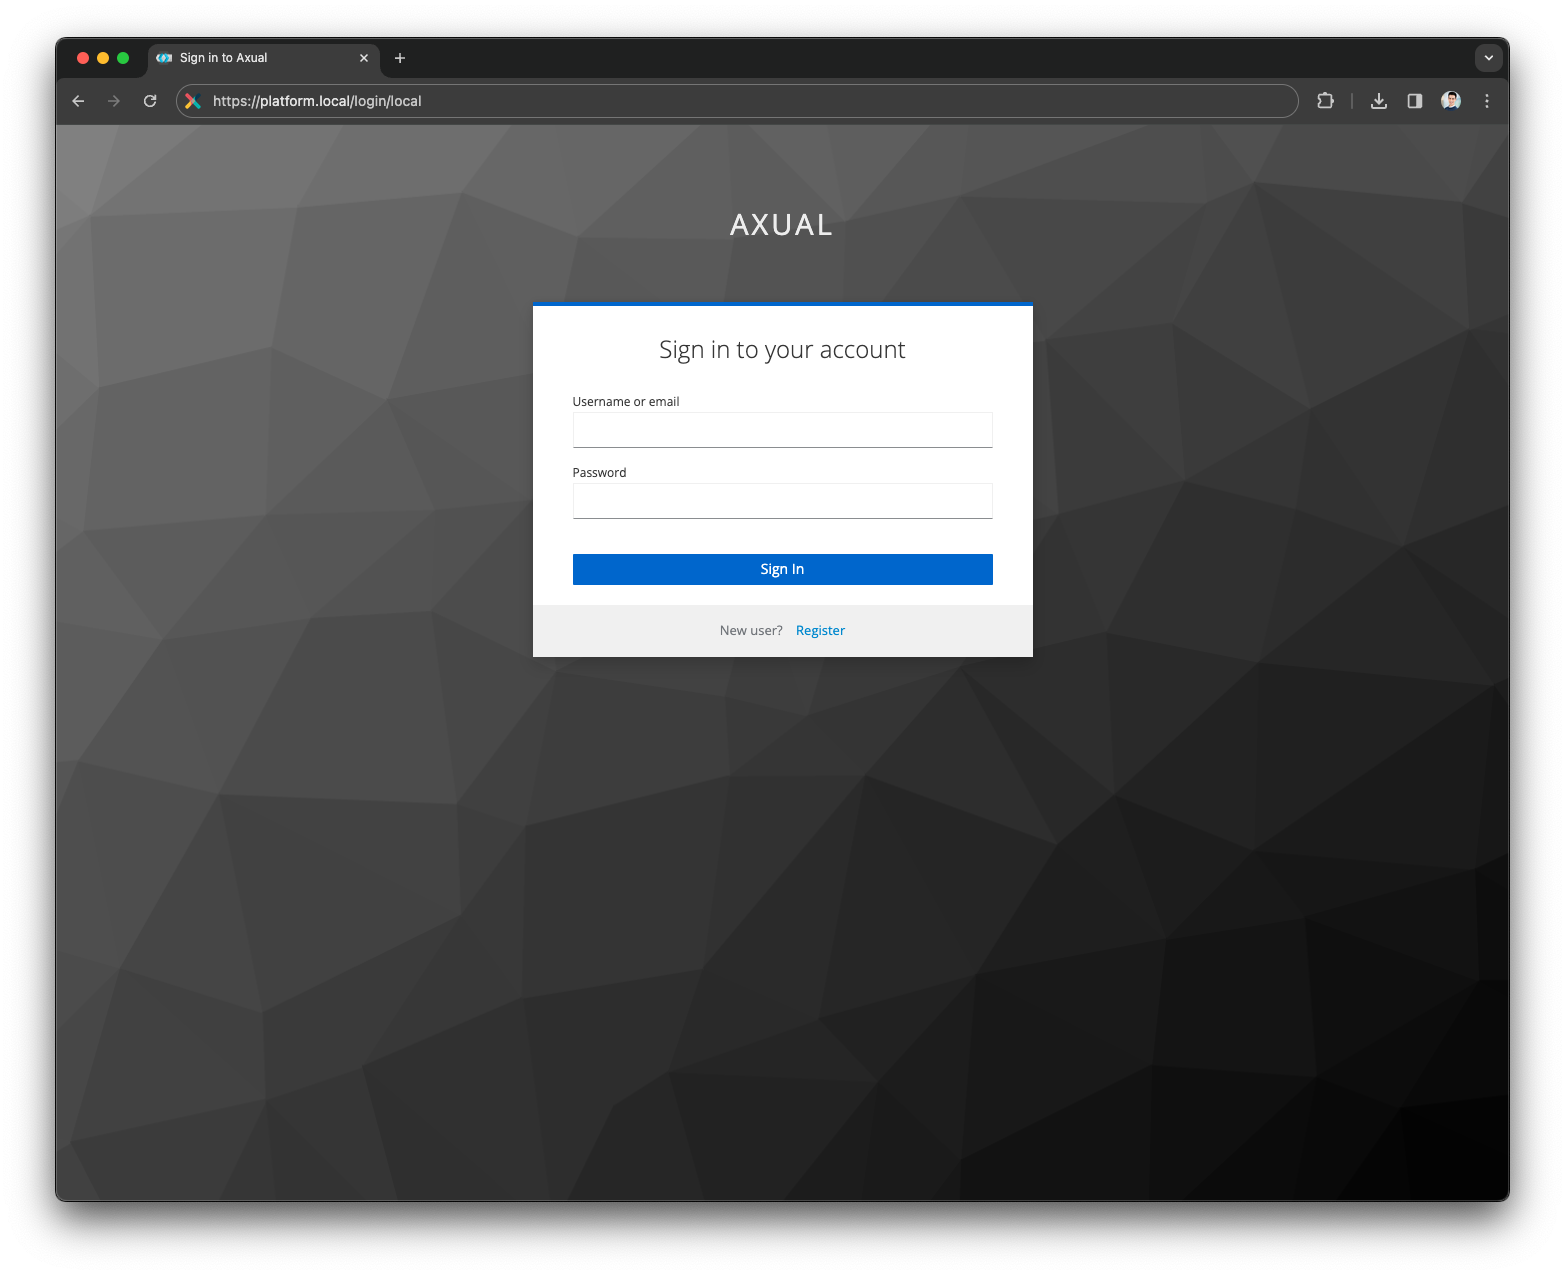
-
Fill the user details and press the
Registerbutton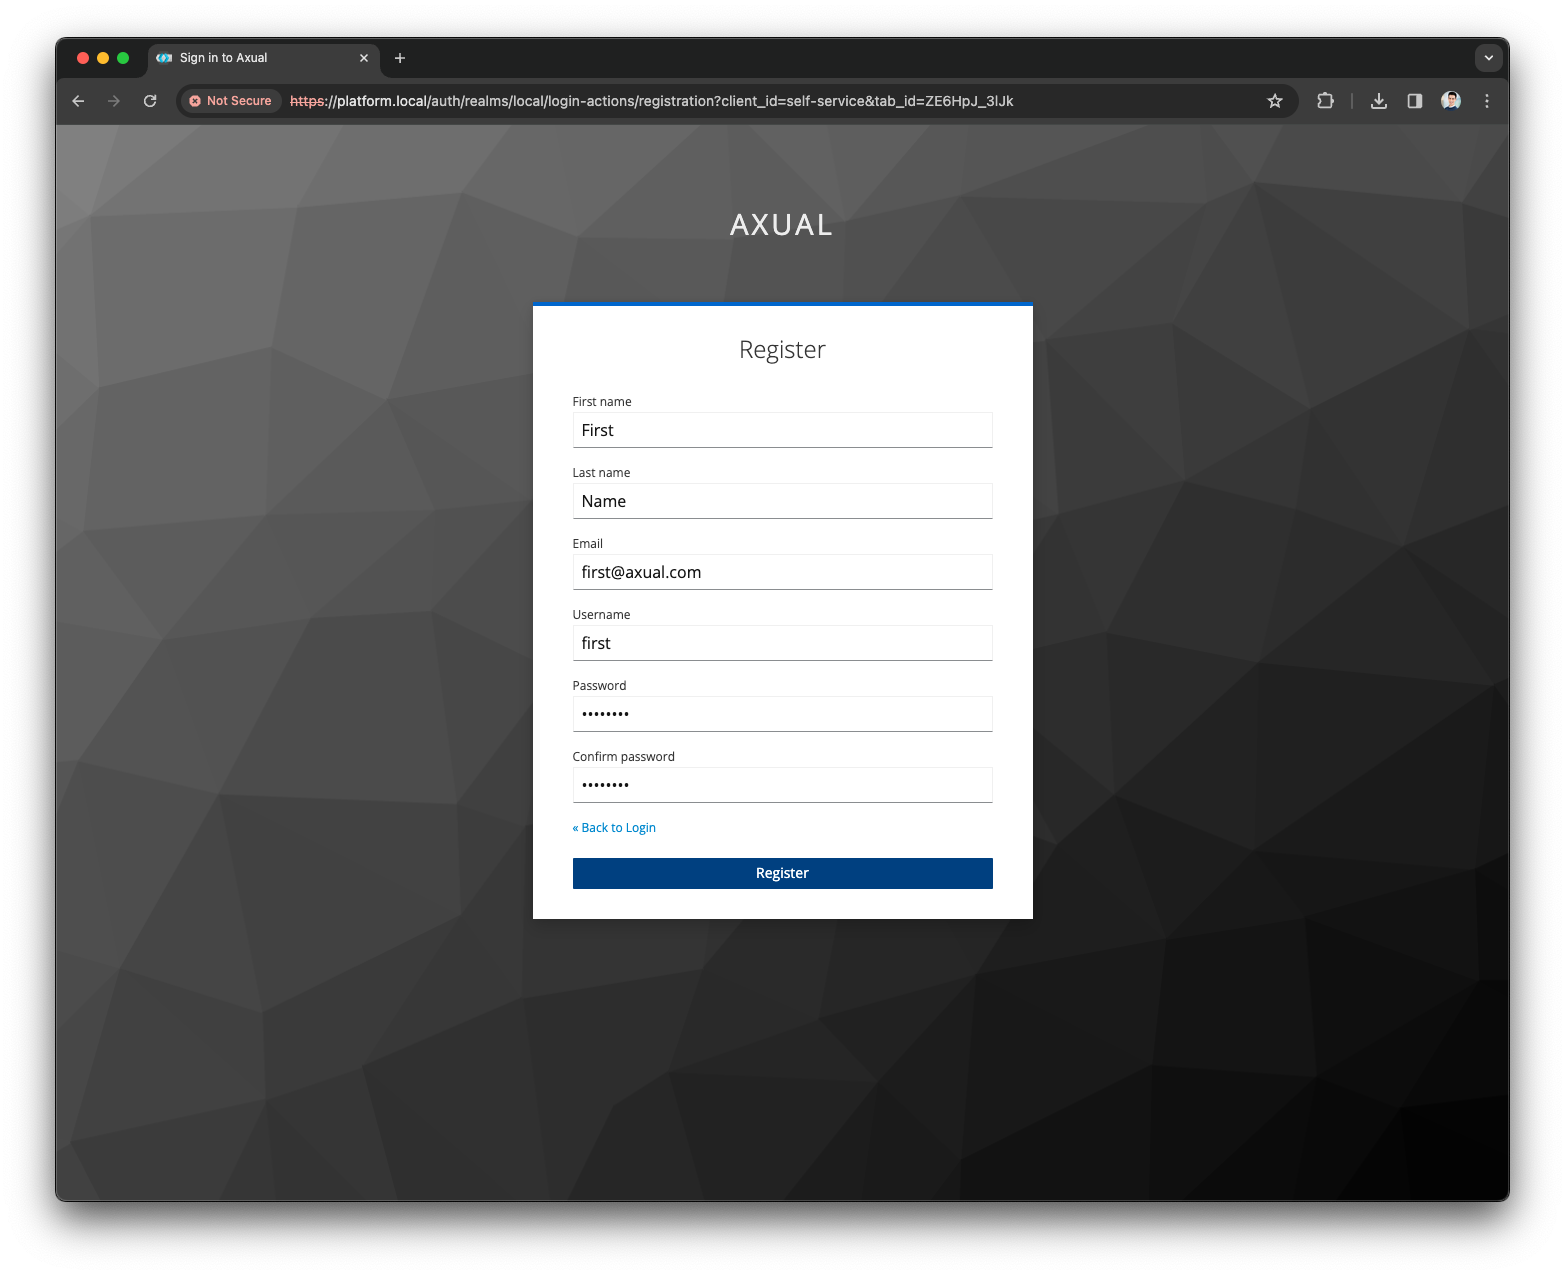
-
Provide the Organization details and press the
ContinuebuttonCheck this page to configure the wizard to expect the Organization Short Name 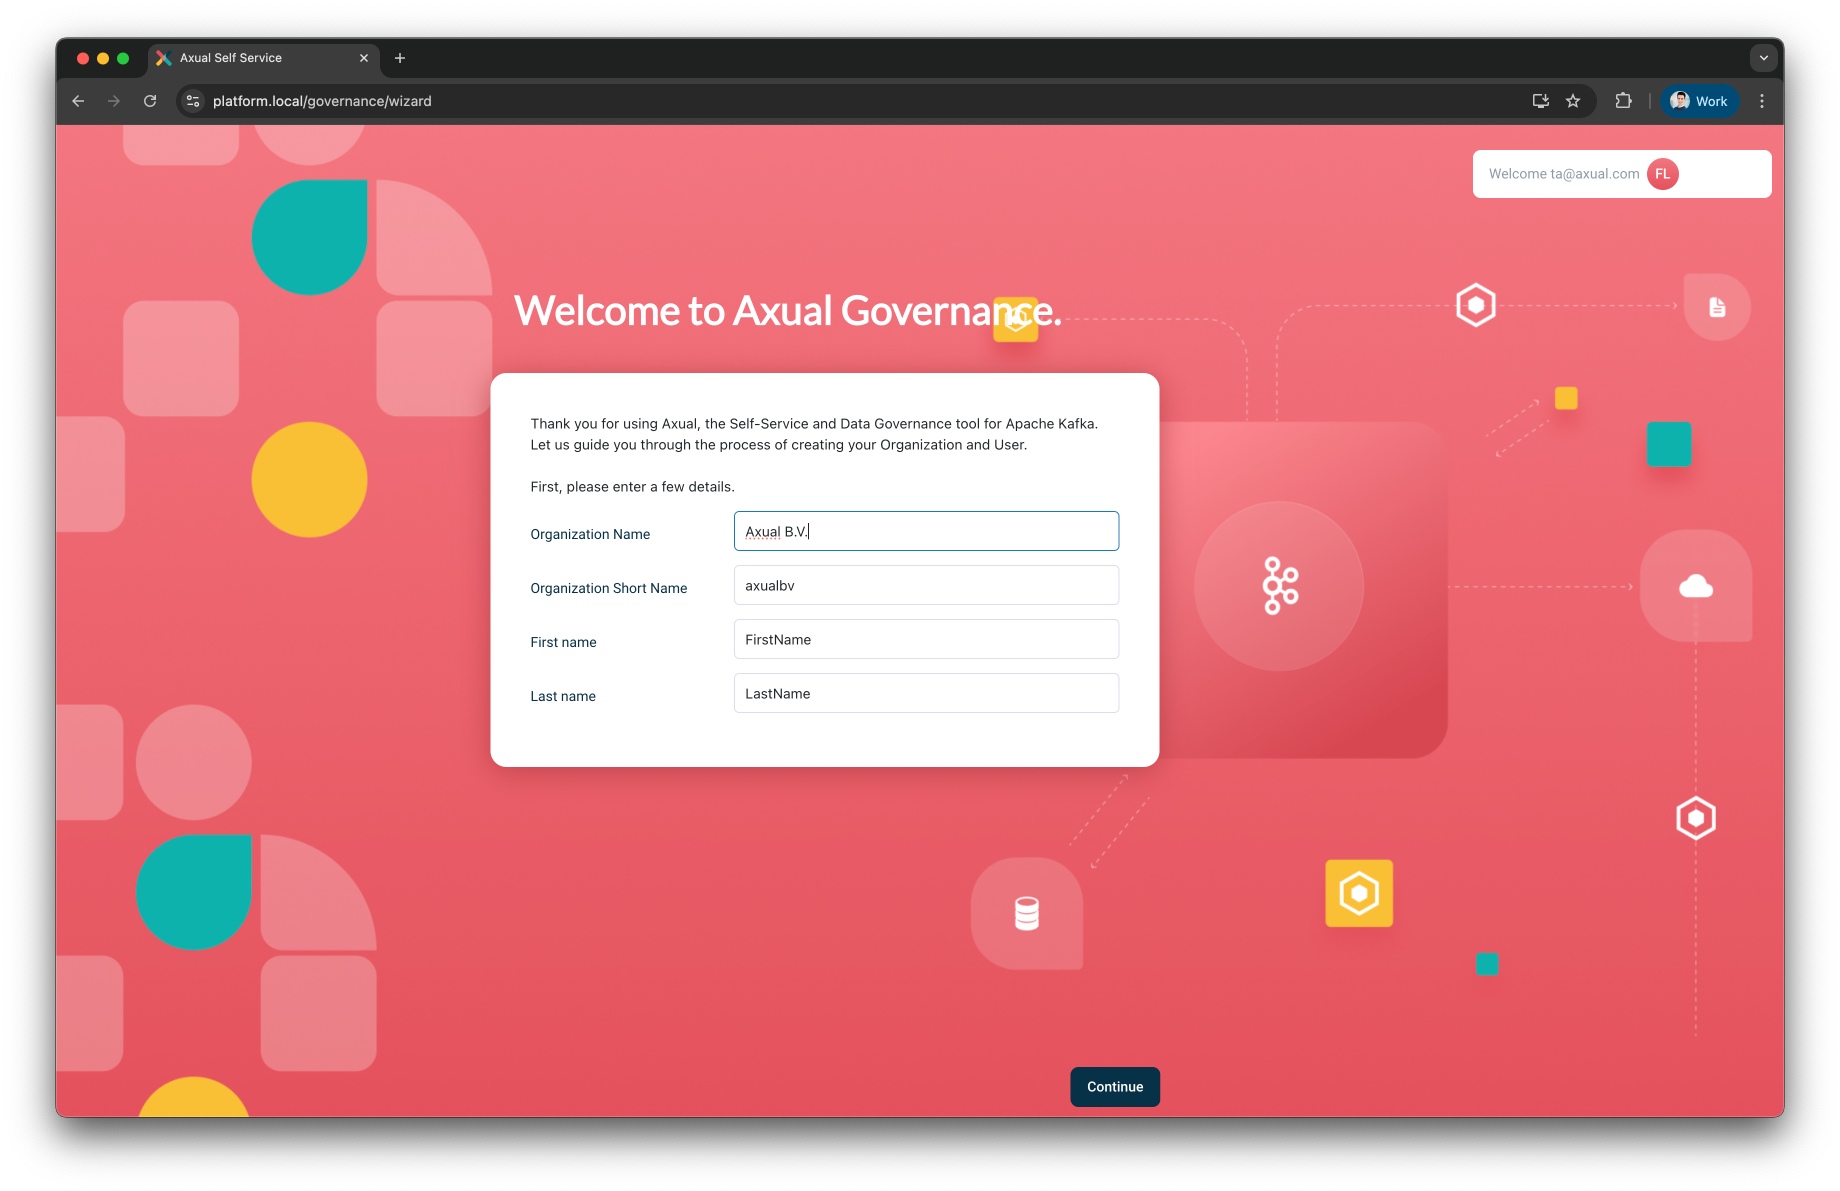
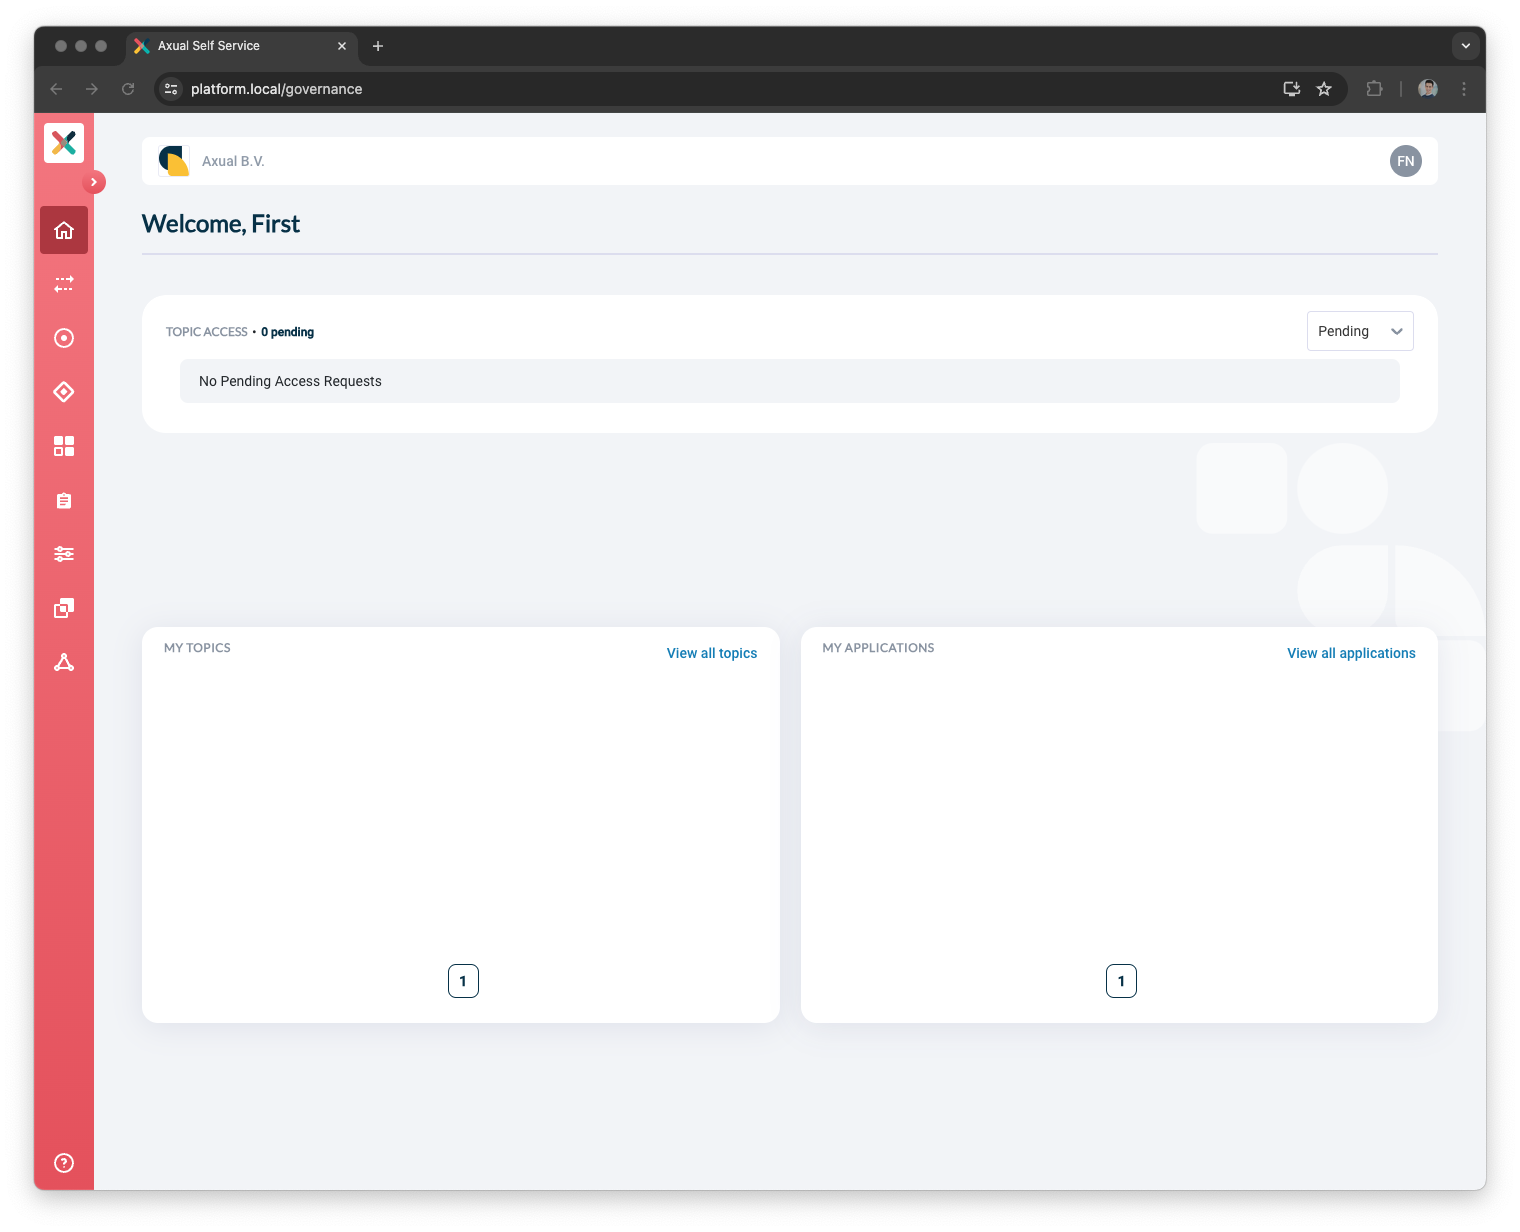
You have now reached the Self-Service dashboard.
Create the Cluster
These steps are used to create a Cluster in the Axual Self-Service.
We are writing the steps to add the local cluster started with the Axual Streaming Charts.
But these steps can be used as reference for any cluster
|
-
Open the
clustersmenu and press theNew Clusterbutton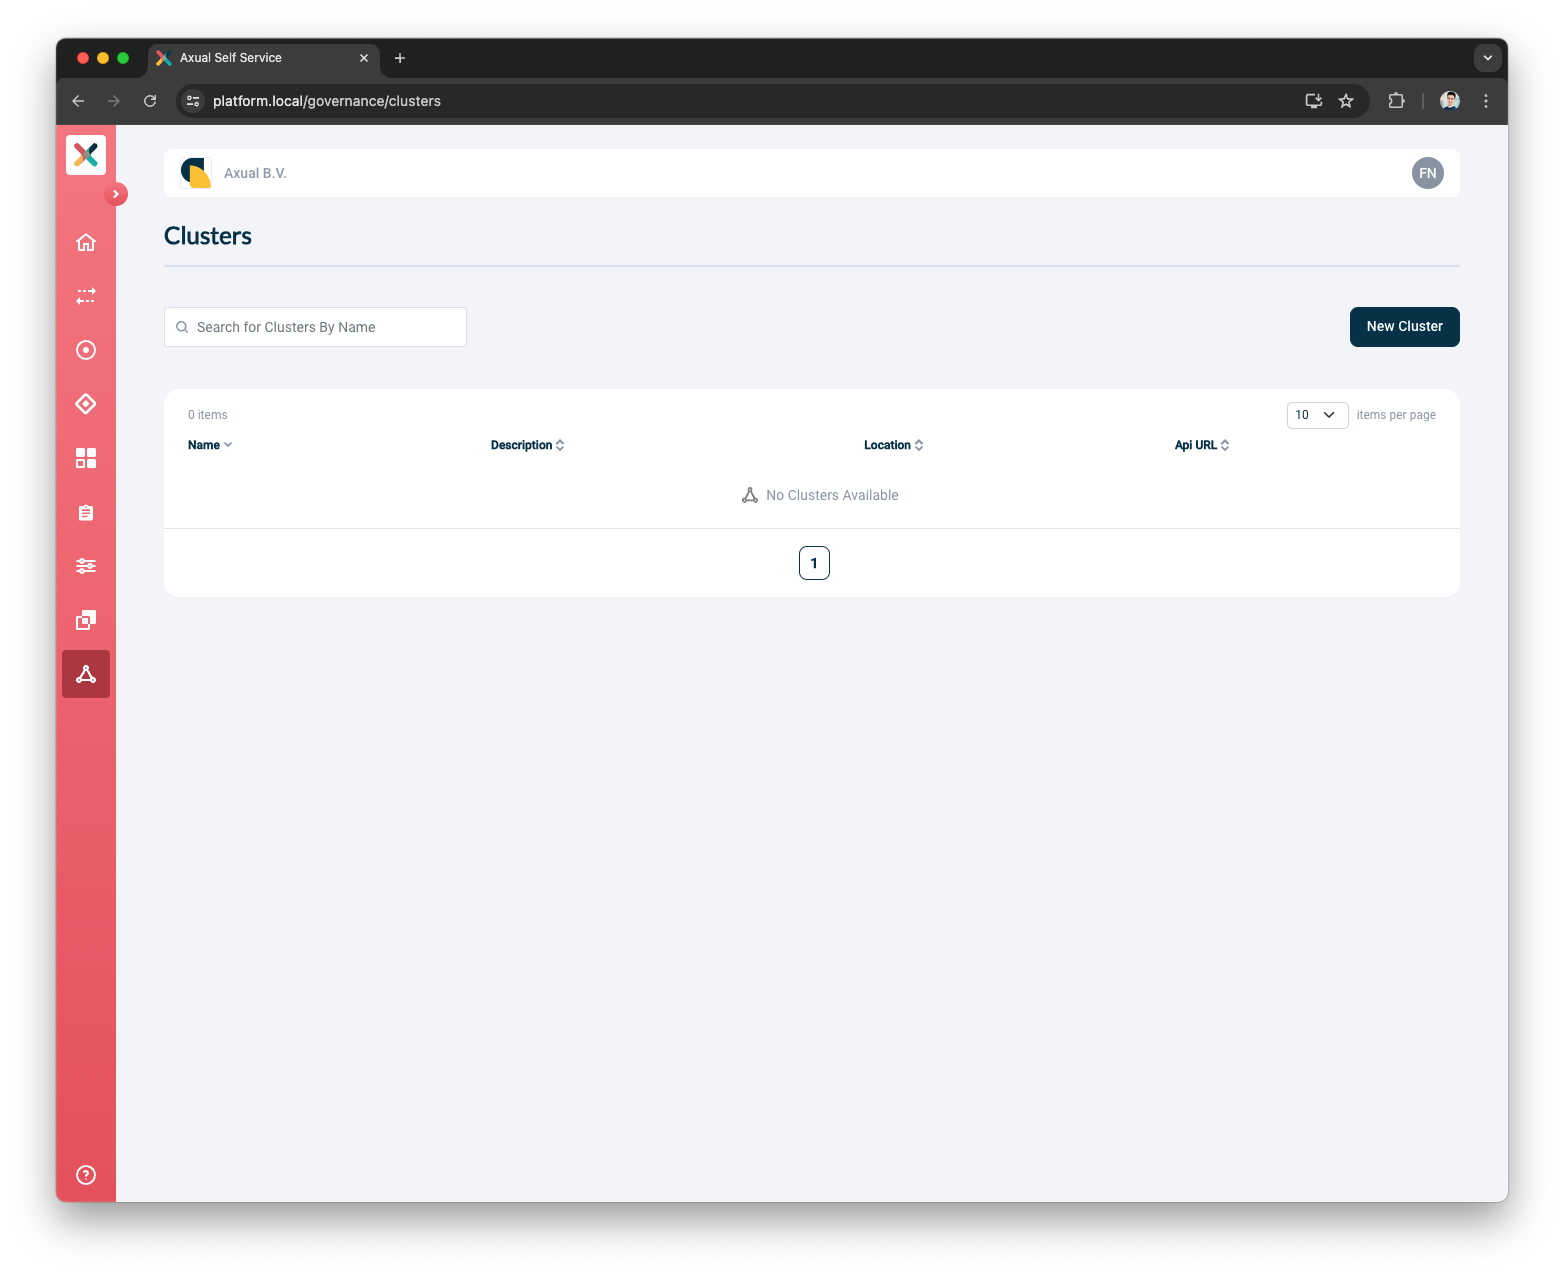
-
Provide the Cluster Details
-
Put
localas the Name -
Put
Local clusteras the Description -
Put
localas the Location -
Select
Apache Kafkaas the Provider Type

-
-
Provide the Kafka Details
-
Put
platform.<domain>:31767as the Kafka bootstrap URL -
Select
TLSas the Authentication Method -
Upload a
super-usercertificate -
Upload a
super-userprivate-key -
Press the
Verifybutton to validate that the above information is valid
-
-
Toggle the Shared cluster to be
noShared clusters are visible to all tenants defined in the Axual Platform. Only SUPER_ADMIN can manage these clusters.
Private clusters are visible to only the tenant that has defined it. TENANT_ADMIN can manage these clusters.
-
Select the
Full Chain Certificateas the SSL Authentication Mode
The Full Chain Certificate option is recommended for multi-tenant environments.
-
Provide the Cluster Patterns
-
Put
{tenant}-{instance}-{environment}-{topic}as the Topic pattern -
Put
{tenant}-{instance}-{environment}-{group}as the Consumer Group pattern -
Put
{tenant}-{instance}-{environment}-{transactional.id}as the Transactional ID pattern
-
-
Press the
Add Clusterbutton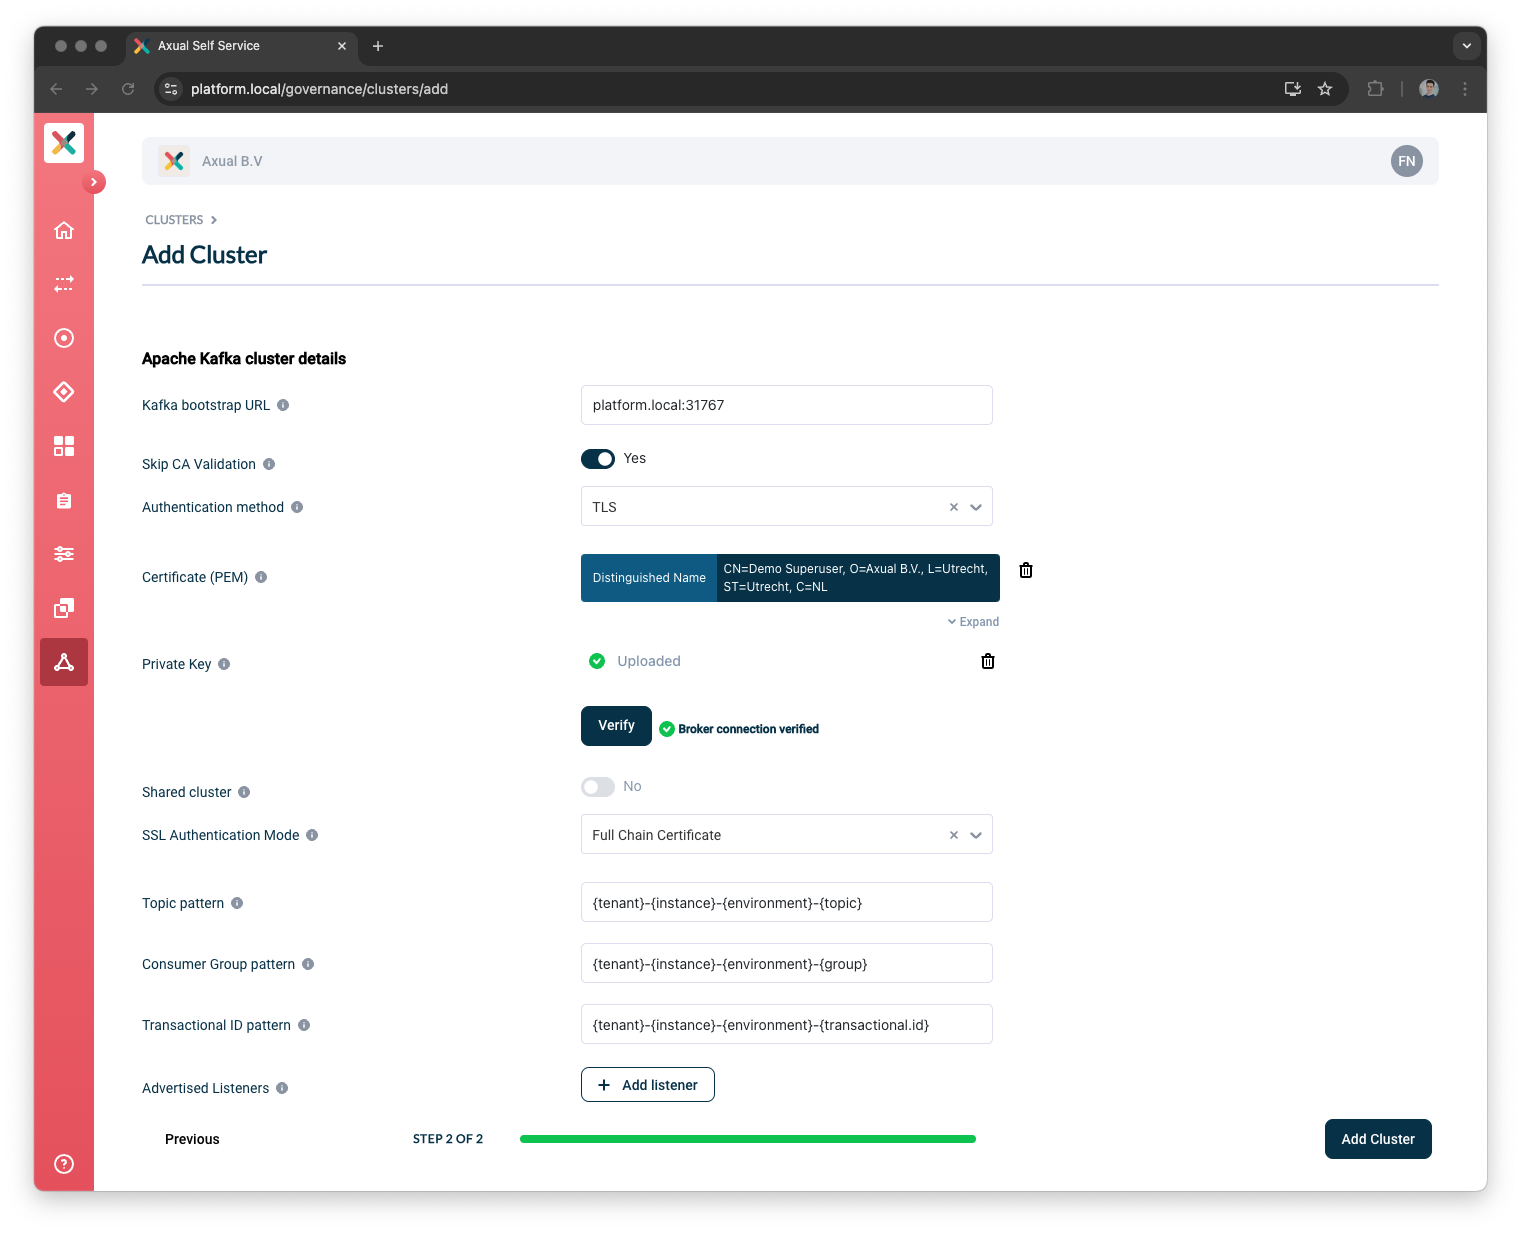
| The cluster patterns are used to decide how many instances, environments, and tenants can use this cluster. |
Now that you have created a Cluster in the Self-Service, you can proceed to create an Instance.
Create the Instance
These steps are used to create an Instance in the Axual Self-Service.
We are writing the steps
to create a dta instance using the local cluster created in the previous step.
-
Open the
instancesmenu and press theAdd instancebutton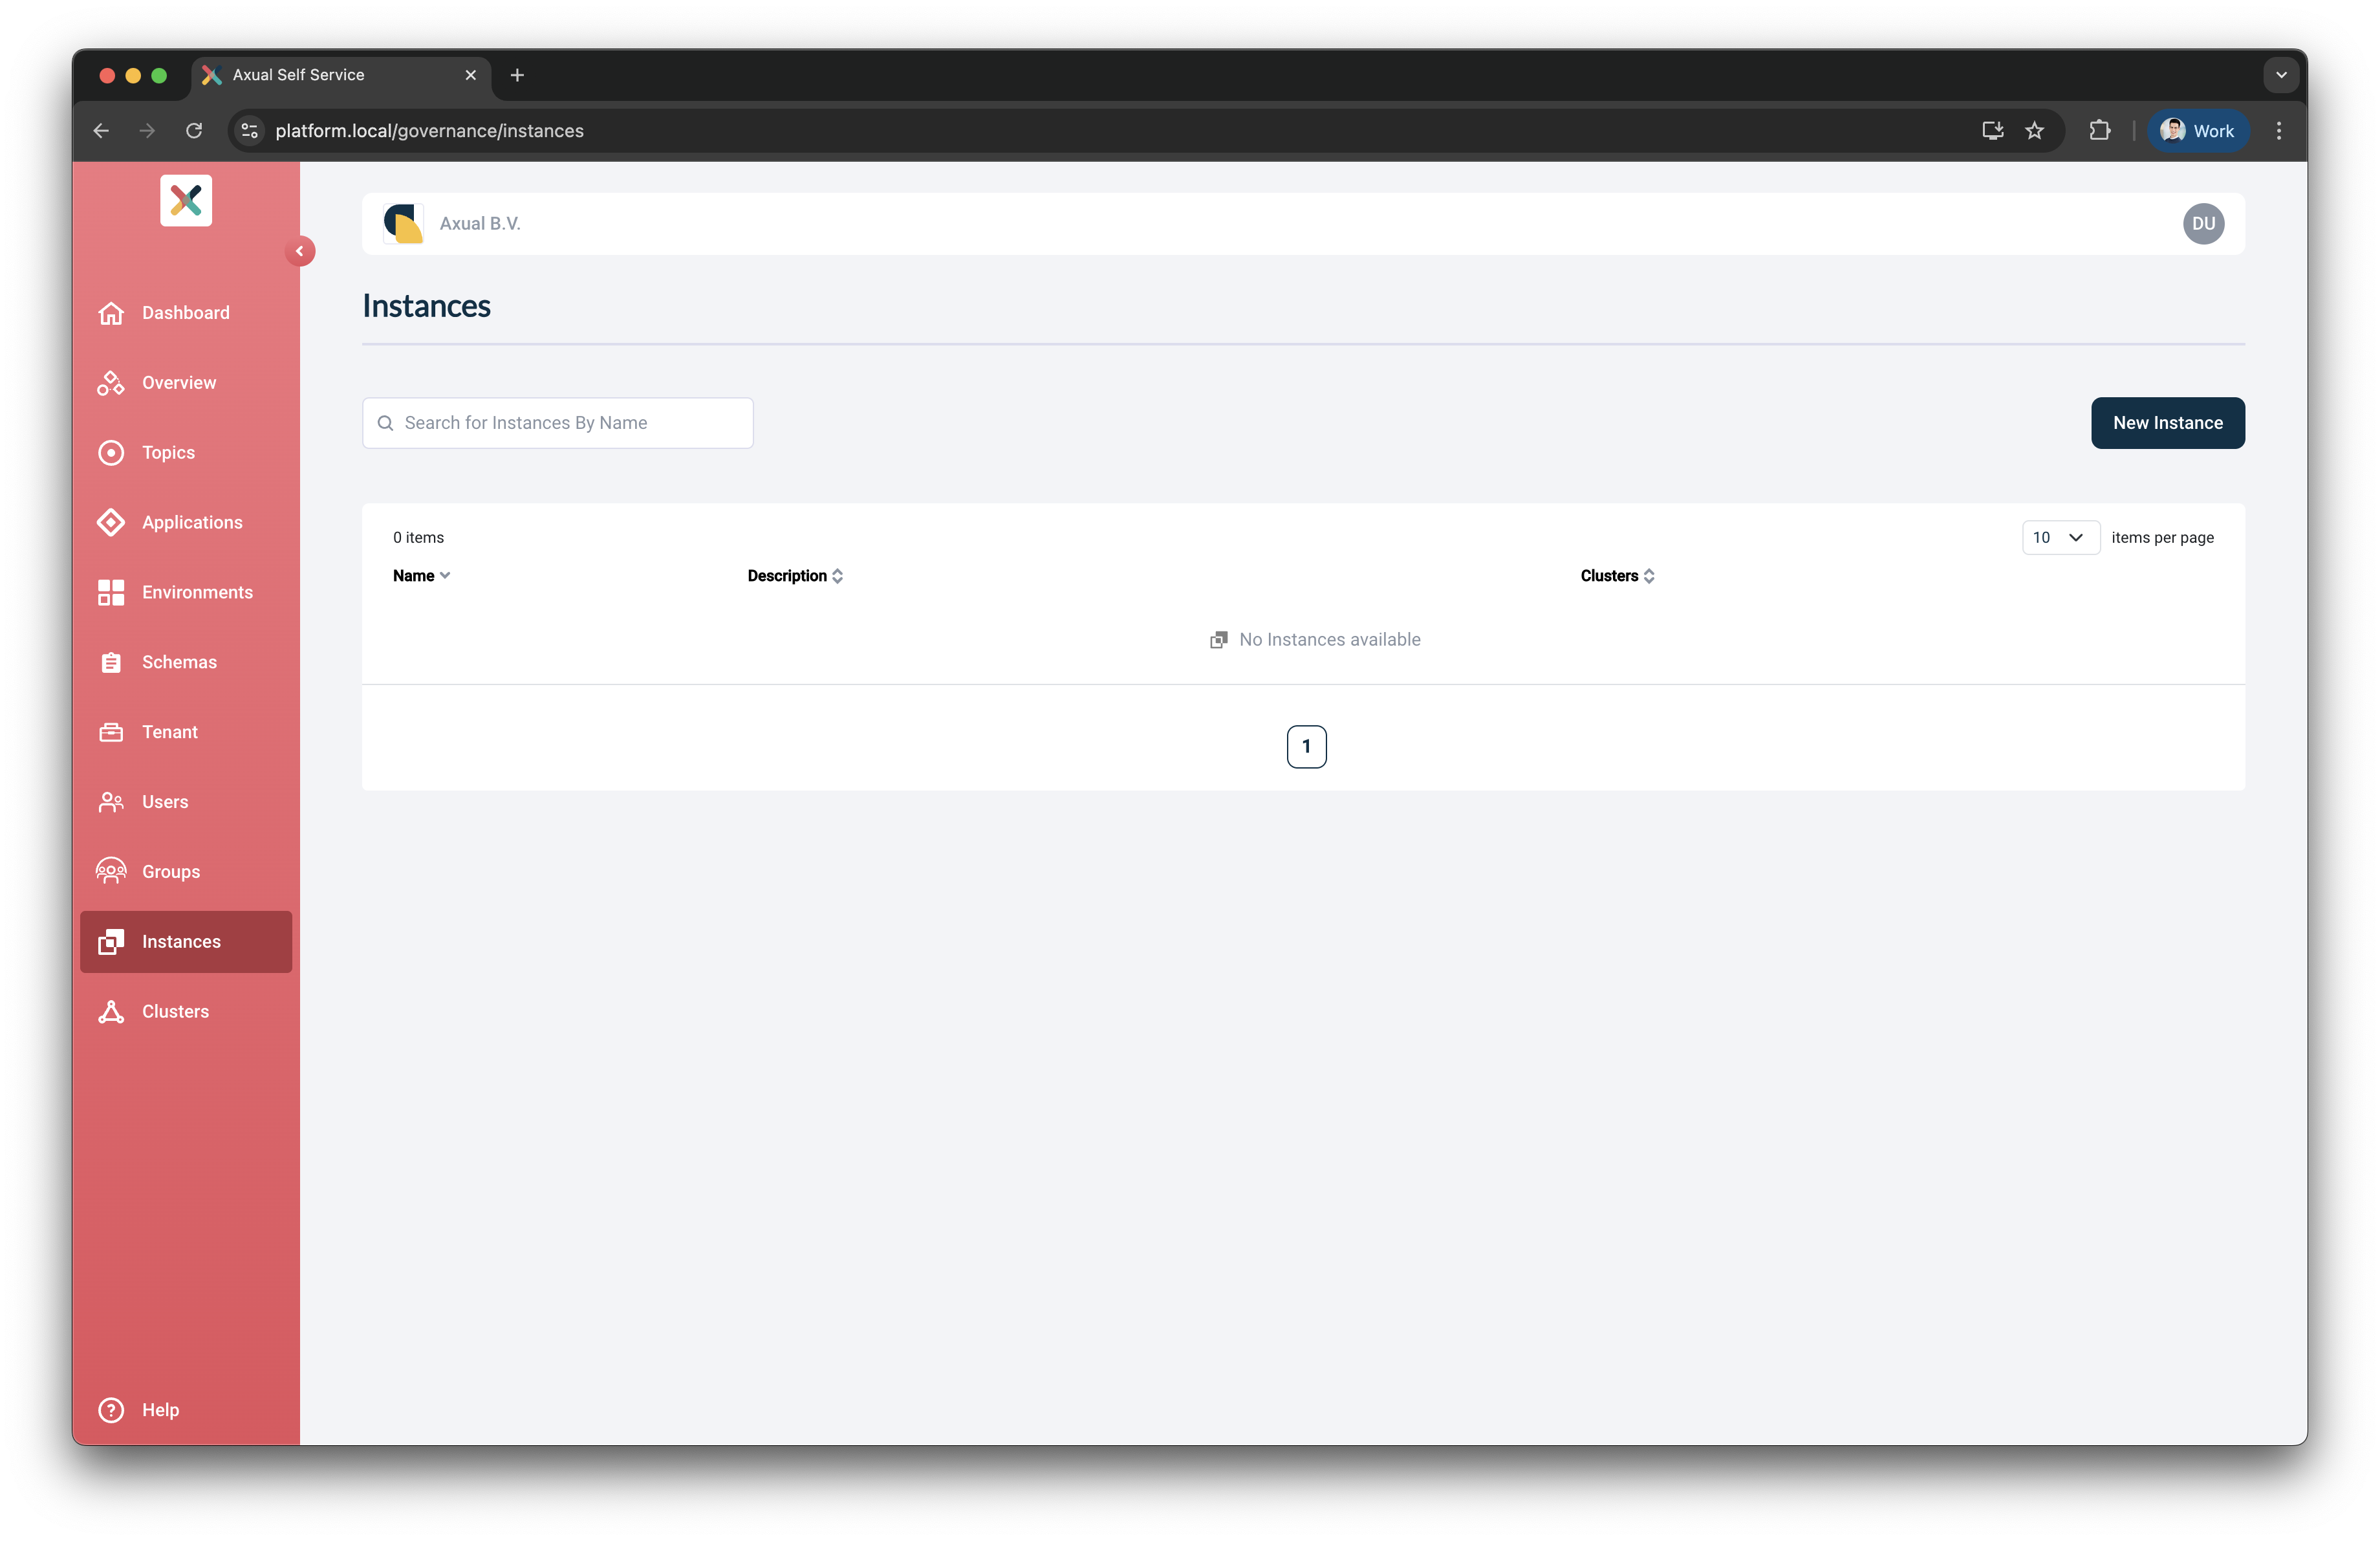
-
Provide the Instance Details and press the
Continuebutton-
Put
Dev Test Acceptanceas the Name -
Put
dtaas the ShortName -
Put
DTA Instanceas the Description
Do not fill the Instance Manager URL field, this field is for older installation. It will be removed in future releases. -
-
Press the
Select clusterbutton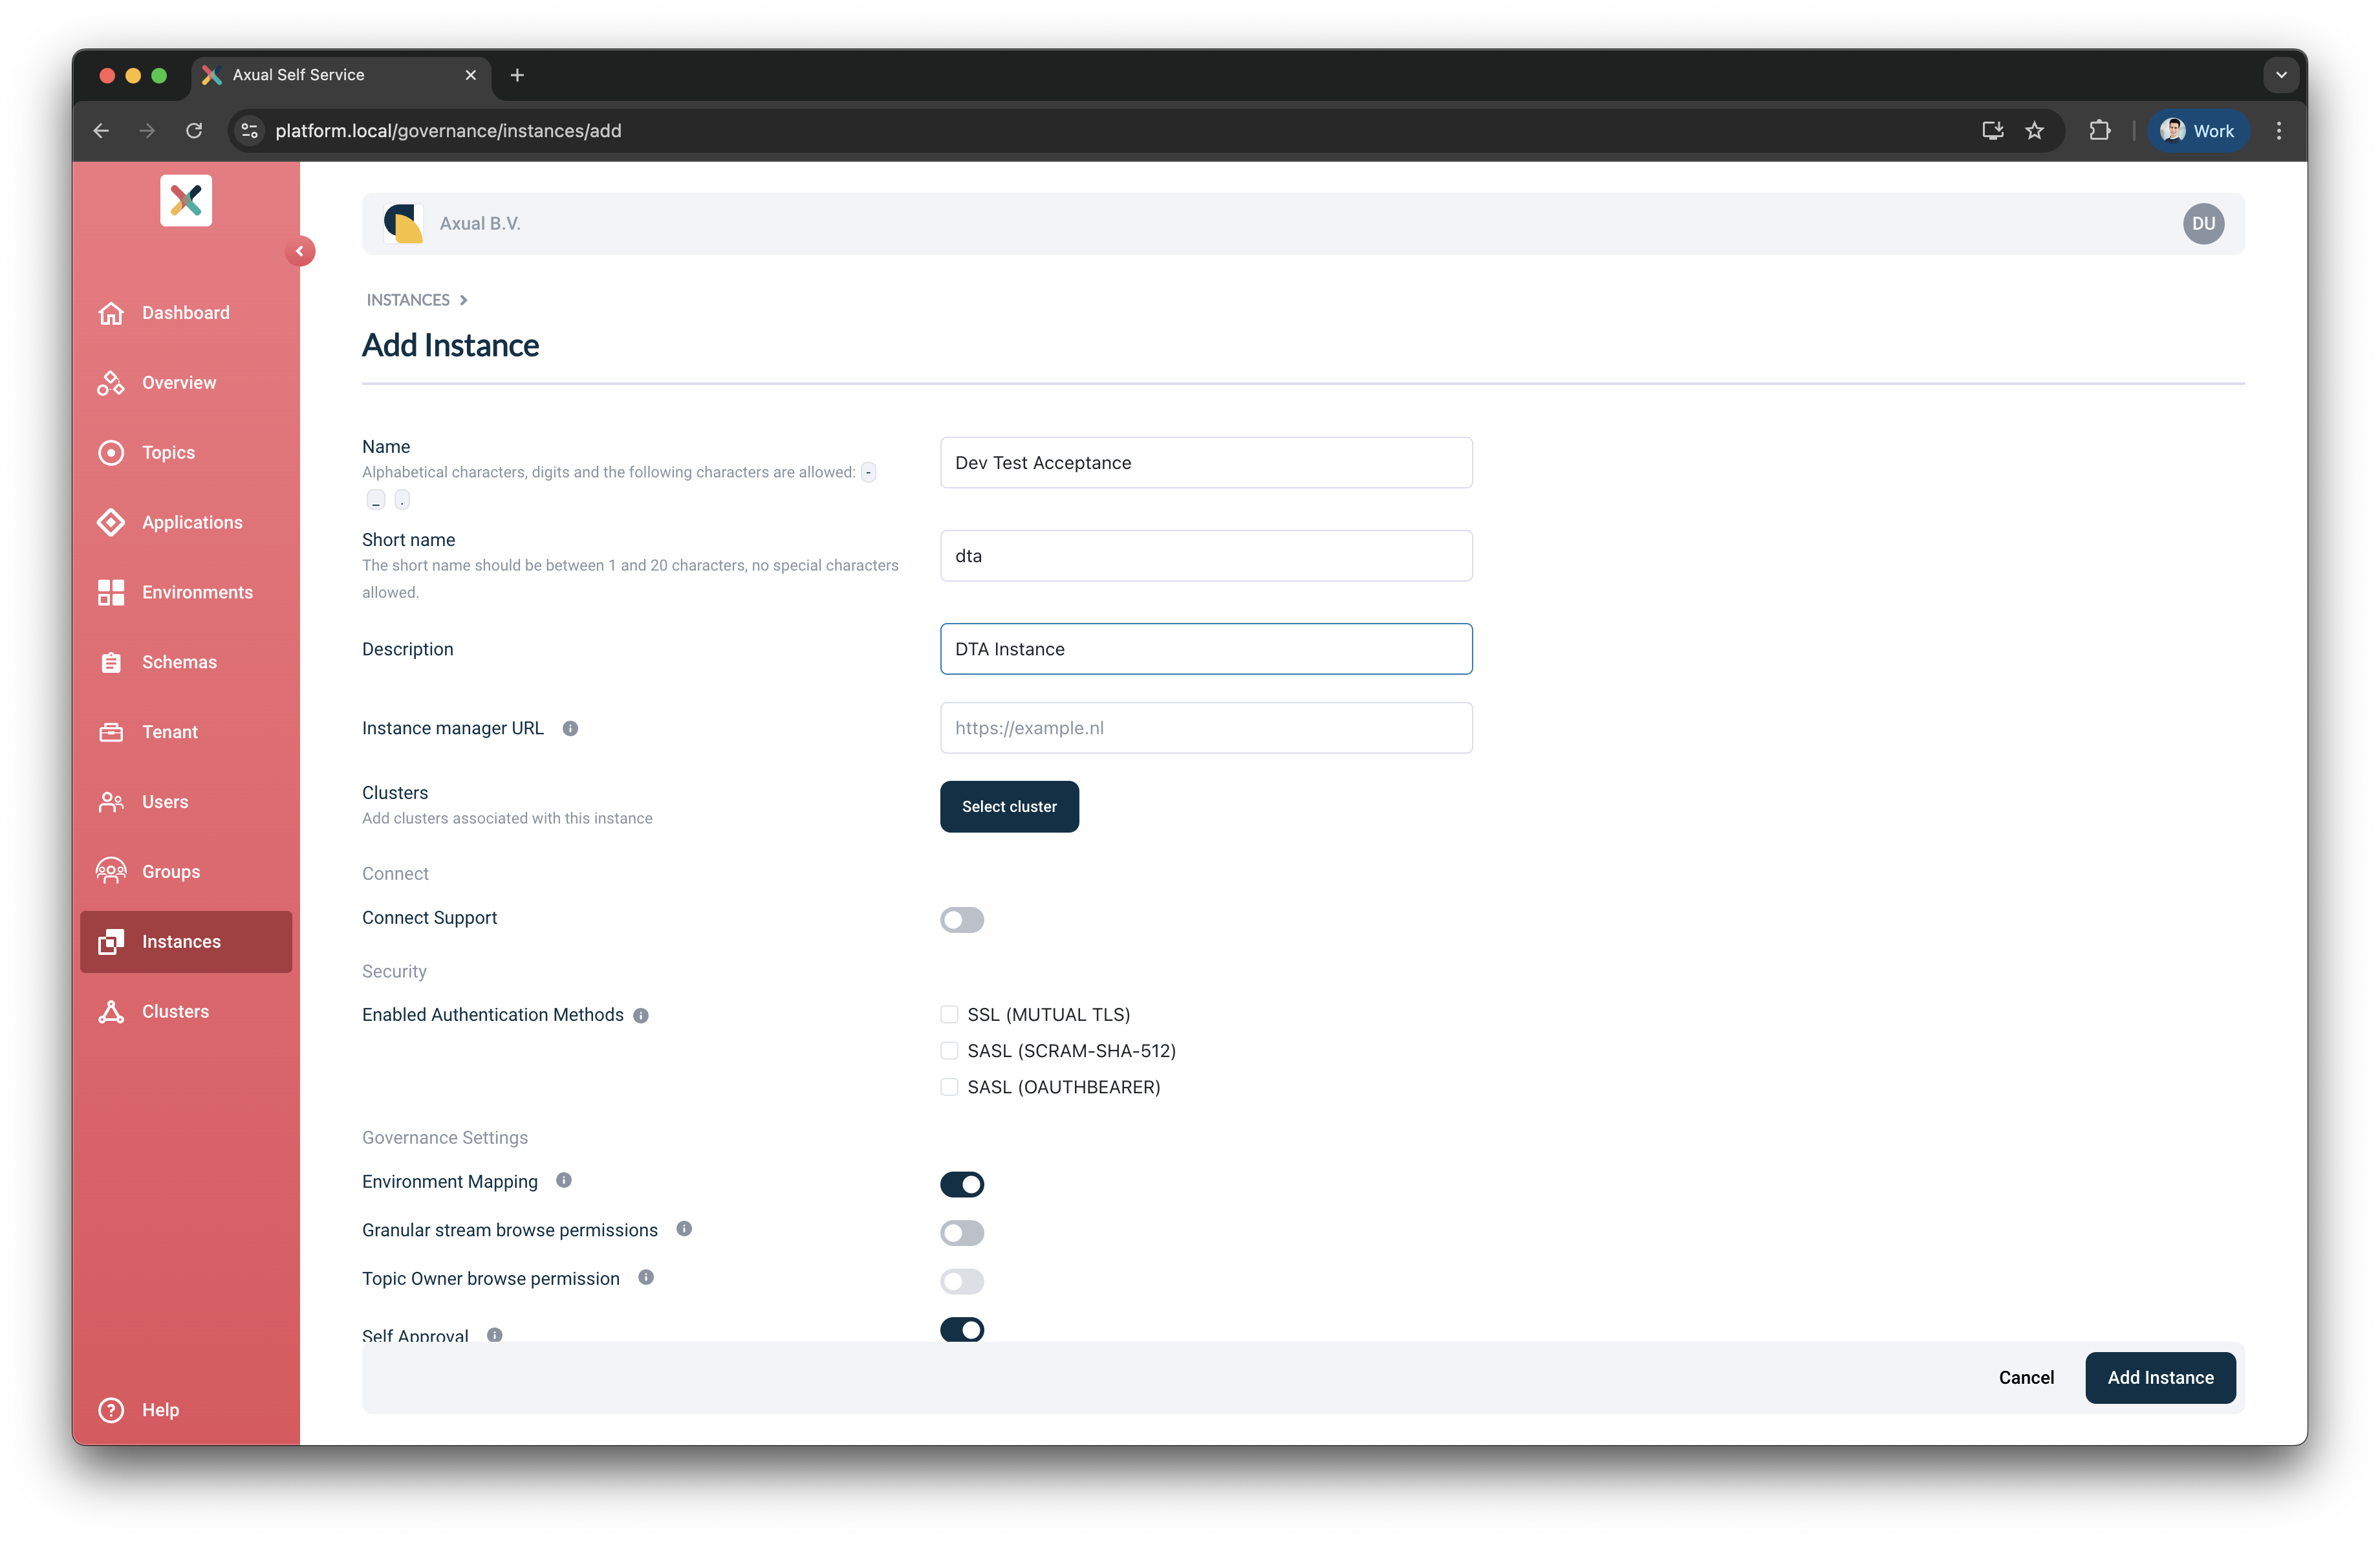
-
Select the
localcluster created in the previous step and press theApplybutton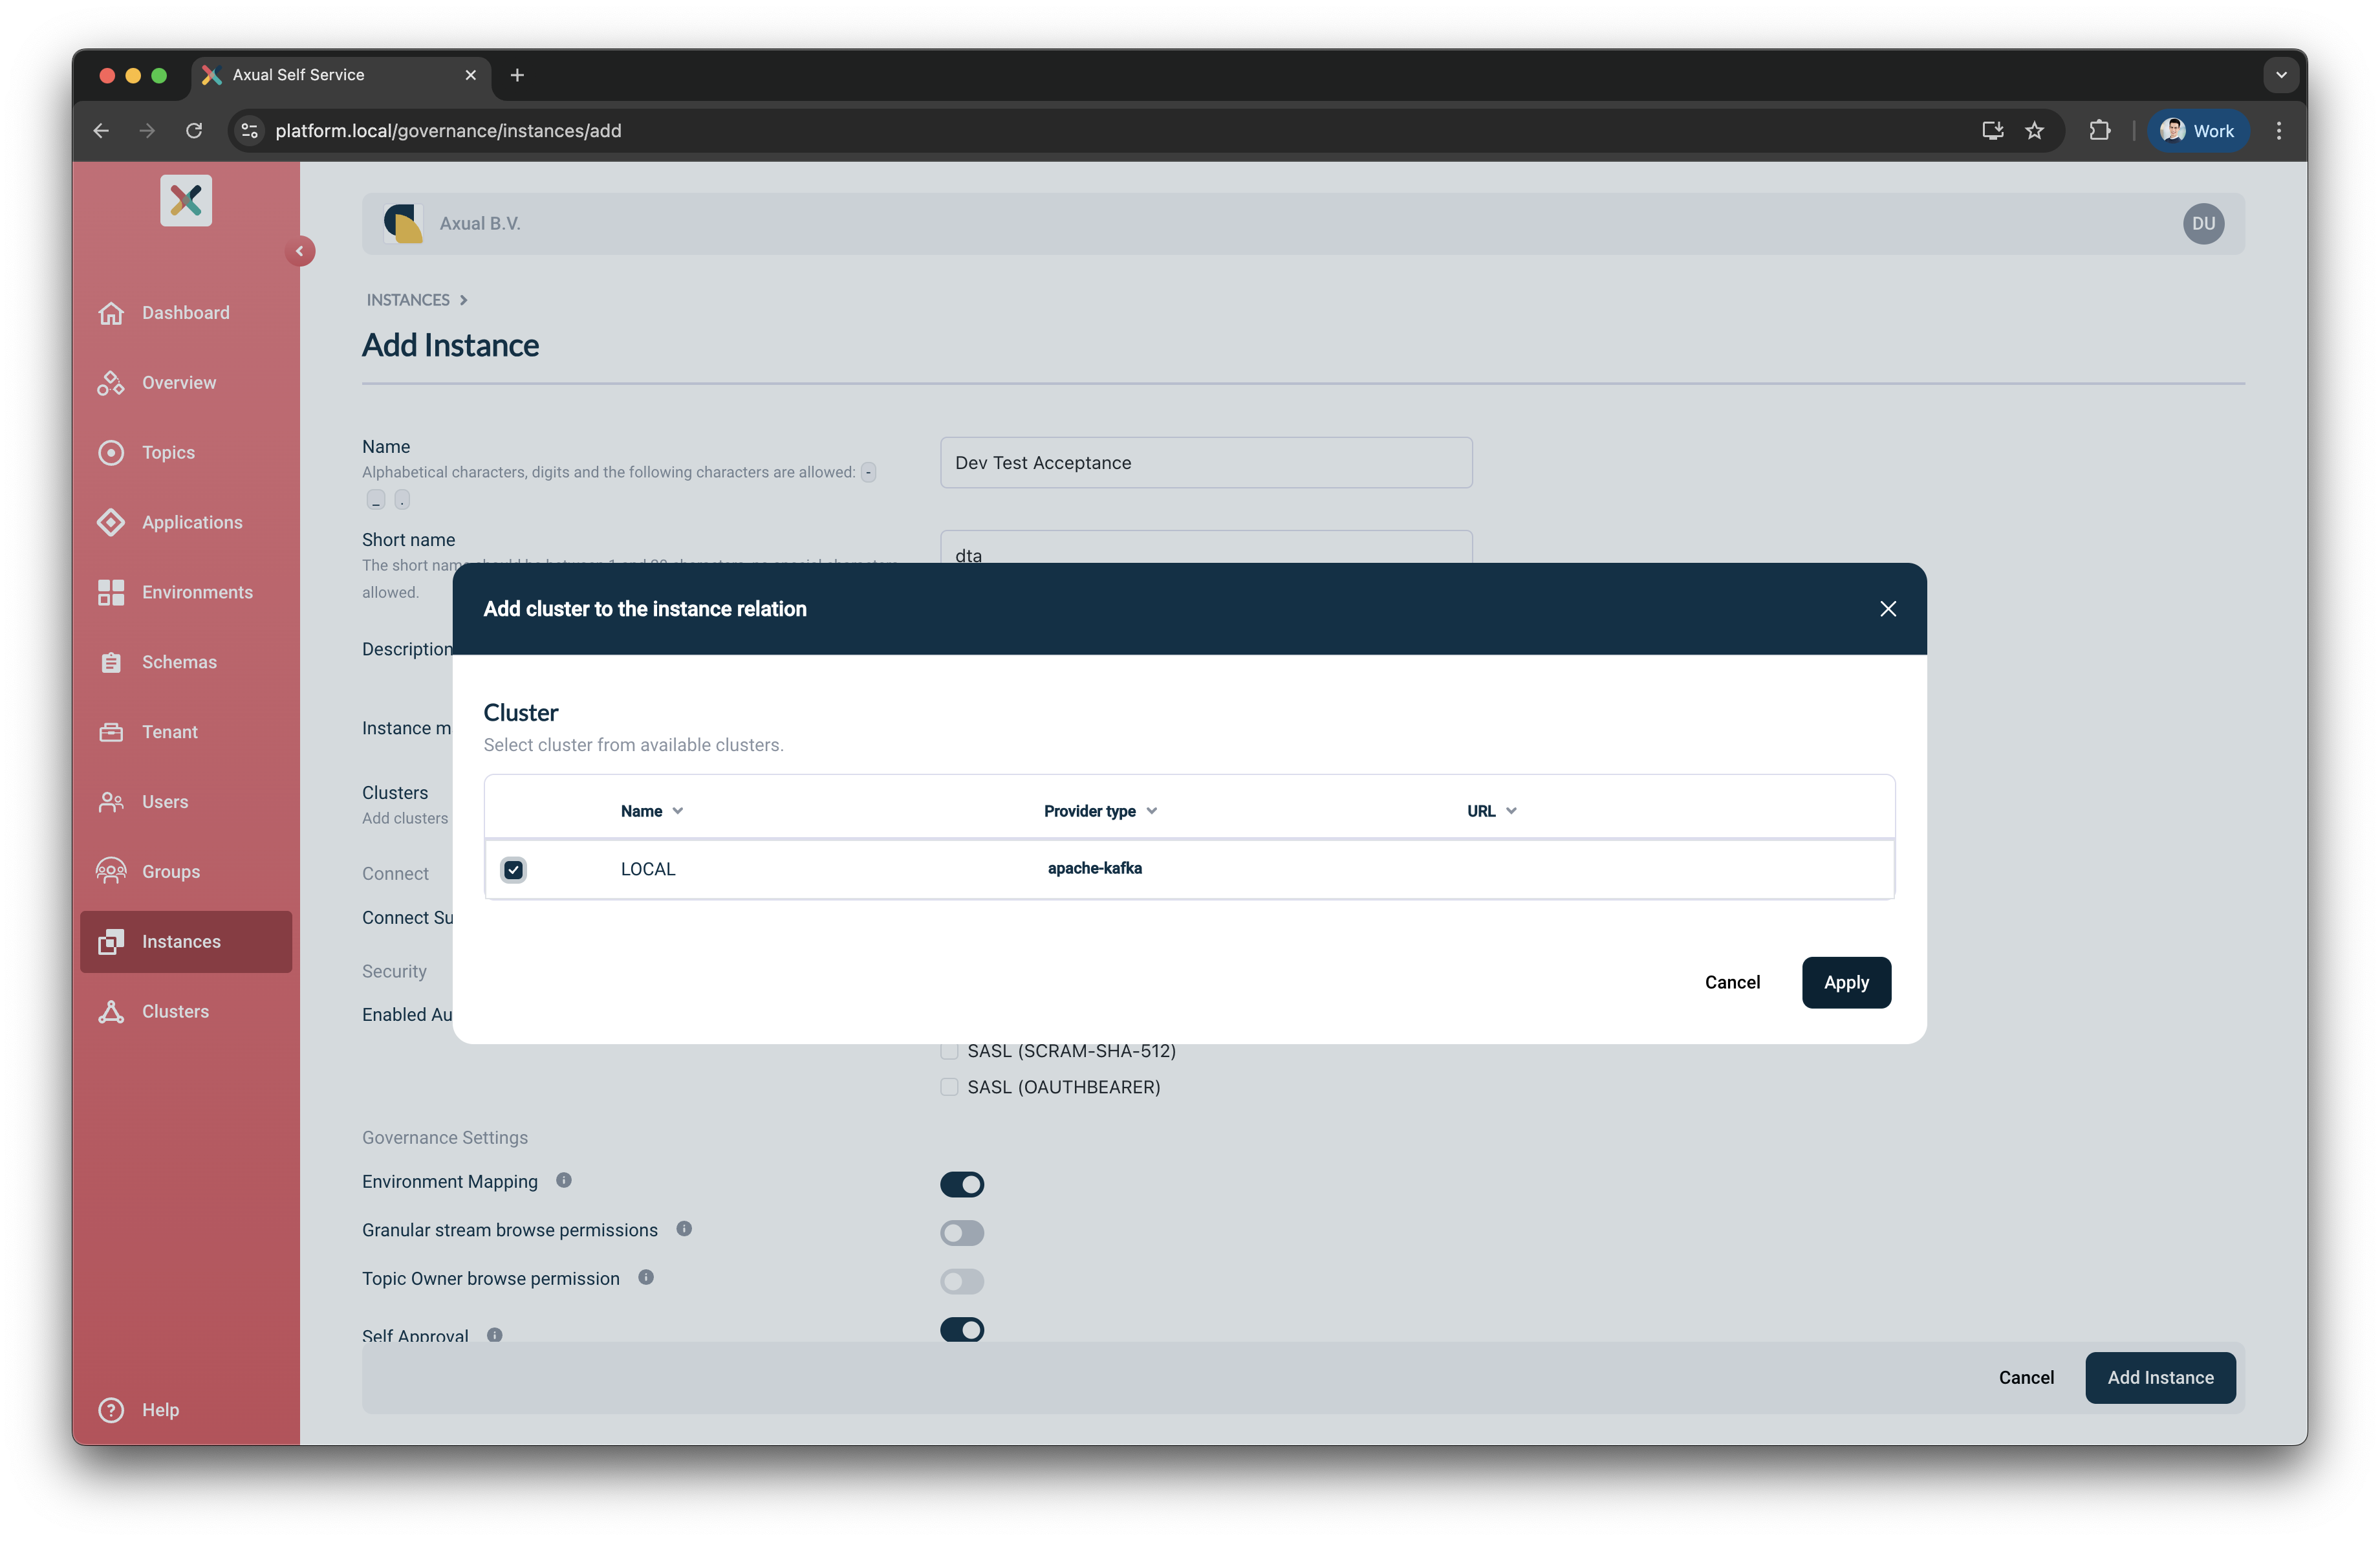
-
Enable the Authentication Method for this Instance
-
Toggle the
SSL (MUTUAL TLS) -
Upload the Signing CA used to sign your application certificate
-
-
Press the
Add Instancebutton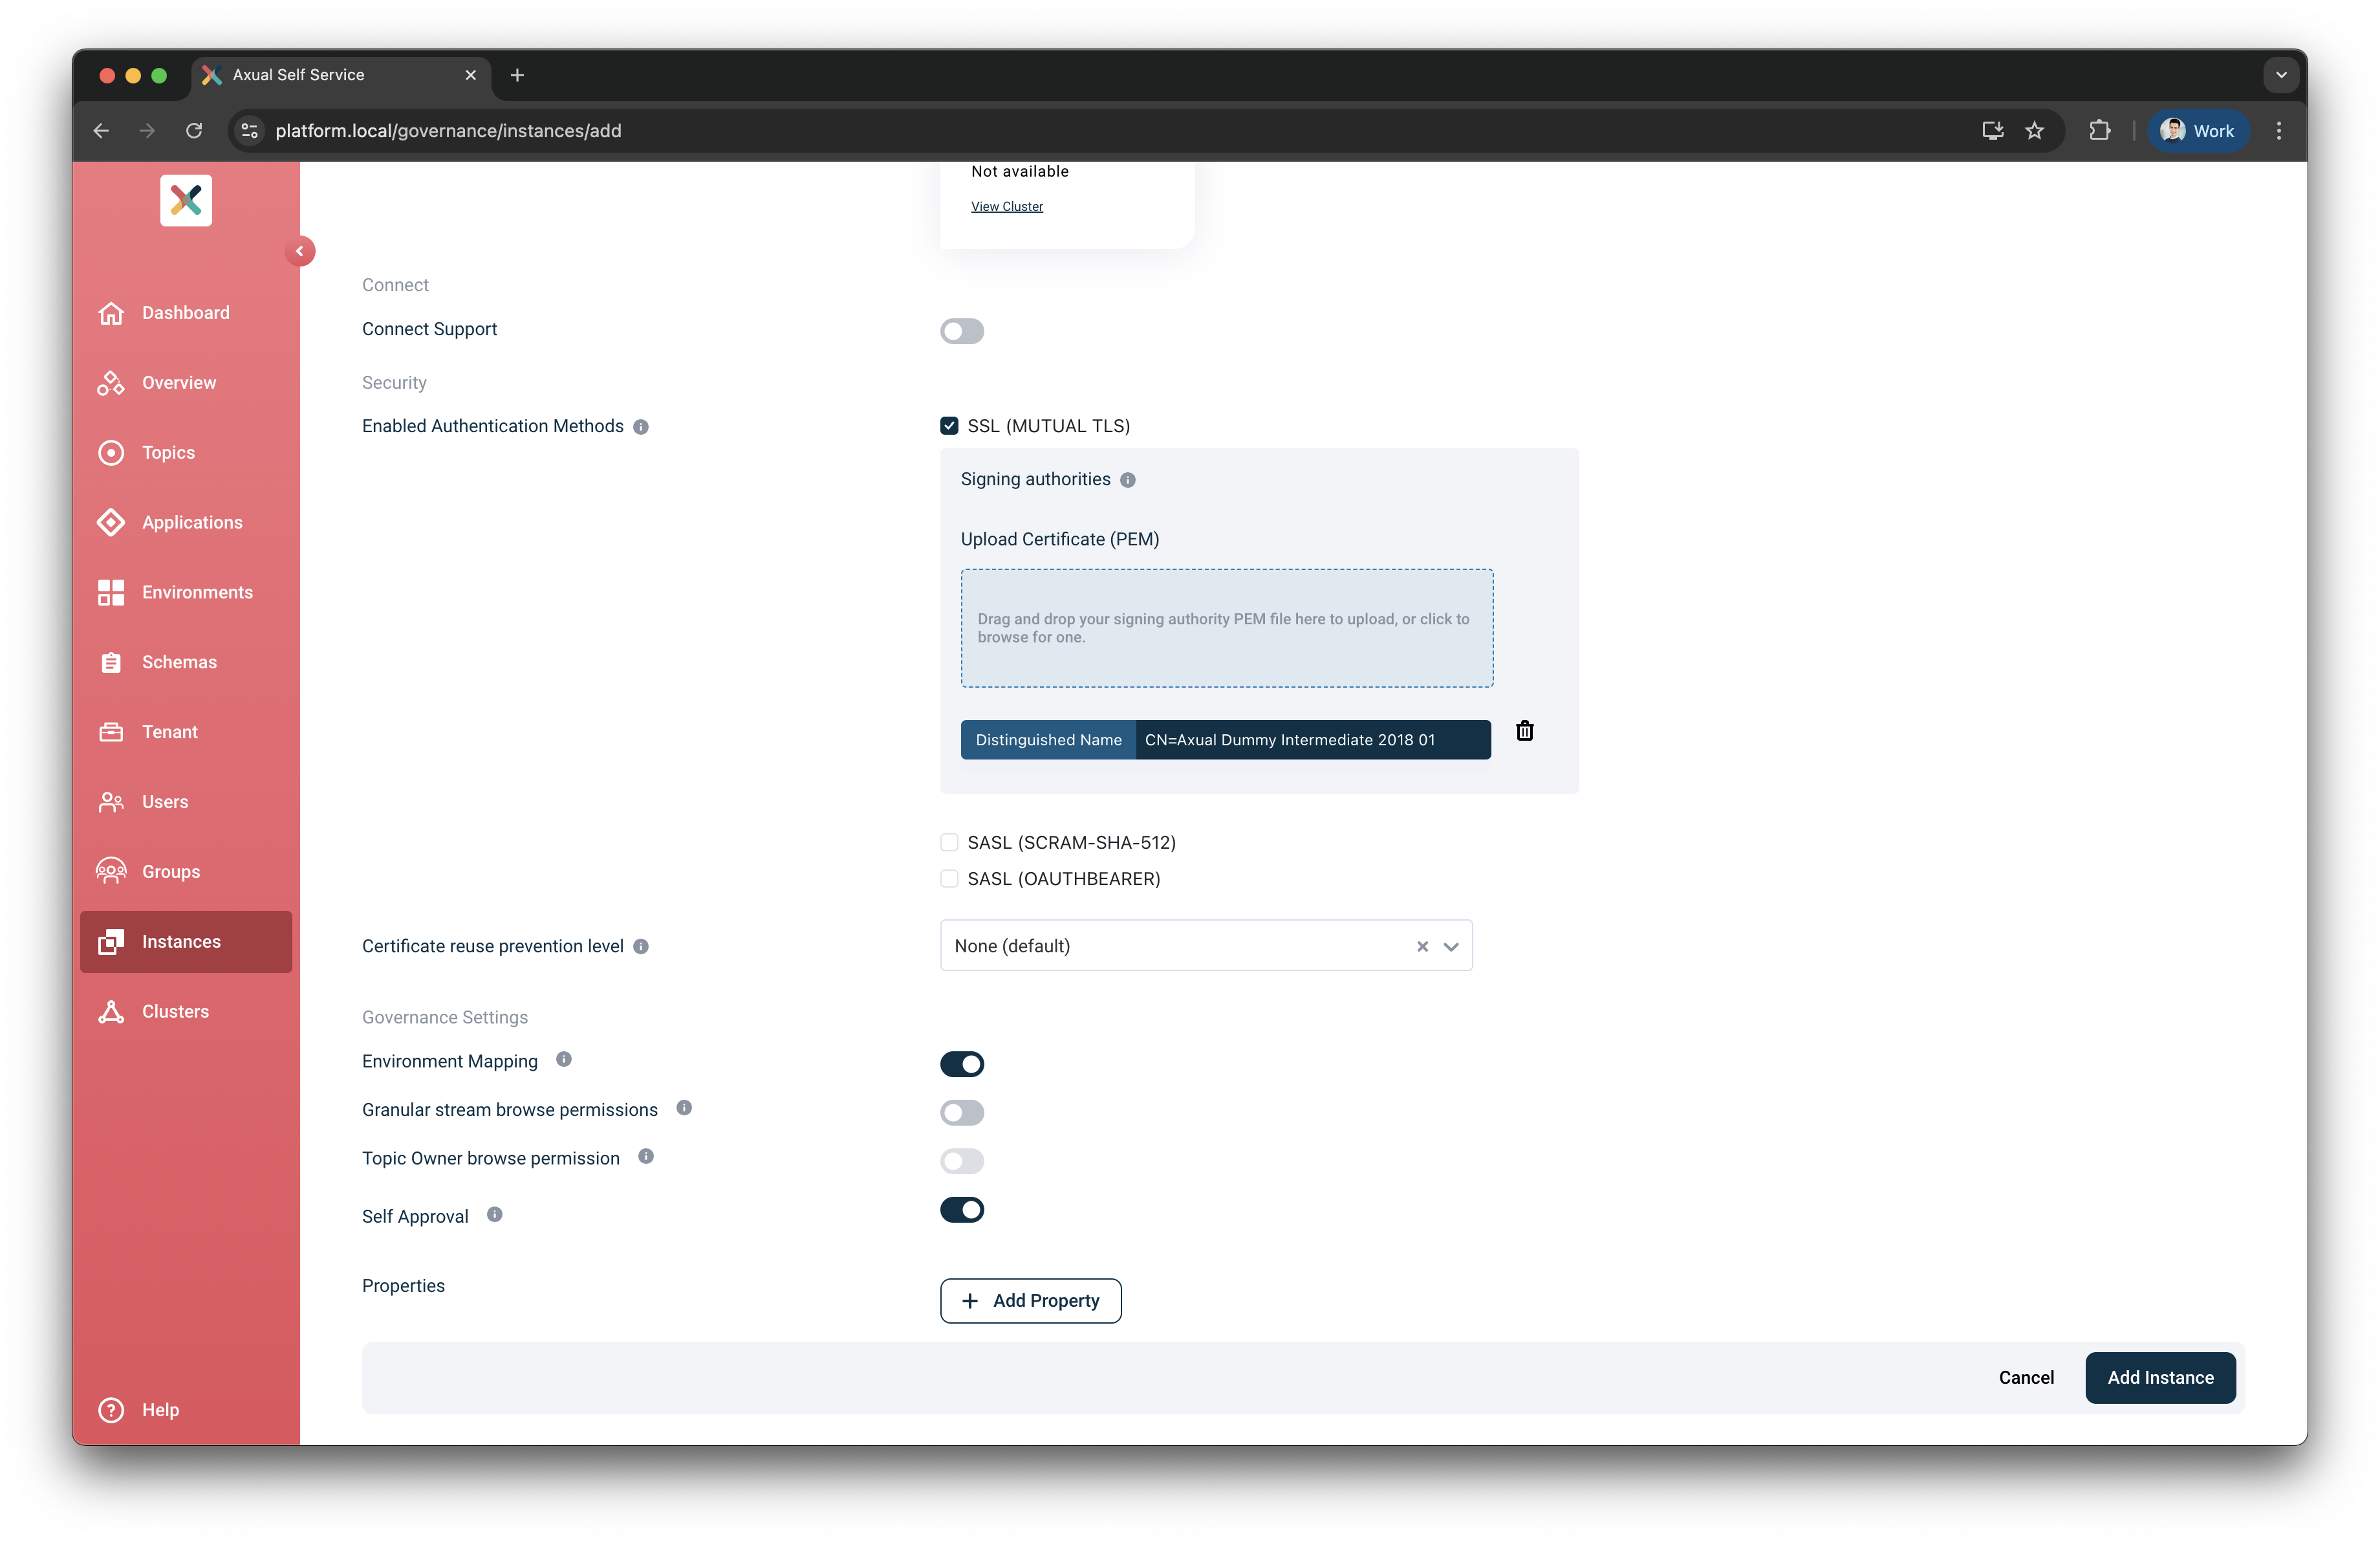
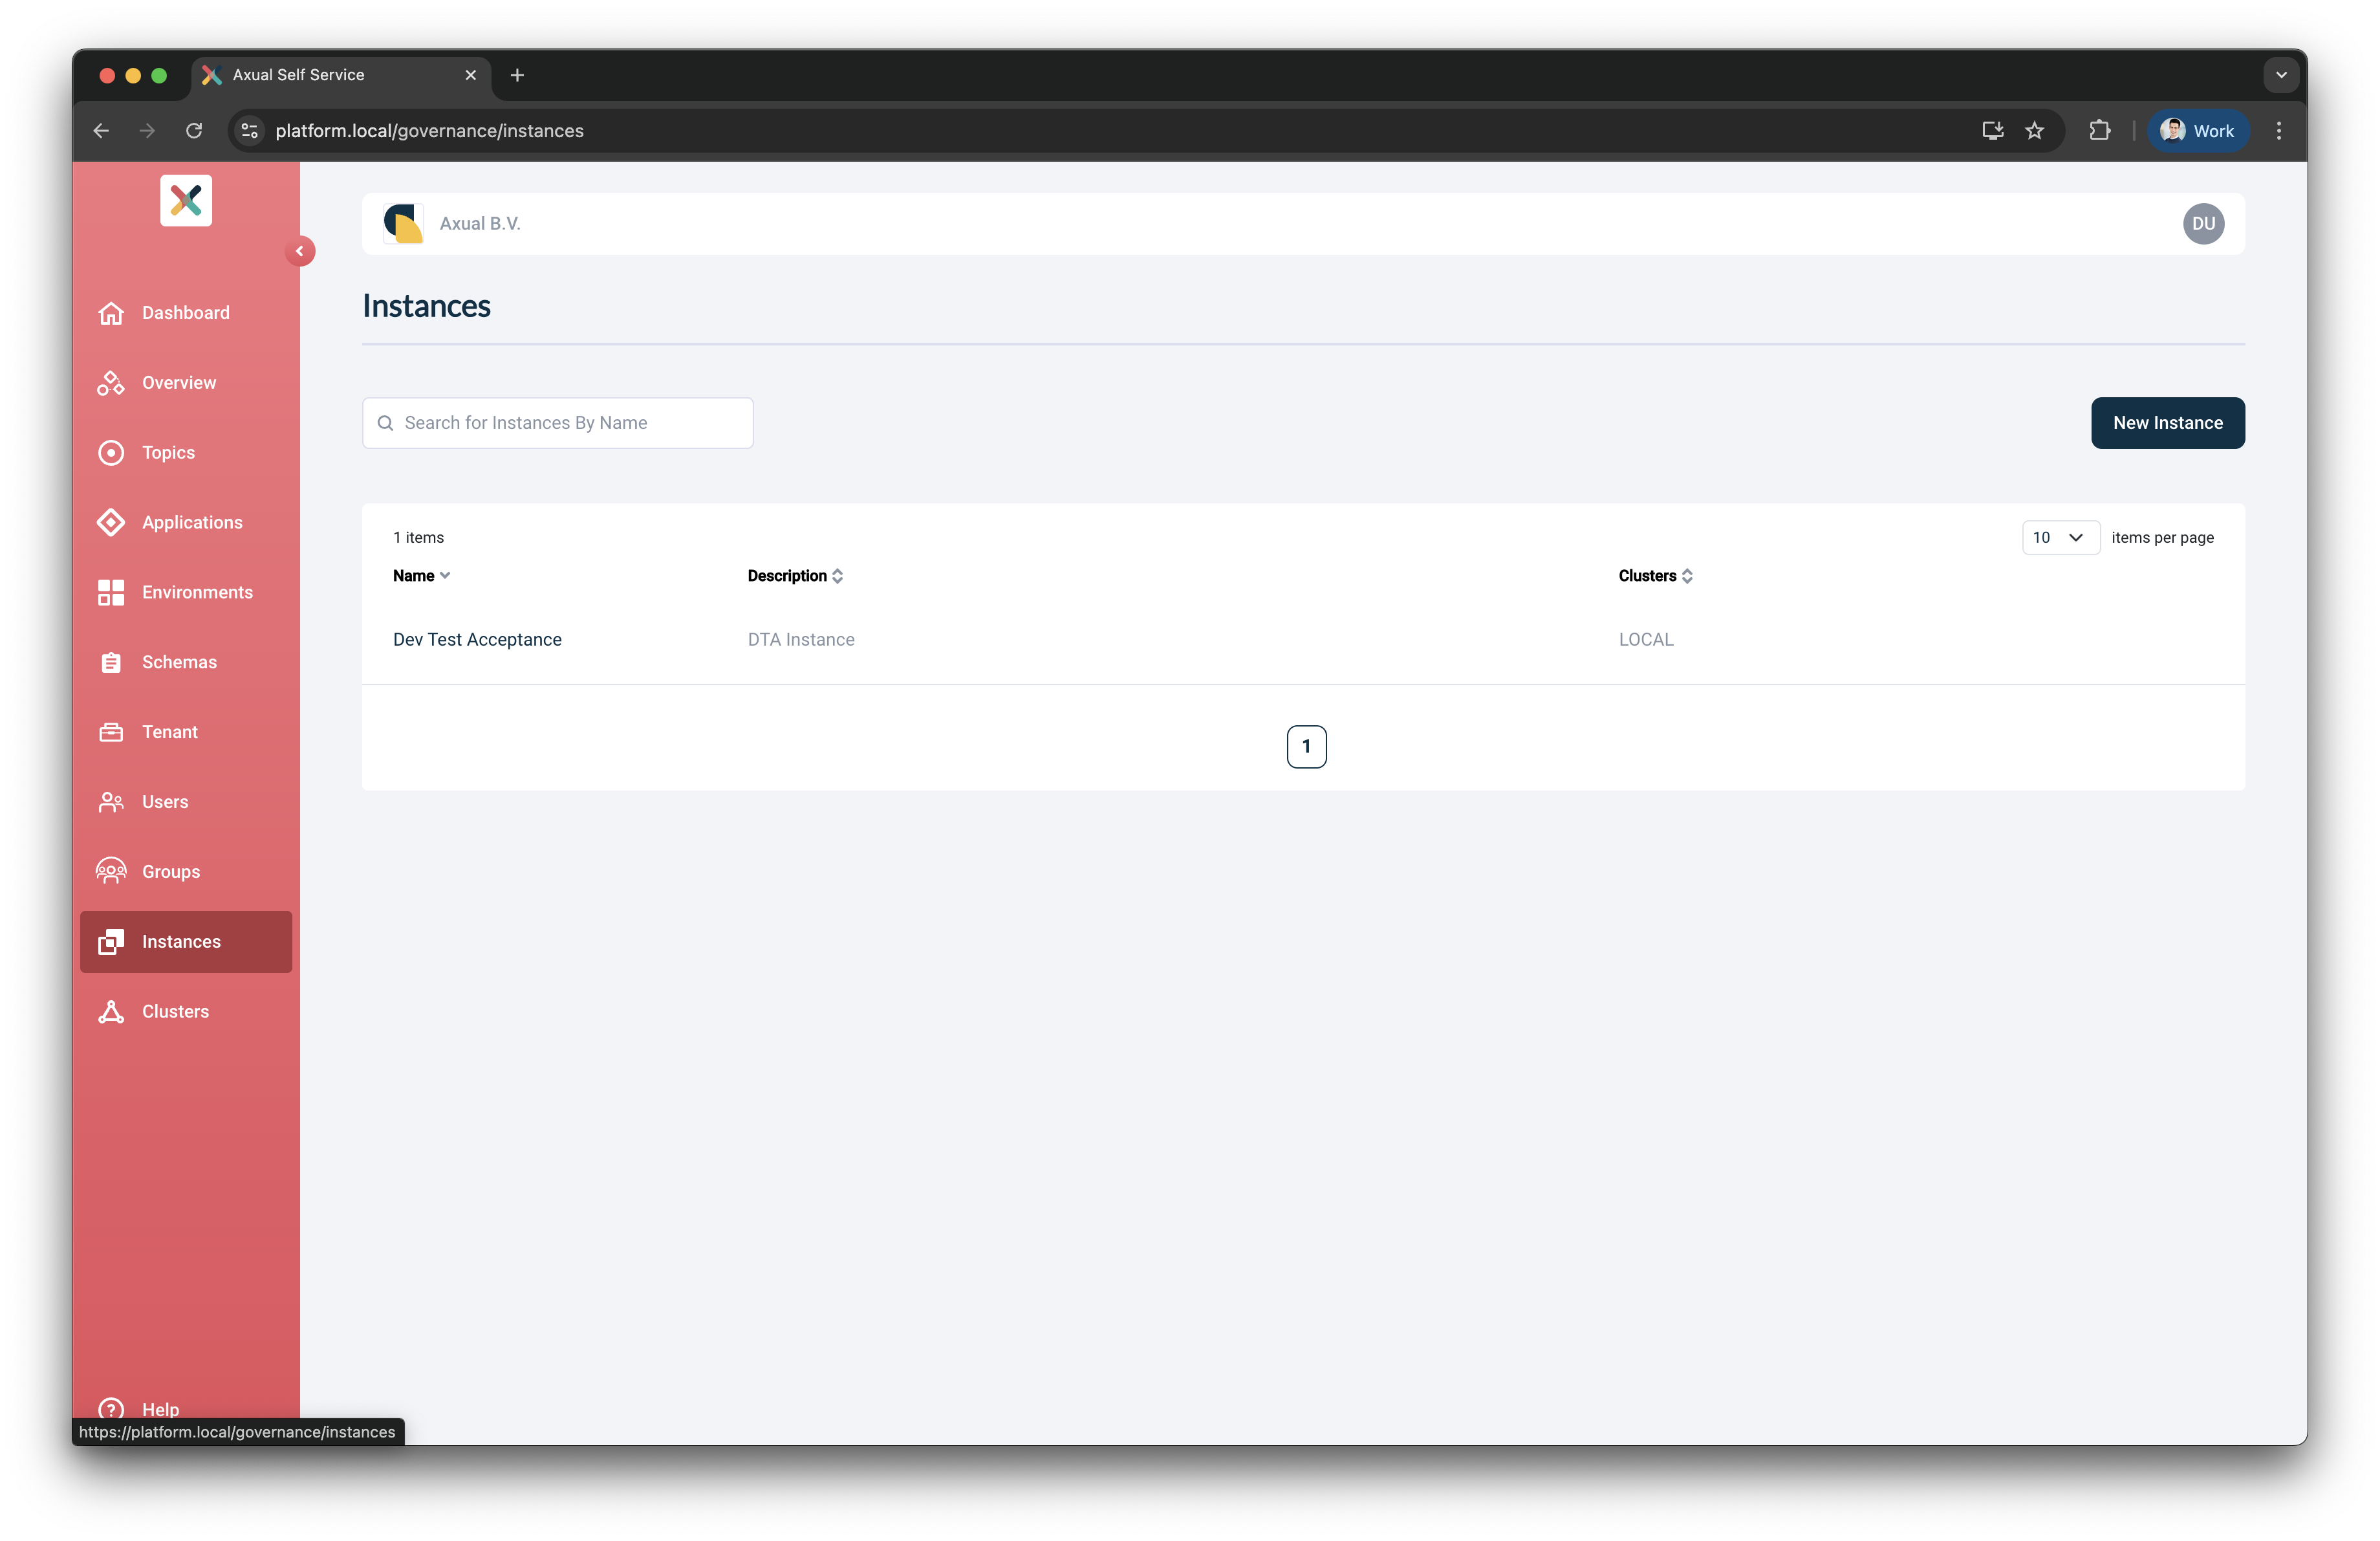
Now you have successfully created an Instance in the Self-Service
Schema Registry Configuration
-
Open the
instancesmenu and select freshly createdDev Test Acceptanceinstance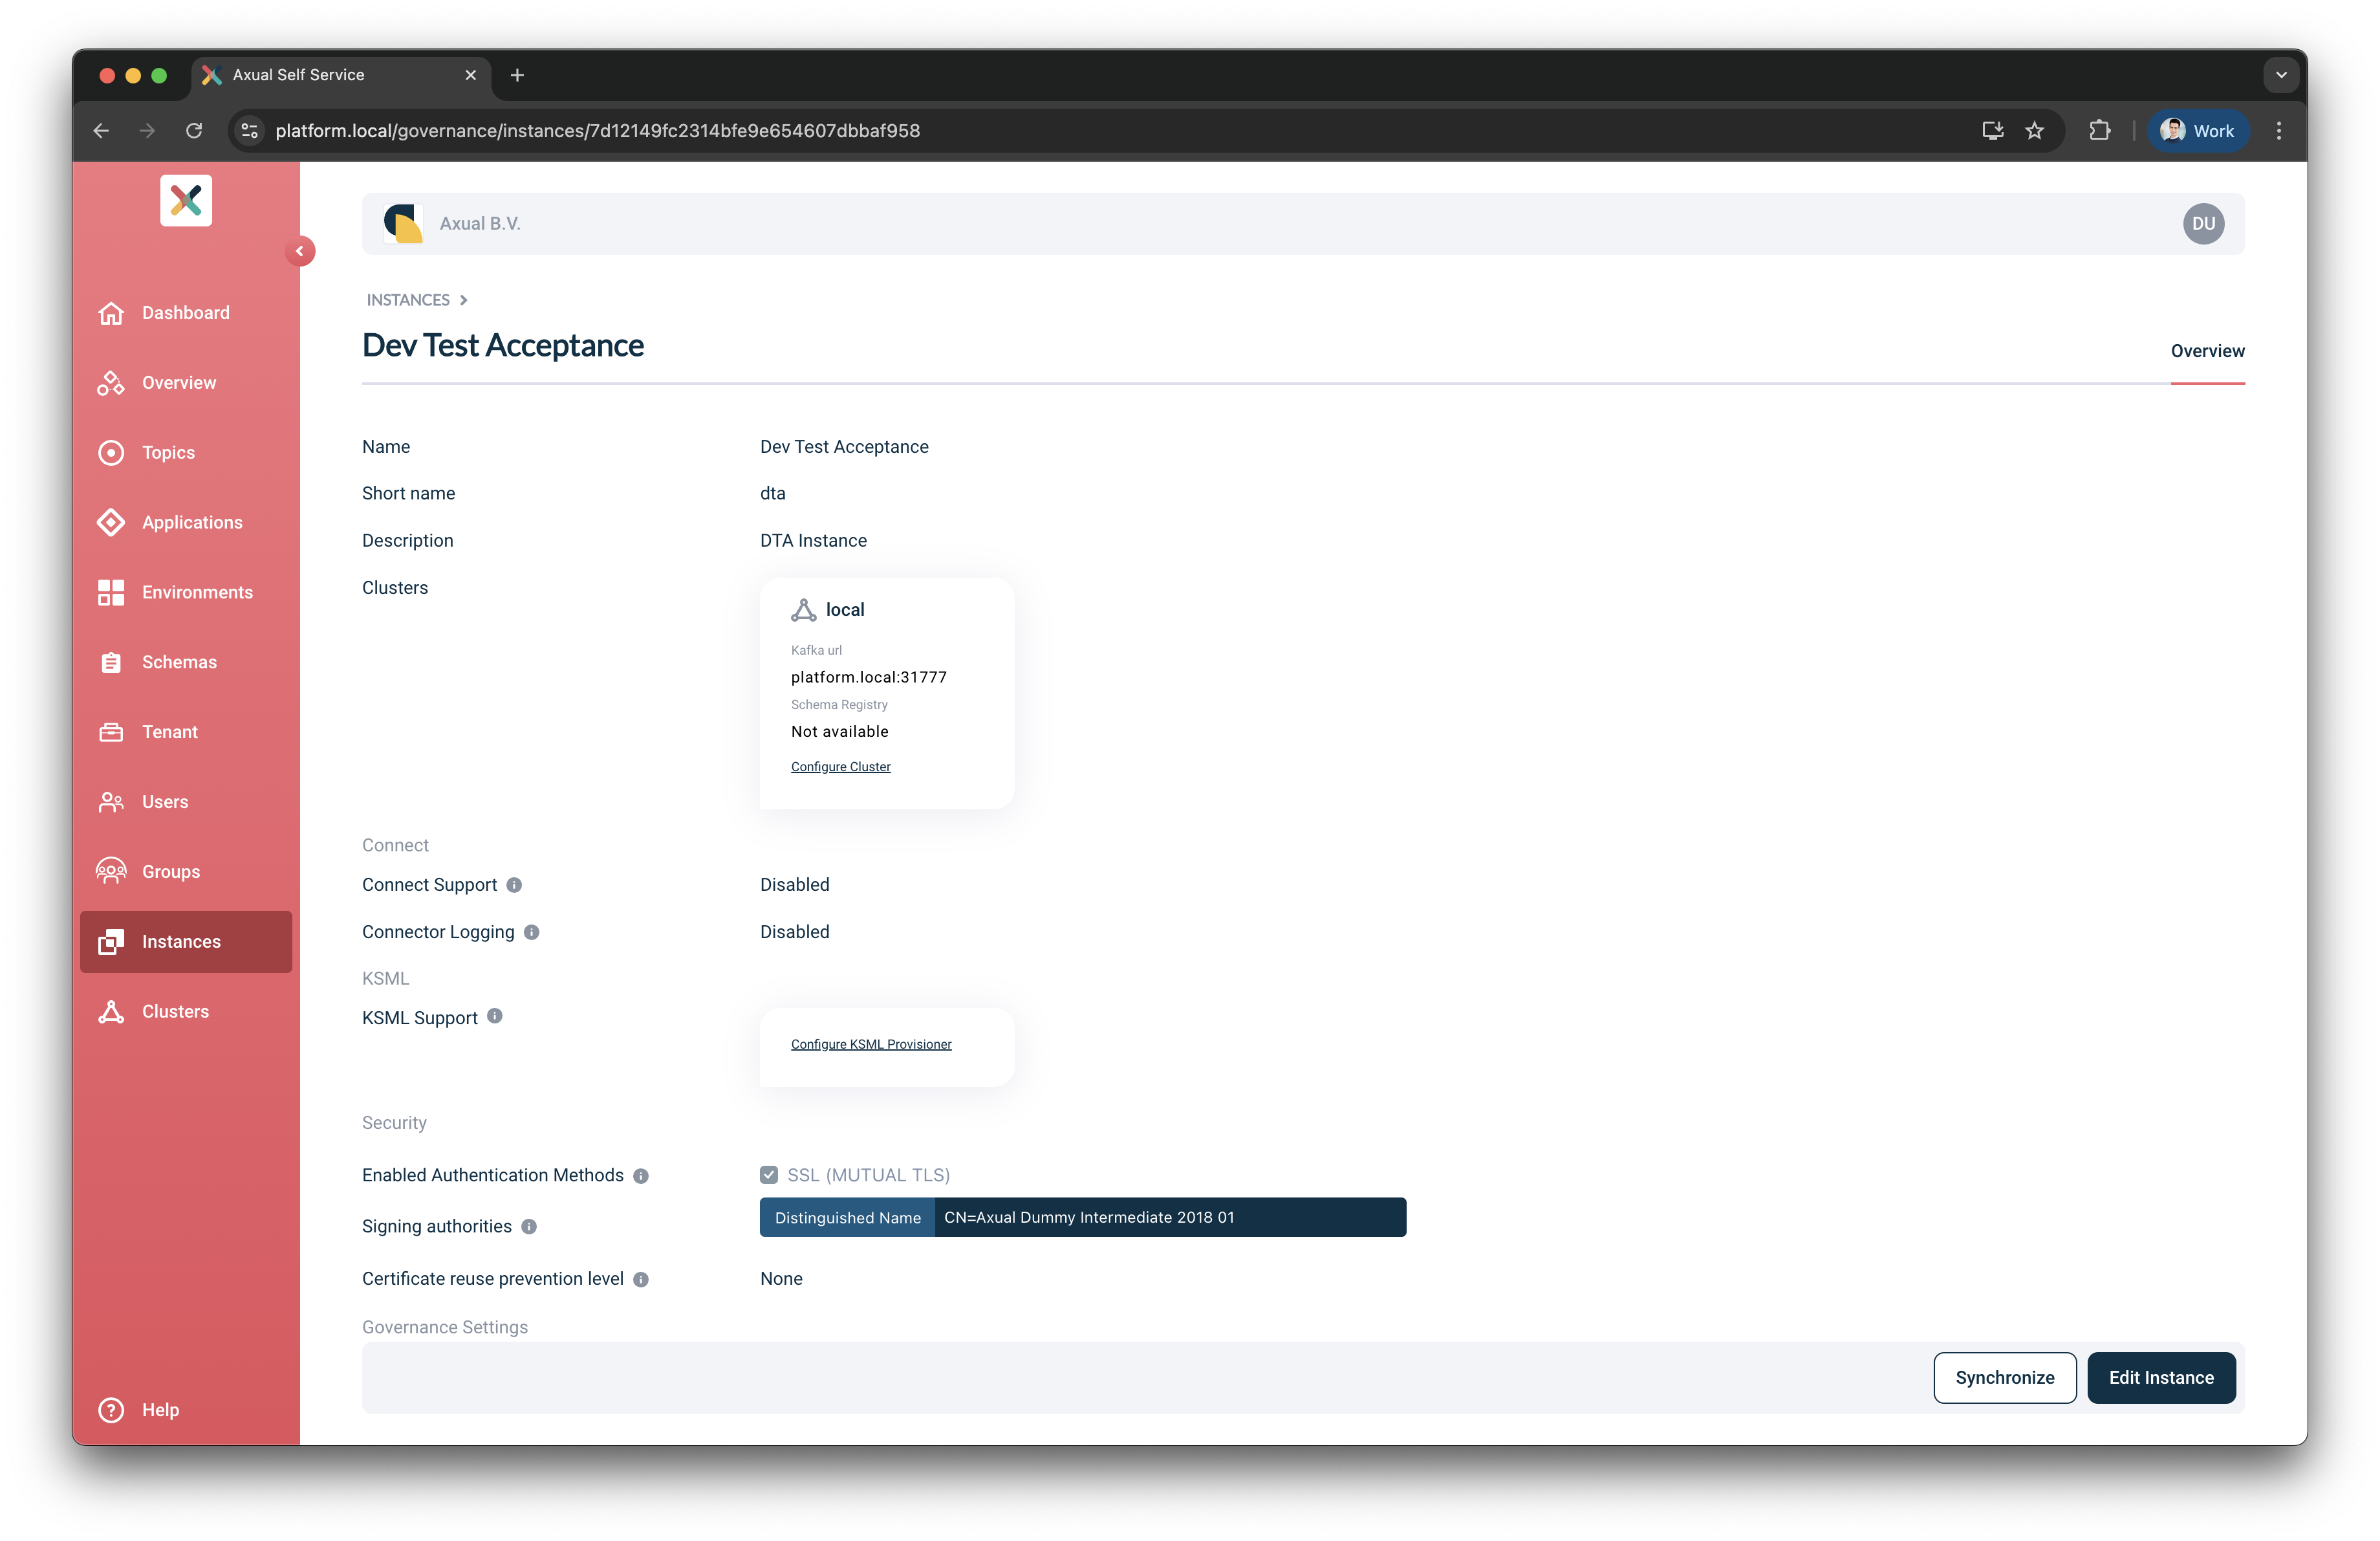
-
Under the field
ClusterspressConfigure Clusterfor clusterlocal. A modal for configuring the Schema Registry will open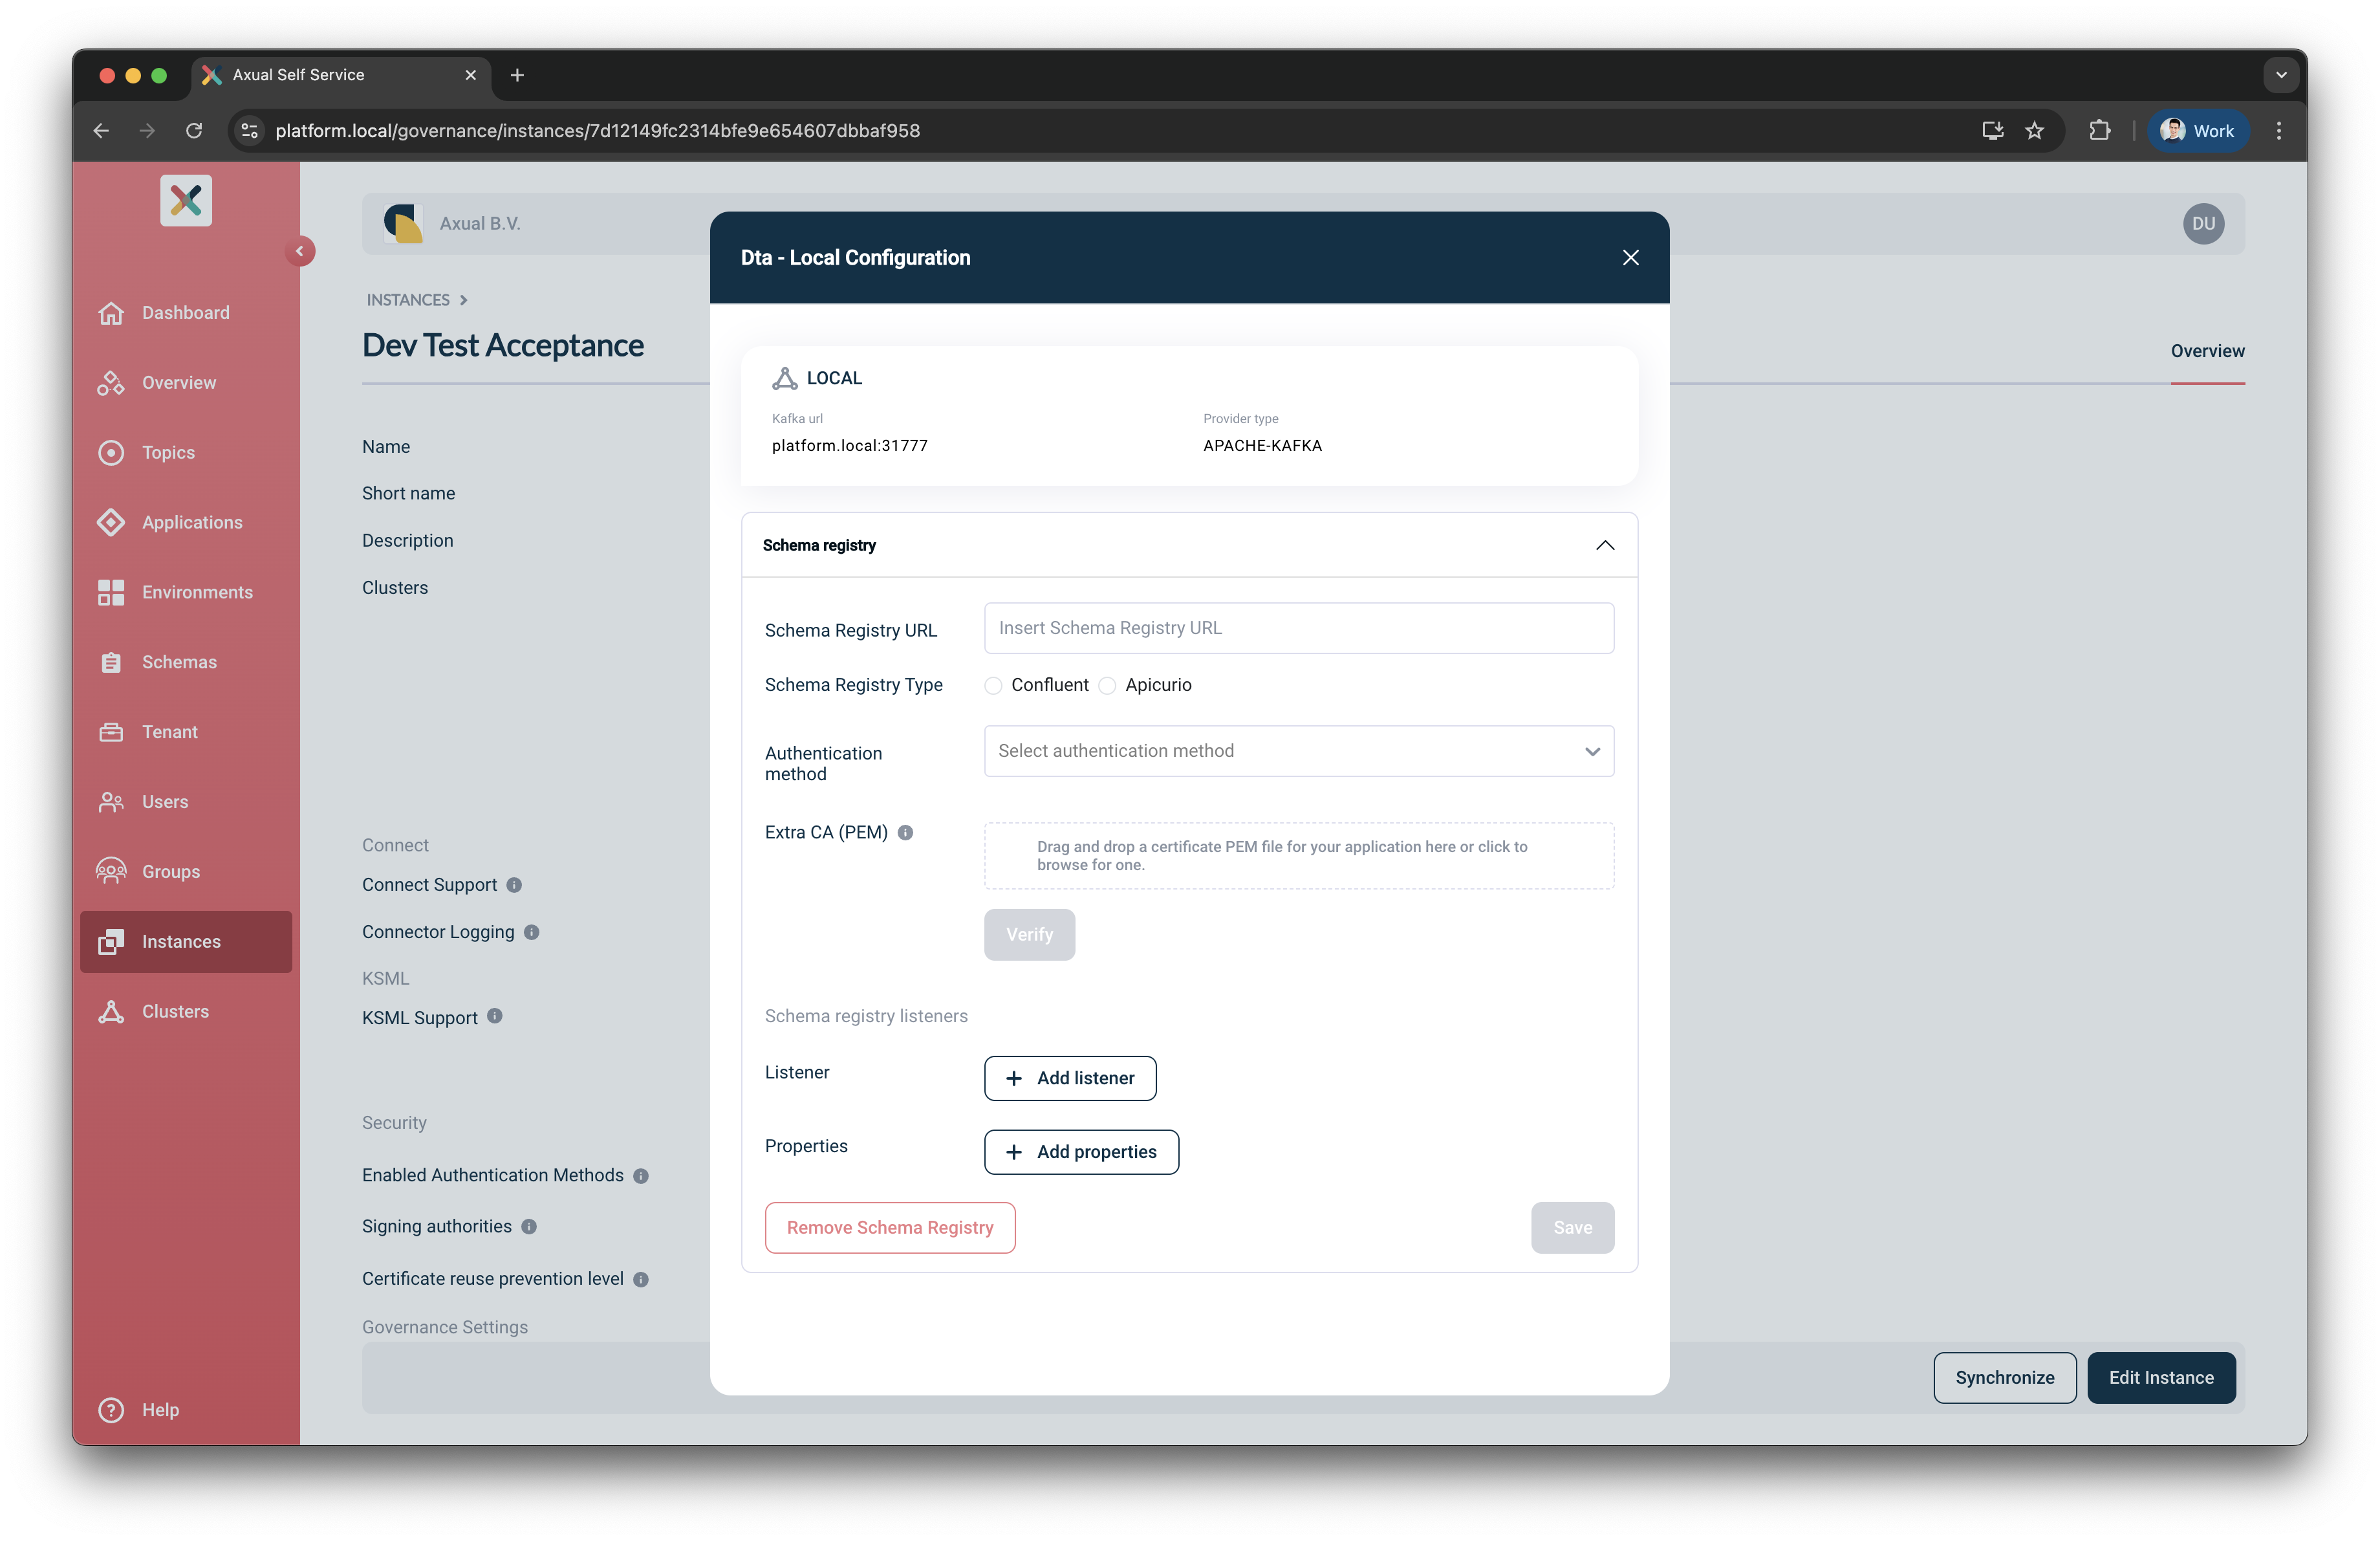
-
Put
https://apicurio.axual.dta.local/apis/registry/v2as the Schema Registry URL -
Select
Apicurioas the Schema Registry Type -
Select
Basic Authenticationas the Authentication Method-
Put the
usernameused by Platform Manager to authenticate against Apicurio Registry -
Put the
passwordused by Platform Manager to authenticate against Apicurio Registry
-
-
-
Verify the Schema Registry details and connectivity by pressing the
Verifybutton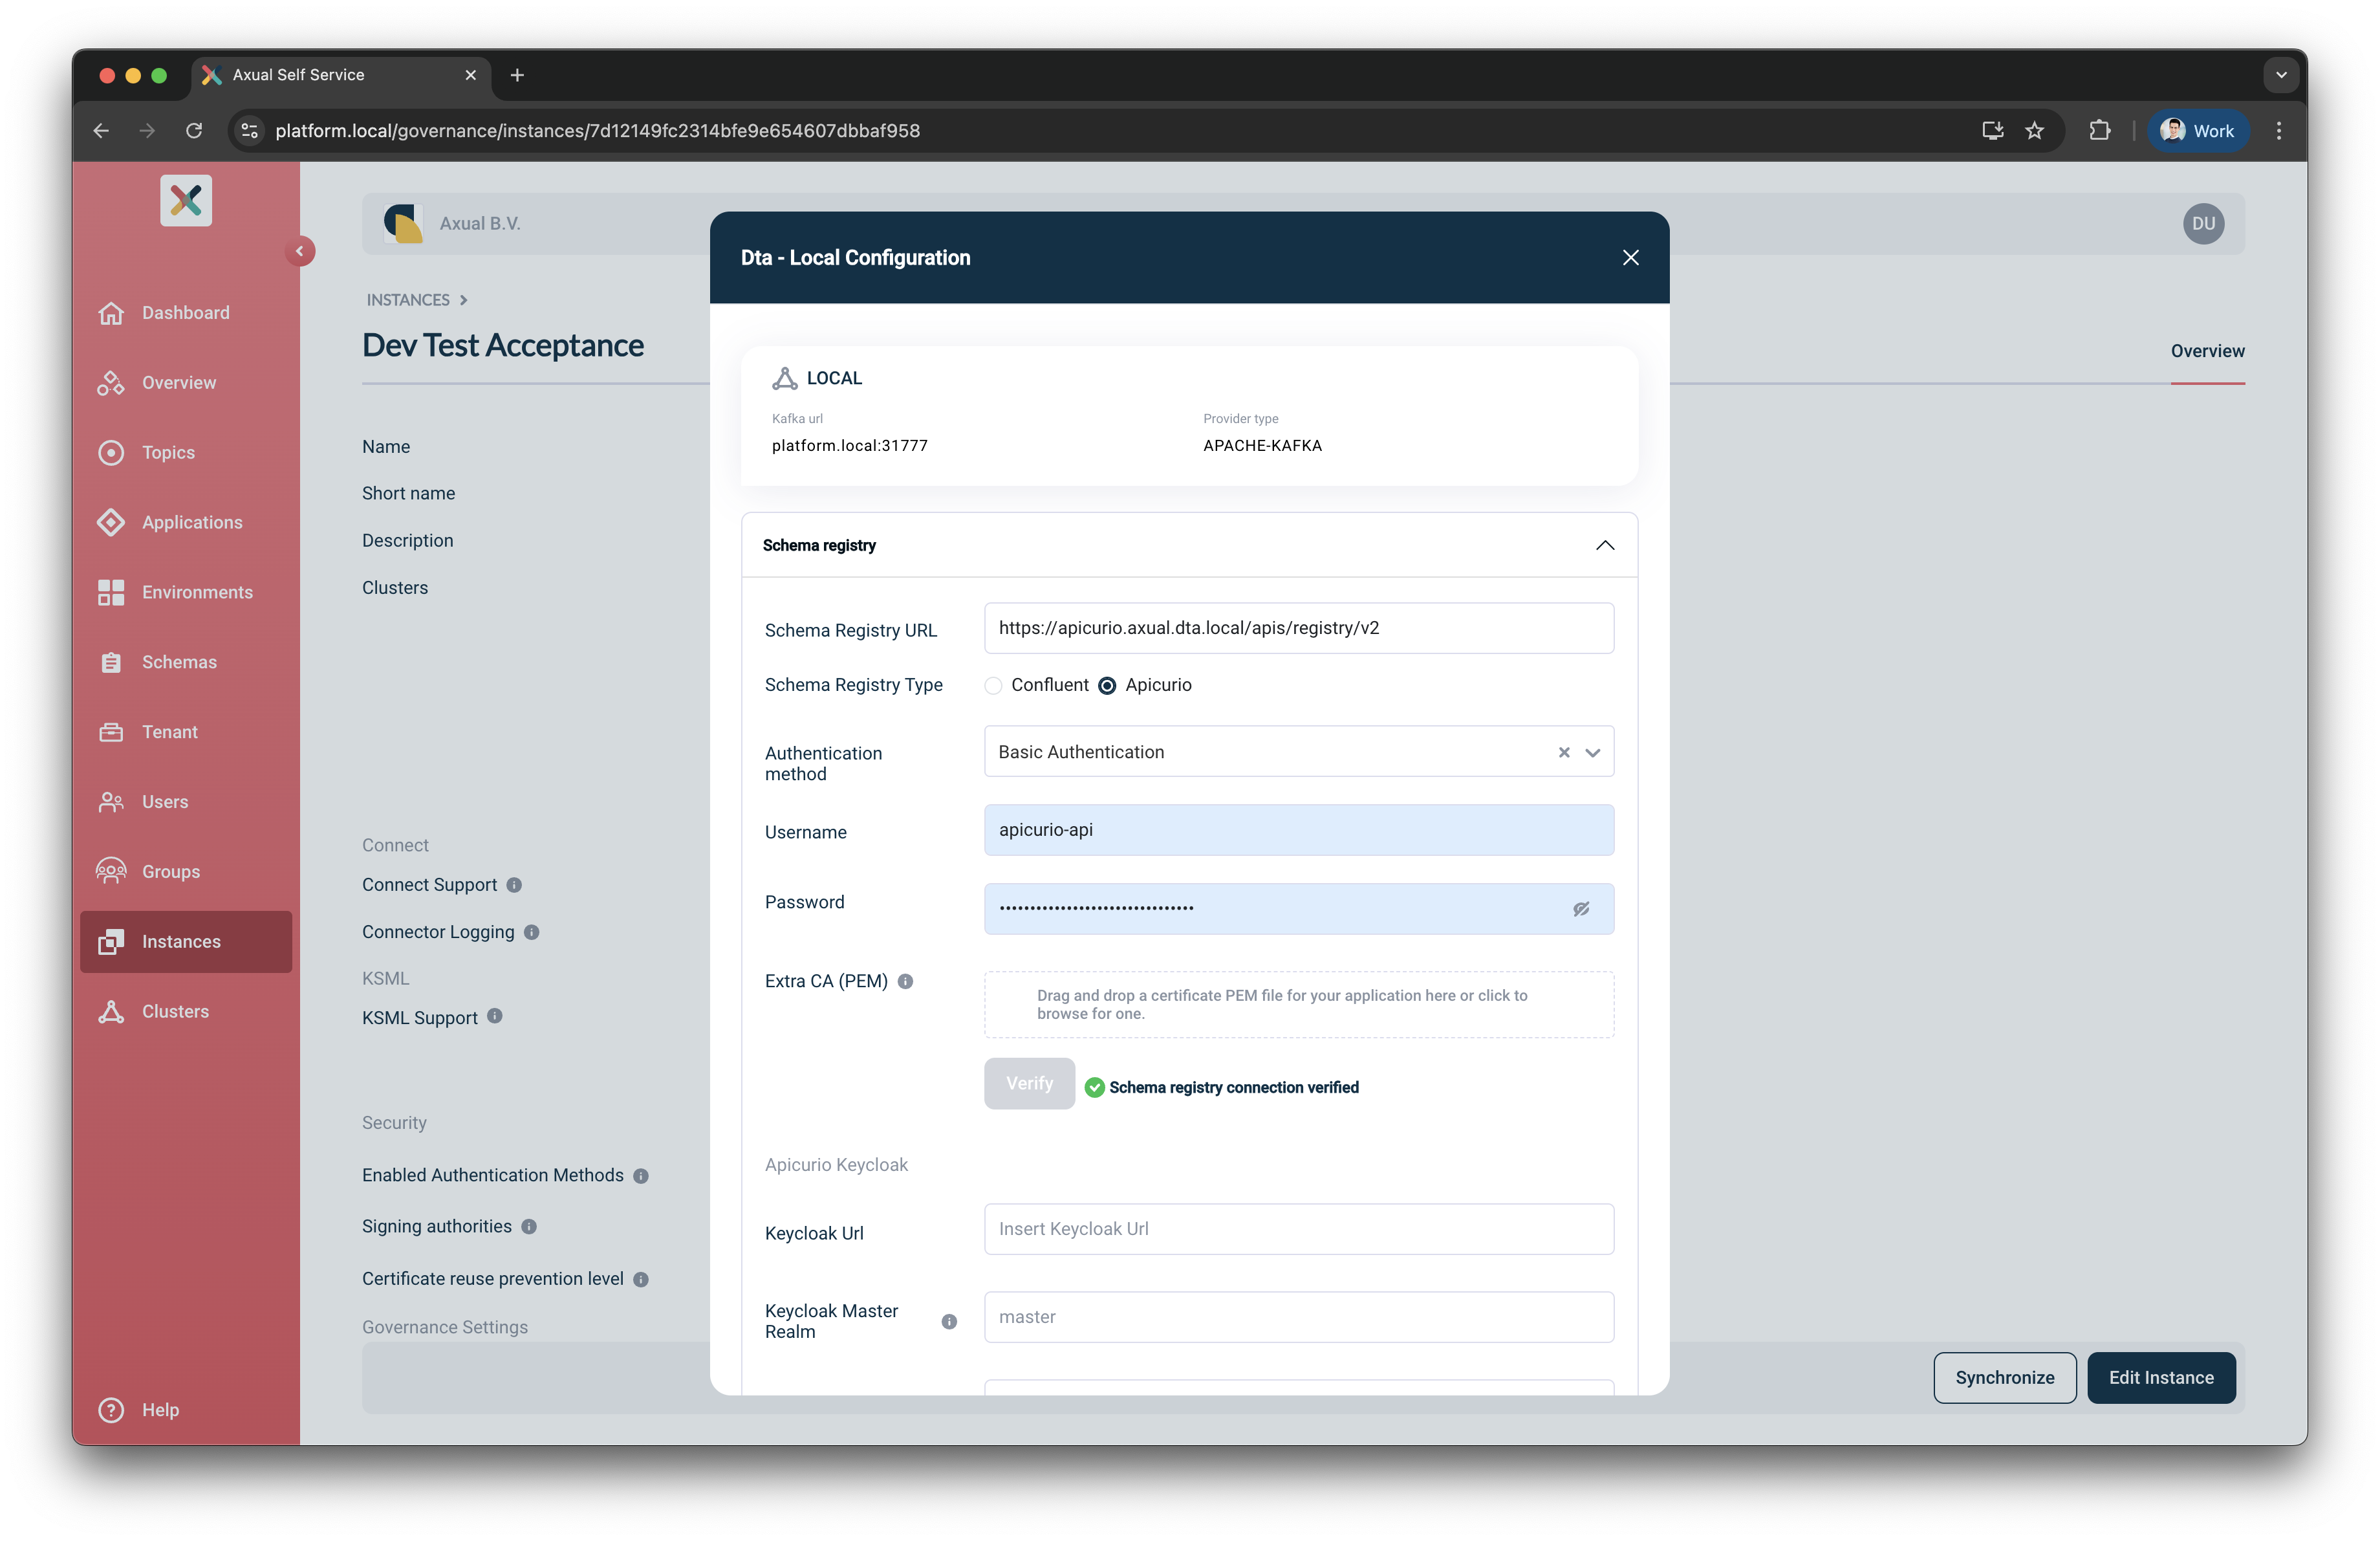
-
You can now press the
Savebutton to update the Instance-Cluster
Create the Environment
These steps are used to create an Environment in the Axual Self-Service.
We are writing the steps
to create a dev environment using the dta instance created in the previous step.
-
Open the
environmentsmenu and press theNew Environmentbutton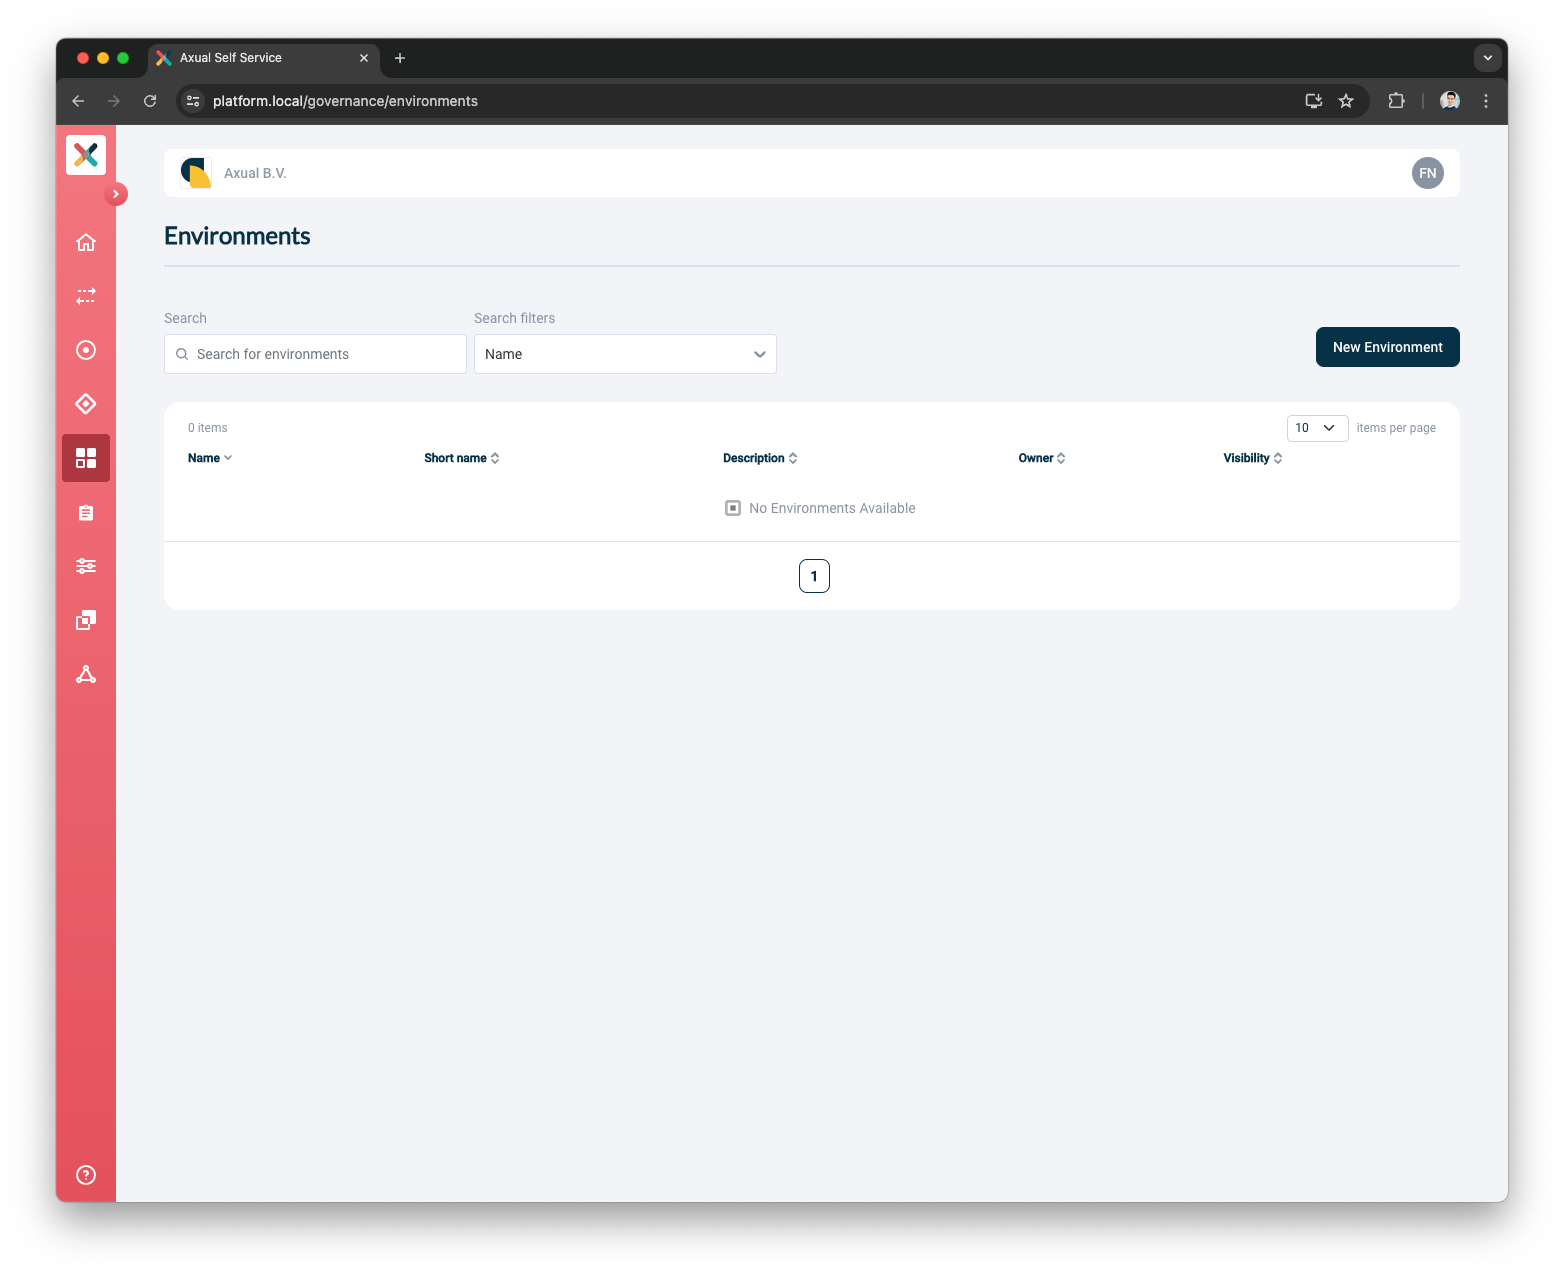
-
Provide the Environment Details
-
Put
Developmentas the Name -
Put
devas the ShortName -
Put
Dev Environmentas the Description -
Select a Color
-
Select
Dev Test Acceptanceas the Instance -
Select
Publicas the Visibility -
Select
Autoas the Authorization Issuer -
Select
Adminsas the Owner
-
-
Press the
Add Environmentbutton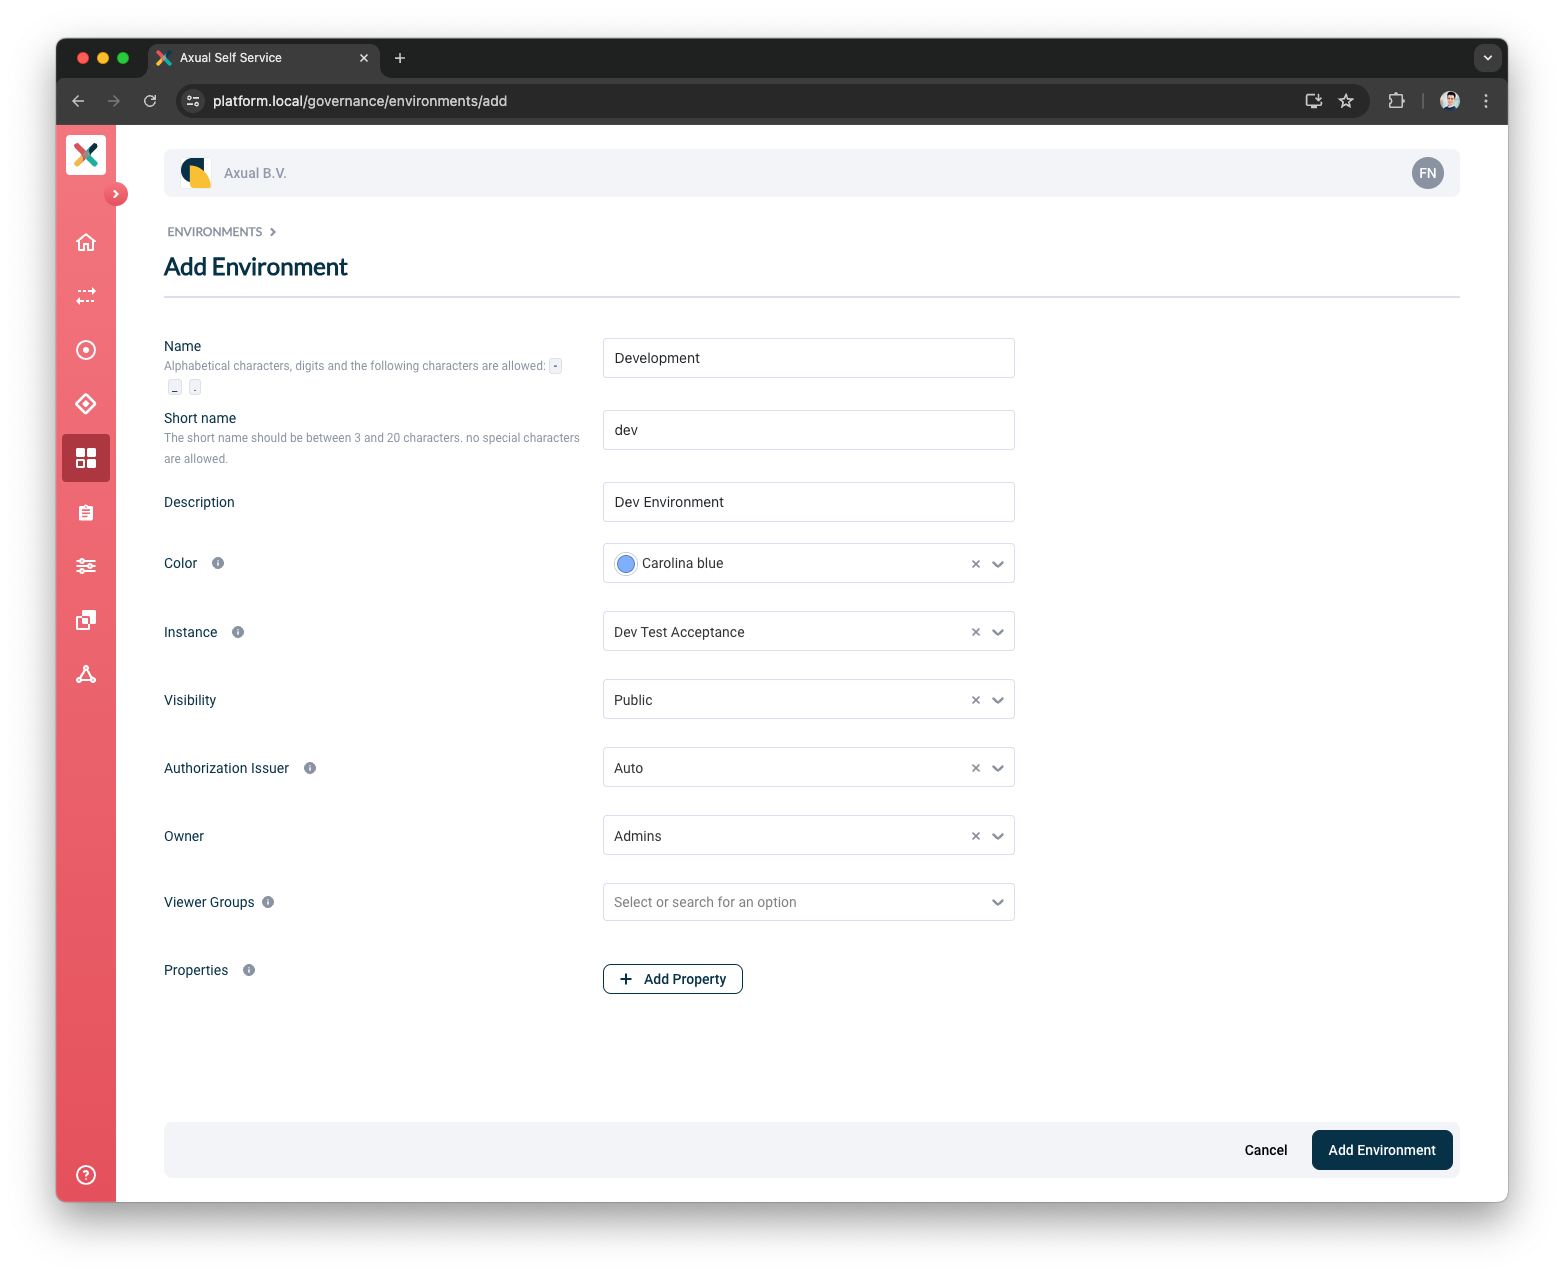
Now that you have created an Environment in the Self-Service, you can proceed to create a Topic.

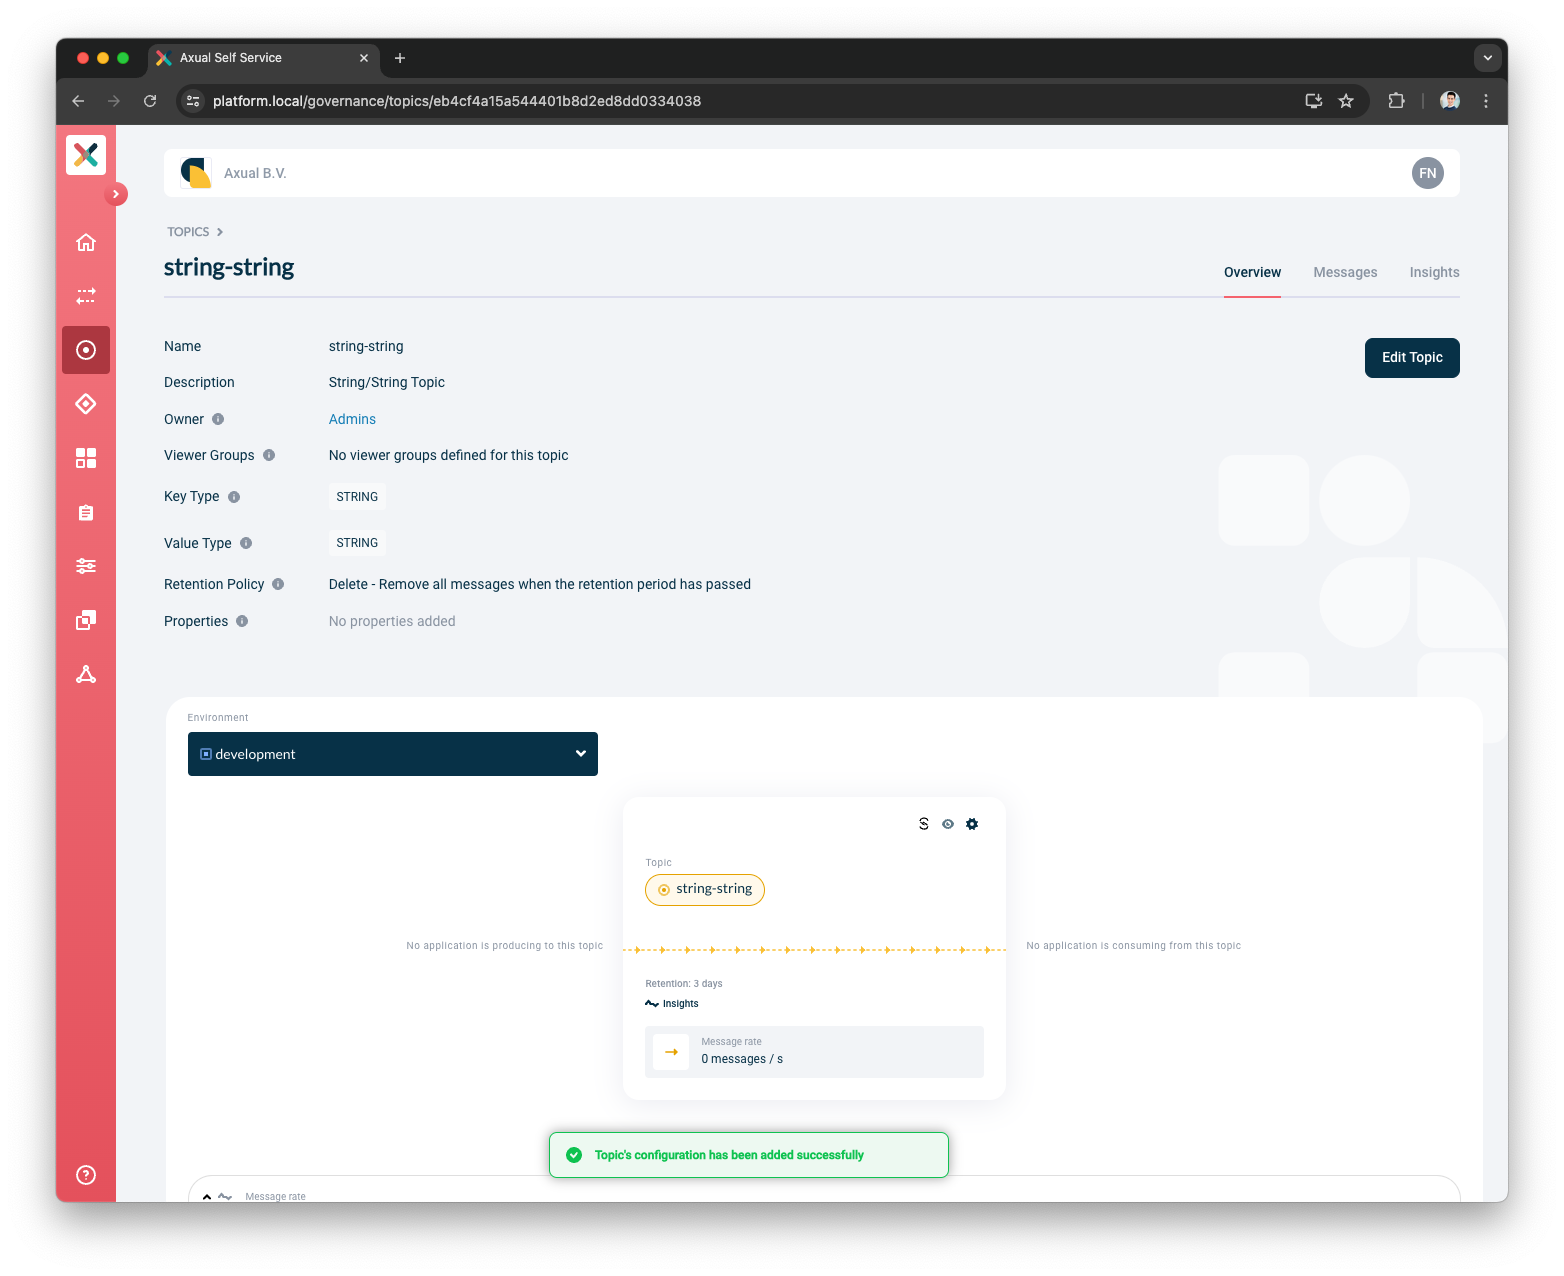
Create the Topic
String/String Topic
These steps are used to create a string/string Topic in the Axual Self-Service and deploy to the Kafka Cluster.
We are writing the steps
to create a string-string topic in the dev environment created in the previous step.
-
Open the
topicsmenu and press theNew Topicbutton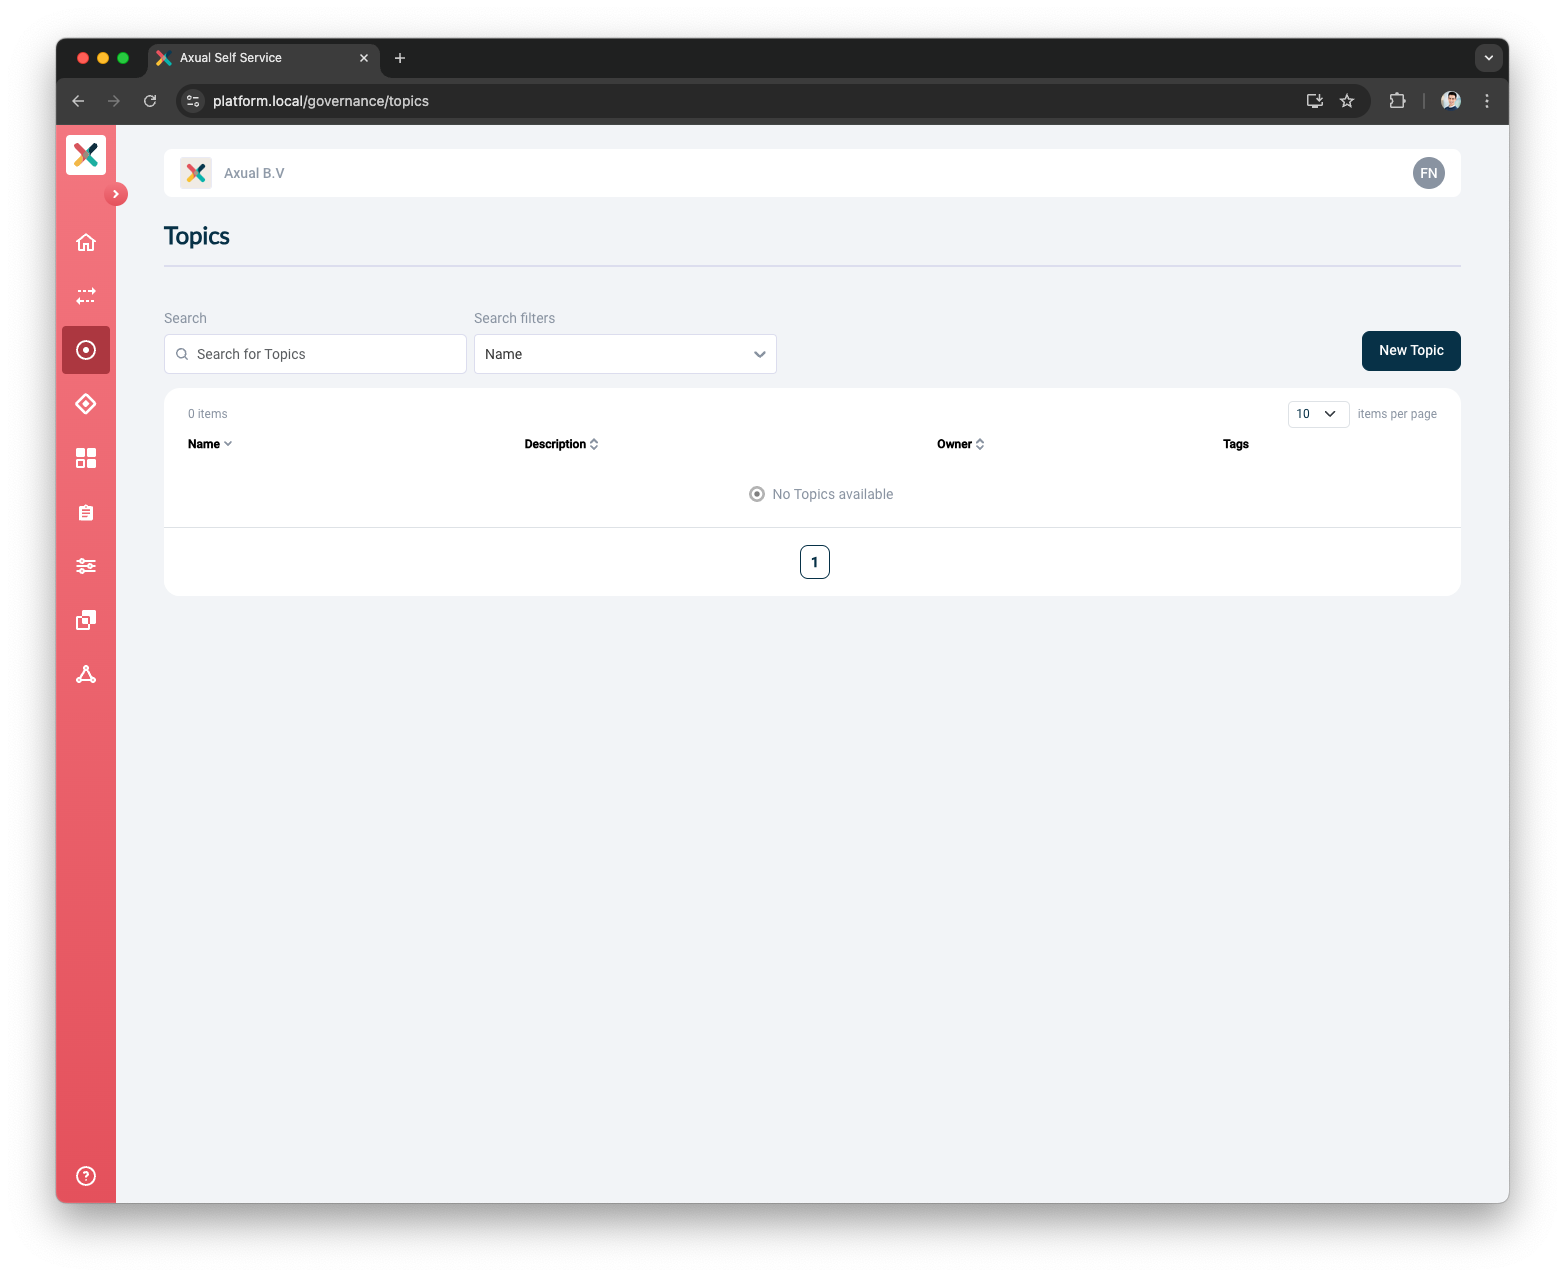
-
Provide the Topics Details
-
Put
string-stringas the Name -
Put
String/String topicas the Description -
Select
Adminsas the Owner -
Select
Stringas the Key Type -
Select
Stringas the Value Type -
Select
Deleteas the Retention Policy
-
-
Press the
Add Topicbutton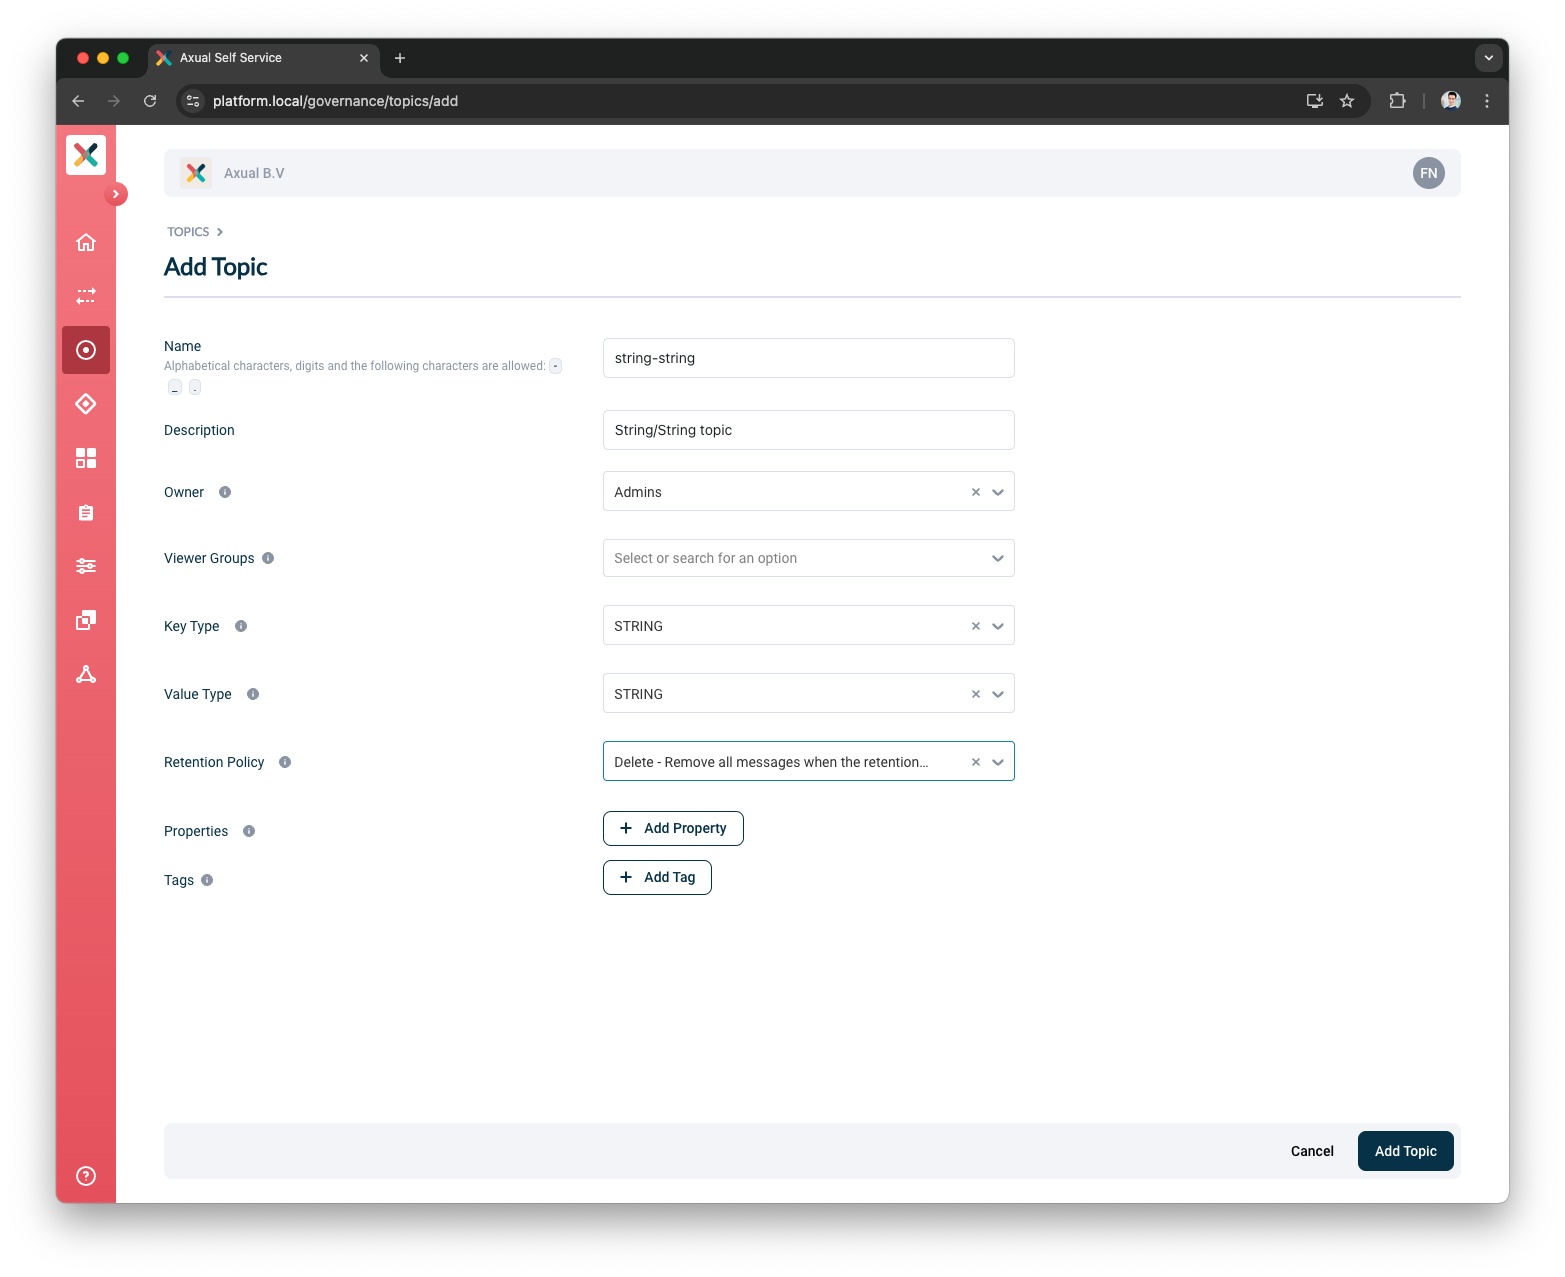
Now that you have created a Topic in the Self-Service, you can proceed to configure it in the previously created Environment
-
Open the
topic configurationmodal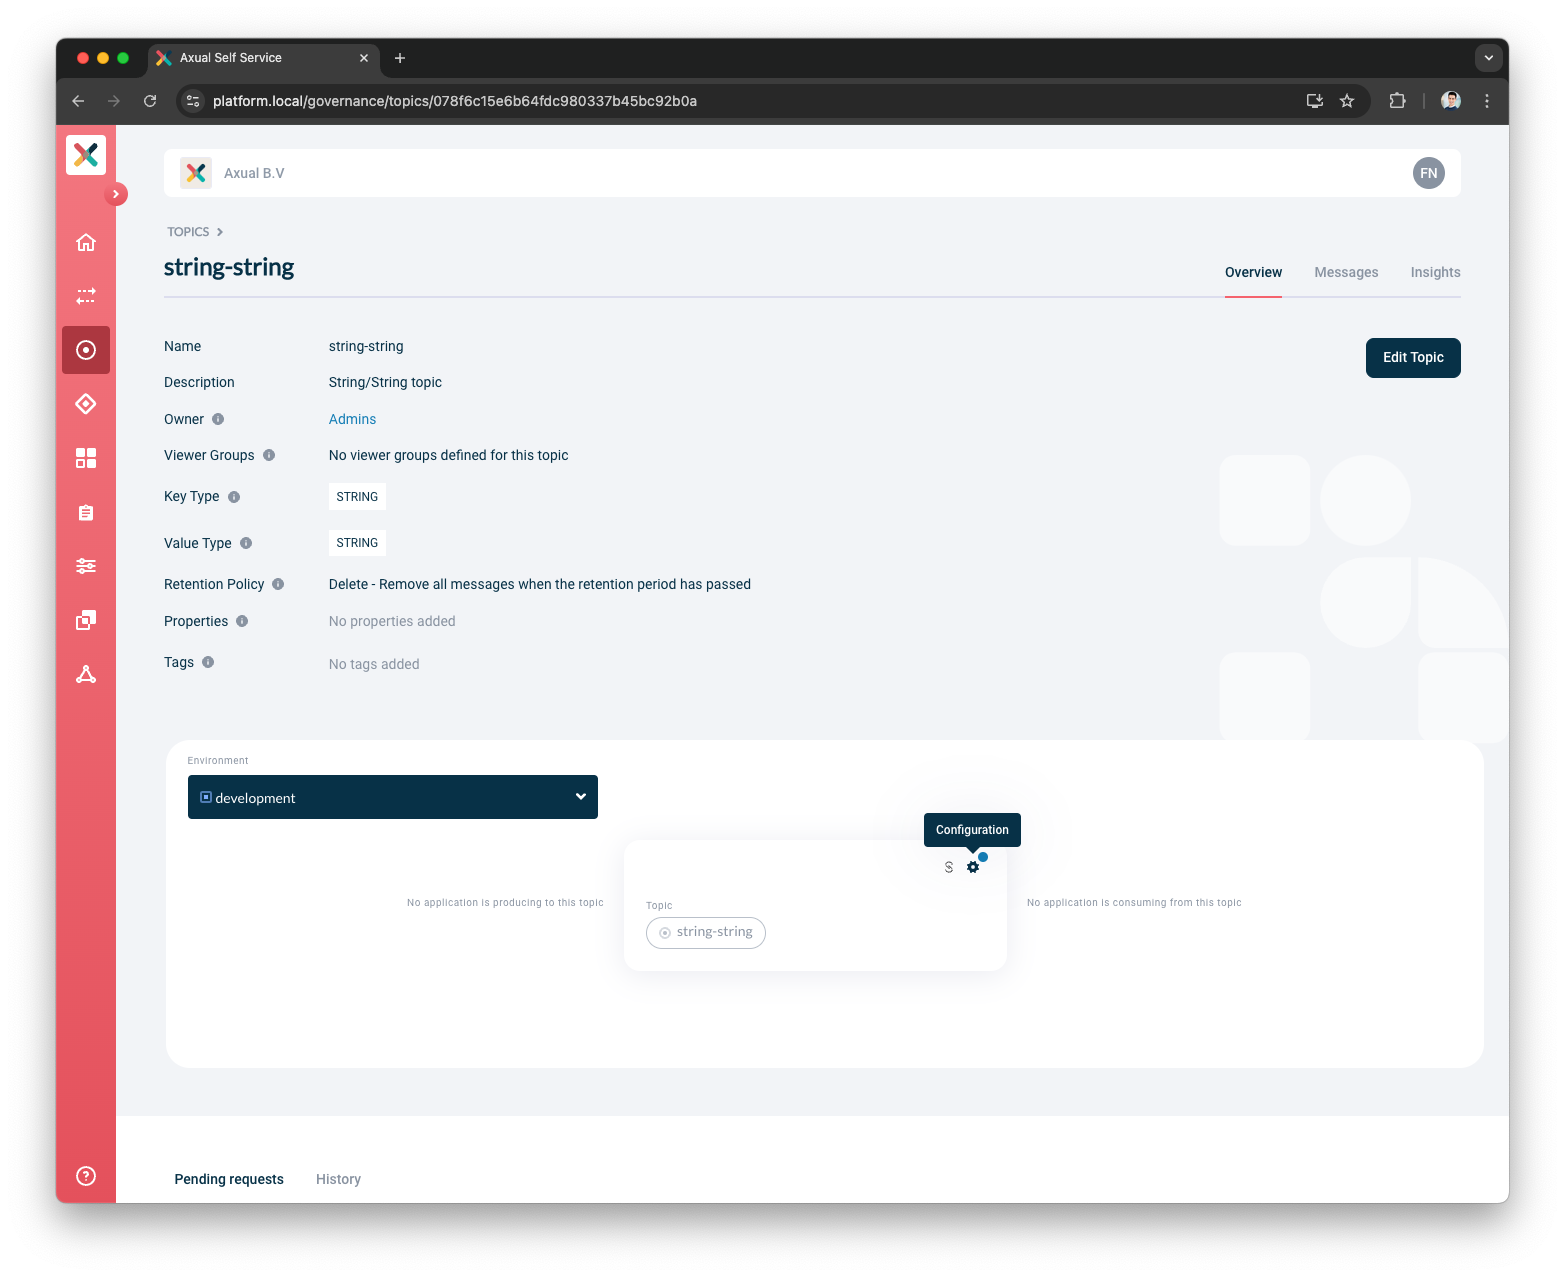
-
Provide the
topic configurationand pressSave-
Put
3as the Retention time -
Put
4as the Number of partitions
-
-
Press the
Savebutton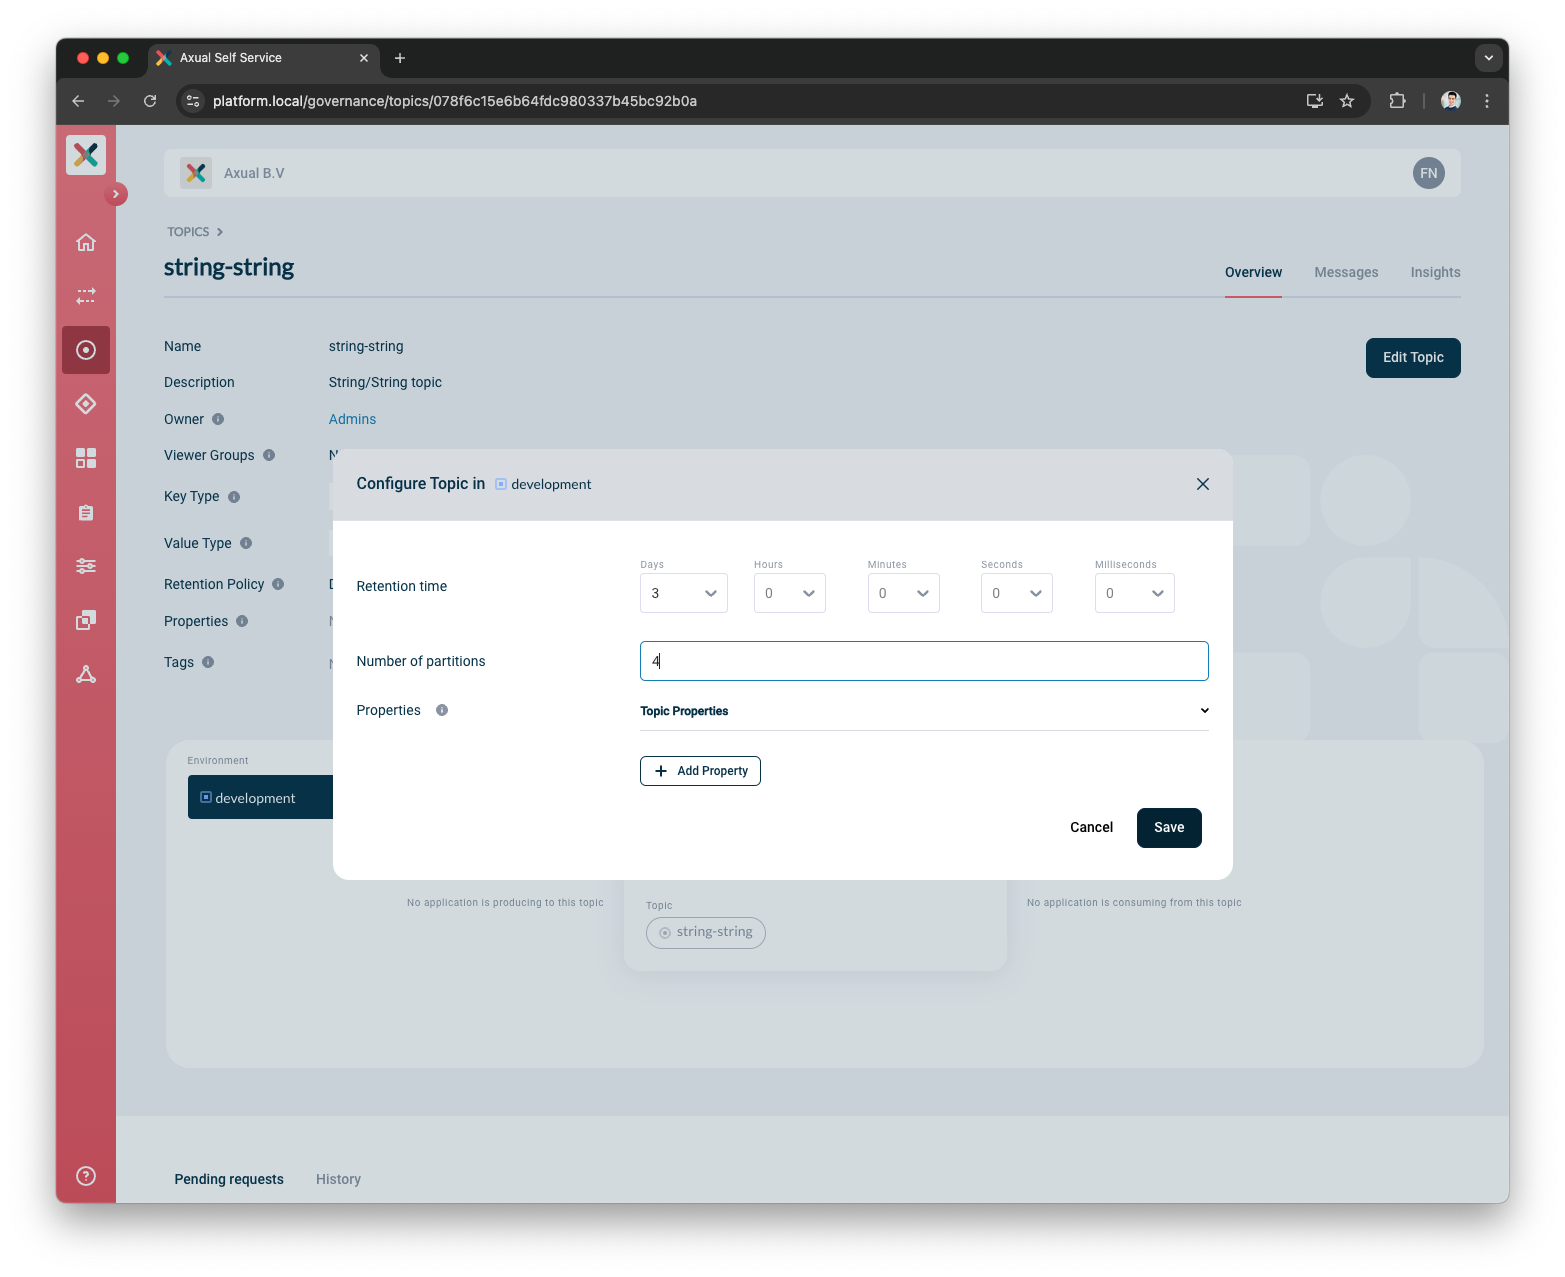
Now the string-string topic is available in the kafka cluster.
Create the Application
These steps are used to create a producer Application in the Axual Self-Service.
We are writing the steps
to create a java-producer application
that will produce to the string-string topic created in the previous step.
-
Open the
applicationsmenu and press theNew Applicationbutton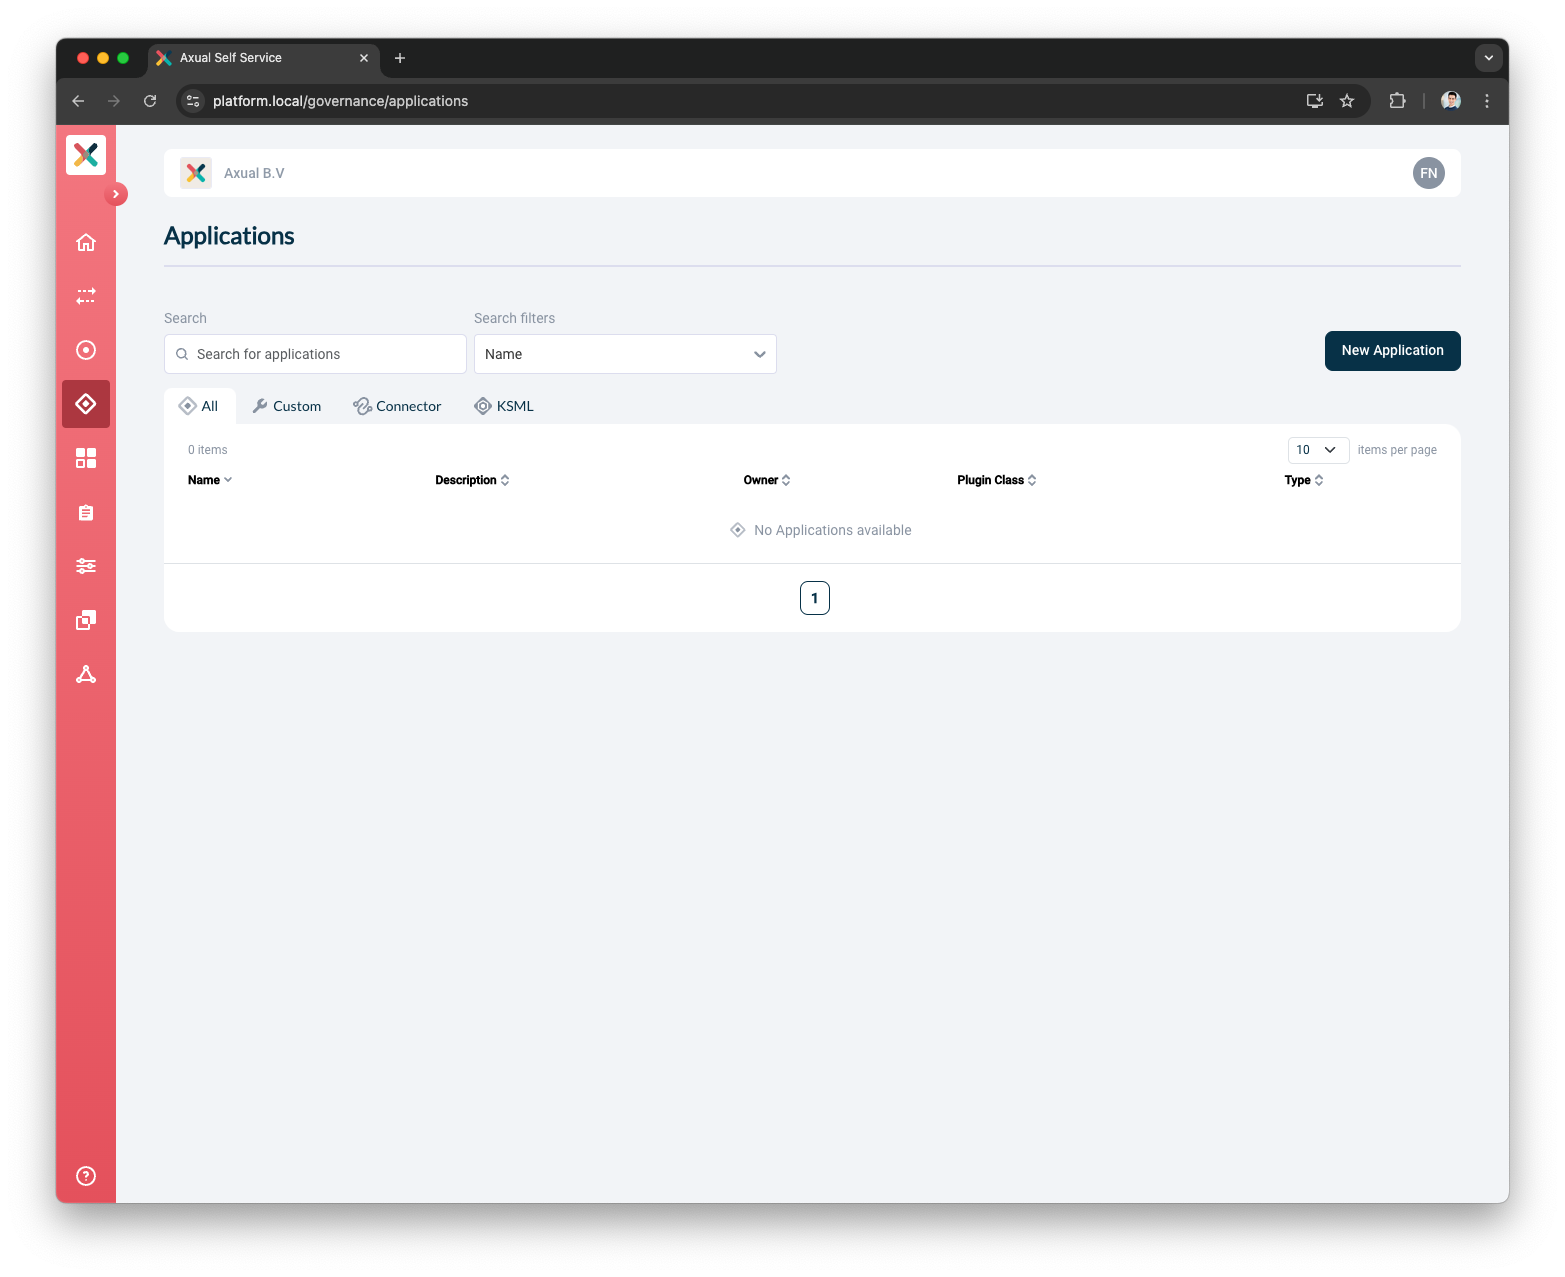
-
Provide the Application Details
-
Put
io.axual.produceras the ID -
Put
Java Produceras the Name -
Put
java_prdas the Short Name -
Select
Adminsas the Owner -
Select
Customas the Application Type -
Select
Javaas the Type -
Select
Publicas the Visibility -
Put
Java producer applicationas the Description
-
-
Press the
Add Applicationbutton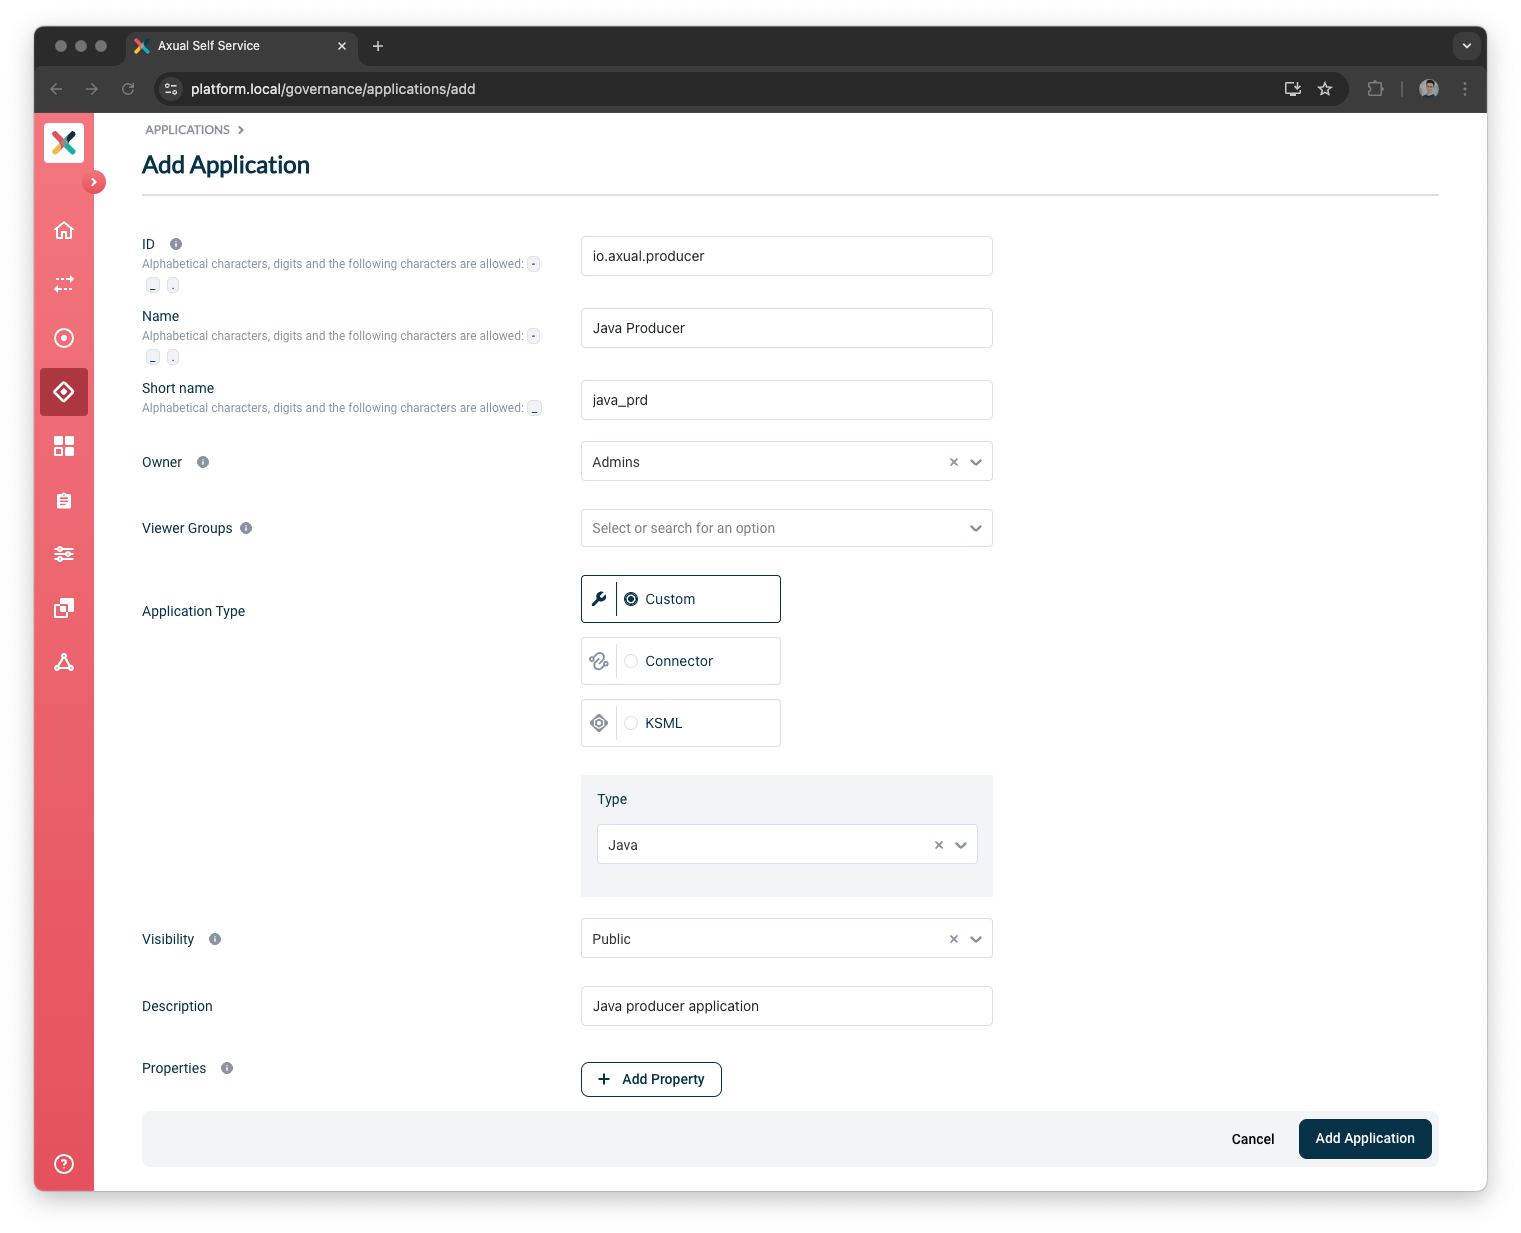
-
Once the application has been created, be sure to have
devenvironment selected in the Environment Dropdown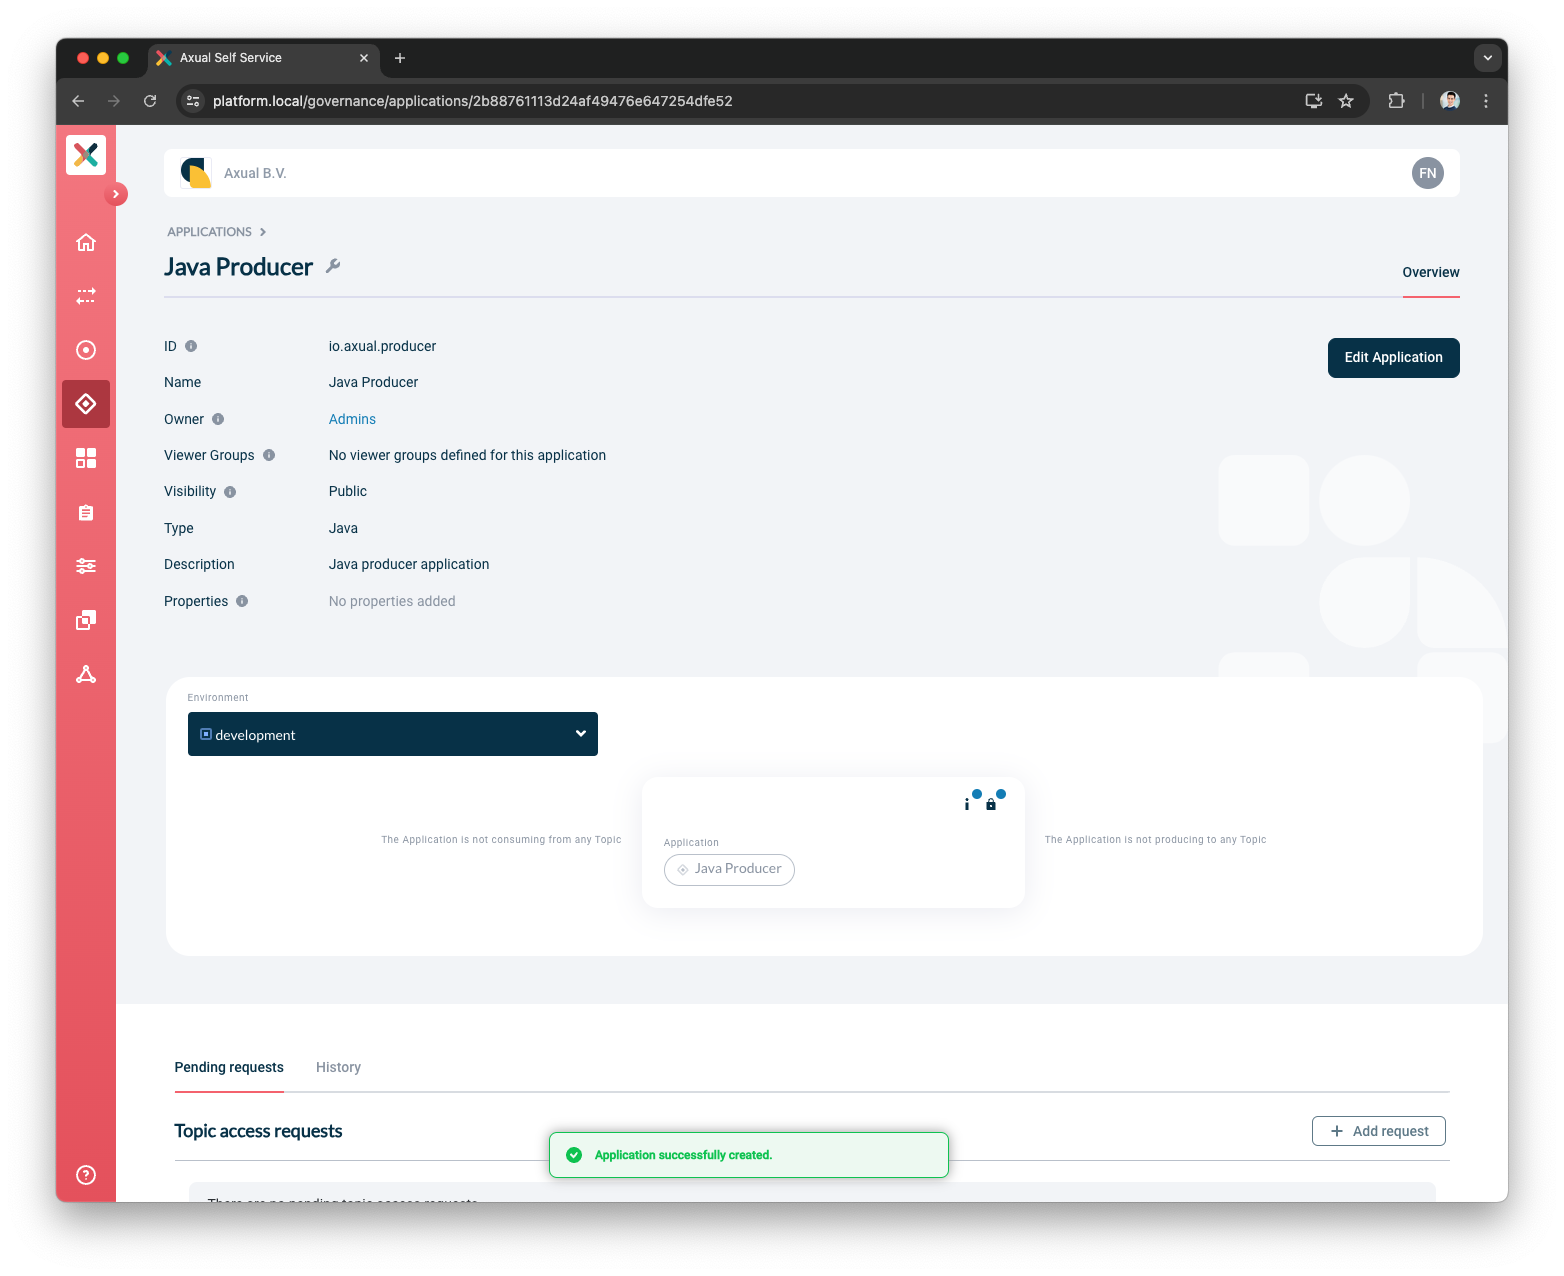
-
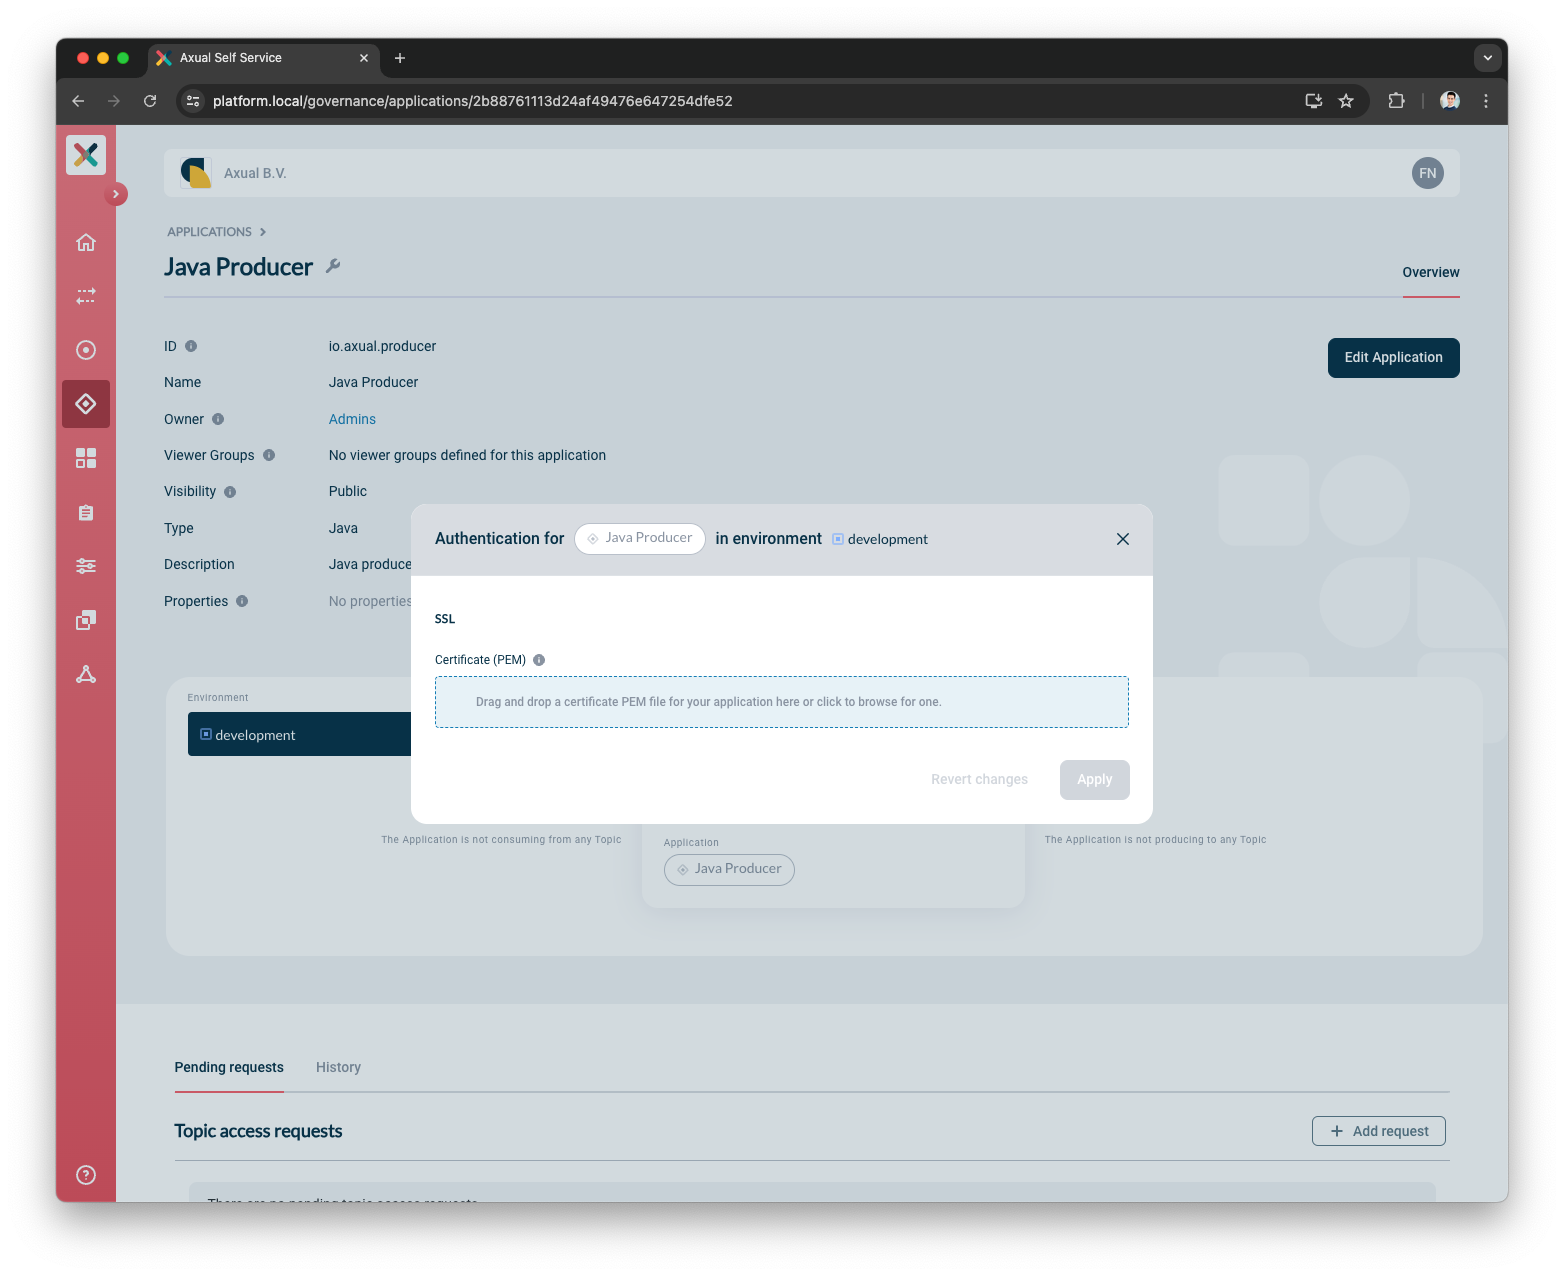
Open the
application-authentication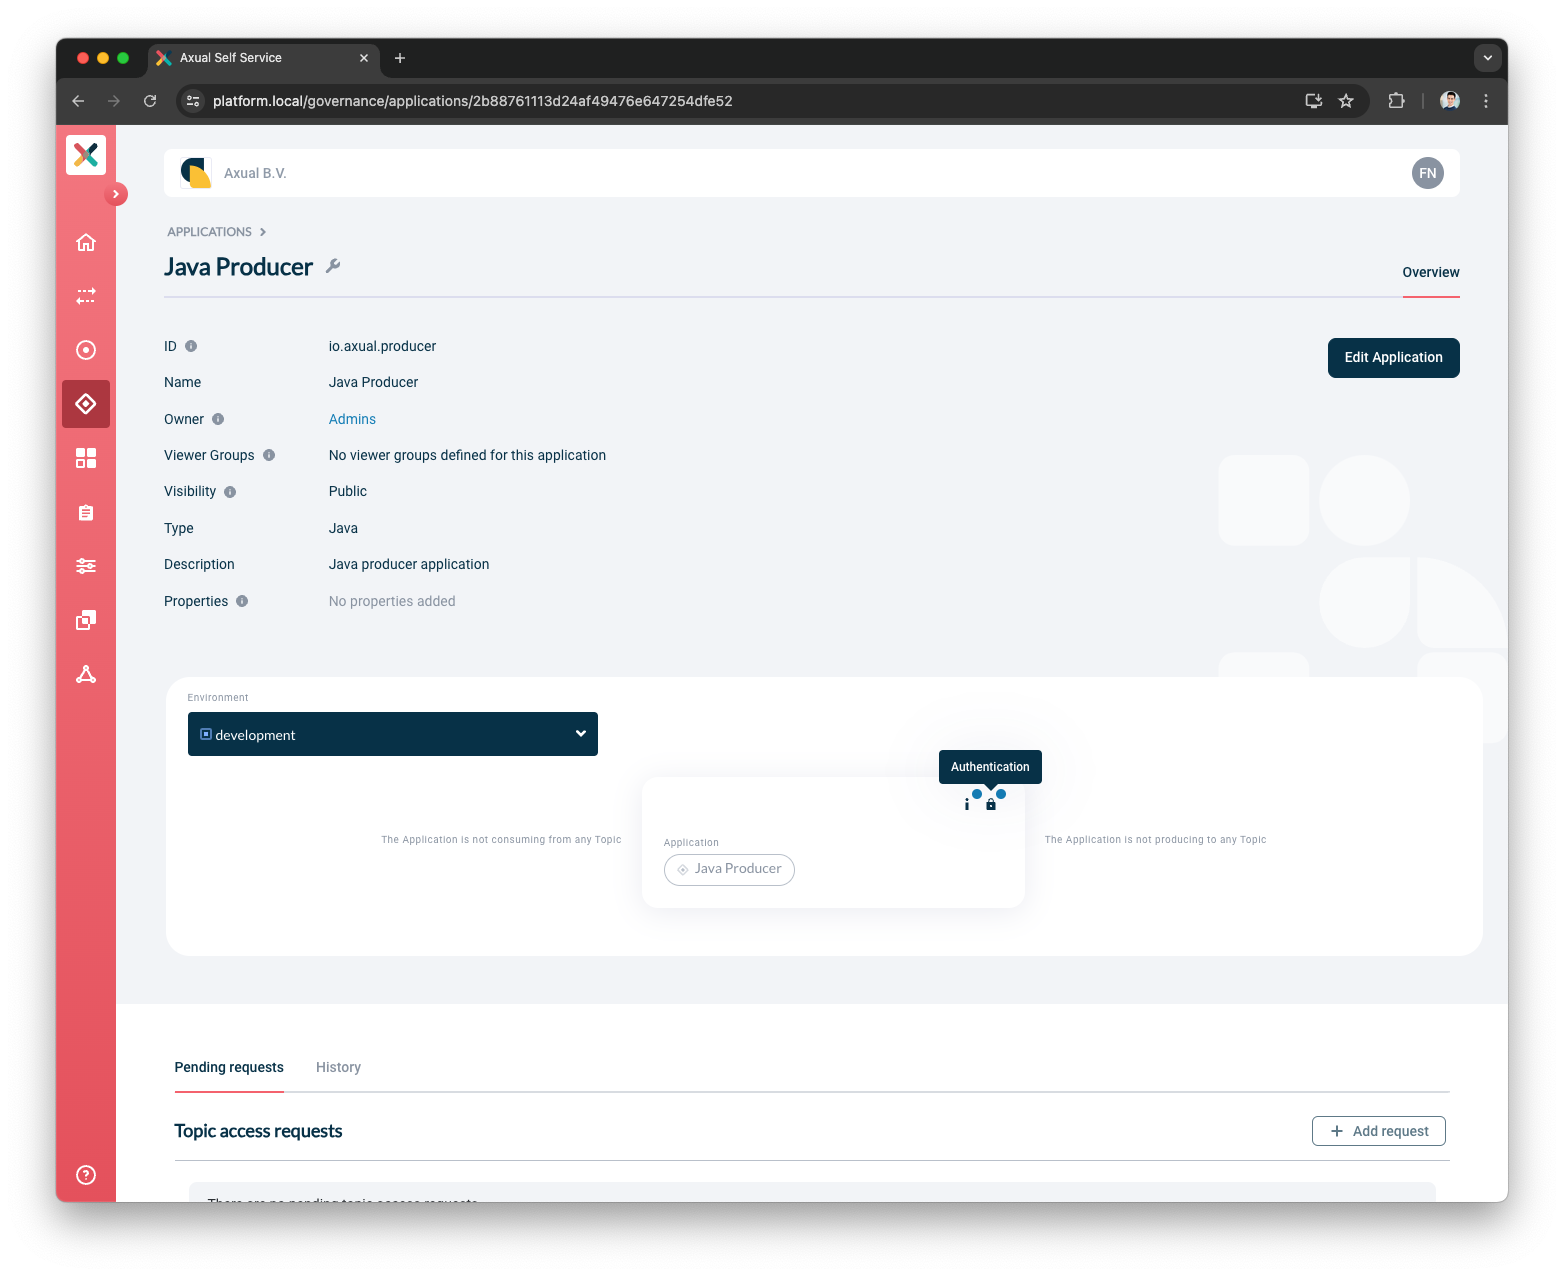
-
Upload your application certificate
-
Once the Platform Manager validates the application certificate, it’s possible to press the
Applybutton
-
Press the
+ Add requestbutton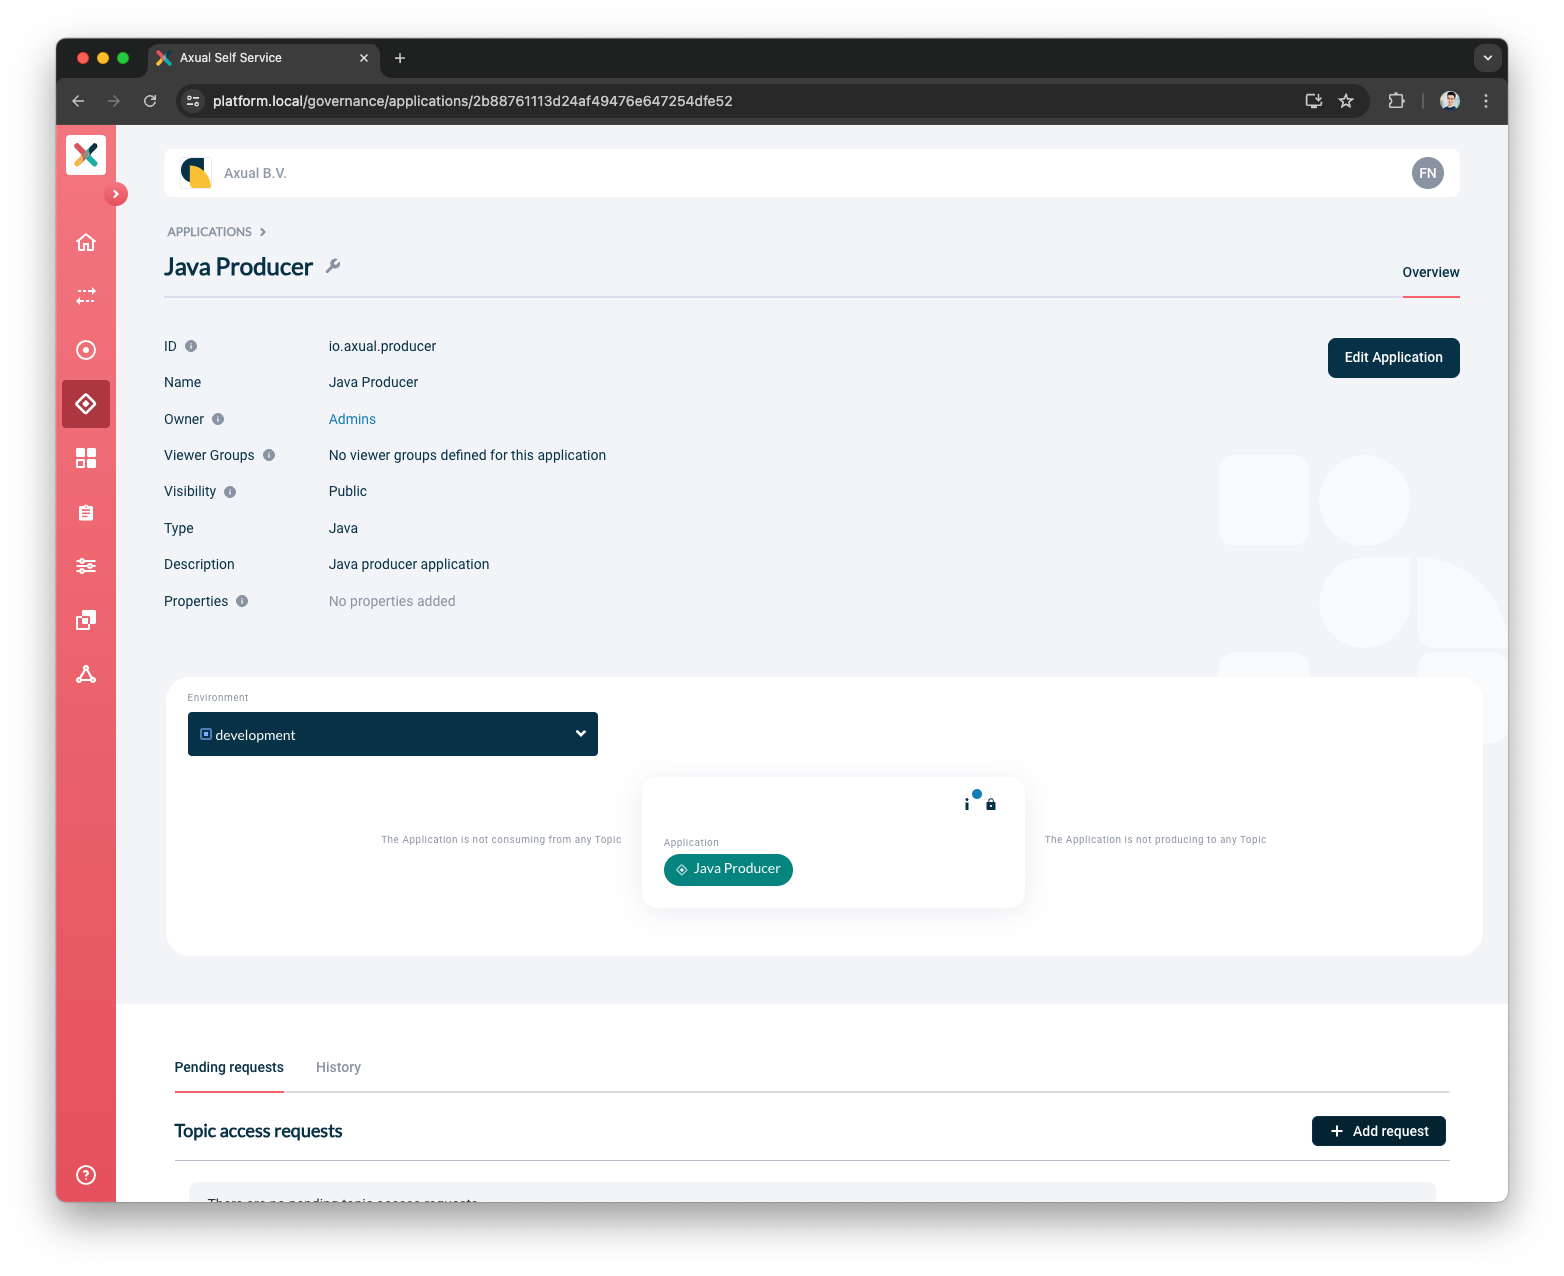
-
Select the type of request to make
-
Choose
Produceras the Application Type -
Select
string-stringas the Topic
-
-
Press the
Request Approvalbutton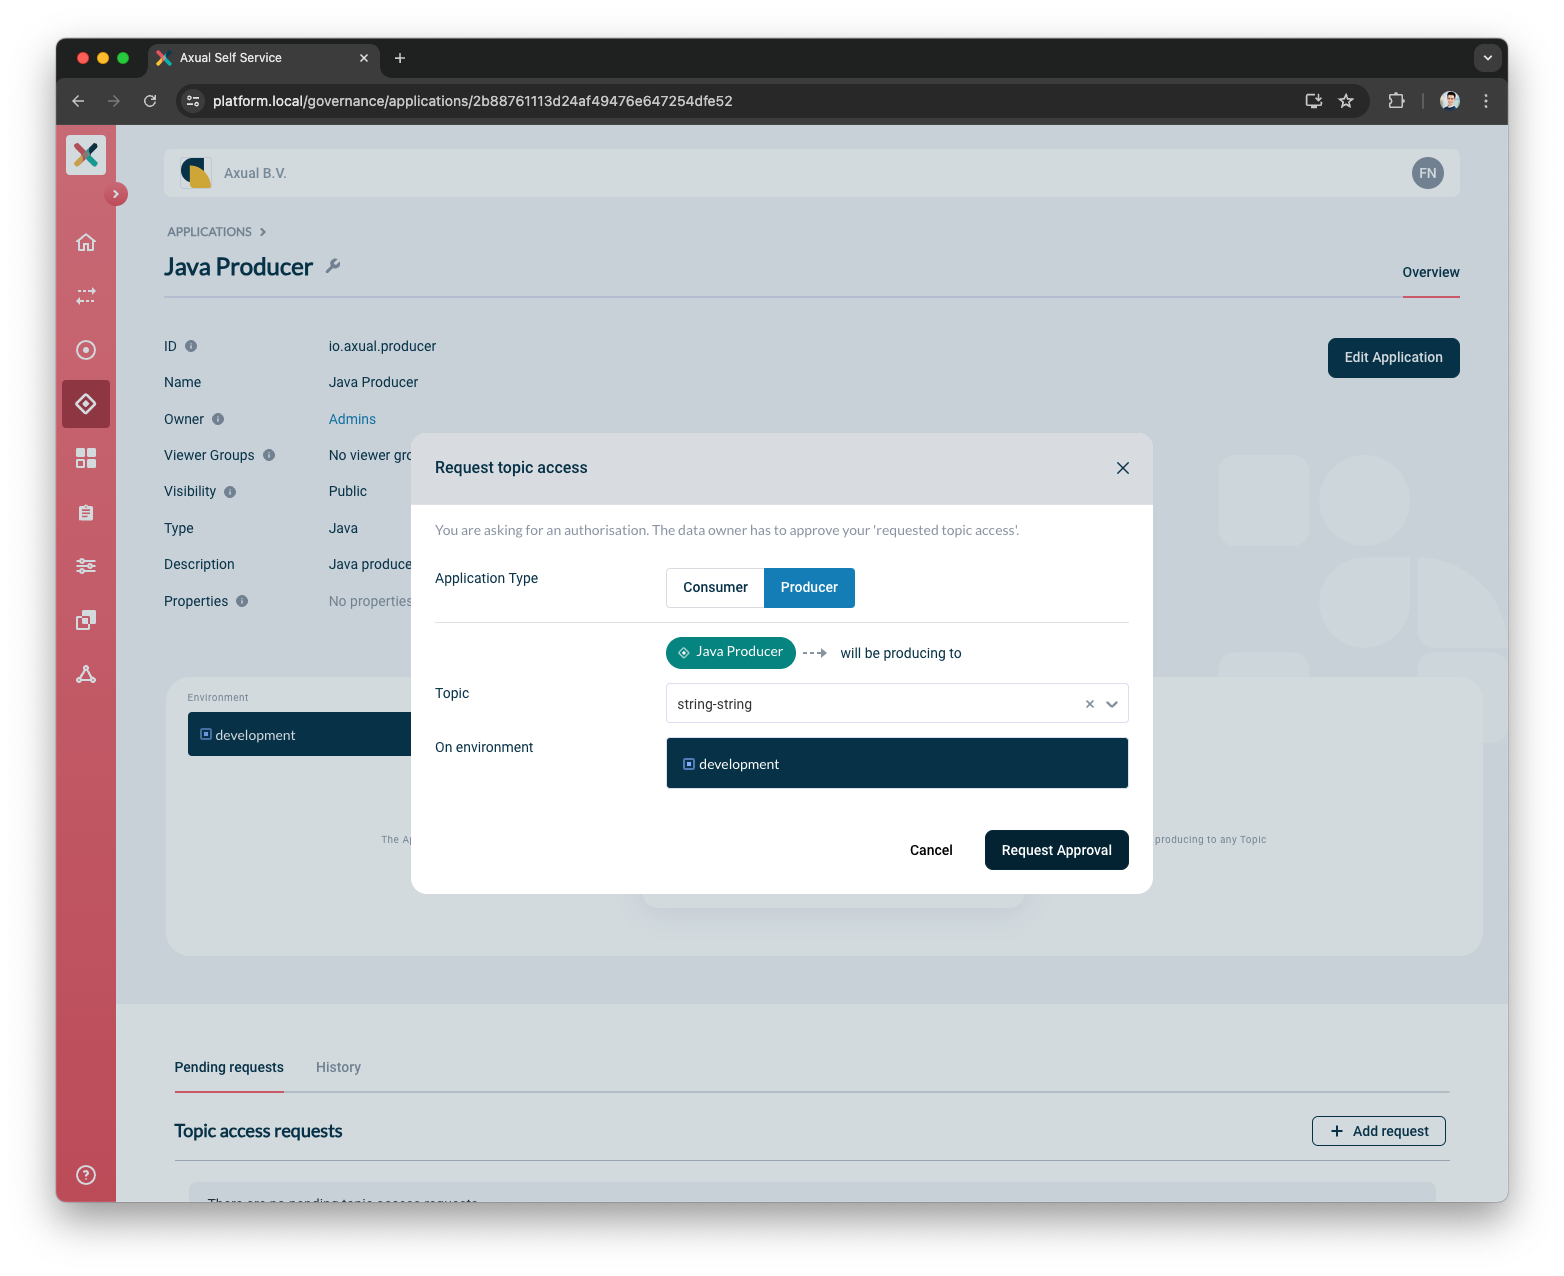
Based on the Environment Authorization Issuer it’s possible that Stream Owner will require approving the pending access request
Since the dev Environment created as AUTO Authorization Issuer, the access request is approved.
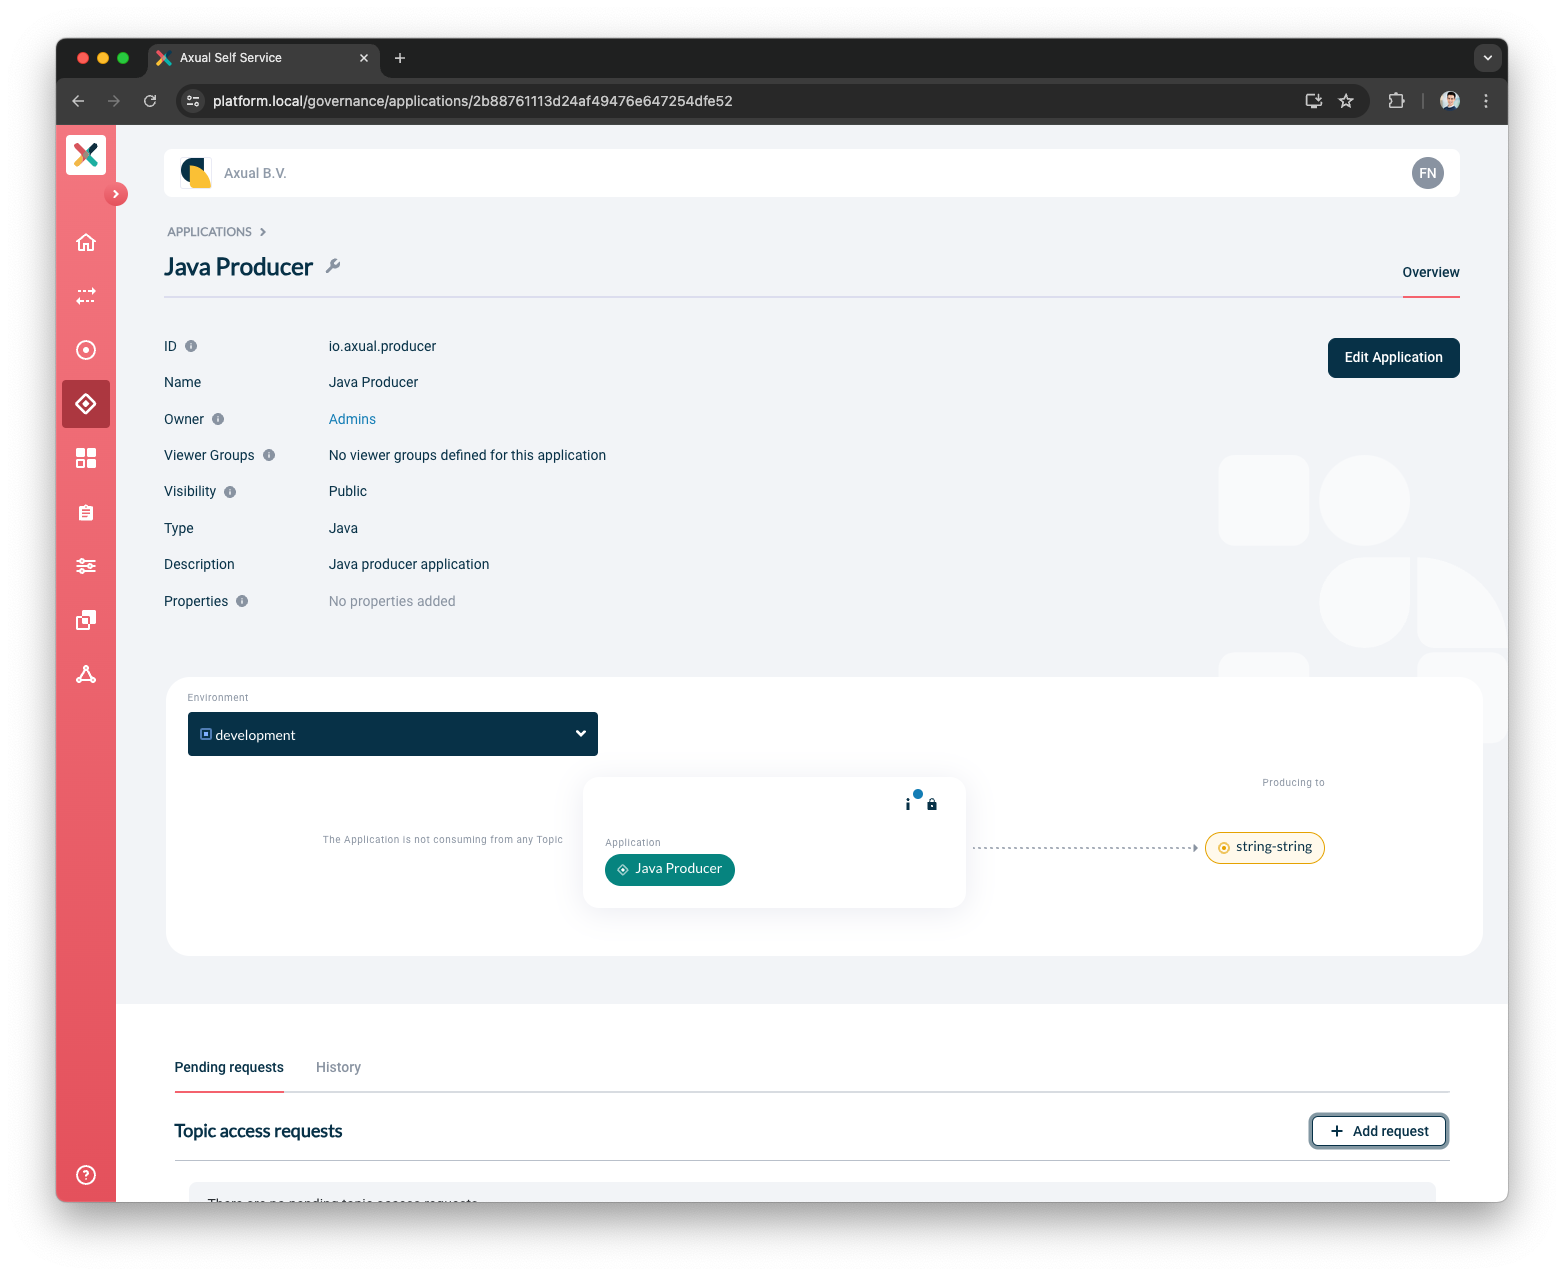
The Topic ACL has been updated, the Application is able to produce to the string-string topic.