Tenant
Editing A Tenant Profile
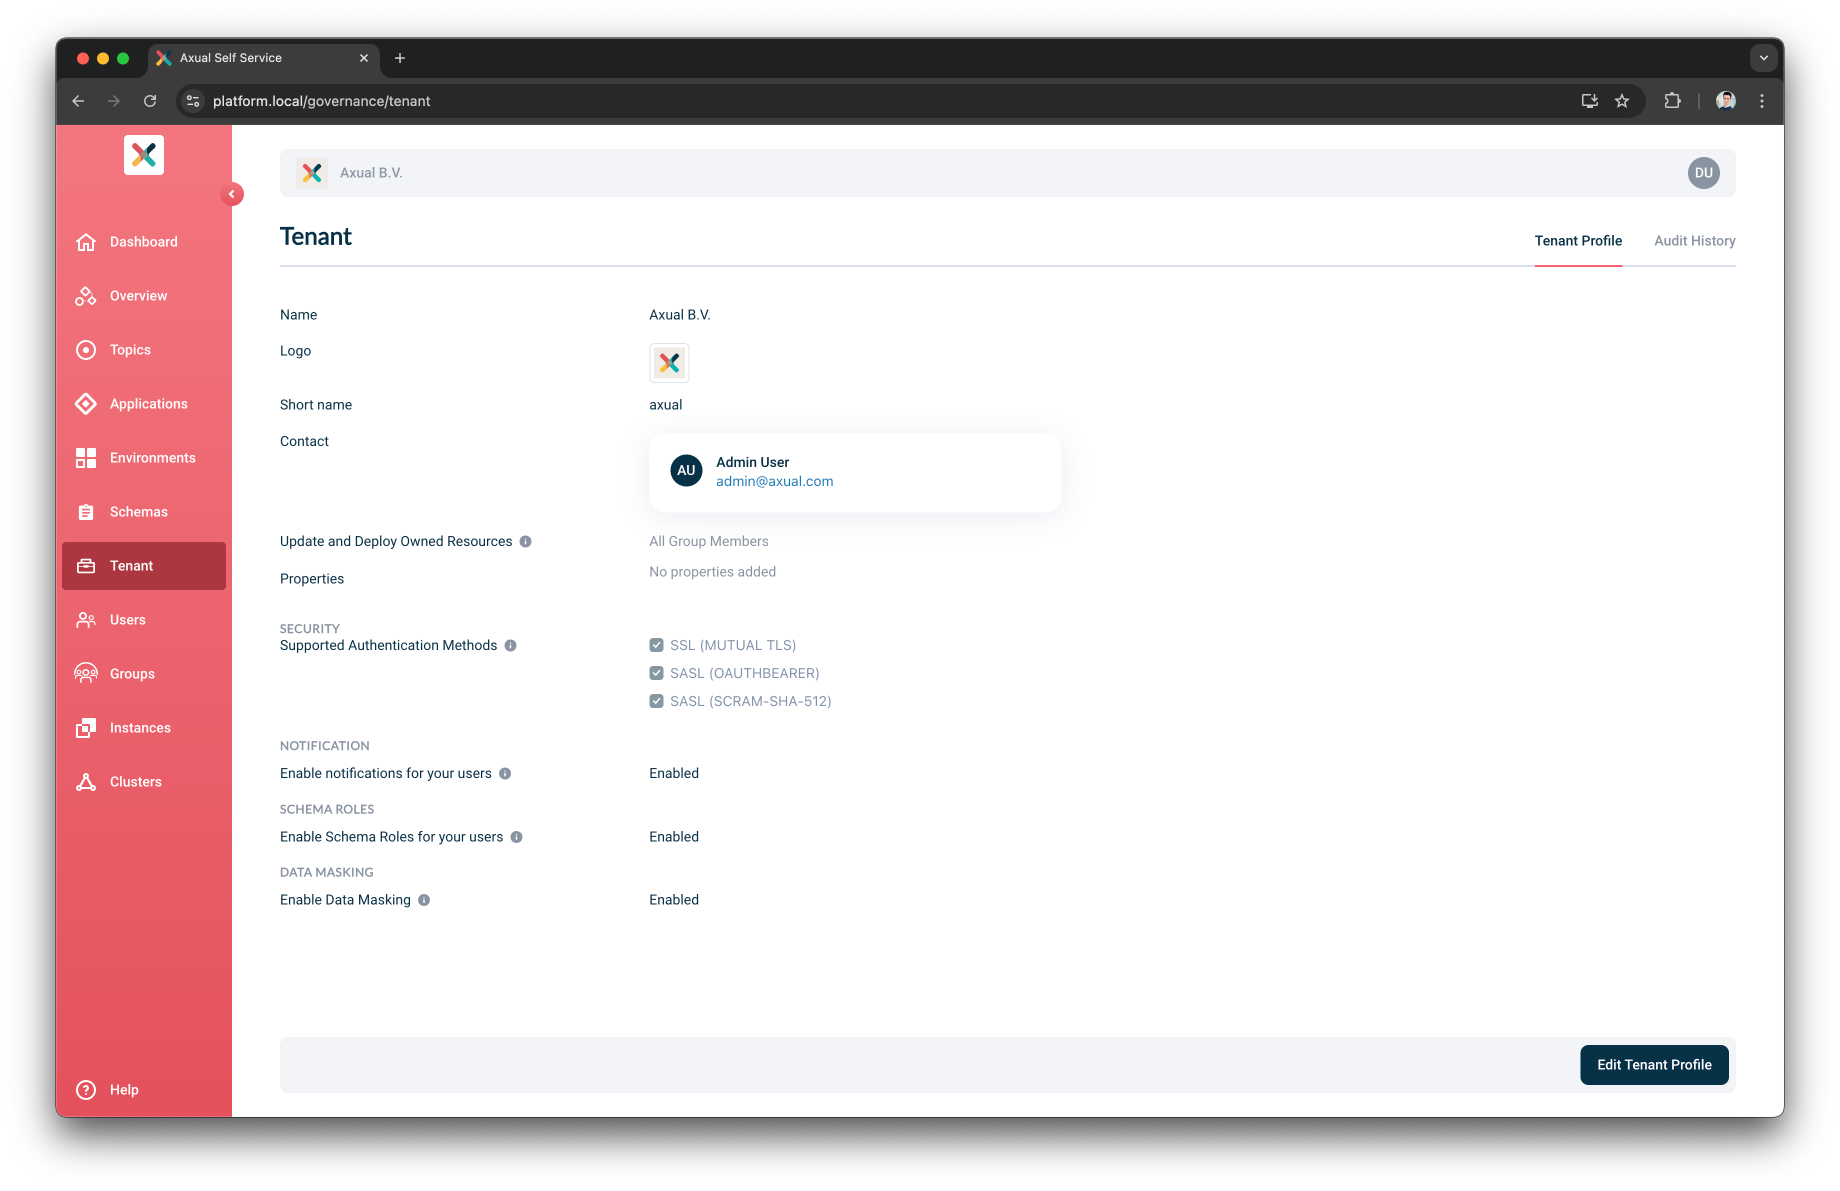
In the "Tenant" page, the tenant profile can be updated.
The following Tenant settings can be modified:
-
Name: this name will be shown in the Self Service UI on top
-
Logo: fully qualified URL to a company logo, which will be displayed in the Self Service UI on top. If no URL is specified, a default icon will show.
-
Properties: a collection of key/value combinations, tenant-specific settings.
-
Security: Authentication Methods supported for the tenant.
-
Notification: By default, notifications are disabled. If enabled, users will receive emails about various events related to their applications and topics.
| Tenant Shortname cannot be modified/updated after tenant creation |
Update and Deploy Owned Resources
This setting determines who is allowed to modify and deploy their Resources.
Two options are supported:
By default, All Group Members of the Owning group is allowed to modify and deploy their Resources.
If the Tenant Admin wants to limit to only selected member fo the Owning group,
he can select the Only Resource Managers option.
In case Only Resource Managers is selected,
follow this guide
to configure the Resource Managers of each Groups
|
Enable Tenant Notifications
| This setting is only available when the Operator has enabled notifications. |
-
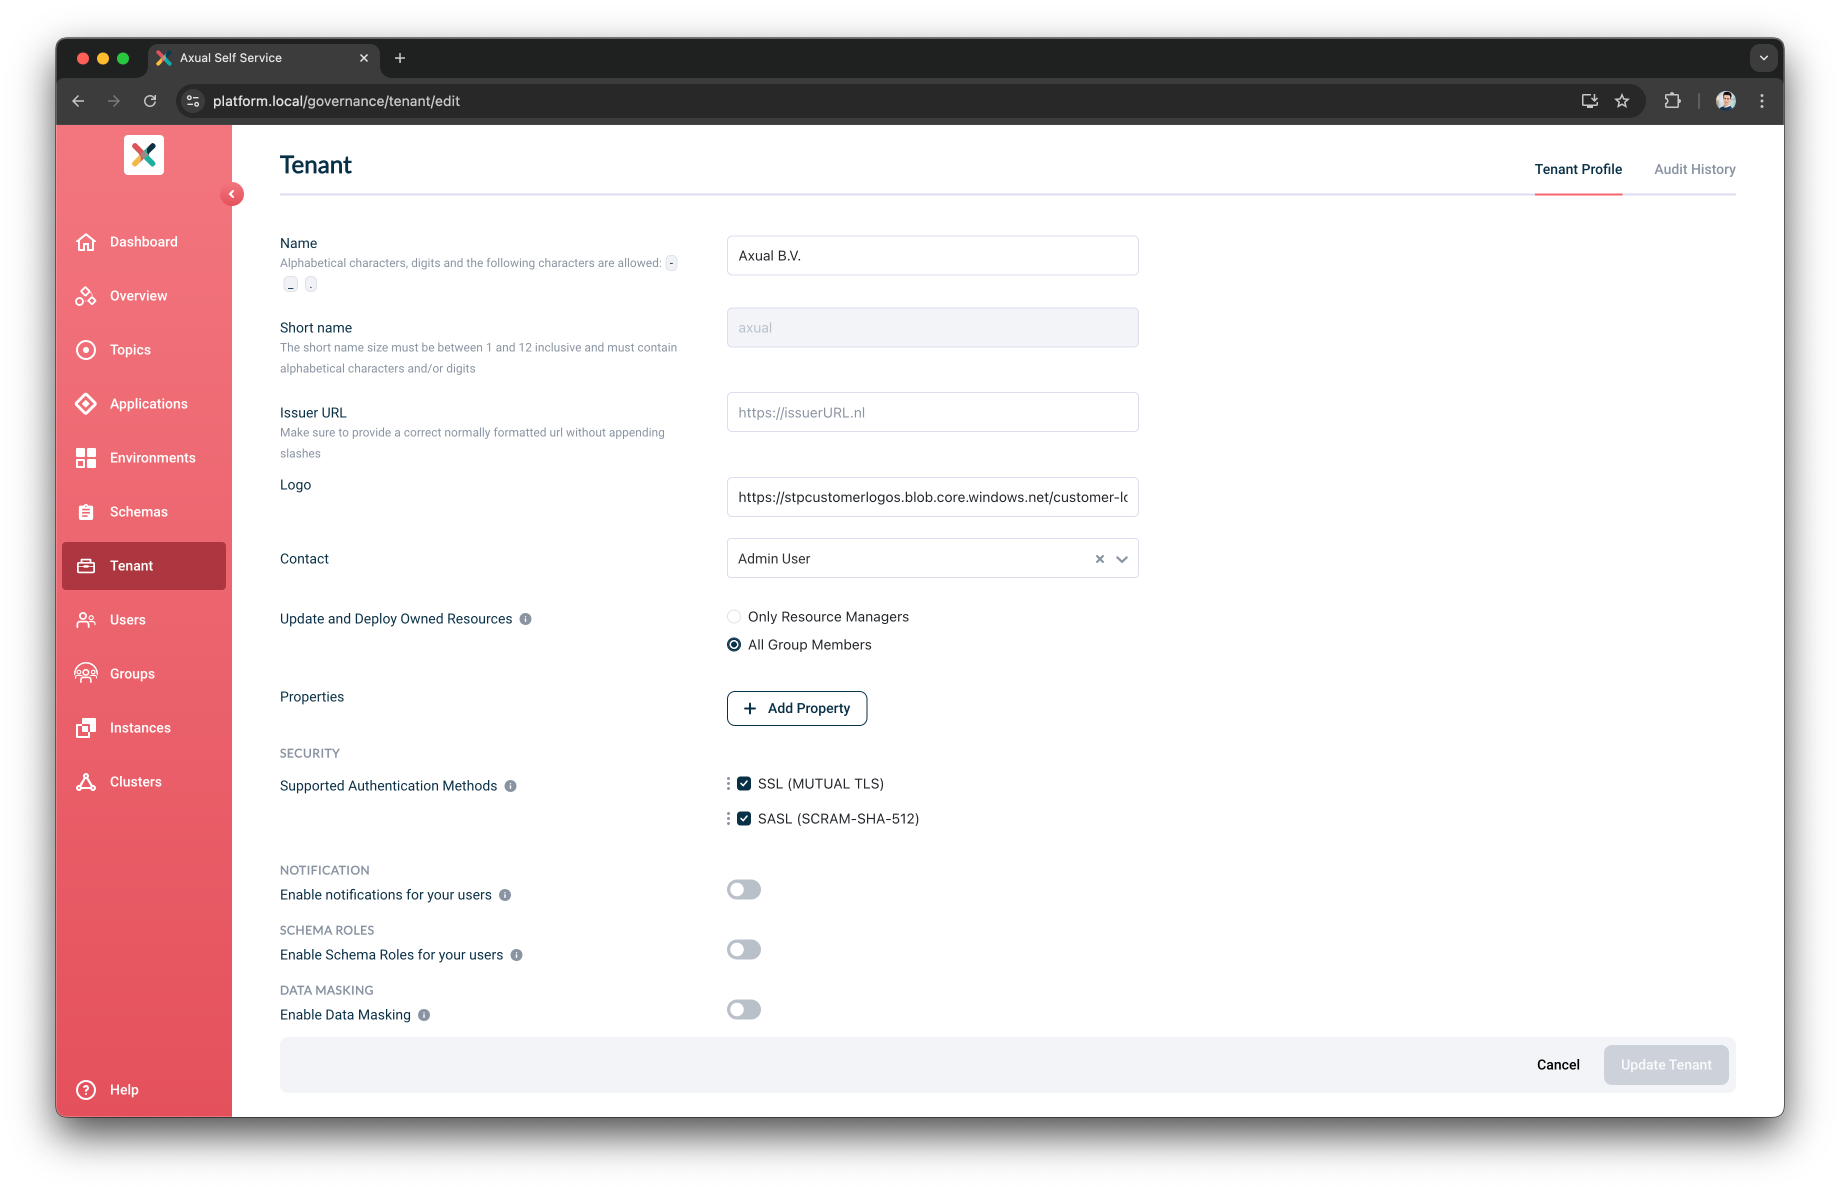
Go to the Tenant’s detail page
-
Click the Edit Tenant Profile button and you see the page below:
-
Toggle Enable notifications for your users to enable it

-
Click on the Update Tenant button
| By default, the notifications feature is disabled. If enabled, users will receive emails about various events related to their applications and topics. |
Enable Schema Roles
-
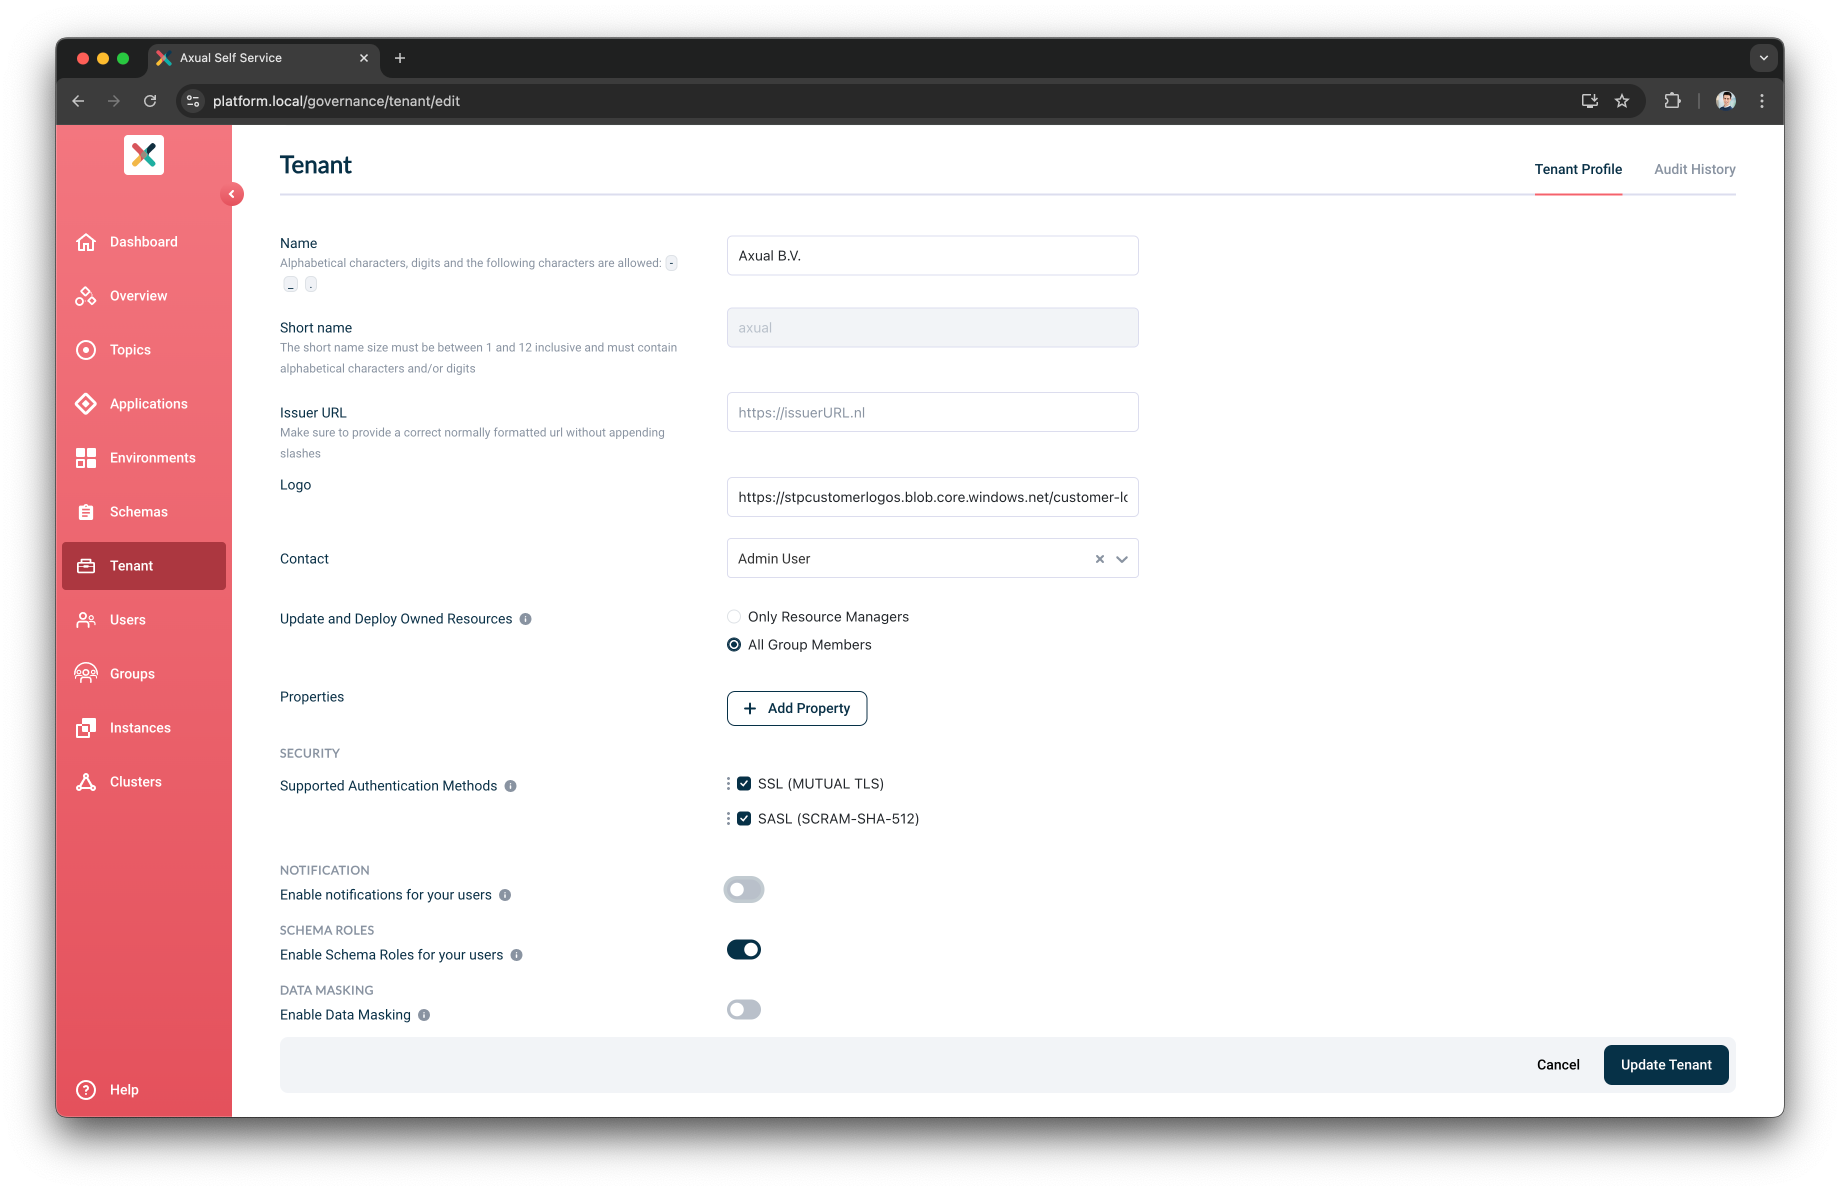
Go to the Tenant’s detail page
-
Click the Edit Tenant Profile button and you see the below page:
-
Toggle Enable Schema Roles for your users to enable it
-
Click on the Update Tenant button
| By default, enforcing schema roles is disabled. If enabled, only users with the SCHEMA_ADMIN or SCHEMA_AUTHOR role can create or delete any schema or schema version. |
Enable Data Masking
| This setting is only available when the Operator has enabled data masking. |
-
Go to the Tenant’s detail page
-
Click the Edit Tenant Profile button and you see the page below:
-
Toggle Enable data masking to enable it

-
Click on the Update Tenant button
| By default, the data masking feature is disabled. If enabled, it allows users to manage masking fields. |