Unresolved include directive in modules/ROOT/pages/_attributes.adoc - include::../_attributes.adoc[]
IBM MQ source Connector, version 1.3.1
IBM MQ
If you already have a publicly accessible deployment of IBM MQ, you can skip ahead and Configure and install a connector, using the Axual Self-Service UI.
Use the configuration instructions below.
If you don’t have one available, the following section instructs you to deploy a publicly available instance of IBM MQ.
Deploying an IBM MQ instance
We’ll deploy an IBM MQ instance using IBM Cloud services.
You will get free credit upon Registration.
If you already have an IBM Cloud account, then simply Login.
-
-
Location:
Frankfurt (eu-de)
The location isn’t very relevant, but usually you would select a region geographically closest to the Connect-Cluster. -
Pricing plan: Lite
At the time of writing this document, the Lite plan is free, making it ideal for our test. -
Configure your resource:
-
Service name:
my_axual_mq -
Everything else (Resource group, Tags, Access management tags) can keep their default values.
-
-
In the bottom right corner of the screen, check the License Agreement checkbox and click Create.
The MQ’s page should open. From this page we can create the queue manager.
-
-
Let’s create a queue manager.
Make sure that the "Queue managers" tab is selected.
On the right side of the screen, click the Create + button.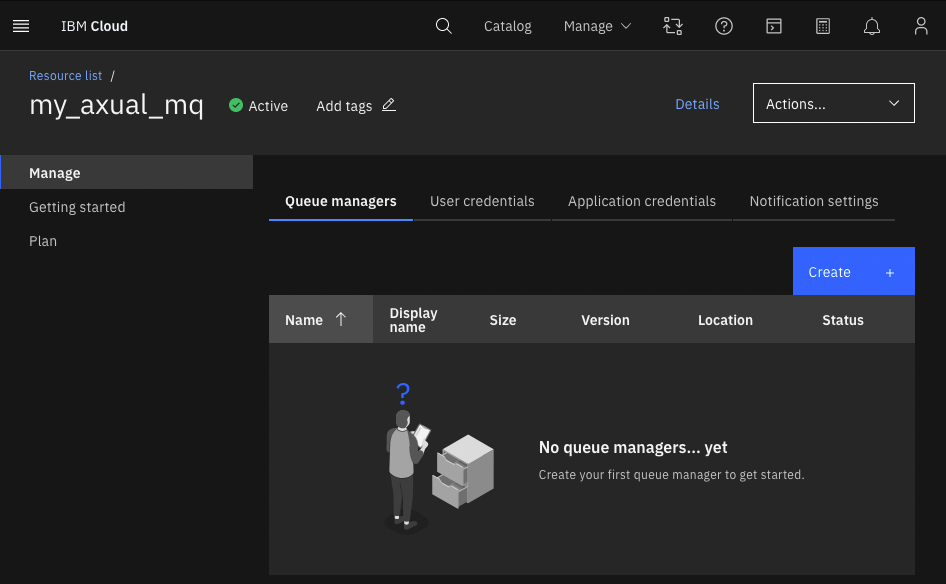
-
A new page opens. Fill in the following queue manager details:
-
Queue manager name:
my_axual_queue_manager -
Display name:
my_axual_queue_manager -
Location:
IBM Cloud Germany(should be the default/only one available, if you chose Frankfurt as the region) -
Size:
Lite(keeping the cost free)
-
-
Click the Create button at the bottom right of the screen.
-
A pop-up prompts you to review your changes. Click Continue.
Your queue manager is being created. Wait for the operation to complete.
In the next few steps we’ll download some files which will assist in connecting to the MQ.
-
-
After your queue manager is created, click it to open its page.
Click the Connect information button on the right side of the screen.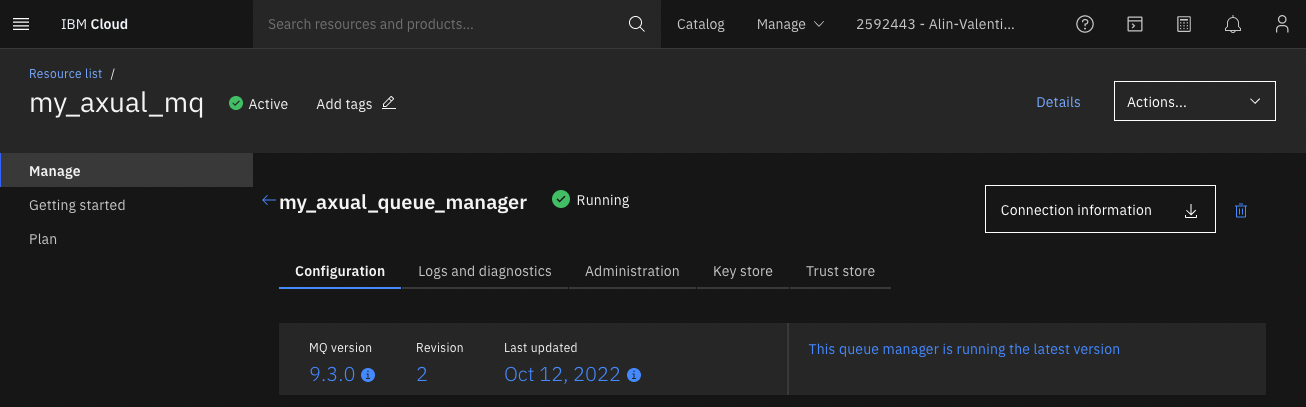

-
Select JSON CCDT. The file will be downloaded to your machine.
Click Close to close the pop-up. -
Click the Key store tab and wait for the default
qmgrcertto load.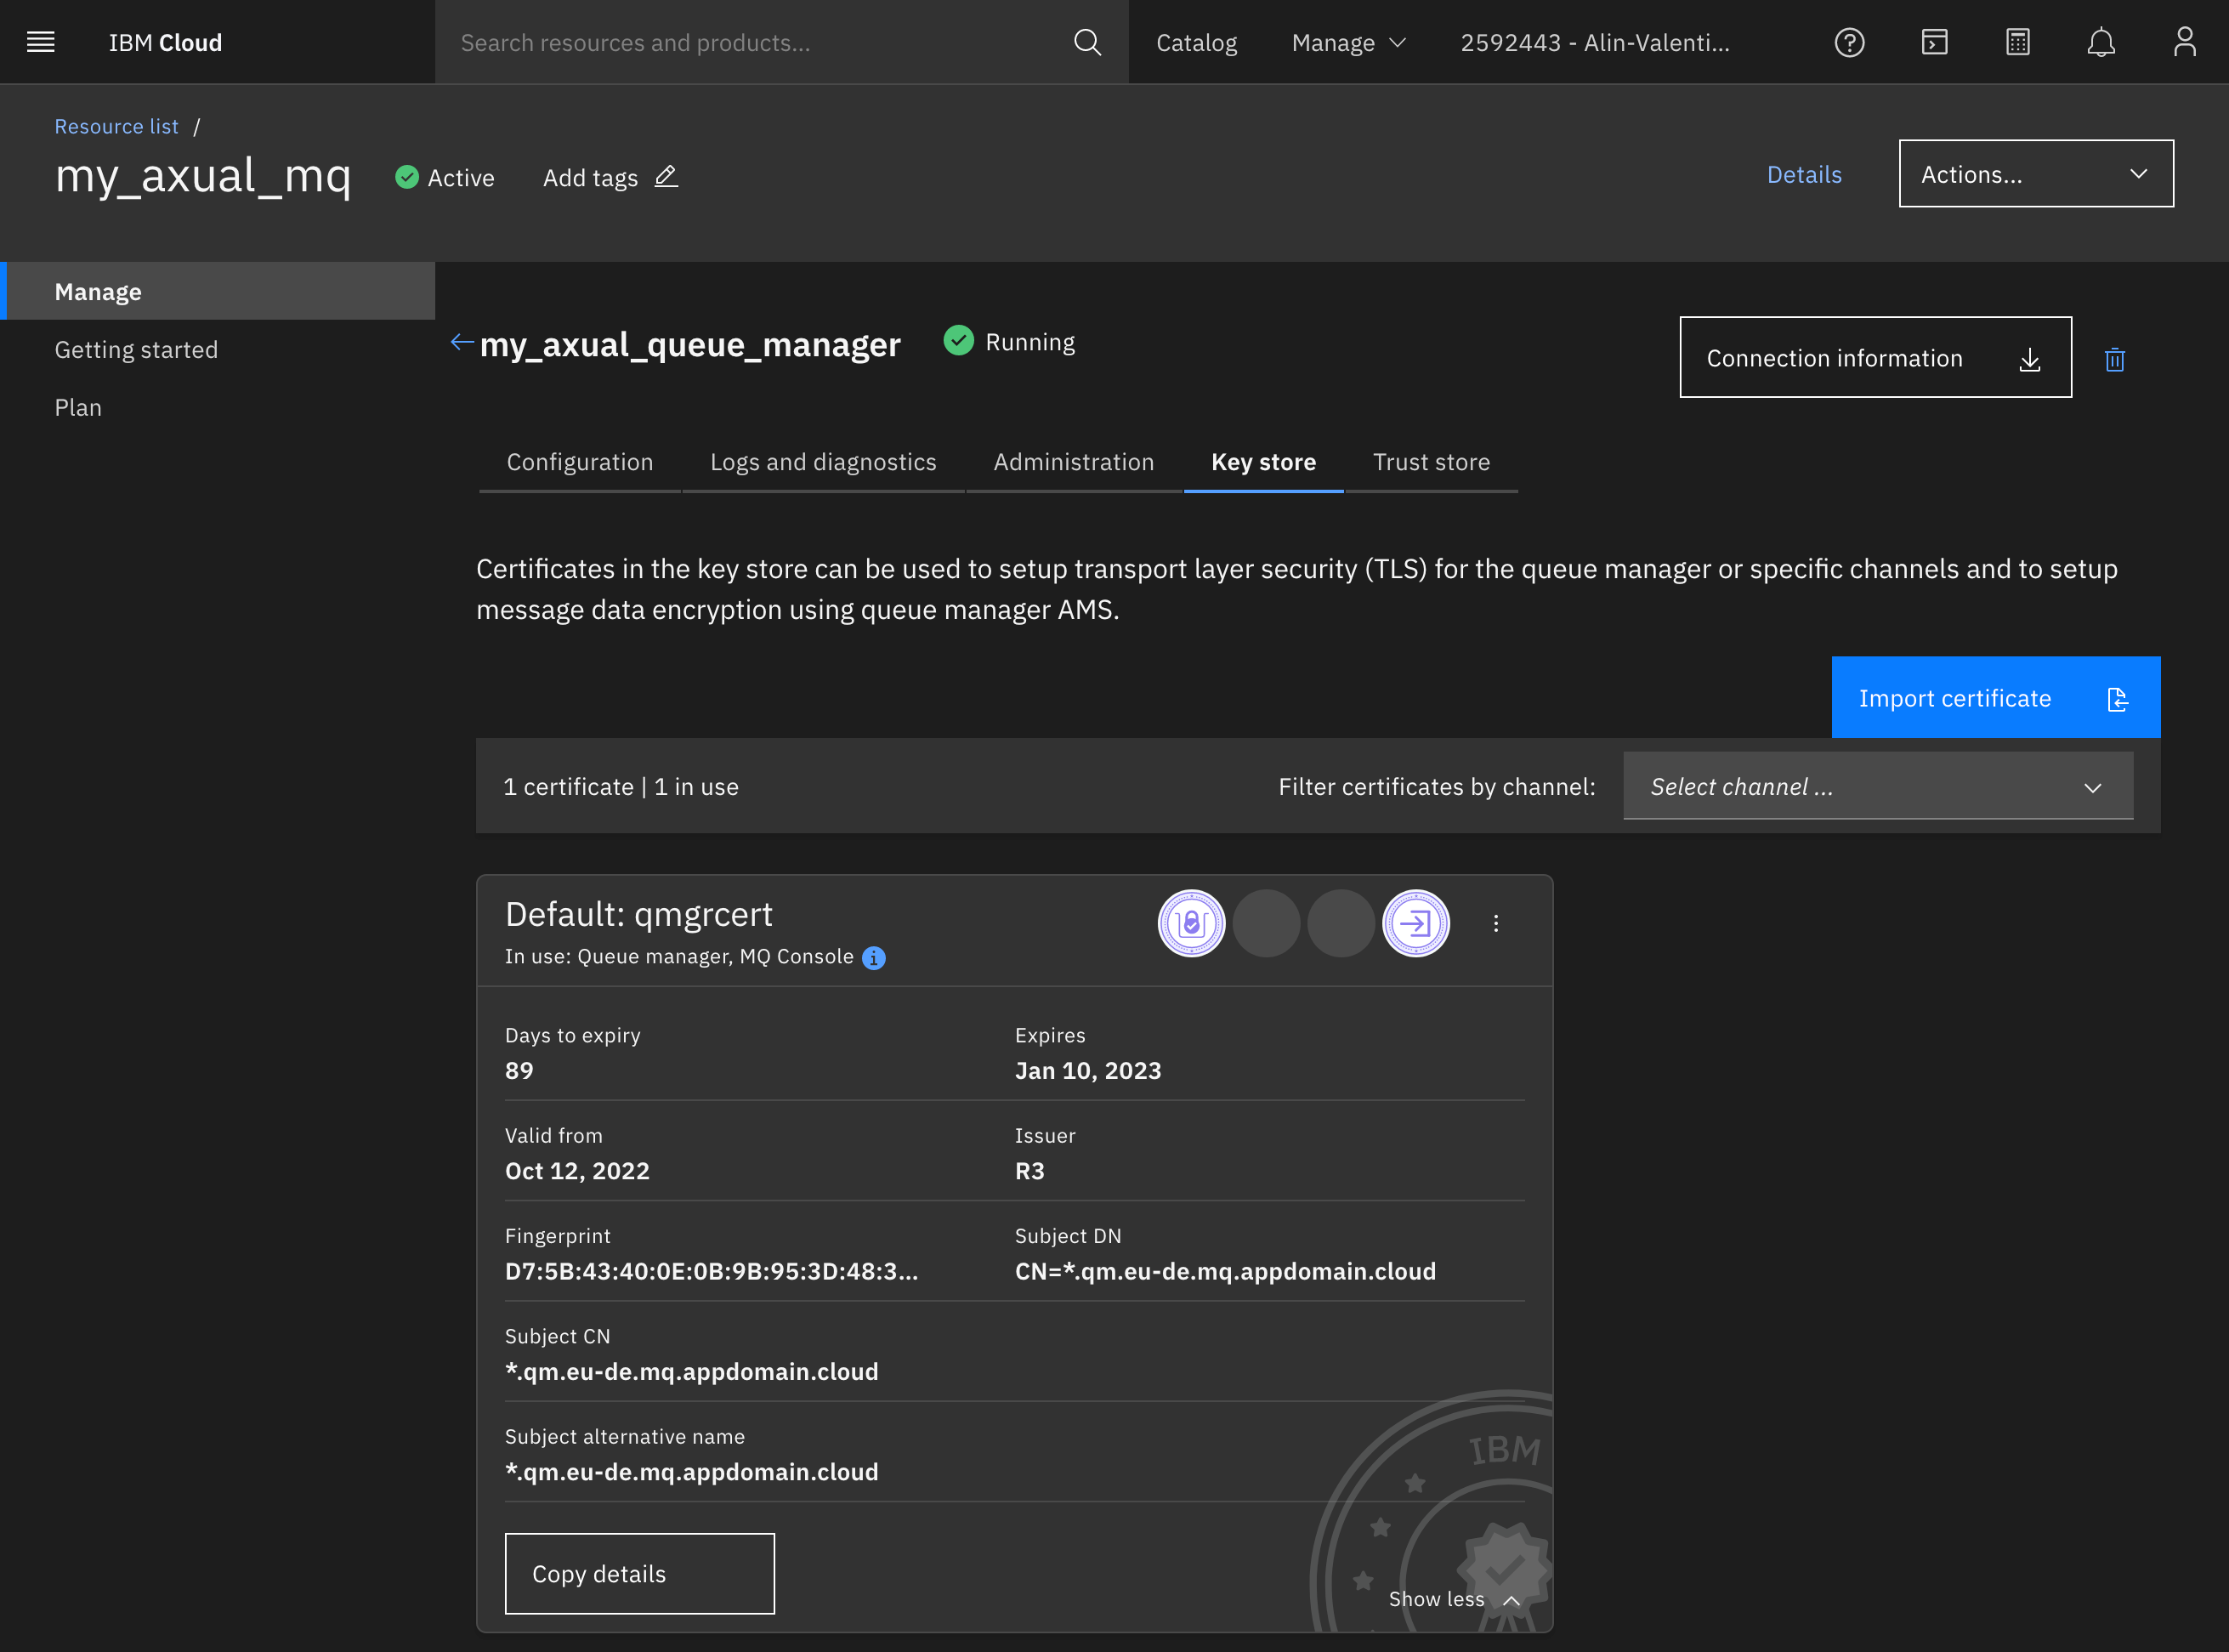
-
Click the 3 dots at the top-right of the default certificate to open a new menu.
Click the Download public certificate button and wait for the operation to complete. -
The next step is to create application credentials. For that, return to the MQ overview:
-
Go to the Resources list page.
-
Expand the "Integration" section.
-
Click the
my_axual_mqMQ service. -
Click the Application credentials tab.
-
-
Create application credentials by clicking the Add + button.
-
Display name:
my_mq_connector -
Description: "Credentials used by an MQ connector application which is deployed within the Axual platform."
-
Application username:
axualconnect
-
-
Click Add and generate API key.
-
Click the Download button on the bottom-right of the pop-up window.
Configuring a new sink Connector
Contact Axual for support with setting up this connector.
-
Follow the Creating streams documentation in order to create one stream and deploy it onto an environment.
The name of the stream will bemy_mq_stream.
The key/value types will beJSON/JSON. -
Follow the Configure and install a connector documentation to set up a new Connector-Application.
Let’s call itmy_mq_app.
The plugin name iscom.ibm.eventstreams.connect.mqsource.MQSourceConnector.
If a plugin isn’t available, ask a platform operator to install plugins.For advanced configuration, see the official source connector documentation.
-
Provide the following minimal configuration in order to connect to the previously configured IBM MQ instance.
mq.ccdt.url
Path to a file on all connect-nodes which contains connectivity info. You downloaded this fileExample value:
file://etc/ibm_mq_ccdt/my_mq_app/ibm-mq-ccdt.jsonmq.password
This value can be found in theapplicationApiKey.jsonfile you just downloaded.Example value:
ABcdefgHIJkLMNOpqRStuvwXYZ1234567890over_flowmq.ssl.keystore.location
Path to a keystore on disk. It’s built from files you downloaded, and stored on the disks of all connect nodes by axual-platform operators.Example value:
/etc/tls/my_mq_app/ibm_mq/keystore.jksmq.ssl.keystore.passwordExample value:
passwordmq.ssl.truststore.location
Path to a truststore on disk. It’s built from files you downloaded, and stored on the disks of all connect nodes by axual-platform operators./etc/tls/my_mq_app/ibm_mq/truststore.jksmq.ssl.truststore.passwordExample value:
passwordmq.queue.managermy_axual_queue_managermq.user.nameaxualconnectmq.queuemy_mq_streamtopicmy_mq_streammq.record.buildercom.ibm.eventstreams.connect.mqsource.builders.JsonRecordBuilderThe following optional configs are also recommended:
errors.log.enabletrueerrors.log.include.messagestrueerrors.toleranceall -
Authorize the
my_mq_appsource Connector-Application to produce to themy_mq_streamstream. -
You can now start the source Connector-Application.
-
You can now check the
my_mq_streamstream to see the events published by the Connector.
Cleanup
Once you are done, stop the Connector-Application and cleanup the unused axual resources.
In case you deployed your MQ via IBM Cloud, don’t forget to delete your queue manager:
-
Go to the Resources list page.
-
Expand the "Integration" section.
-
Click the
my_axual_mqMQ service. -
On the right side of the screen, click the delete button
-
Confirm deletion
License
IBM MQ source-Connector is licensed under the Apache License, Version 2.0.
Source code
The source code for the Connect-Plugin can be found at github.com/ibm-messaging/kafka-connect-mq-sink