Unresolved include directive in modules/ROOT/pages/_attributes.adoc - include::../_attributes.adoc[]
ElasticSearch sink Connector, version 1.0.1
ElasticSearch
ElasticSearch is an open-source search and analytics suite that makes it easy to ingest, search, visualize, and analyze data.
Common OpenSearch use cases are application search, log analytics, data observability, data ingestion, and more.
Deploying an ElasticSearch instance
This documentation page is a work in progress and as such, we don’t have a solution for obtaining a publicly available service exposing the ElasticSearch API, for you to test your Connector against.
For developers who have the means to run the axual platform locally, we’ll outline the steps to deploy ElasticSearch locally.
-
Clone the
gitlab.com/axual/bitnami-kafka-connect-setupgit repository → branchelasticsearch. -
Deploy an Elasticsearch multi-node cluster and dashboard by running
docker-compose up kibana. -
Confirm the deployment was successful by opening the ElasticSearch dashboard.
Login usingelastic:qw34er!as credentials.
You’re done for now. You’ll get back to the dashboard after starting the Connector.
Configuring a new sink Connector
-
Follow the Creating streams documentation in order to create one stream and deploy it onto an environment.
The name of the stream will bemy_elasticsearch_stream.
The key/value types will beJSON/JSON. -
Produce some data as
JSON/JSONevents to this stream. -
Follow the Configure and install a connector documentation to set up a new Connector-Application.
Let’s call itmy.elasticsearch.sink.
The plugin name iscom.ibm.eventstreams.connect.elasticsink.
If a plugin isn’t available, ask a platform operator to install plugins. -
Provide the following minimal configuration in order to connect to the previously configured ElasticSearch instance.
For advanced configuration, see the official sink connector documentation.connector.classcom.ibm.eventstreams.connect.elasticsink.ElasticSinkConnectorerrors.log.include.messagestruees.user.nameelastices.index.buildercom.ibm.eventstreams.connect.elasticsink.builders.DefaultIndexBuildererrors.log.enabletruekey.converterorg.apache.kafka.connect.storage.StringConverterkey.converter.schemas.enablefalsevalue.converter.schemas.enablefalsenameelassink-deverrors.tolerancealles.identifier.buildercom.ibm.eventstreams.connect.elasticsink.builders.DefaultIdentifierBuilderes.document.buildercom.ibm.eventstreams.connect.elasticsink.builders.JsonDocumentBuilderes.connection
The hostname should be configured as a SAN of the host certificatees01:9200es.passwordqw34er!value.converterorg.apache.kafka.connect.json.JsonConverteres.tls.truststore.location
A platform operator has to make this truststore available on every node of the Connect-Cluster, and provide you with a path to use/etc/tls/elastic/elastic.jkstopicsmy_elasticsearch_streamenvironmentdeves.tls.truststore.passwordqw34er -
[Optional] Adding ID information for the connector:
If you would like to have named ids in the elasticsearch index, a change should be made to the connector config.
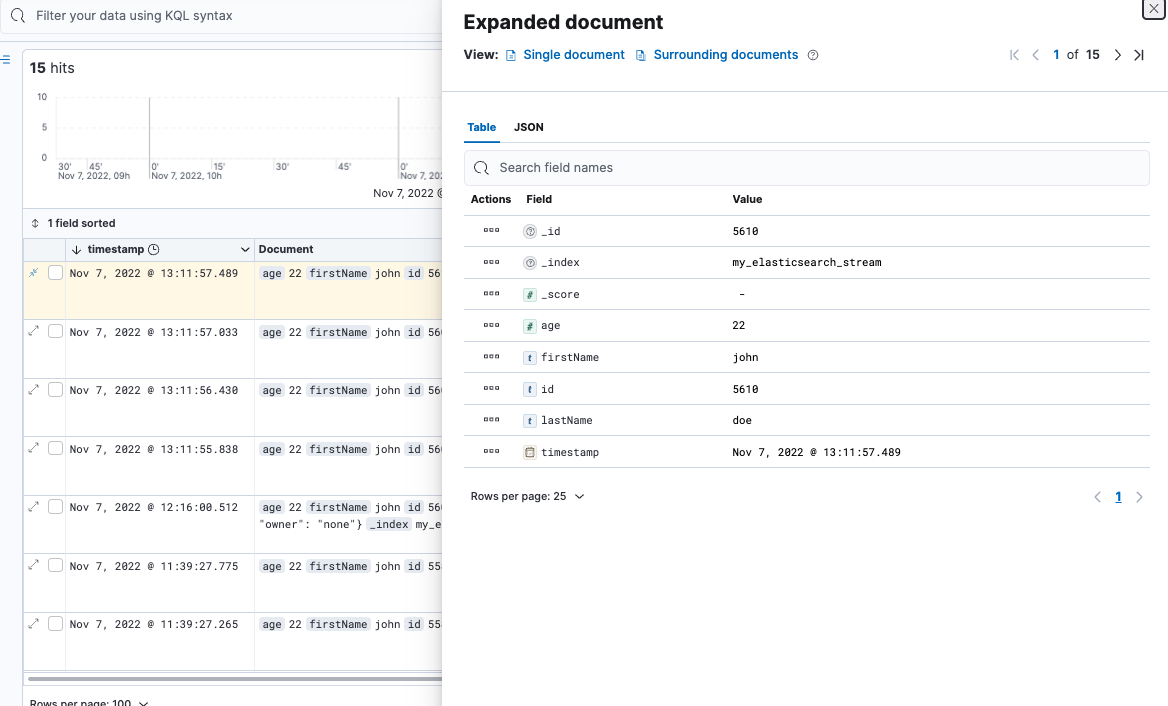
The value of thees.identifier.builderproperty should becom.ibm.eventstreams.connect.elasticsink.builders.KeyIdentifierBuilder. In that case the document id of the send in message is used as a identifier. Add the following items to the above displayed configuration.es.identifier.buildercom.ibm.eventstreams.connect.elasticsink.builders.KeyIdentifierBuildertransformsInsertKey,extractKeytransforms.InsertKey.typeorg.apache.kafka.connect.transforms.ValueToKeytransforms.InsertKey.fieldsidtransforms.extractKey.typeorg.apache.kafka.connect.transforms.ExtractField$Keytransforms.extractKey.fieldidAn example message with id is displayed below
{
    "id": "10",
    "name": "john",
    "age": 28
}
Make sure to use unique IDs for event you produce on the topic. The result in Elastic Search would look like the picture displayed below.
-
Authorize the
my.elasticsearch.sinksink Connector-Application to consume themy_elasticsearch_streamstream. -
You can now start the sink Connector-Application.
-
Log back into the ElasticSearch dashboard.
-
Go to the index-pattern creation page
-
Click the menu button (three stripes) in the top-left corner of the screen → Management → Stack management
-
Click Index Patterns (although it may look like it’s already selected)
-
-
Click + Create index pattern
-
Index pattern name:
my_elasticsearch_stream -
Click Next step
-
-
Click Create index pattern
-
Go to the Discover page.
-
Click the menu button (three stripes) in the top-left corner of the screen → ElasticSearch Dashboards → Discover
-
-
You should now see your records in ElasticSearch
Cleanup
Once you are done, stop the Connector-Application and cleanup the unused axual resources.
Run docker-compose down in the same directory you ran the up command in order to stop and remove the ElasticSearch containers.
License
ElasticSearch sink-Connector is licensed under the Apache License, Version 2.0.
Source code
The source code for the Connect-Plugin can be found at github.com/ibm-messaging/kafka-connect-elastic-sink.