Managing Connector Applications
Creating Connect Applications
-
Open the "Applications" page in the Self-Service portal.
-
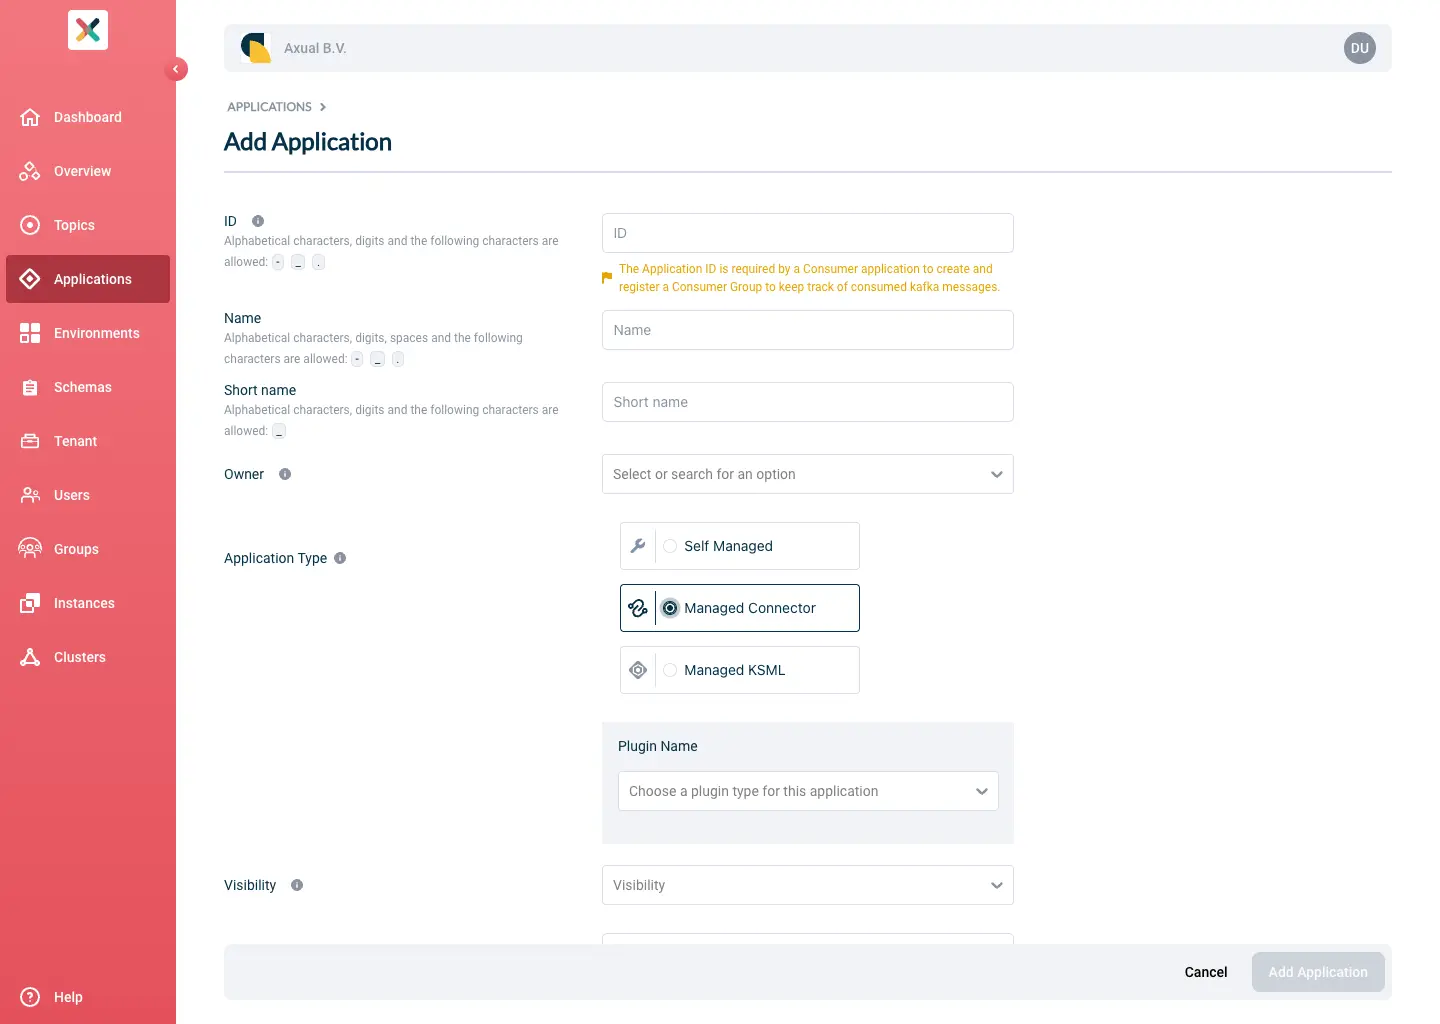
Click the New Application button. This window will open
-
Fill the required information in the form:
-
ID: The Application ID of your Connect Application.
This is a string that uniquely identifies your Connect Application.
The maximum length is 255. It can contain numbers, letters and dots.
We recommend using a fully qualified package/class name, which is sufficiently unique within the organization.
E.g.com.company.division.AppName. -
Name: Full name of the Connect Application.
This value is displayed when opening this Connect Application’s page.
The maximum length is 50. Allowed characters are displayed in the UI. -
Short Name: A shorter name for the Connect Application. This name is displayed in the applications list page, making it a little more important than the full name. The maximum length is 60. It can contain numbers, letters and underscores. It has to be unique within the company (tenant).
-
Owner: All members of the selected group will be authorized to edit this Connect Application.
This dropdown lists all the groups you belong to. Choose an adequate group.
If no group is listed, ask a team member or platform-operator to add you to a group. -
Plugin Name: choose the plugin corresponding to the system you wish to integrate with Kafka
-
Visibility: Controls read access. Public applications are readable to the entire organization.
Private applications are only visible to its owners. -
Description: A short summary describing the purpose of this application.
Limit of 200 characters.
-
-
Click the Add Application button in the bottom-right of the screen.
Upon creating the Connector Application in the Self-Service portal, you will be directed to the application detail page.
Here you can "instantiate" this Connect Application onto multiple environments.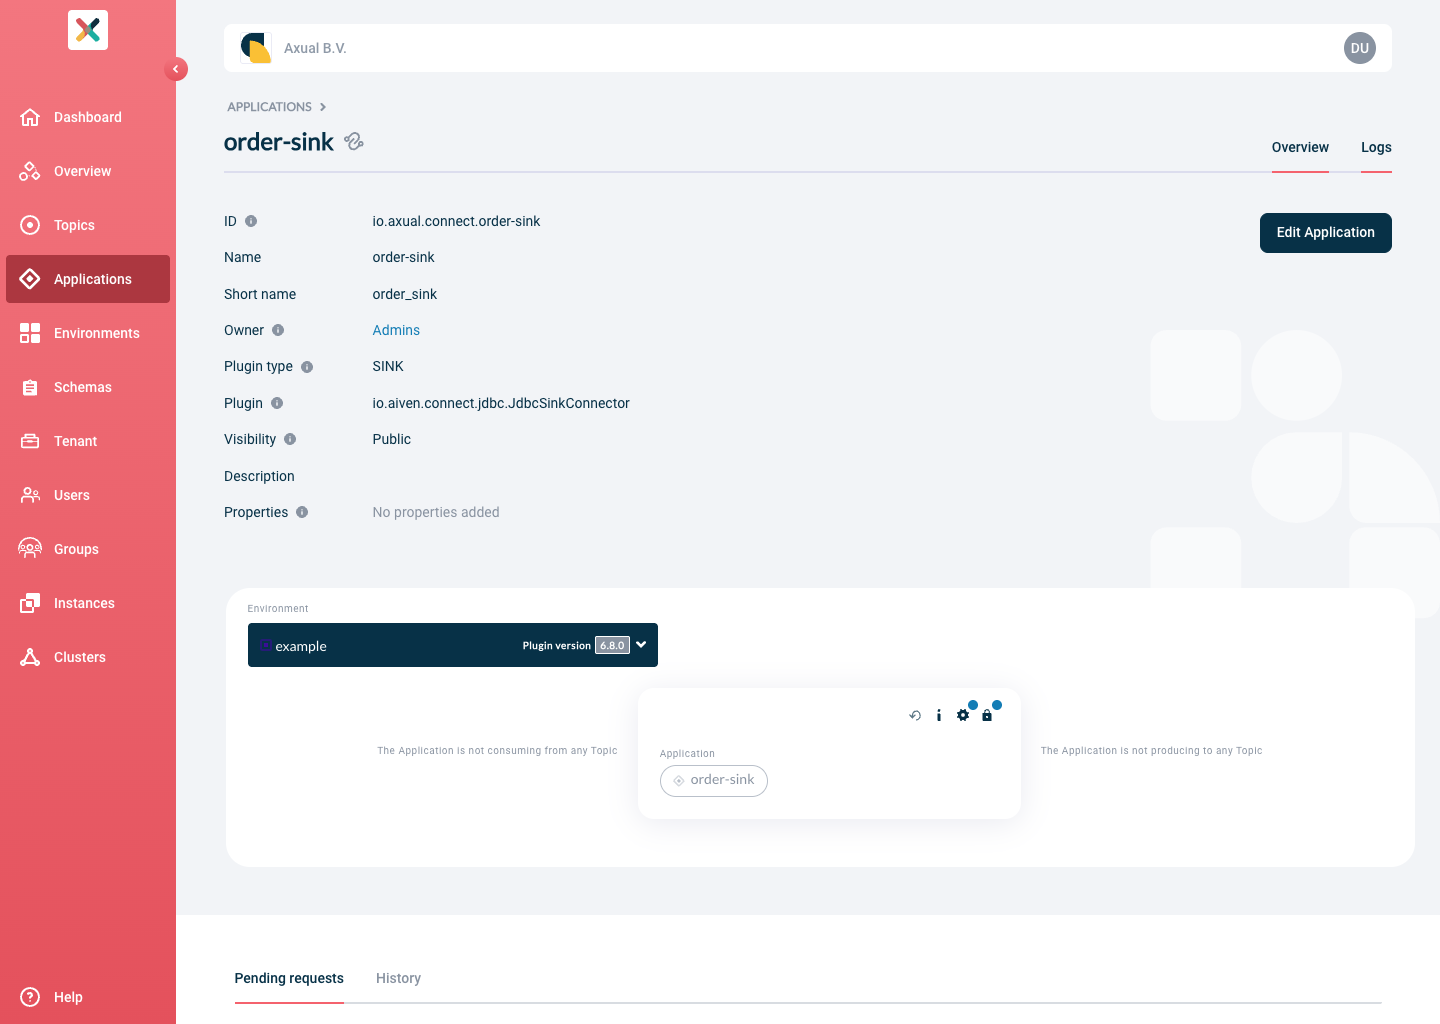
Configuring and starting Connector Applications
A Connector Application needs 2 sets of configuration for every environment in which it’s deployed:
-
Authentication: One or more certificate and private key pairs used for authentication and authorization against the Kafka cluster.
-
Plugin Configuration: plugin-specific configuration, depending on the connector implementation (e.g. connectivity information for the integrated system).
|
|
Authentication
The certificate and private key are used to authorize the Connector-Application against Kafka when accessing the topics. Each environment can hold multiple certificate and private key pairs. Exactly one pair is marked as Active — this is the pair currently used by the running connector. Uploading an additional certificate and activating it allows you to rotate credentials without stopping the connector.
-
The certificate must be
X.509formatted and contained within aPEMfile. Ideally, it should contain the whole certification chain. -
The private key must be
pkcs8formatted and contained within aPEMfile.
| If your key material is currently in JKS format, you can extract the certificate and private key using a tool such as Keystore Explorer. |
Considering you have both these files available, let’s configure the Connector Application’s authentication:
-
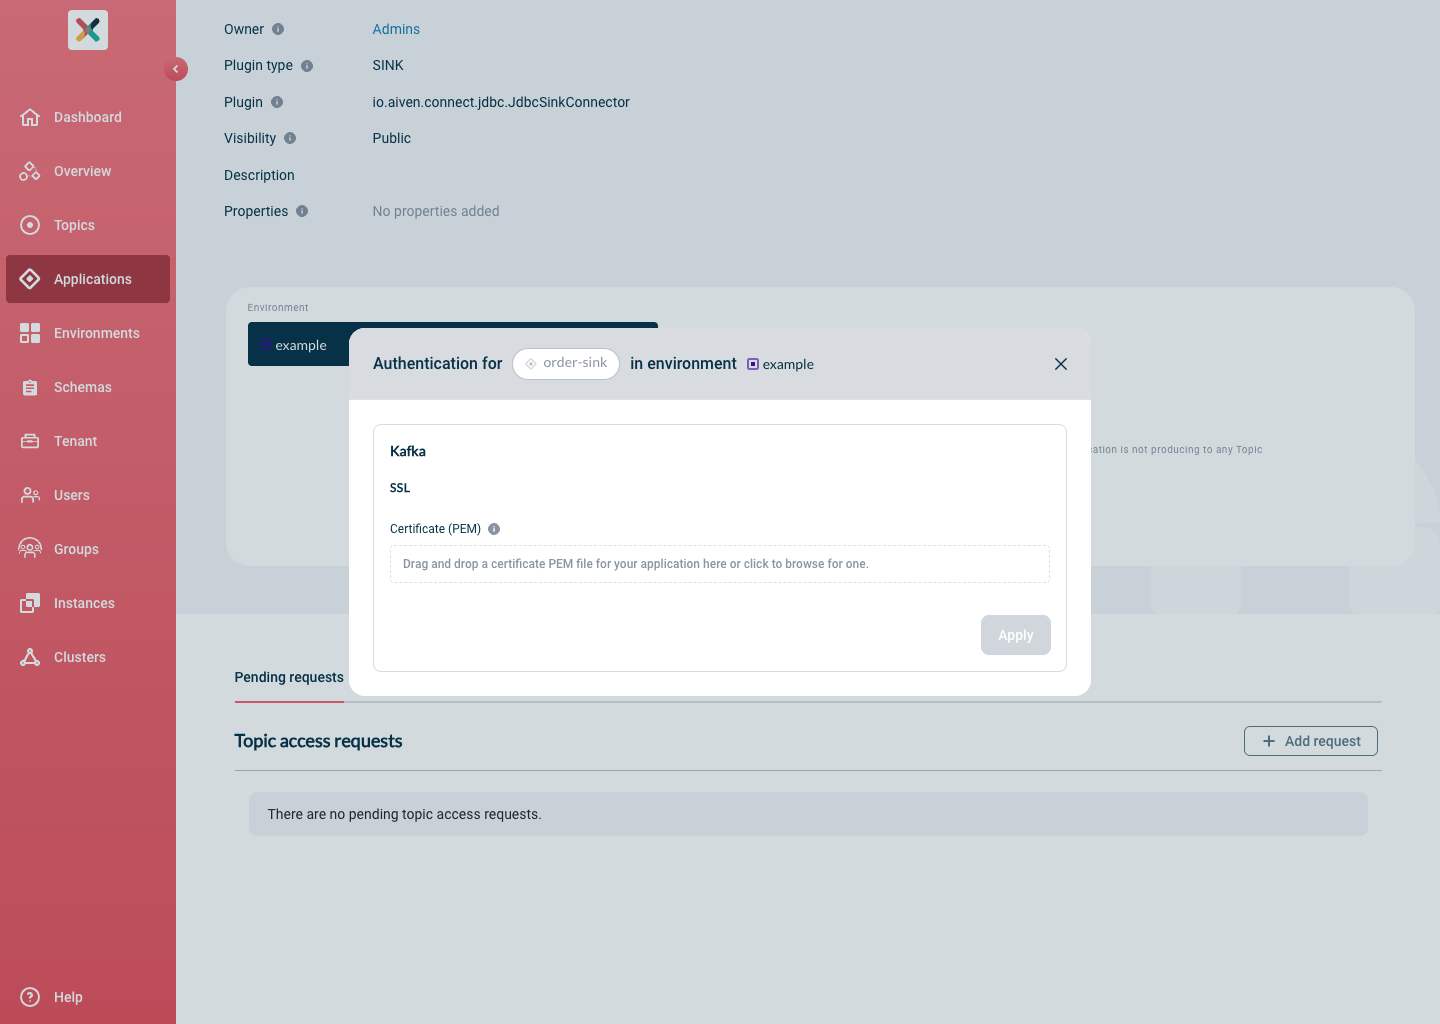
From the environment dropdown, select the environment for which you want to configure the certificate and private key.
-
Click on the Padlock button in the application box. The Authentication modal will open, showing the Kafka > SSL section with the certificate upload area:
-
Upload the certificate file by dragging and dropping it onto the upload area, or clicking to browse.
NOTE: The trash icon to delete a certificate is disabled while the connector is running with that certificate as the active one.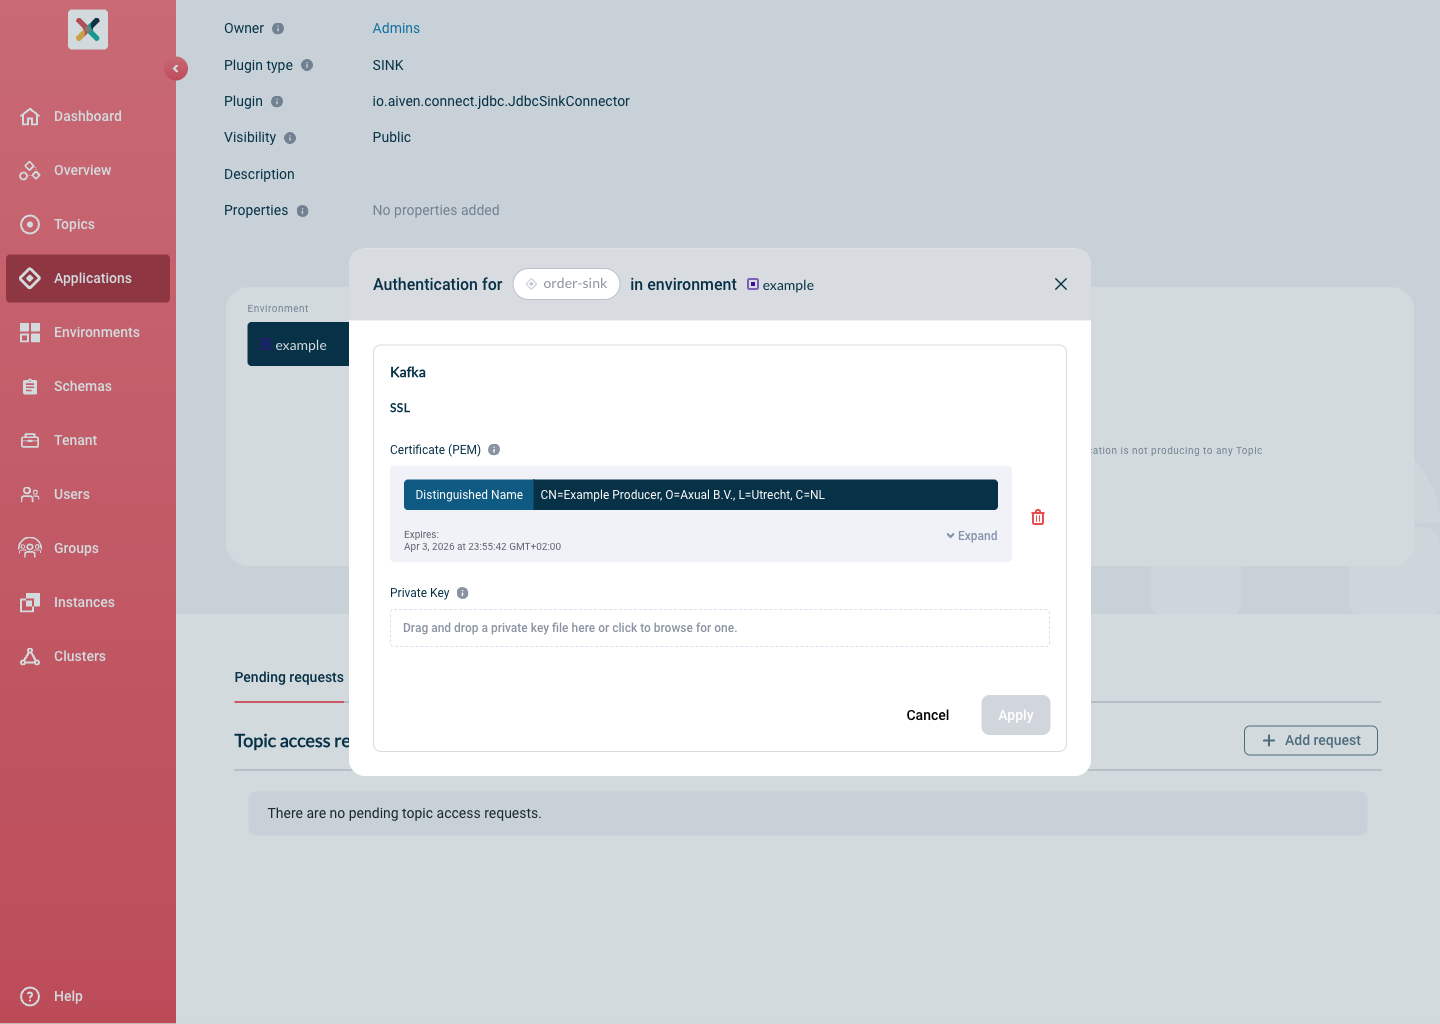
-
Upload the private key file that matches the certificate.
The private key is never displayed. Once uploaded, a confirmation row appears below the certificate showing who uploaded it and the upload date.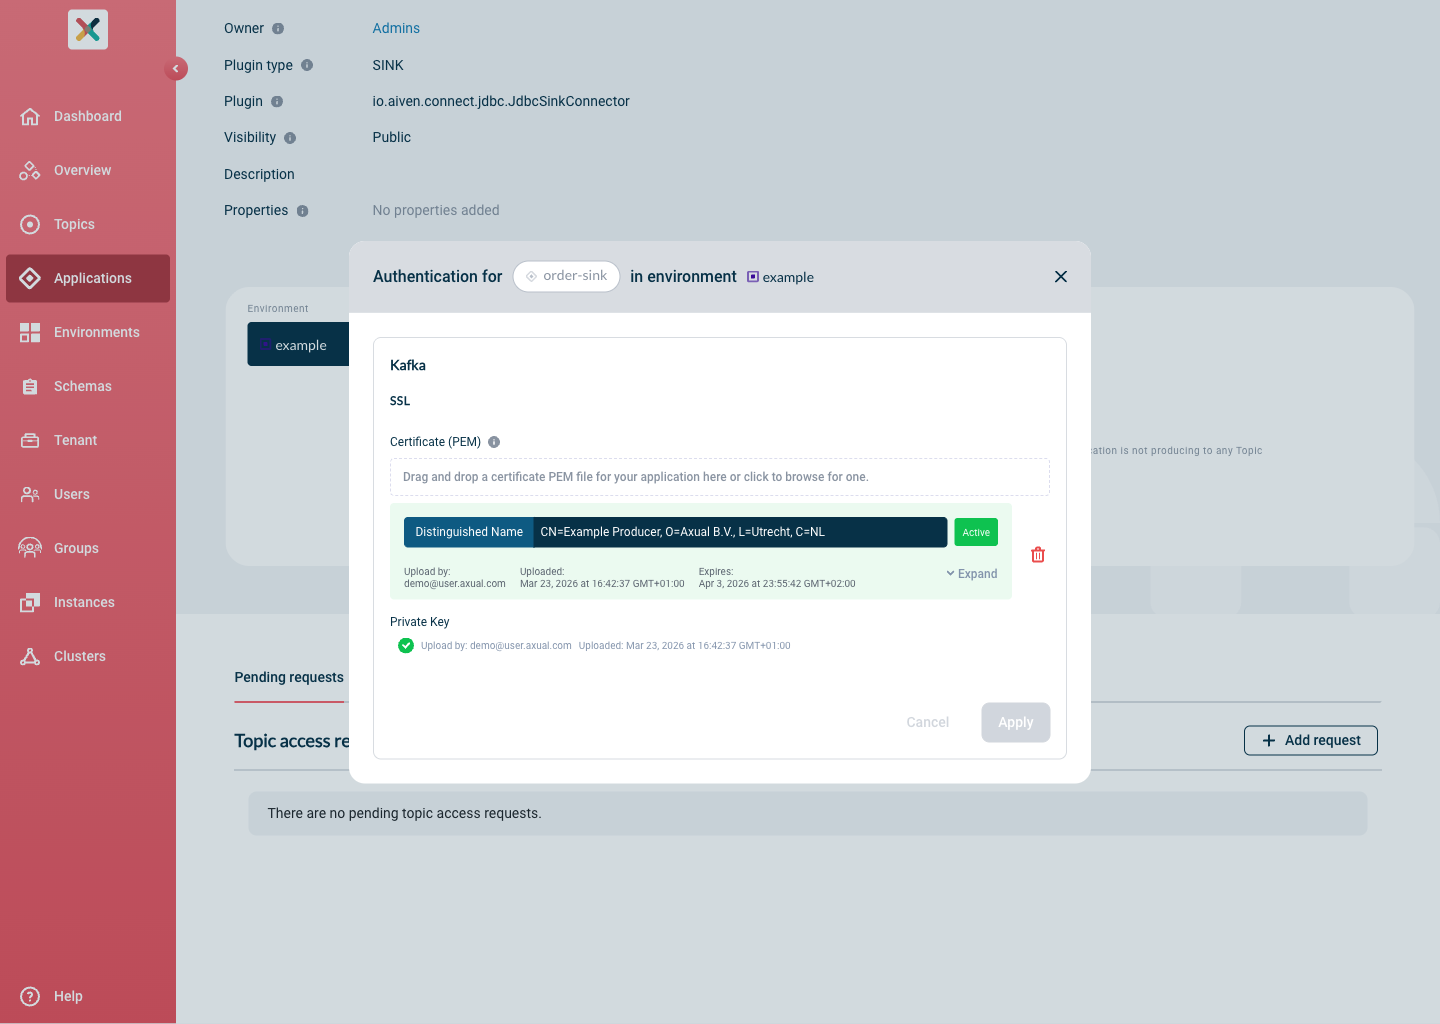
-
Click Apply.
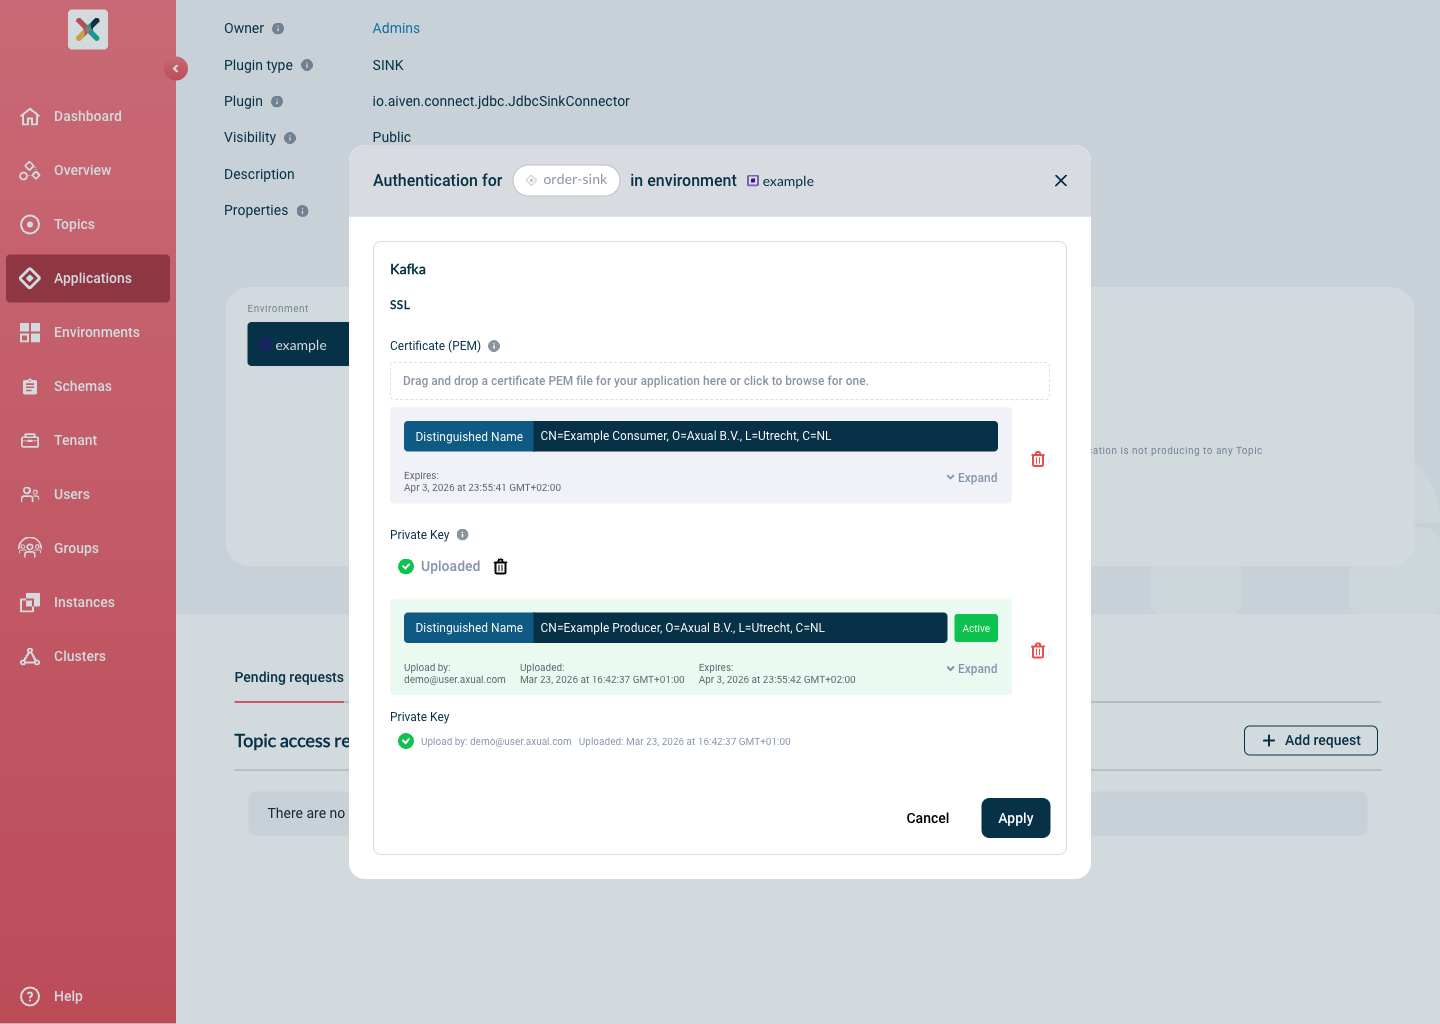
Rotating certificates
To rotate the certificate of a running connector without downtime:
-
Upload a new certificate and private key pair in the Authentication modal. The new pair is added as an additional card alongside the existing active one.
-
Activate the new pair by clicking the Set as Active button (checkmark icon) on its card.
The Platform Manager will upload the new credentials to Vault and restart the connector automatically to pick them up.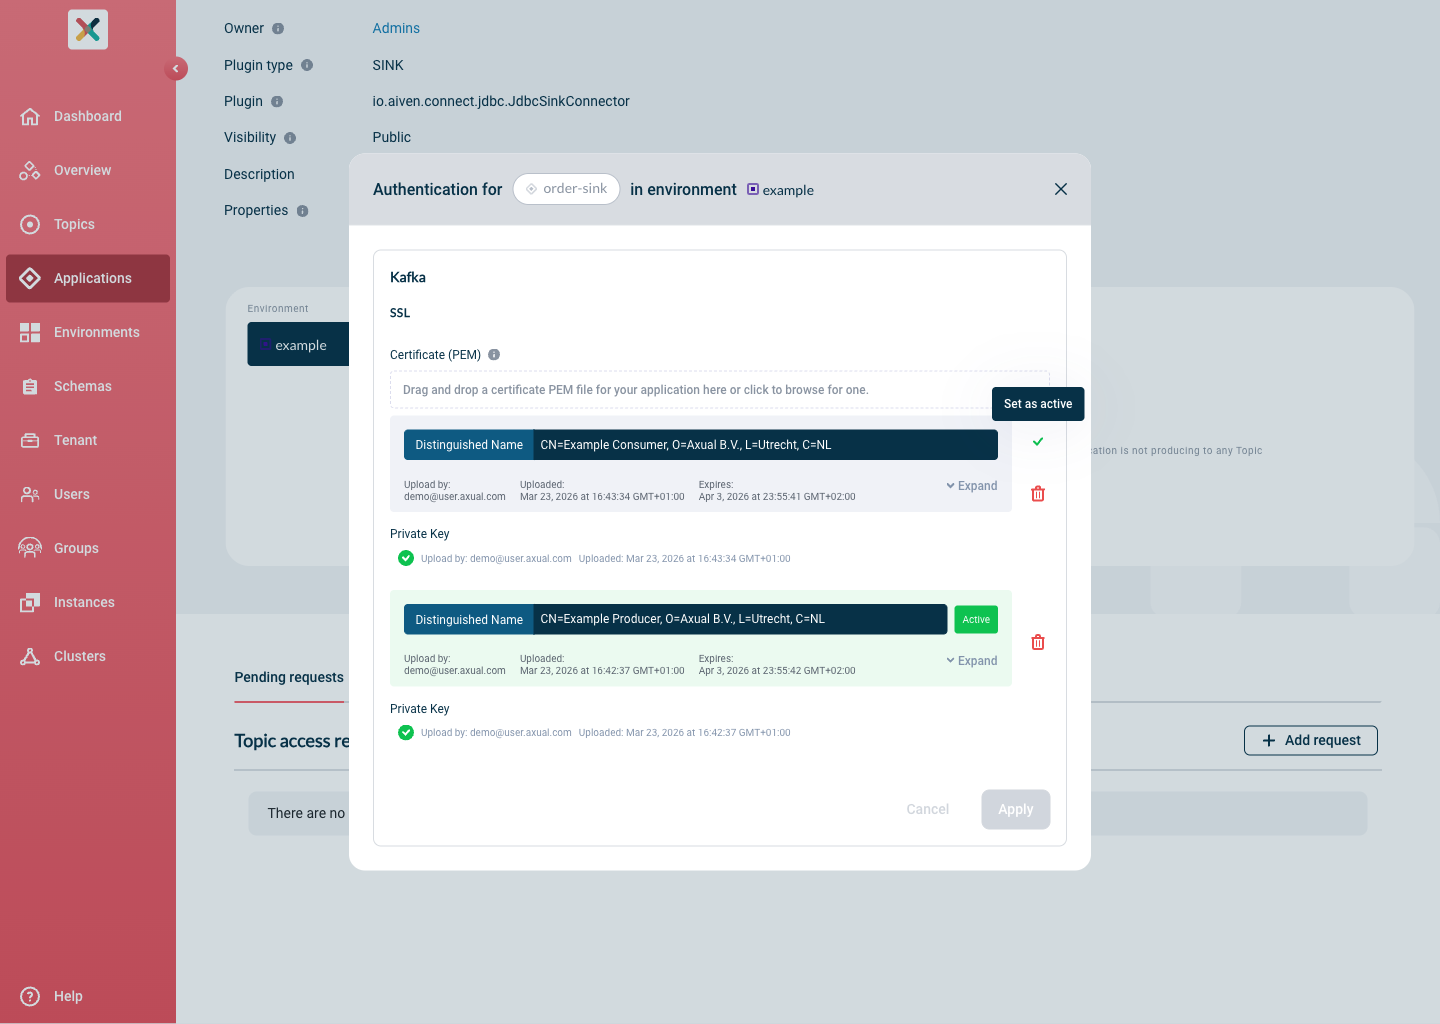
-
Once the connector is running with the new certificate, you can delete the old one.
|
Plugin configuration
Clicking the Gear button opens a dedicated Plugin Configuration page for the selected environment. The page title shows the plugin class name and the target environment.
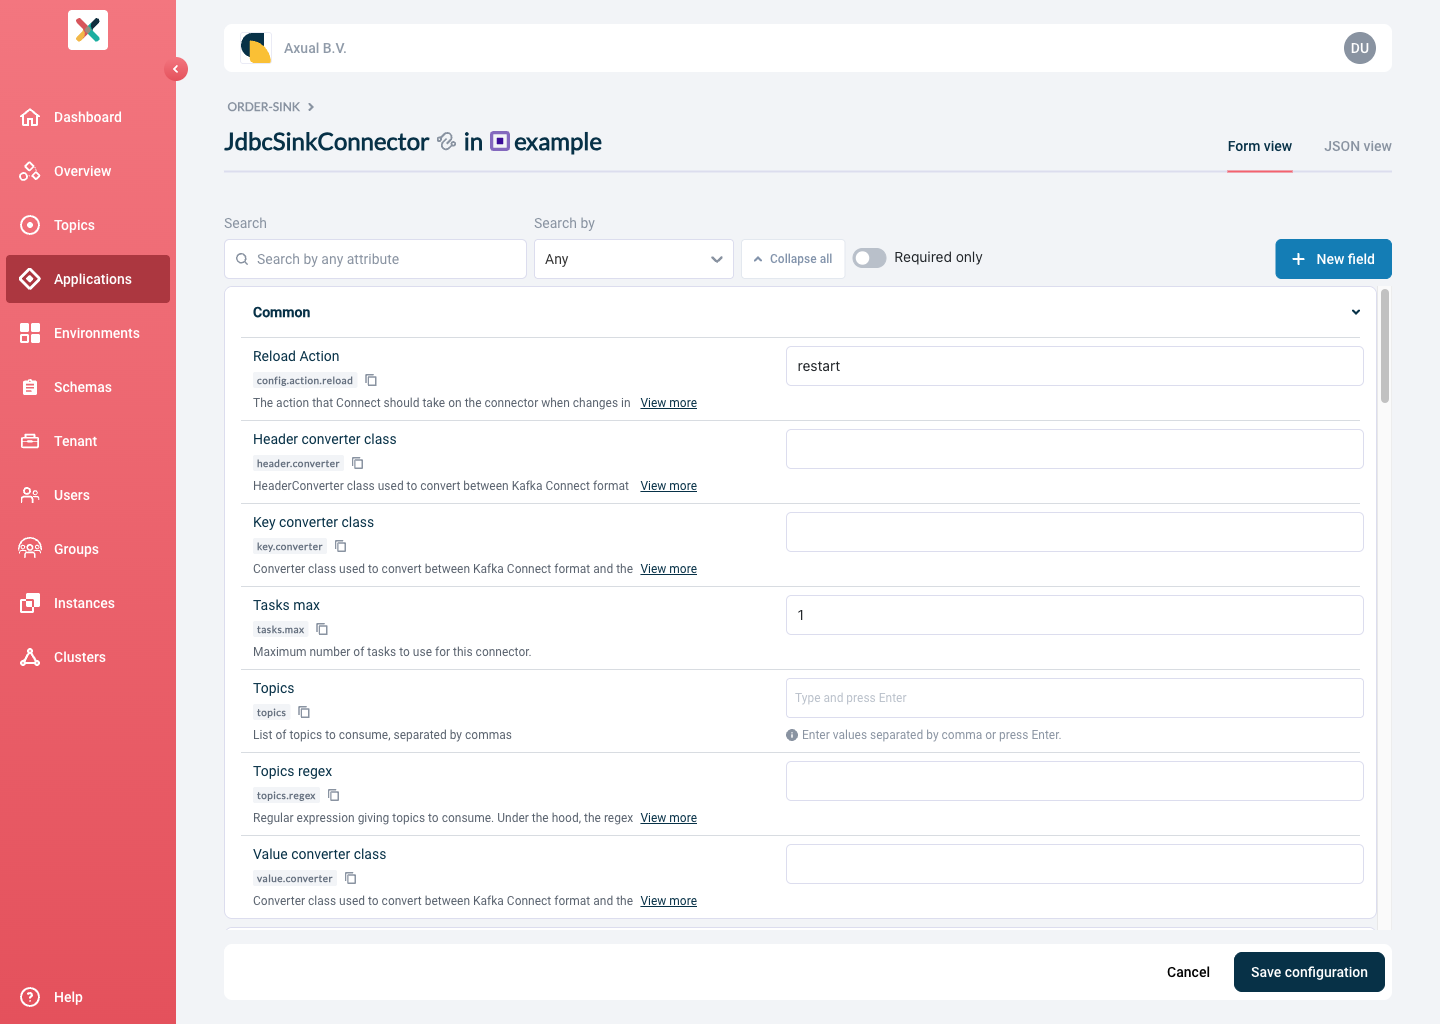
Form view
Configuration fields are grouped into collapsible sections (e.g. Common, Database, Data Mapping, Error Handling). Each field shows:
-
A human-readable label. Required fields are marked with an asterisk (
*). -
The underlying Kafka property key with a copy button.
-
A description (truncated with a View more link for long descriptions).
-
An input widget appropriate for the field’s type (text, number, boolean dropdown, multi-value tag input).
-
A Reset to default button to restore the original default value.
The toolbar above the form provides:
| Control | Description |
|---|---|
Search + Search by dropdown |
Filter fields by any attribute, or narrow the search to name, property key, or description specifically. |
Required only toggle |
Show only the fields that have no default value and must be provided before the connector can start. |
Collapse all |
Collapse all sections for a compact overview. |
+ New field |
Add a custom configuration property not listed in the plugin’s schema. |
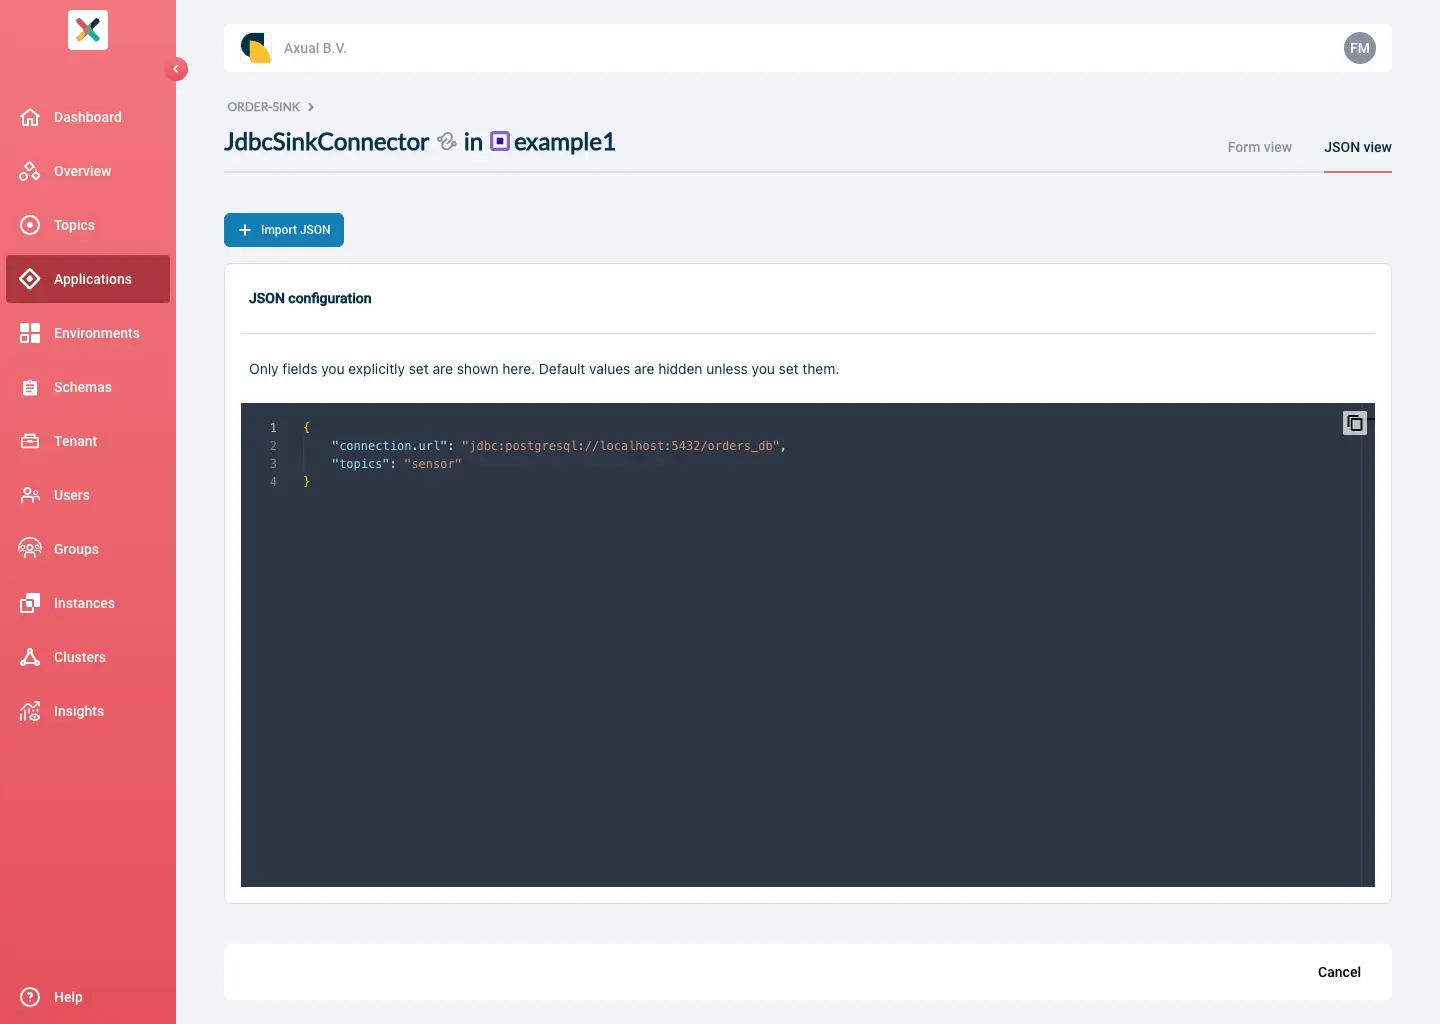
JSON view
Switch to the JSON view tab to inspect or edit the configuration as raw JSON. Only properties you have explicitly set are shown — default values are omitted to keep the editor focused on your changes. Use the Import JSON button to paste or upload an existing configuration.
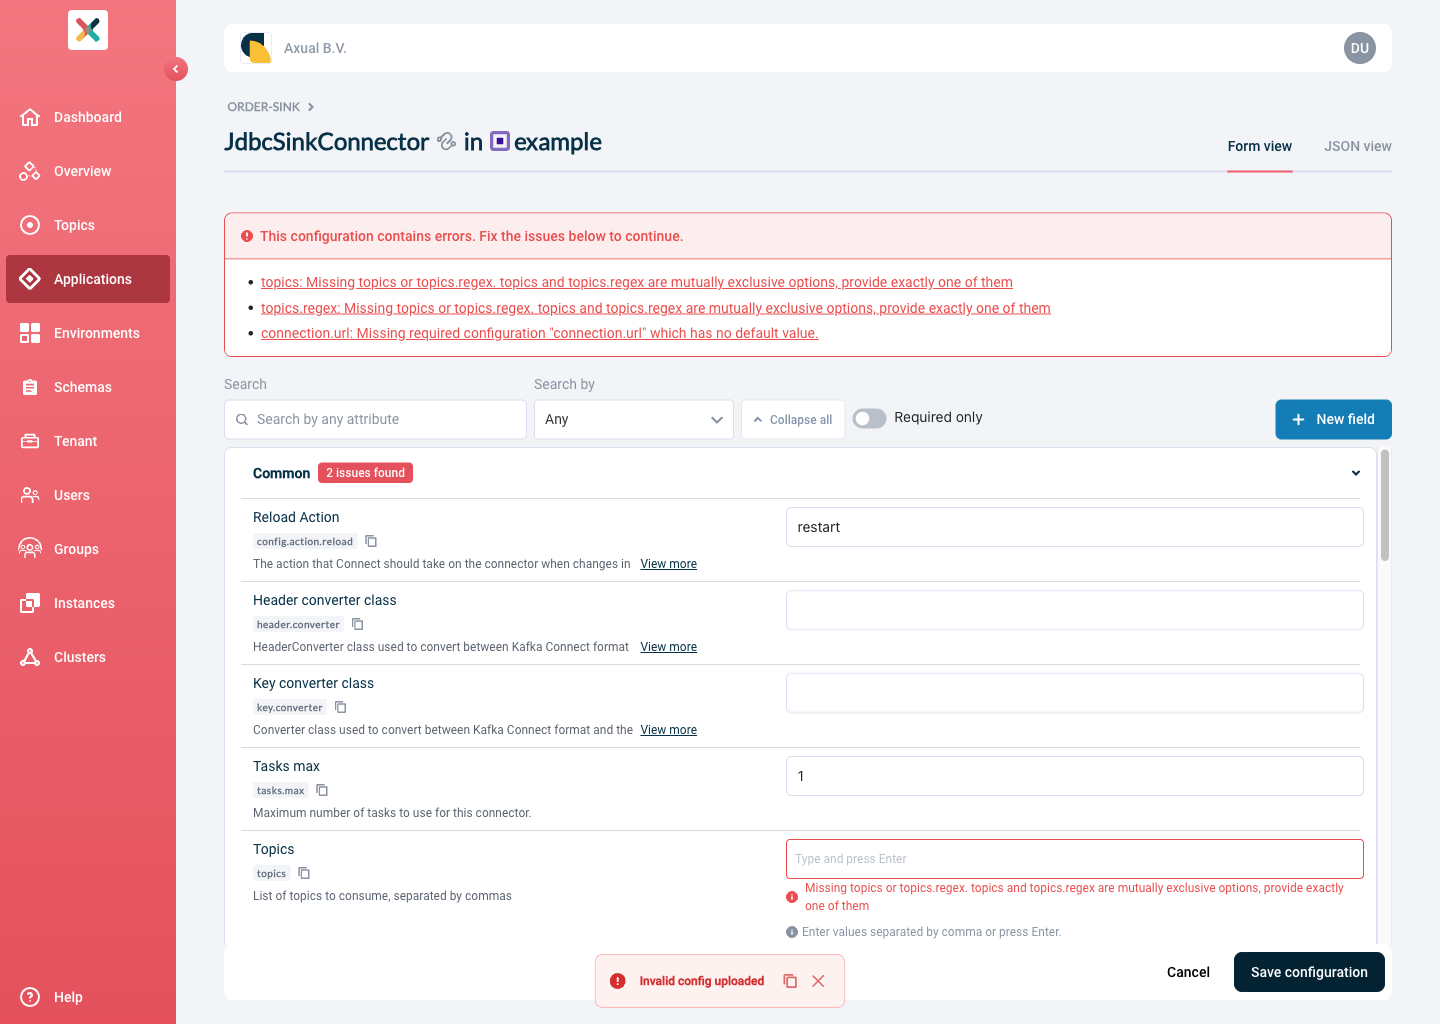
Saving and validation
Click Save configuration when done.
If any required fields are empty or contain invalid values, the page shows an error banner at the top listing each problem as a clickable link.
Clicking a link scrolls directly to the affected field and focuses it.
Sections containing errors display an N issues found badge on their heading, so you can spot problems even when sections are collapsed.
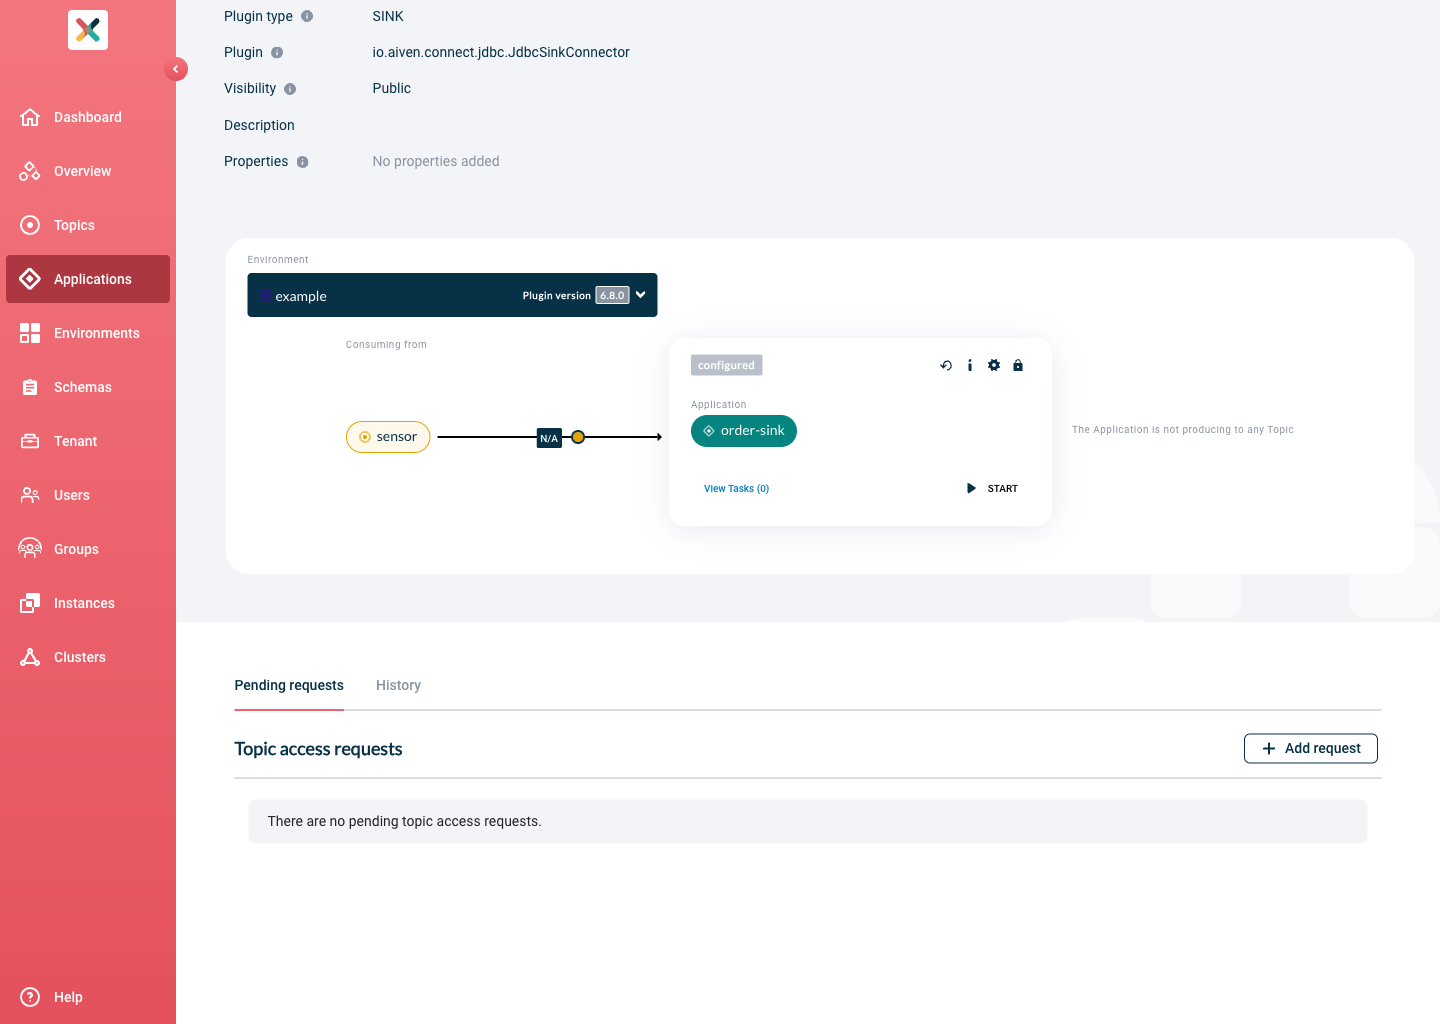
After a successful save, you will see the status box on the application detail page:
| To remove the entire plugin configuration for an environment, use the Delete plugin configuration button at the bottom of the Plugin Configuration page. |
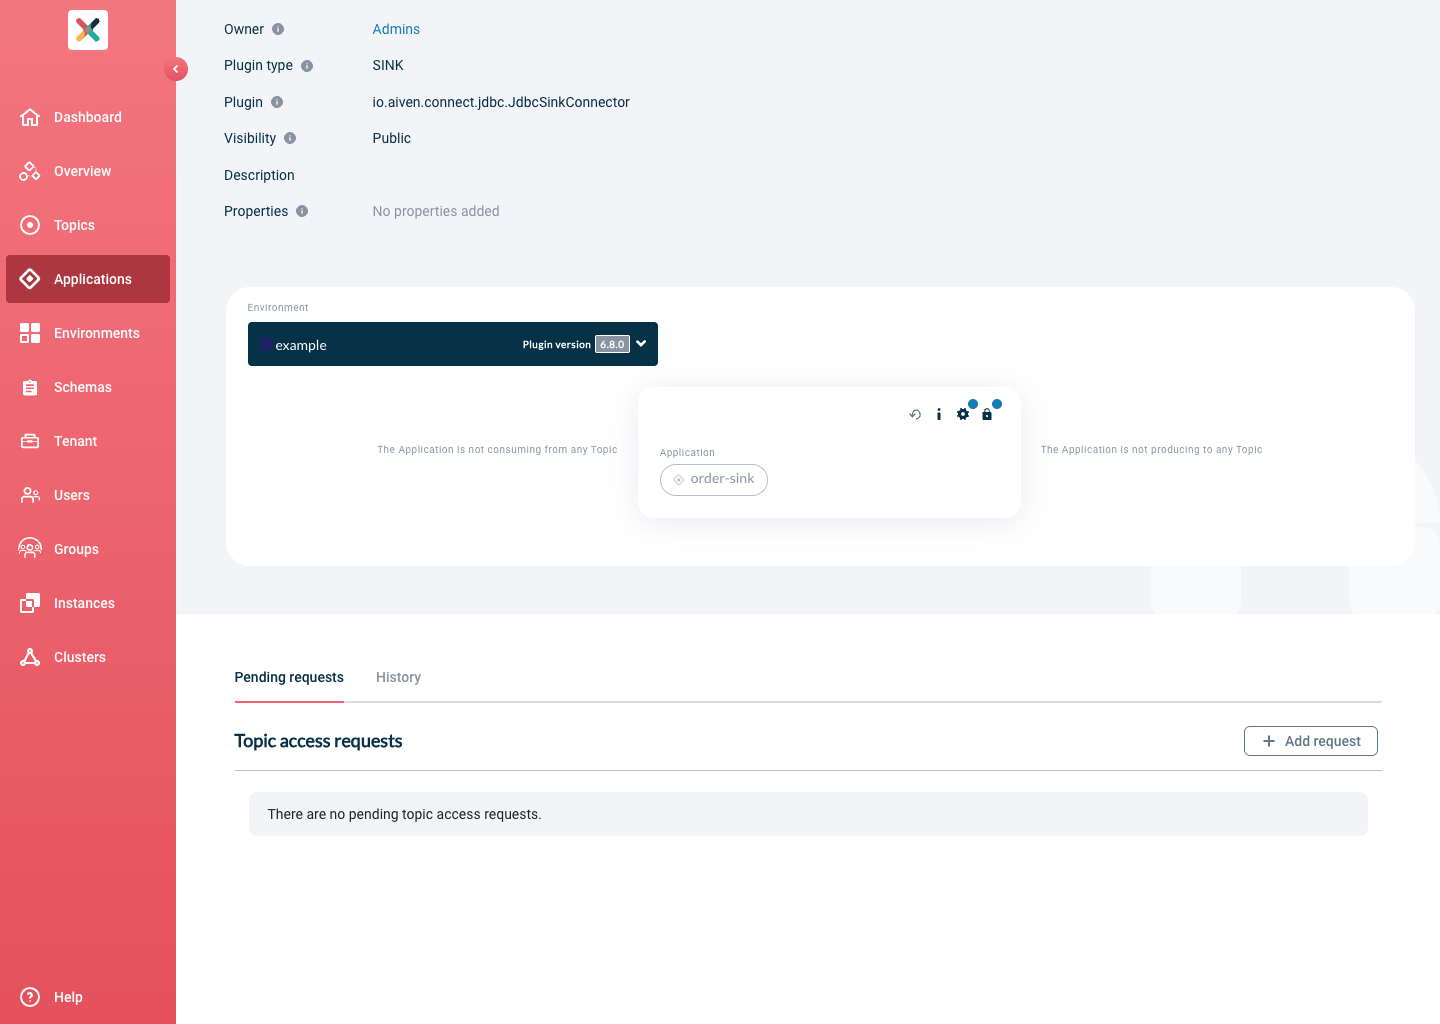
Requesting Topic Access
Your Connector Application needs to be authorized to produce/consume a kafka topic before it can be started.
Follow the docs to grant it access.
Starting and stopping Connector-Applications
You can start the Connector by clicking the 'START' button. Within seconds, the status should change to 'RUNNING'.
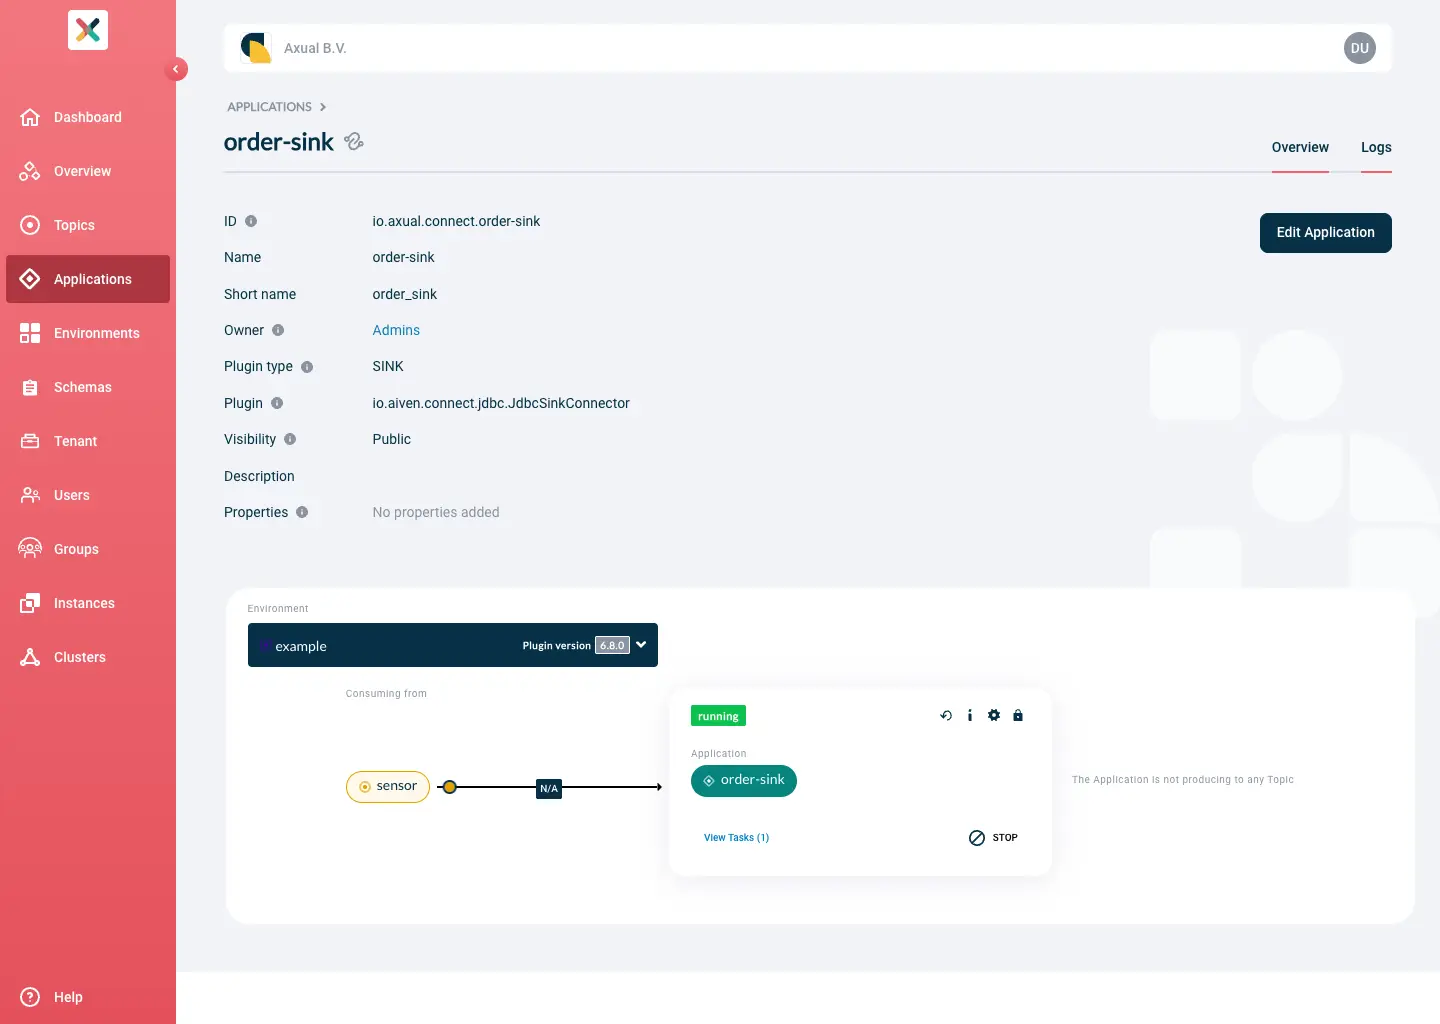
If the status changed to FAILED, you can click View tasks to open up a modal showing you a stack trace that should give you more information. Alternatively, you can take a look at the connector’s logging (see below).
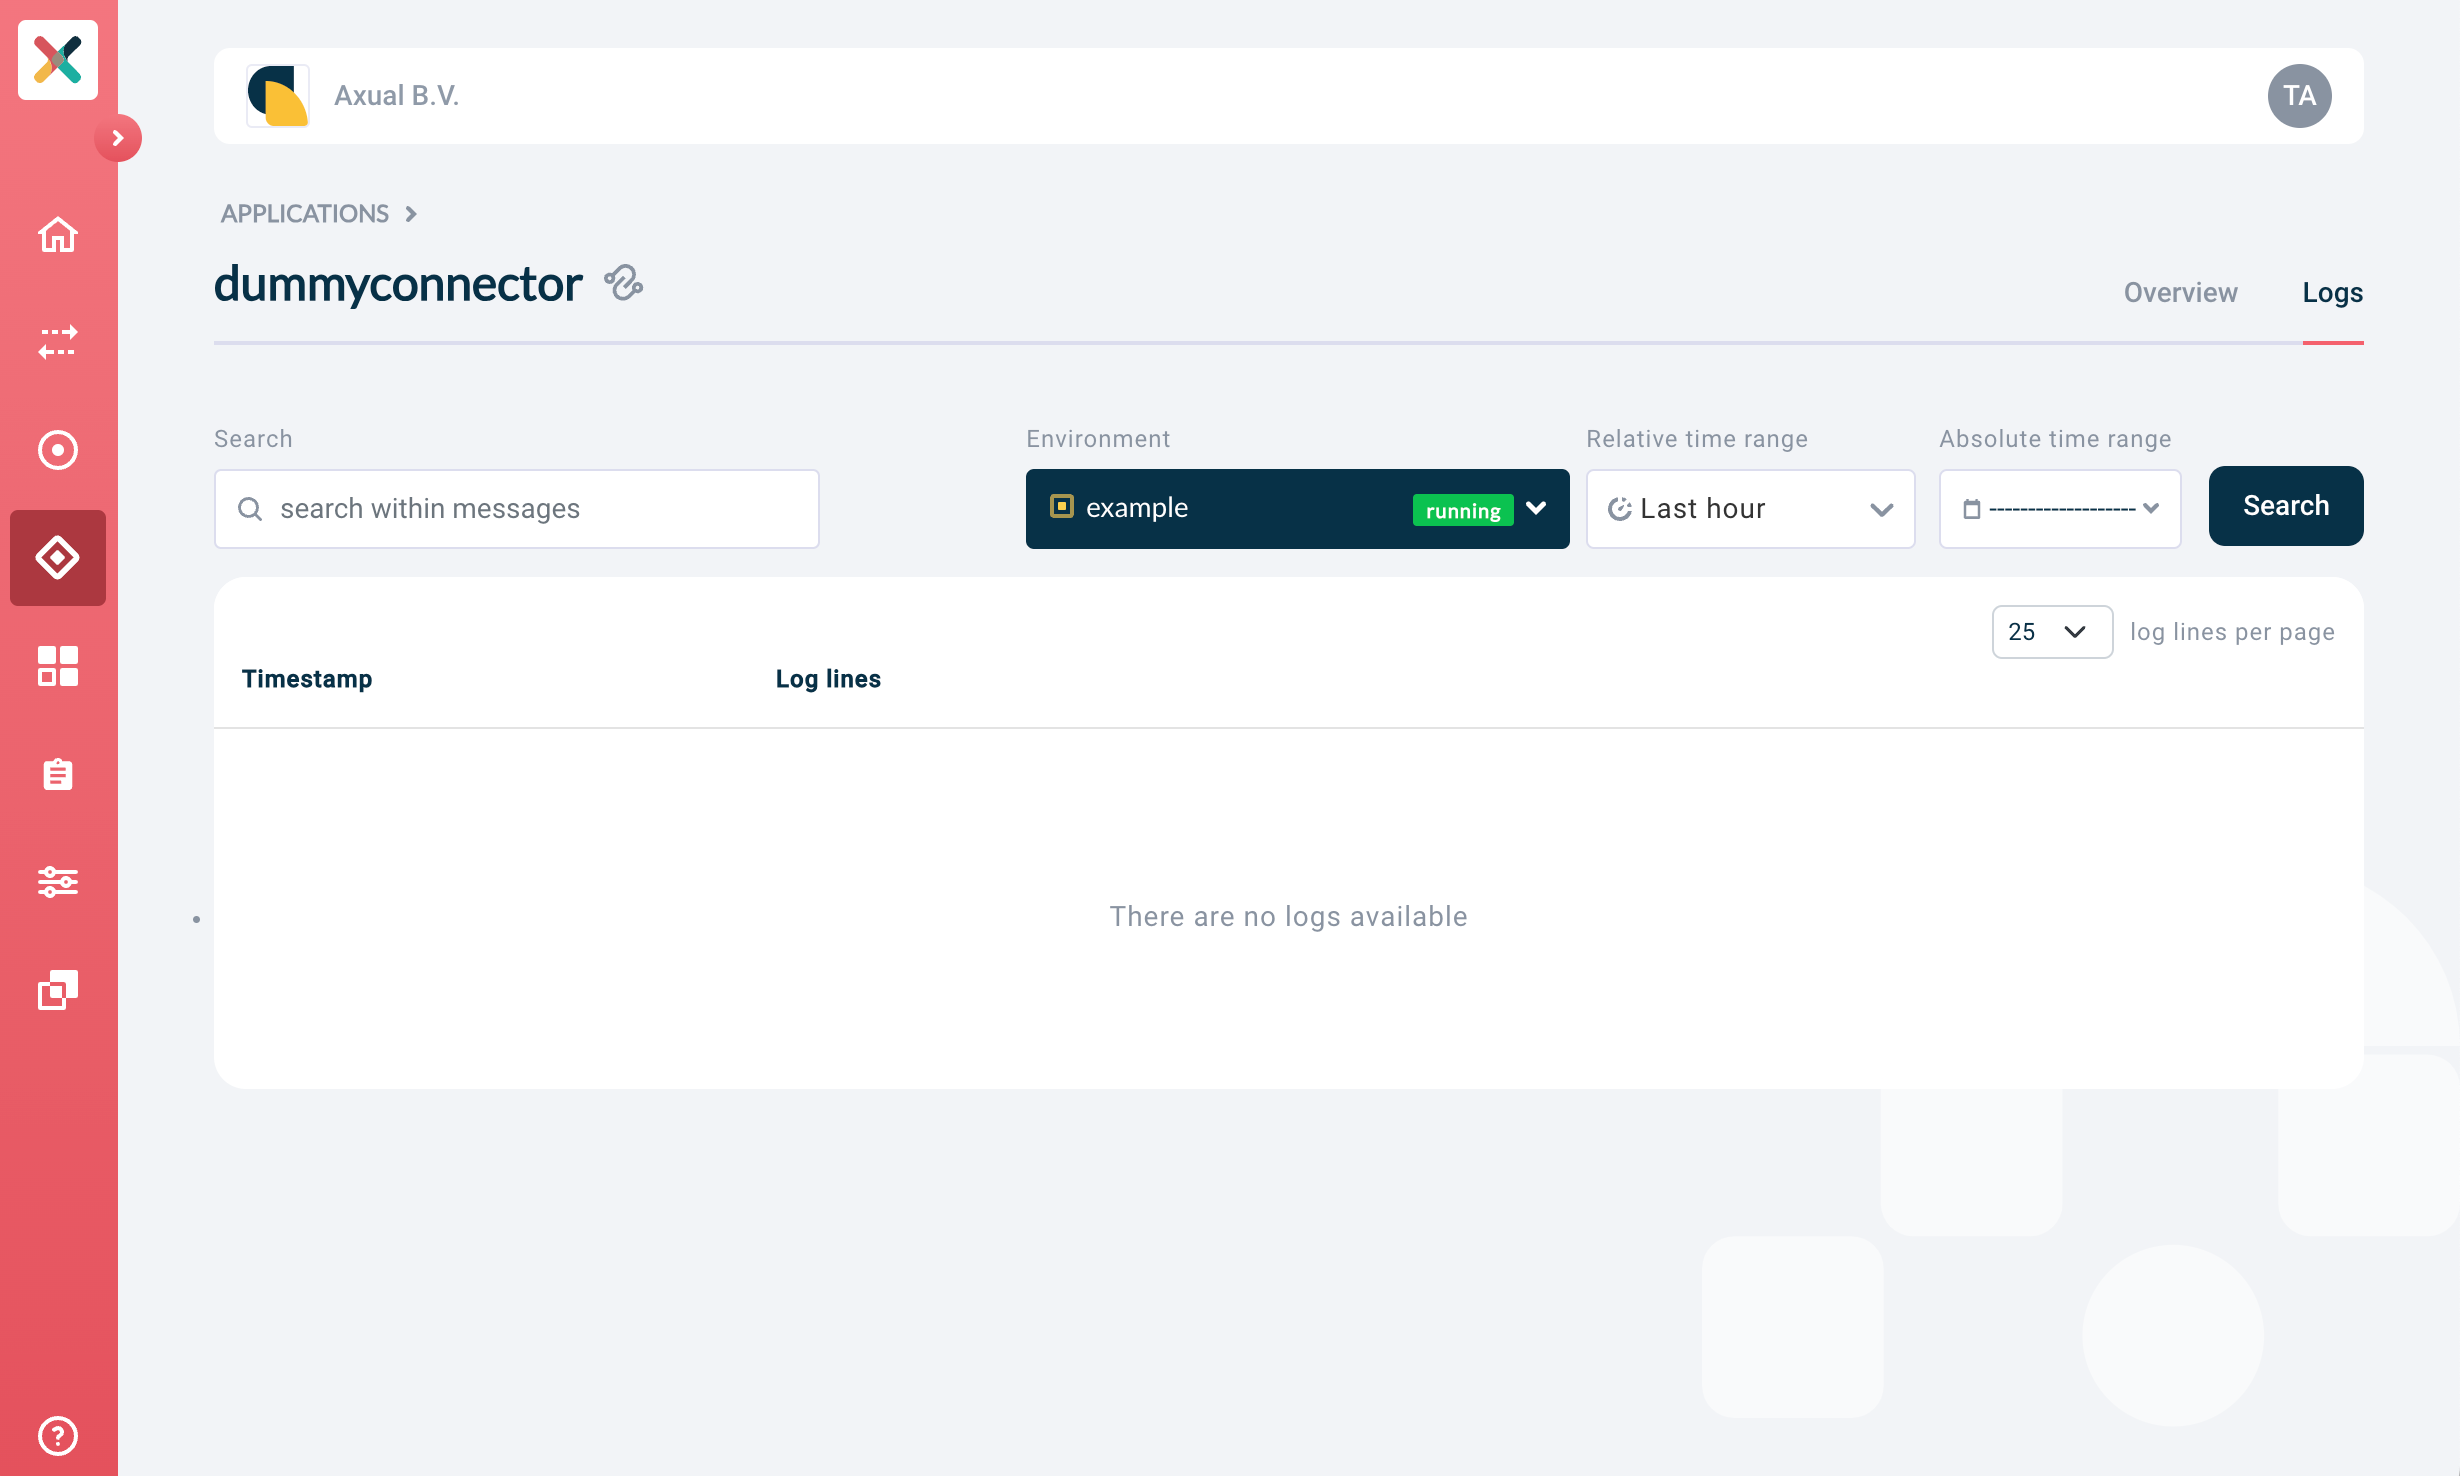
Viewing Connector logging
As soon as you have started your connector application and something goes wrong, e.g. your connector goes in a FAILED state, you can use connector logging to find pointers for the cause of the error.
Prerequisite: connector logging is enabled by the platform administrator. See also Enabling Connector logging into Kafka
-
On the Connector page, click on the "Logs" tab. The following screen shows
-
Click "Search" to search immediately. This will return the logging of the last hour. If you are looking for specific log messages, you can choose to configure the following parameters:
-
Search string: here, enter the string you would like to search for in logging. Use ' ERROR ' or ' WARN ' (including spaces) to find logging on the
ERRORorWARNlog level respectively. -
Environment: from which environment do you want to see the logging of your connector
-
Relative time range: if you want to limit the time interval to last 5 minutes or something else, use this dropdown
-
Absolute time range: if you know the specific time range you want to see logging from, define the start and end of the time range here
-
If your search returned logging for your connector, you will see a screen like this:
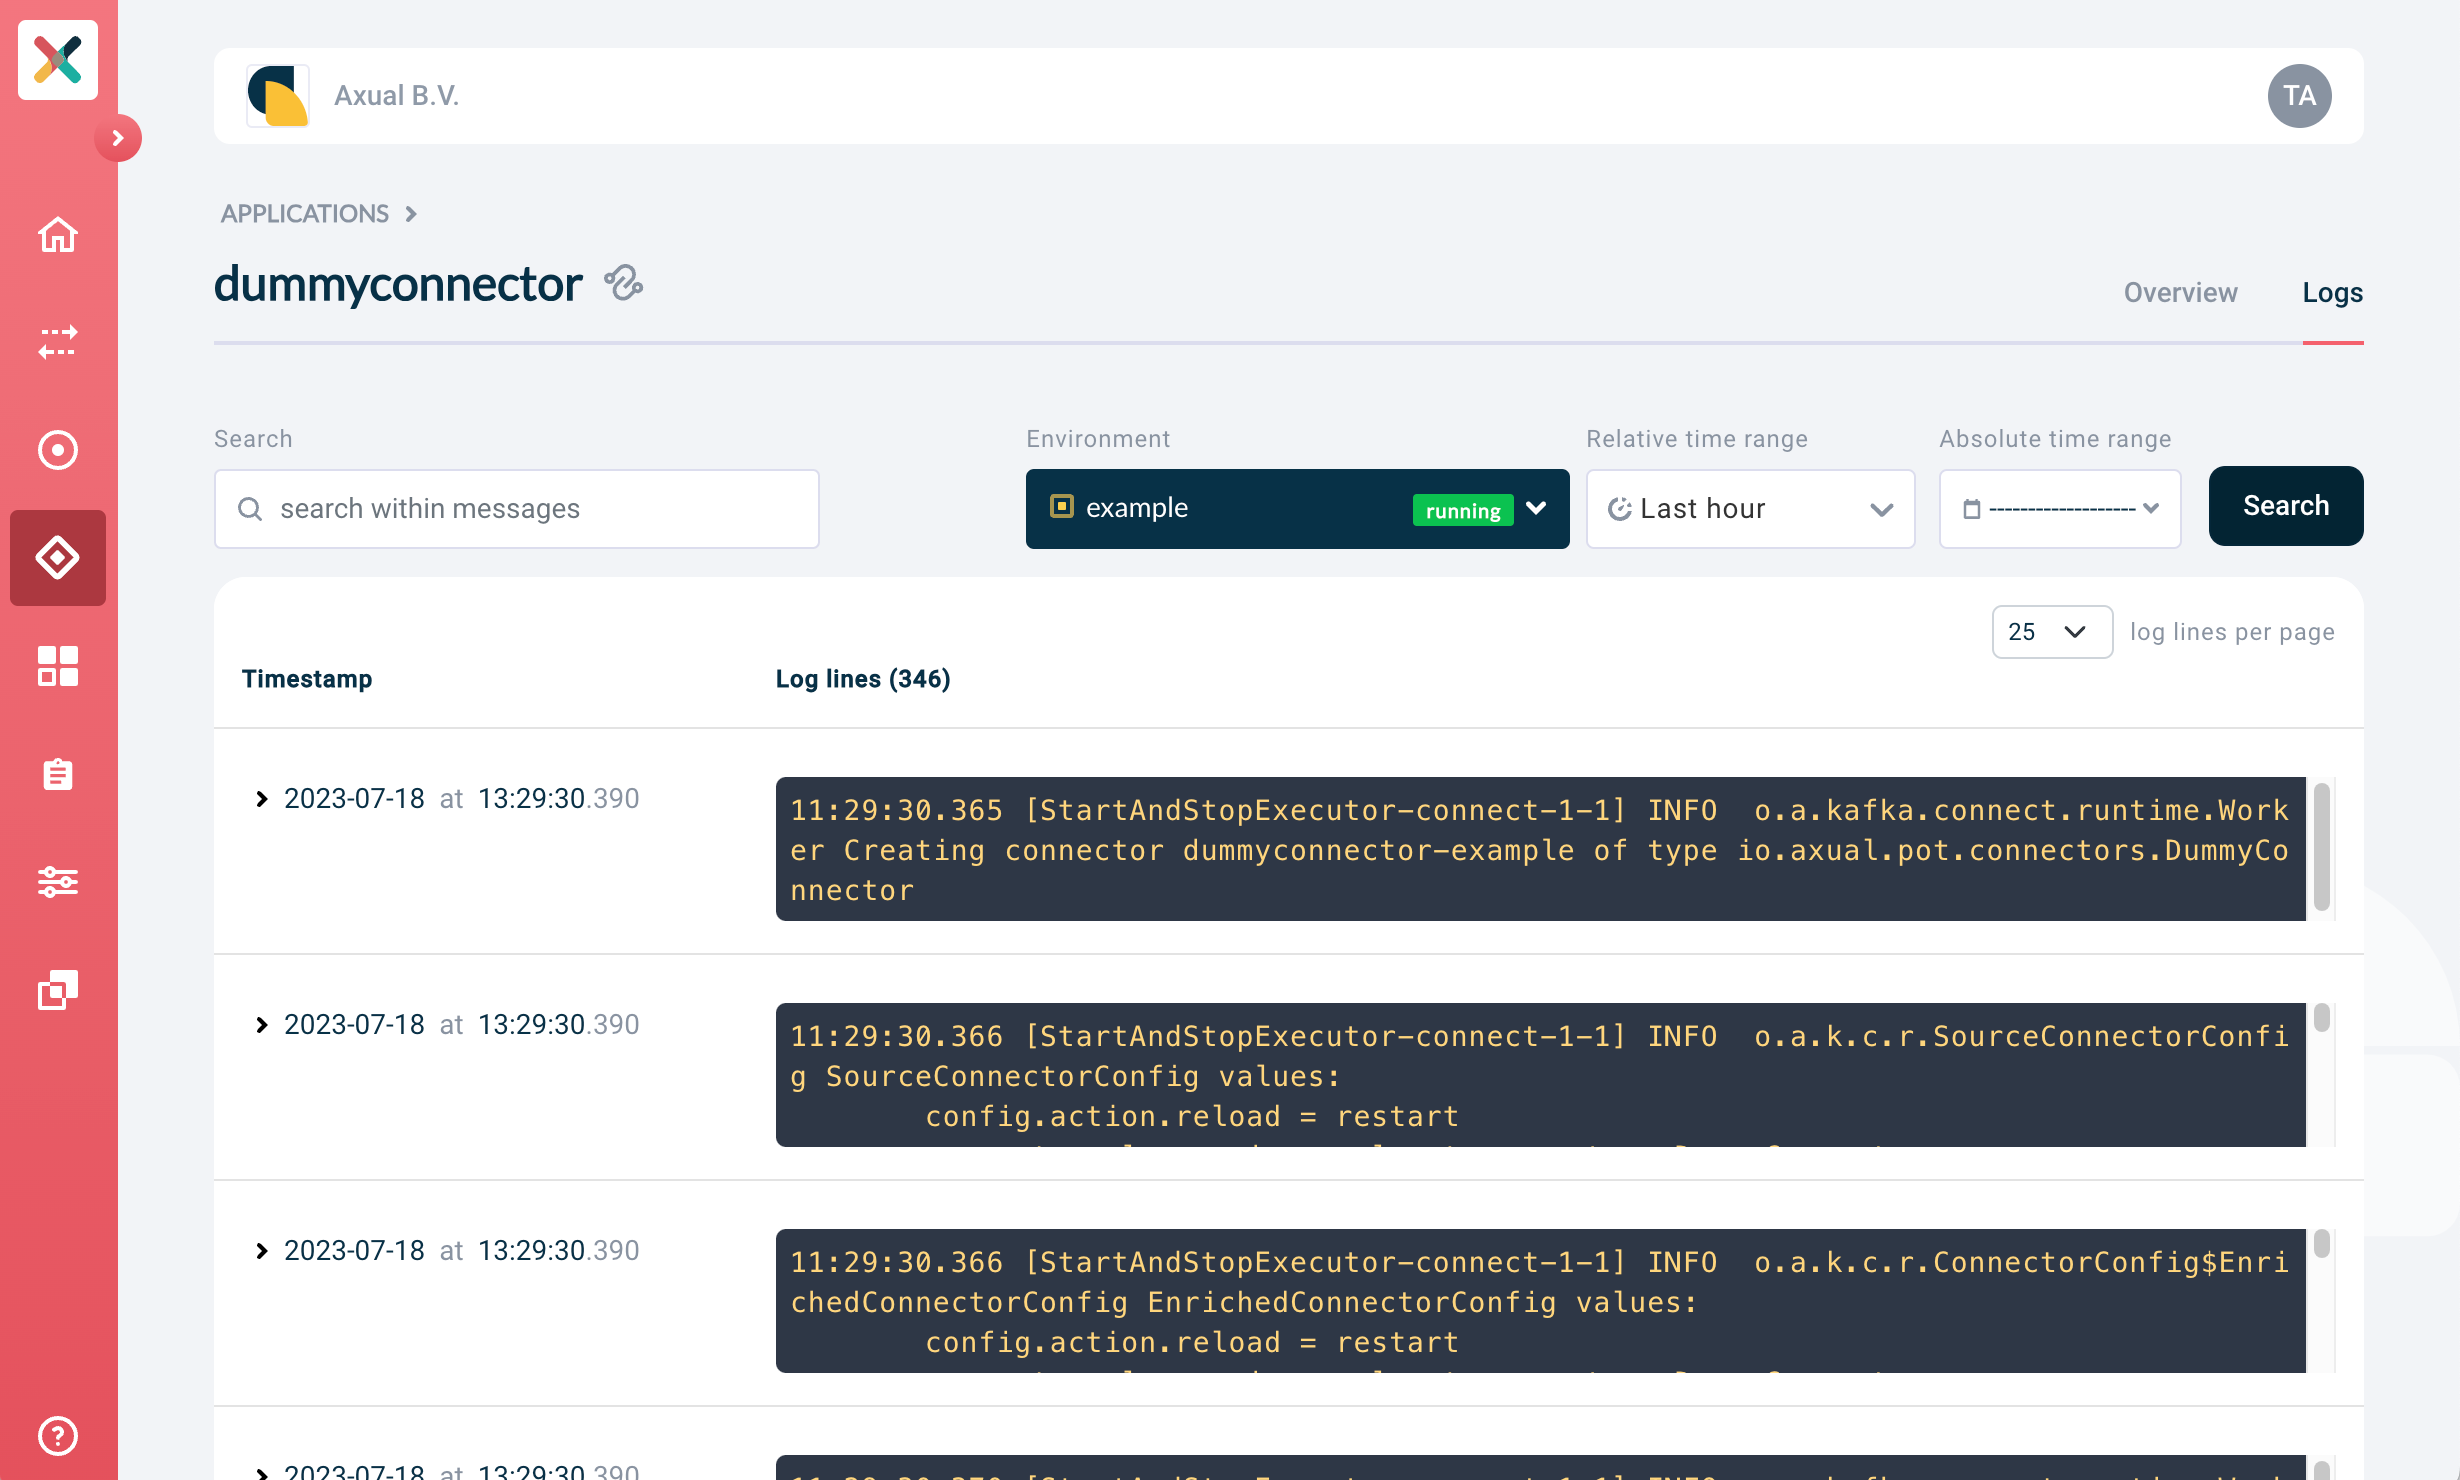
| Search results are returned in chronological order, with the oldest (log) message first. An improvement to allow control of the search result order is pending implementation. |
For instances which have Granular Browse Permissions enabled, users have to be granted permissions explicitly before they can view connector logging. Please check how to grant permissions to users on the connector-logging- topics.
|
Deleting A Connector Application
-
Stop all the Connector Applications on all environments.
-
Follow the docs to remove the application.
Available Connector Application Actions
The following actions are available for Connector Applications:
Connector action |
Effect |
|
start the connector application |
|
stop the connector application |
|
remove any existing active connector and its configuration (including offsets) |
The following actions are available for Connector Tasks:
Task action |
Effect |
|
view the task(s) status and trace (in case the status is FAILED) |
|
restart a task in a FAILED state |