Deploying Axual Streaming and Axual Governance on Kubernetes
Use the following instructions to deploy Axual Governance and Streaming on Kubernetes, so you can use Axual Platform.
Prerequisites
To install Axual Governance and Axual Platform in your own infrastructure, you need:
-
Credentials for the Axual Registry (https://docker.axual.io)
If you do not have credentials yet, please request them here: https://insights.axual.com/credentials -
A Kubernetes cluster (version 1.24 or above) with an Ingress controller
-
Helm (>= version 3)
-
Your favorite terminal
Installation procedure
By following the steps below, you will deploy Axual Streaming first, after which you will deploy Axual Governance and integrate the two.
Step 1: preparations
To install the Axual Streaming and Governance Helm Charts we need to go through some preparation steps.
Create a namespace and Docker Registry Secret
Creating a namespace is optional but recommended. A namespace provides an isolation layer within a Kubernetes cluster.
-
Create a namespace.
kubectl create namespace kafka -
Create a secret for the Axual Docker registry.
kubectl -n kafka                                    \
    create secret docker-registry axualdockercred   \
    --docker-server=docker.axual.io               \
    --docker-username=[your-username]               \
    --docker-password=[your-password]
Make sure to replace the username and password with your credentials for Axual Harbor.
Download the dependencies
To pull images from the Axual Nexus Registry with Helm, you need to log in with the command:
helm repo add axual-stable https://dev.axual.io/nexus/repository/axual-helm-stable --username [your_username]
helm repo update
Optionally, create a Chart.yml file locally and download the dependencies. Execute the helm dependency update command in the folder where the Chart.yml file is located
helm dependency updateStep 2: install Strimzi Operator
Installing the Strimzi Operator using Helm simplifies the deployment of Kafka and its associated Custom Resource Definitions (CRDs) on a Kubernetes cluster.
To be able to install Strimzi, we need to:
-
Add the Strimzi repository to helm:
helm repo add strimzi https://strimzi.io/charts/ -
Update the repo:
helm repo update -
If you want to deploy the platform supporting multi-tenant installations (as described in Configure Strimzi), you need to install the
Strimzi Operatorusing a custom Axual Kafka image. In that scenario, use the command below:helm install strimzi strimzi/strimzi-kafka-operator \ --version=0.34.0 \ --namespace kafka \ --set kafka.image.registry=docker.axual.io \ --set kafka.image.repository=axual/streaming/strimzi \ --set image.imagePullSecrets='axualdockercred'If multi-tenancy support is not required, you can install the
Strimzi Operatorwith standard images:helm install strimzi strimzi/strimzi-kafka-operator \ --namespace kafkaIn the first case, you can install the latest version of Strimzi that supports released Axual Kafka images (Strimzi 0.34.0), in the second scenario, you can install the latest version of Strimzi available.
Step 3: deploying Axual Streaming
-
Download the example
axual-streaming.values.yamlClick to open axual-streaming.values.yaml
global: clusterDomain: "cluster.local" imageRegistry: "docker.axual.io" imagePullSecrets: - name: axualdockercred platform-manager: enabled: true platform-ui: enabled: true api-gateway: enabled: true organization-mgmt: enabled: true topic-browse: enabled: true api-gateway: config: gateway: endpoints: platformManager: enabled: true url: "http://axual-governance-platform-manager" organizationManager: enabled: true url: "http://axual-governance-organization-mgmt" topicBrowse: enabled: true url: "http://axual-governance-topic-browse" billing: enabled: false metricsExposer: enabled: false platformUi: enabled: true url: "http://axual-governance-platform-ui" keycloak: enabled: true url: "http://keycloak:8080" topic-browse-config-api: url: "http://axual-governance-platform-manager/api/stream_configs/{id}/browse-config" permissions-api: url: "http://axual-governance-platform-manager/api/auth" local: auth: issuerUrlForValidation: https://axual-governance.apps-crc.testing/auth/realms/local jwkSetUri: http://keycloak:8080/auth/realms/local/protocol/openid-connect/certs sso: keycloak: advertisedBaseUrl: https://axual-governance.apps-crc.testing internalBaseUrl: http://keycloak:8080 useInsecureTrustManager: true logging: filter: enabled: true route: enabled: true annotations: {} labels: {} host: "axual-governance.apps-crc.testing" path: "/" tls: termination: "edge" platform-manager: debug: enabled: false image: pullPolicy: "Always" mtls: enabled: false config: spring: datasource: name: "fluxdb" url: "jdbc:mysql://axual-platform-manager-mysql:3306/selfservicedb?useSSL=false&useLegacyDatetimeCode=false&serverTimezone=UTC" username: "fluxmaster" password: "Passw0rd" driver-class-name: "com.mysql.cj.jdbc.Driver" jpa.database-platform: "org.hibernate.dialect.MySQLDialect" flyway: locations: "classpath:db/migration/mysql" axual: api.available.auth.methods: "SSL, SCRAM_SHA_512" instance-api: available: false operation-manager: available: false connect: available: false client: socket-timeout: 60000 security: header-based-auth: true # Disable Keycloak and rely on headers passed from API Gateway governance: vault: enabled: false uri: "http://vault:8200" path: "governance" # Required: change to your roleId for PlatformManager, see step 9 above roleId: "744062d7-1d86-3496-bfdc-76f4d7352a2e" # Required: change to your secretId for PlatformManager, see step 9 above secretId: "634799b5-3ac7-ff6e-071f-a620243318fe" # Vault Configuration for Connectors vault: enabled: false azure: keyVault: enabled: false subscription-management: enabled: false server: ssl: enabled: false forward-headers-strategy: framework platform-ui: platformManager: fqdn: "axual-governance.apps-crc.testing" # Window.ENV Configuration config: docsVersion: "2023.3" mgmtApiUrl: "https://axual-governance.apps-crc.testing/api" mgmtUiUrl: "https://axual-governance.apps-crc.testing/" organizationManagerUrl: "https://axual-governance.apps-crc.testing/api/organizations" topicBrowseUrl: 'https://axual-governance.apps-crc.testing/api/stream_configs' stripeBillingManagementUrl: "https://billing.stripe.com/p/login/test_00g15x1UV4hKcI8eUU" # Feature Flags billingEnabled: false insightsEnabled: false dataClassificationEnabled: false connectEnabled: false clientId: "self-service" clientSecret: "notSecret" configurationType: "remote" # Stream Browsing streamBrowseEnabled: false # This is for deciding on SB/CB(false) or TB(true) topicBrowseEnabled: true # Hide multiple environments singleEnvironmentEnabled: true organizationShortNameEditEnabled: true # Stripe Subscription subscriptionEnabled: false # Keycloak Configuration keycloakEnabled: true oidcScopes: "openid profile email" responseTypes: "code" oidcEndpoint: "https://axual-governance.apps-crc.testing" # Wizard Allowed Providers enabledKafkaProviders: - aiven - confluent_cloud - apache_kafka organization-mgmt: config: authStrategy: "keycloak" keycloakDomain: "http://keycloak:8080" keycloakCLIUsername: "admin" keycloakCLIPassword: "admin" tlsVerification: false -
Determine the domain you want to use throughout the deployment. This domain will be used to access the interfaces of the services you deploy. Set the domain in your shell, it will be used to template a
values.yaml. Replace[YOUR_DOMAIN]with your domain in the example below.export DOMAIN=[YOUR_DOMAIN] -
Apply your domain to the
axual-streaming.values.yamlyou downloadedsed -i '' -e "s/<domain>/$DOMAIN/g" axual-streaming.values.yamlNote: the example
sedcommand above works withbashonMacOS. Use the correctsedcommand for your shell/OS. -
Install Axual Streaming
helm install streaming axual-stable/axual-streaming --version 1.0.0 -f ./axual-streaming.values.yaml -n kafka
As soon as the platform is deployed successfully, you can continue with the next step.
Axual Streaming certificates
In a default deployment of Axual Streaming, the following certificates should be used during the onboarding in Axual Governance.
| Download each of the following files into the same folder, you will need them later on in the configuration of the platform. |
-
cluster-ca.crt: the CA certificate (root + intermediate), used to sign the broker certificate.Axual Governance and other connecting clients need it to trust the connection from the brokers.
View cluster-ca.crt
-----BEGIN CERTIFICATE----- MIIFLTCCAxWgAwIBAgICEAAwDQYJKoZIhvcNAQELBQAwIDEeMBwGA1UEAwwVQXh1 YWwgRHVtbXkgUm9vdCAyMDE4MB4XDTE4MDUyOTExMDEzNFoXDTI4MDUyNjExMDEz NFowKzEpMCcGA1UEAwwgQXh1YWwgRHVtbXkgSW50ZXJtZWRpYXRlIDIwMTggMDEw ggIiMA0GCSqGSIb3DQEBAQUAA4ICDwAwggIKAoICAQC9uOuzJekmeo3hl8fjQlKS HApS3llcliq1YrXpkMbHAA9StHaMHPW+Dzr2/+cdfBAmN3sujCY8Paq15QI+TDOq KA5SByCBQKXx2qulBPcZs3mDMt+KxAaeWfwR4Nj0NNKbmw2HjDddo77joeVOuOX2 4o1wXzmAAolVMIcRYA11EMWNUtYrHCzBa7RfYht2G5dE69ckrgfw1Nxs01Sbg+xP sK9aK/LHPUalYZNY+76x7vabEpzaPfpyKzDTWA20SPk0WfTf9/+K3o+urzDG8O/q w9xbBOzWohGmRyA/z841p1SD7inpZcyO/KeW1yTP2WyFxADwUrv2mEYXnma/Gdna G62IQYk/UMex9W8pT6tfwrg/36sSwr88yPR5dJxzjHUE+w/rYG3k+K+EqvZ5qOC5 32AJ9BS2nbNuGpmRU1qoMCwpL7B2E/CKJLIdFcf/qmcnWJEXo+u34+fQZg8XaDCI XhUqAHz6YkjCiFGd/JwL1IqsfxFsV9wHTUbW2AumglU65ZrjhXrrzE7Hk9ng1spJ dOwfBihBNjnr0mKHY9leJ3chJ9HQ55/fEgcRNrj8EC69QCeAtpY5yOAjKpA03UvF grDt8CIyIehNUwTXIhQSHZU4eZ0rzWf0vvMbhL2FvKtphbpnNKoXeNLv2IMZpT4B VwsqLqaIkl/I4FPpYBoSYwIDAQABo2YwZDAdBgNVHQ4EFgQUa9IpV4tSNiwFCsZX uRp0eKwTH2YwHwYDVR0jBBgwFoAUdKOPDqSFQ6Bfk0I/asBkByt5gsUwEgYDVR0T AQH/BAgwBgEB/wIBADAOBgNVHQ8BAf8EBAMCAYYwDQYJKoZIhvcNAQELBQADggIB AKoNIqiOdjlUBNg7cvR9Su4KgGrsZf78pG1H2MlNxJjFM/80EiWEfze/EG2MLxFq 8vToIHDjb0kVetYpdmfHNXTTlaaroBlXwyUYToPzQ985qr3LD8RhYZFAsiZCTtpJ 4FT6sh/mccTyx8G8+ZS6mn/le2WPj/t6beNLgbdl5n8fghdQcmT/TqGXE50UftWt HSx3fsq2aKuNdVzhKzTin50IbiE9DV1dKo6B+ipOy/Dz5GMv3Z/3ntLTvxabCMOl 7s7WsUE7VPABRSifUS80Z9Ai38faLSu+Ouzx40ceXwvlFQtJ2LYQ8Ru5Q63k2wB3 EOE6cgAhiYExrz3fDDtUkui9vIfWfTPMnXR7xQ8YqK4Qqld2ESxvMQU2jzbZKSf+ 3sWnPvN4HTg0cfysmOdLGZwf3u8A9tMtxhUEtxUx7r76M4ekSKdNv1Nf5u5N/h7b AbEqSp1XADTxkE448i7hNJzn2Ce6JtFya231Ni0xyYKQIajP18jNypAw1eABYFkN 53vQTUfqcbtcrCios1xRdDqfgkYaKZv7p63aoObFTf/mmG7sFjGAEPQscagOukwN wnkjCVifVbk5qJUaUWSLeYziI+HYkEA9P/h4o83nbf0YgBtOFoc0XWKmKagHifZN SEJ9kRCWzYaL2ChiL6jHGh26WT/hbNKeAlcxPnT4u/l1 -----END CERTIFICATE----- -----BEGIN CERTIFICATE----- MIIFJjCCAw6gAwIBAgIJAINuAirfnRU6MA0GCSqGSIb3DQEBCwUAMCAxHjAcBgNV BAMMFUF4dWFsIER1bW15IFJvb3QgMjAxODAeFw0xODA1MjkxMDM0MTRaFw0zODA1 MjQxMDM0MTRaMCAxHjAcBgNVBAMMFUF4dWFsIER1bW15IFJvb3QgMjAxODCCAiIw DQYJKoZIhvcNAQEBBQADggIPADCCAgoCggIBAMVDjbhq3TGuQ6INTZ+dhSIgsdbq w2nxF3myrS7v89bcNxMyLypWYTmR4OAYRXRBnW4KX6sTubPyL3ogPz6hXmfmPfAz +X//HTIiybL3e3qwxqWphp09+JT6veEp/e/wEEjSMj5nsxkDEjj9JEQWu/1B+N+V XOJkTYFy05ZgeWplkyLwT71myF047aISK27a+VebBMaPpvvetScbMSwxAbk51cGV UC4gpwvnvsbp/CRuMV0dYzkeTmxgn860l3s8+7qUJoOrtiO0cDpv97SK9Ck9ef1k R6KFttzxb/u+eMFi3RUErEGwE8P3thTseXRkp5hMwcyaSQv0wfLawlwcNFGOzsBx fJS7QUIUpEyzRqj5Ppgaj530APxbgitLOfVLZ2DvcBcmnQns6OE+uwymuvAj8Ftj 6AFJXH2lmswHLl5uD9kIOwmpZg4NZLP2Qv+WOT6HLgI7Kv1z0OV2H7UlWA7hwQXl oQ6fJ2YLEhT+GM9xHKJ+DQCxvjWvtGUSb/Dk0j/R9mpSFfHvVJgE/xV+7F7Vlyw5 /cDpF3GZOTGQ/MFy4RqRrTtjnZw2/bZZyJ+Xb743OeQhABFUdadh8cmyehDregtr alHxtjKxCxrT55OHCYhbCoz6nEnQURD7EPQhU5puUKalRq2ApDkveIk8uj0HQmQm KyRuNX7M6vCoWnpxAgMBAAGjYzBhMB0GA1UdDgQWBBR0o48OpIVDoF+TQj9qwGQH K3mCxTAfBgNVHSMEGDAWgBR0o48OpIVDoF+TQj9qwGQHK3mCxTAPBgNVHRMBAf8E BTADAQH/MA4GA1UdDwEB/wQEAwIBhjANBgkqhkiG9w0BAQsFAAOCAgEAbJanqR4P mr05AyAu8vlrLsleXA8VAPDiaaYStYH5cIdBBWkaIxanLFDmbyQwKkKdkHQWV9X8 1P52q49T9RsoBsEOmwdiaCY2PEUz7Y3bFW0UeM+k65VlHlXWywRM6+O02t4TrJXH F6h7vPon01OwhgW9Yil/Kr+yyZK50Ic+pm4UhHmtxY932cNaRCdae5tKsjabsP7Z rdAksLia8mTp+HADkZJ1uODxyDh0S1WMKB5JoHYBrmtUr1NYLgRC6SinhK4r7rbi EWuurE605Nm//jv3Czdy8gEsMDtXLZYY0iqGnD11MAJFXyQ6PG2eq1cXcsJNRojm 8D4ipfQ+z4bp9dDVR2DzVyTYe4yuhZuIe2phOhPc8KkBaXQRMHfVKyeEmzqEFLaM kfaDZkRsrMZSqh+KJoxDG3h8UqssChX+cuZdsjRhNWRqfbB20I9Upwa+XooyCU4E EkYyFTMchtvbYZEN/XvlPfhK5JB9eJ5rrcE8hKsP3gftchWWqCDedKugvZW/t5Vk lc+z4IjiJFnRDfcr4Z5V2Hpseyno3AEK7aUdJlmuPnxoImFXfQ4jUguM/wznJHl7 Xv9T0oaBVHM7Bd6PlES04Oho0KZXS6NryTsZn9GFV4qGZj5lEeOVl15AOfeIjP/I okA2uUH/ZuJlR/BEmqbLt5HWPRNT/GgLfPY= -----END CERTIFICATE----- -
platform-manager.key: private key which (in this example) is used by Platform Manager to connect to the Kafka cluster
View platform-manager.key
-----BEGIN PRIVATE KEY----- MIIEvAIBADANBgkqhkiG9w0BAQEFAASCBKYwggSiAgEAAoIBAQDa1WkLb9cnmOav zGdH9h+M5R3mcuQQ43CJGoatLsXmK696VTtIQGpCt4LWB2FcMJ+eUZaHNIjBM1zp Iq9+SS7ZYy3YAKP8IXXBkK0E6/4u9juacRpZ2Jg7LBCYBNVPA/CQ6IJJ+iZ5tISB ykHmSkn/t6rE6OagpHdqGNINSEDWXGK3x5kYSekZqdcZsI5d8CosghrKvURzdY6M HrX7ib1ED8bLAP3KPe5EYtpHGvNUOBvhfRBFM4LLK0GG3OEPN0k6Qf+O8h7Y9Mtv qXqie52RD50Gn6ArPIuEYnz6KtIoKMjxy08GXRM38rfjC8bxxnr7k4npfC25aQFL +AwAuLOHAgMBAAECggEALBUljgo/m1hv0CYrABISlP1qoouuacCHYPcY/jYX46AV P12ADbP8M+hn0Nm3wSyCWxAwdJgenFzOcKBuHdB8QYp7J7IpVpce85lDYWRw1eEA bMIv/r1lHTZpOVZv6fTvNyG/bUuZCJdWwhaOY+e/NGY5XmVUYDQBYjwRxF8zwHqI gQCqIz4L9lwMooblODVH23LaR3wY5G0abnY6ZxlUtTgrGJ3uzLKMjr97T2vqCLTz pToIiqH3HSd6ncN8zfRj1OK+CQv6Wm7msSlXGv4pWiENHni+n3+jI7R0Kf+rAaxH taPK1HNDDmJ5XdhHr5fYVGuoglkt1q2wrDUO+Hs84QKBgQDo5WcDDca1gZmeHI++ HZsmPcdnAfL+ayD5x73P9o8y6KR3pW2iH5rOwZZxF+wjyyxUU0vzGCNUjikcEYUO OB/UYgXCWR/PfpY6RKPZjaC52XiQ2c55MoyWB0gQ5WdK2f0bXh4Q1Gs5IKZ83Ghq BtraGPsobdSyospUFAH7mdLXyQKBgQDwiuEgVujTaCDrGnTb5z15MfaqHv7G7wtr 8CaNudMGfNUPwwK2Z3q6CDUy3zq6MXUG6/kUFo9QHLEE0ZCM90HtRt6GH97jENB8 nMTbrLNnGt04AgsIVDUzl2fBjEEfuz1MCqtpPQjb9Zr2ffA87MqCl1u/GkdWK7AG V3UXUGZ4zwKBgBgqNVYLx+JtYBMXw5JmYALHxjjZ6uybEQDZyMgbPSB7IxWHBKkd vmJVk9aINOhB3IejXO4MQx4y4fEXoEapbCQNR6uys6pD6DKDjLy2BUdDWU8uSk4p AI1QlBmss9sAY1LDoTr9z2JOEPhDplHaBDs8/FJlkvw2B+hRayNAArCBAoGAaDRR 2Letvz/B2veoHkeryuAJMqOgzb9q3ES5/vW8ZHgZuO1LNIfZk9PQcAxinZylTO1X BwvK4/K6ARNkIp1O0yK7bbFK1mVHXGRxp5TGV2k84nGIJACO153ElgVThRKROGr6 3OlS+C8LBbODKnGOPUqitUQGGV9tryGeGQ58heMCgYAicgNAF0BQFqBR/V8A5WZW 3sfzq4rWcHXT7a10yWhVP4BDaKUyPOplLTaVzuU5hIzNeaNu/VCQt7I1VzS1dRrb 9Ct6ppN/esgYNL+8V/JY3Sr3b33Z8GmNhxz5MKCjSbyIplwztaMA3p/2b9p6iGzg hPeCOXiO6U8BmSkWbFg/vQ== -----END PRIVATE KEY----- -
platform-manager.crt: certificate which (in this example) is used by Platform Manager to connect to the Kafka cluster. This certificate is already authorized as superuser in our Kafka cluster.
View platform-manager.crt
-----BEGIN CERTIFICATE-----
MIIEPjCCAiagAwIBAgIQKN8xYMLPhiCZbAaapZM2rzANBgkqhkiG9w0BAQsFADAr
MSkwJwYDVQQDDCBBeHVhbCBEdW1teSBJbnRlcm1lZGlhdGUgMjAxOCAwMTAeFw0y
NDAyMjcwNzMxNTlaFw0yNzAyMjYwNzMxNTlaMEgxCzAJBgNVBAYTAk5MMQ4wDAYD
VQQKEwVBeHVhbDEOMAwGA1UECxMFQXh1YWwxGTAXBgNVBAMTEFBsYXRmb3JtIE1h
bmFnZXIwggEiMA0GCSqGSIb3DQEBAQUAA4IBDwAwggEKAoIBAQDa1WkLb9cnmOav
zGdH9h+M5R3mcuQQ43CJGoatLsXmK696VTtIQGpCt4LWB2FcMJ+eUZaHNIjBM1zp
Iq9+SS7ZYy3YAKP8IXXBkK0E6/4u9juacRpZ2Jg7LBCYBNVPA/CQ6IJJ+iZ5tISB
ykHmSkn/t6rE6OagpHdqGNINSEDWXGK3x5kYSekZqdcZsI5d8CosghrKvURzdY6M
HrX7ib1ED8bLAP3KPe5EYtpHGvNUOBvhfRBFM4LLK0GG3OEPN0k6Qf+O8h7Y9Mtv
qXqie52RD50Gn6ArPIuEYnz6KtIoKMjxy08GXRM38rfjC8bxxnr7k4npfC25aQFL
+AwAuLOHAgMBAAGjQTA/MA4GA1UdDwEB/wQEAwIFoDAMBgNVHRMBAf8EAjAAMB8G
A1UdIwQYMBaAFGvSKVeLUjYsBQrGV7kadHisEx9mMA0GCSqGSIb3DQEBCwUAA4IC
AQBJSNDNGHDqLKat1Ommkw00hrUT4cCjo2lbVCS22yf4Y5GDv8EnbxLZfJD582Uo
SPtaKJjzwW+53FSa/fuBCfAzcSSh5DrG5qJ9uDCDXx6IMeElrMMEbicU21vJ3mbj
OsMnlgEBaQ9IYeaSlIFWuO1DeZUFxUrEsd012MNuosXCDfITUdX2Wu7P4/0IyMF2
PQ9S/ktV6GJn3pI7868m39DdSX9hjIOKamdyR+ywdXW+PUKH5N4WD9SuYHBXGlBj
EsWxaN91FhKvh9L4K9J+VWep9dsaohZlJWxyGOBcyZr22+Qd8biPVpY4FkVp/u8k
FXLH1ZYPSSZM8zVVFKGgdj3zX5jQl5D9QeW41N2Zan9RU7J7kfz2A31h0CoOGiEY
QwNyF3ep+tyzBzk2PTrYU3AuNFiTjibuE0/jOUXk9UIBOHtwaZ/upTnCcdoyj8oK
/Ohb2XTRN/Qzf84odLB9KUkNC++LzzyXeXe0poUAtaFUSBKHttesCtCns+URk77U
1H/s3ah4mkNyUl2bEZXa2qTdEyBFcSiaXZ/3VkcU827YyfI+cmPiSrBxQ43qSuJ0
6NymkOa/cjiFZfqXQ8CZZqfzC4Tv5BXzfEtbZ+Ue1rBYxZqOO18nskd+C6ne5pUR
o1eKZY6E3Mu4C65tFZfL6IuqOx1cCmL1syJ6H96PawePeg==
-----END CERTIFICATE-----
-----BEGIN CERTIFICATE-----
MIIFLTCCAxWgAwIBAgICEAAwDQYJKoZIhvcNAQELBQAwIDEeMBwGA1UEAwwVQXh1
YWwgRHVtbXkgUm9vdCAyMDE4MB4XDTE4MDUyOTExMDEzNFoXDTI4MDUyNjExMDEz
NFowKzEpMCcGA1UEAwwgQXh1YWwgRHVtbXkgSW50ZXJtZWRpYXRlIDIwMTggMDEw
ggIiMA0GCSqGSIb3DQEBAQUAA4ICDwAwggIKAoICAQC9uOuzJekmeo3hl8fjQlKS
HApS3llcliq1YrXpkMbHAA9StHaMHPW+Dzr2/+cdfBAmN3sujCY8Paq15QI+TDOq
KA5SByCBQKXx2qulBPcZs3mDMt+KxAaeWfwR4Nj0NNKbmw2HjDddo77joeVOuOX2
4o1wXzmAAolVMIcRYA11EMWNUtYrHCzBa7RfYht2G5dE69ckrgfw1Nxs01Sbg+xP
sK9aK/LHPUalYZNY+76x7vabEpzaPfpyKzDTWA20SPk0WfTf9/+K3o+urzDG8O/q
w9xbBOzWohGmRyA/z841p1SD7inpZcyO/KeW1yTP2WyFxADwUrv2mEYXnma/Gdna
G62IQYk/UMex9W8pT6tfwrg/36sSwr88yPR5dJxzjHUE+w/rYG3k+K+EqvZ5qOC5
32AJ9BS2nbNuGpmRU1qoMCwpL7B2E/CKJLIdFcf/qmcnWJEXo+u34+fQZg8XaDCI
XhUqAHz6YkjCiFGd/JwL1IqsfxFsV9wHTUbW2AumglU65ZrjhXrrzE7Hk9ng1spJ
dOwfBihBNjnr0mKHY9leJ3chJ9HQ55/fEgcRNrj8EC69QCeAtpY5yOAjKpA03UvF
grDt8CIyIehNUwTXIhQSHZU4eZ0rzWf0vvMbhL2FvKtphbpnNKoXeNLv2IMZpT4B
VwsqLqaIkl/I4FPpYBoSYwIDAQABo2YwZDAdBgNVHQ4EFgQUa9IpV4tSNiwFCsZX
uRp0eKwTH2YwHwYDVR0jBBgwFoAUdKOPDqSFQ6Bfk0I/asBkByt5gsUwEgYDVR0T
AQH/BAgwBgEB/wIBADAOBgNVHQ8BAf8EBAMCAYYwDQYJKoZIhvcNAQELBQADggIB
AKoNIqiOdjlUBNg7cvR9Su4KgGrsZf78pG1H2MlNxJjFM/80EiWEfze/EG2MLxFq
8vToIHDjb0kVetYpdmfHNXTTlaaroBlXwyUYToPzQ985qr3LD8RhYZFAsiZCTtpJ
4FT6sh/mccTyx8G8+ZS6mn/le2WPj/t6beNLgbdl5n8fghdQcmT/TqGXE50UftWt
HSx3fsq2aKuNdVzhKzTin50IbiE9DV1dKo6B+ipOy/Dz5GMv3Z/3ntLTvxabCMOl
7s7WsUE7VPABRSifUS80Z9Ai38faLSu+Ouzx40ceXwvlFQtJ2LYQ8Ru5Q63k2wB3
EOE6cgAhiYExrz3fDDtUkui9vIfWfTPMnXR7xQ8YqK4Qqld2ESxvMQU2jzbZKSf+
3sWnPvN4HTg0cfysmOdLGZwf3u8A9tMtxhUEtxUx7r76M4ekSKdNv1Nf5u5N/h7b
AbEqSp1XADTxkE448i7hNJzn2Ce6JtFya231Ni0xyYKQIajP18jNypAw1eABYFkN
53vQTUfqcbtcrCios1xRdDqfgkYaKZv7p63aoObFTf/mmG7sFjGAEPQscagOukwN
wnkjCVifVbk5qJUaUWSLeYziI+HYkEA9P/h4o83nbf0YgBtOFoc0XWKmKagHifZN
SEJ9kRCWzYaL2ChiL6jHGh26WT/hbNKeAlcxPnT4u/l1
-----END CERTIFICATE-----
-----BEGIN CERTIFICATE-----
MIIFJjCCAw6gAwIBAgIJAINuAirfnRU6MA0GCSqGSIb3DQEBCwUAMCAxHjAcBgNV
BAMMFUF4dWFsIER1bW15IFJvb3QgMjAxODAeFw0xODA1MjkxMDM0MTRaFw0zODA1
MjQxMDM0MTRaMCAxHjAcBgNVBAMMFUF4dWFsIER1bW15IFJvb3QgMjAxODCCAiIw
DQYJKoZIhvcNAQEBBQADggIPADCCAgoCggIBAMVDjbhq3TGuQ6INTZ+dhSIgsdbq
w2nxF3myrS7v89bcNxMyLypWYTmR4OAYRXRBnW4KX6sTubPyL3ogPz6hXmfmPfAz
+X//HTIiybL3e3qwxqWphp09+JT6veEp/e/wEEjSMj5nsxkDEjj9JEQWu/1B+N+V
XOJkTYFy05ZgeWplkyLwT71myF047aISK27a+VebBMaPpvvetScbMSwxAbk51cGV
UC4gpwvnvsbp/CRuMV0dYzkeTmxgn860l3s8+7qUJoOrtiO0cDpv97SK9Ck9ef1k
R6KFttzxb/u+eMFi3RUErEGwE8P3thTseXRkp5hMwcyaSQv0wfLawlwcNFGOzsBx
fJS7QUIUpEyzRqj5Ppgaj530APxbgitLOfVLZ2DvcBcmnQns6OE+uwymuvAj8Ftj
6AFJXH2lmswHLl5uD9kIOwmpZg4NZLP2Qv+WOT6HLgI7Kv1z0OV2H7UlWA7hwQXl
oQ6fJ2YLEhT+GM9xHKJ+DQCxvjWvtGUSb/Dk0j/R9mpSFfHvVJgE/xV+7F7Vlyw5
/cDpF3GZOTGQ/MFy4RqRrTtjnZw2/bZZyJ+Xb743OeQhABFUdadh8cmyehDregtr
alHxtjKxCxrT55OHCYhbCoz6nEnQURD7EPQhU5puUKalRq2ApDkveIk8uj0HQmQm
KyRuNX7M6vCoWnpxAgMBAAGjYzBhMB0GA1UdDgQWBBR0o48OpIVDoF+TQj9qwGQH
K3mCxTAfBgNVHSMEGDAWgBR0o48OpIVDoF+TQj9qwGQHK3mCxTAPBgNVHRMBAf8E
BTADAQH/MA4GA1UdDwEB/wQEAwIBhjANBgkqhkiG9w0BAQsFAAOCAgEAbJanqR4P
mr05AyAu8vlrLsleXA8VAPDiaaYStYH5cIdBBWkaIxanLFDmbyQwKkKdkHQWV9X8
1P52q49T9RsoBsEOmwdiaCY2PEUz7Y3bFW0UeM+k65VlHlXWywRM6+O02t4TrJXH
F6h7vPon01OwhgW9Yil/Kr+yyZK50Ic+pm4UhHmtxY932cNaRCdae5tKsjabsP7Z
rdAksLia8mTp+HADkZJ1uODxyDh0S1WMKB5JoHYBrmtUr1NYLgRC6SinhK4r7rbi
EWuurE605Nm//jv3Czdy8gEsMDtXLZYY0iqGnD11MAJFXyQ6PG2eq1cXcsJNRojm
8D4ipfQ+z4bp9dDVR2DzVyTYe4yuhZuIe2phOhPc8KkBaXQRMHfVKyeEmzqEFLaM
kfaDZkRsrMZSqh+KJoxDG3h8UqssChX+cuZdsjRhNWRqfbB20I9Upwa+XooyCU4E
EkYyFTMchtvbYZEN/XvlPfhK5JB9eJ5rrcE8hKsP3gftchWWqCDedKugvZW/t5Vk
lc+z4IjiJFnRDfcr4Z5V2Hpseyno3AEK7aUdJlmuPnxoImFXfQ4jUguM/wznJHl7
Xv9T0oaBVHM7Bd6PlES04Oho0KZXS6NryTsZn9GFV4qGZj5lEeOVl15AOfeIjP/I
okA2uUH/ZuJlR/BEmqbLt5HWPRNT/GgLfPY=
-----END CERTIFICATE-----
Step 4: deploying Axual Governance
-
Create a new namespace for Axual Governance
kubectl create namespace axual -
Download the example
axual-governance.values.yamlClick to open axual-governance.values.yaml
global: imageRegistry: "docker.axual.io" imagePullSecrets: - name: axualdockercred platform-manager-mysql: enabled: true platform-manager-vault: enabled: true keycloak-mysql: enabled: true keycloak: enabled: true # -- Axual Components toggles platform-manager: enabled: true platform-ui: enabled: true api-gateway: enabled: true organization-mgmt: enabled: true topic-browse: enabled: true # Component specific configuration ## Keycloak DB keycloak-mysql: fullnameOverride: "axual-keycloak-mysql" auth: rootPassword: "rootpassword" database: "keycloak-db" username: "keycloak" password: "Passw0rd1!" ## Keycloak keycloak: autoscaling: enabled: false database: vendor: "mysql" hostname: "axual-keycloak-mysql" database: "keycloak-db" port: "3306" username: "keycloak" password: "Passw0rd1!" extraEnv: | - name: KEYCLOAK_ADMIN value: "admin" - name: KEYCLOAK_ADMIN_PASSWORD value: "admin123" - name: JAVA_OPTS_APPEND value: -Djgroups.dns.query={{ template "keycloak.serviceDnsName" . }} - name: KC_HTTP_ENABLED value: "true" - name: KC_HOSTNAME_STRICT value: "false" # This control access to the Keycloak Admin Console ingress: enabled: false ingressClassName: "nginx" rules: - # -- The fully qualified domain name of a network host. host: "axual.<domain>" paths: - # -- Matched against the path of an incoming request. path: "/auth" # -- Determines the interpretation of the Path matching. # Can be one of the following values: `Exact`, `Prefix`, `ImplementationSpecific`. pathType: "ImplementationSpecific" tls: [ ] ## Platform Manager DB platform-manager-mysql: fullnameOverride: "axual-platform-manager-mysql" auth: rootPassword: "rootpassword" database: "selfservice-db" username: "fluxmaster" password: "Passw0rd" ## Platform Manager platform-manager: # Enable Remote Debug with Platform Manager debug: enabled: false mtls: enabled: false config: spring: # Spring Datasource datasource: name: "fluxdb" url: "jdbc:mysql://axual-platform-manager-mysql:3306/selfservice-db?useSSL=false&useLegacyDatetimeCode=false&serverTimezone=UTC" username: "fluxmaster" password: "Passw0rd" driver-class-name: "com.mysql.cj.jdbc.Driver" # Spring JPA jpa.database-platform: "org.hibernate.dialect.MySQLDialect" # Flyway Configuration flyway: locations: "classpath:db/migration/mysql" # Axual Platform Manager axual: api.available.auth.methods: "SSL, SCRAM_SHA_512" # Instance Manager Configuration instance-api: available: false # Application Operation Manager Configuration operation-manager: available: false # Connect Configuration connect: instance-connect-credentials: axual-poc: authorizer: "basic" username: "me" password: "notsecret" available: true #Client Configuration client: socket-timeout: 60000 # Security Configuration security: header-based-auth: true # Disable Keycloak and rely on headers passed from API Gateway # Governance Vault Configuration governance: vault: enabled: false uri: "http://axual-governance-platform-manager-vault:8200" path: "governance" roleId: "885d808c-6c58-33fe-fe4f-592b32eaa763" secretId: "efb8dc0a-f16a-913c-6f7c-99dbf77ccce1" # Vault Configuration for Connectors vault: enabled: false connector-vault: enabled: true instances: axual-poc: uri: "http://axual-governance-platform-manager-vault:8200" roleId: "a76c3bf3-2e9a-eb14-968a-bd65c112b5c4" secretId: "ff19752d-7ba5-83d7-d281-8497fa919e52" certChainKeyname: "certificate.chain" privateKeyname: "private.key" connectorsPath: "connectors" # Azure KeyVault Configuration azure: keyVault: enabled: false # Subscription Management Configuration subscription-management: enabled: false #Server Security server: ssl: enabled: false forward-headers-strategy: framework ## Self-Service UI platform-ui: # Auth0 Function Qualified Domain auth0: fqdn: "axual.<domain>" # PlatformManager Function Qualified Domain platformManager: fqdn: "axual-governance-platform-manager" # Window.ENV Configuration config: docsVersion: "2024.1" mgmtApiUrl: "https://axual.<domain>/api" mgmtUiUrl: "https://axual.<domain>/" stripeBillingManagementUrl: "https://billing.stripe.com/p/login/test_00g15x1UV4hKcI8eUU" topicBrowseUrl: 'https://axual.<domain>/api/stream_configs' # Feature Flags billingEnabled: false insightsEnabled: false streamBrowseEnabled: false # This is for deciding on SB/CB(false) or TB(true) topicBrowseEnabled: true dataClassificationEnabled: false connectEnabled: true subscriptionEnabled: false # Keycloak Configuration keycloakEnabled: true oidcEndpoint: "https://axual.<domain>" oidcScopes: "openid profile email" configurationType: "remote" responseTypes: "code" clientId: "self-service" clientSecret: "notSecret" # OM Configuration organizationManagerUrl: 'https://axual.<domain>/api/organizations' organizationShortNameEditEnabled: true # Wizard Providers Configuration enabledKafkaProviders: - confluent_cloud - aiven - apache_kafka # CSP Extra Values csp: extra: # To allow loading UserFlow script scriptSrc: "https://*.userflow.com" mediaSrc: "https://*.userflow.com https://storage.googleapis.com/studio1-prod-blob/" imageSrc: "https://*.userflow.com https://storage.googleapis.com/studio1-prod-blob/" styleSrc: "https://*.userflow.com" connectSrc: "https://*.userflow.com wss://e.userflow.com" ## Organization Manager organization-mgmt: config: # Keycloak Configuration authStrategy: "keycloak" # Issue with API GW -> Keycloak # keycloakDomain: "https://platform.local" keycloakDomain: "http://axual-governance-keycloak-http" keycloakCLIUsername: "admin" keycloakCLIPassword: "admin123" # -- To disable tls verification in the http-client tlsVerification: false ## Api GateWay api-gateway: debug: enabled: false # -- Configuration passed to the container. # Contents get injected to a ConfigMap, which gets mounted as an `application.yml` file. config: spring: cloud: gateway: httpclient: ssl: use-insecure-trust-manager: true permissions-api: url: "http://axual-governance-platform-manager/api/auth" topic-browse-config-api: url: "http://axual-governance-platform-manager/api/stream_configs/{id}/browse-config" gateway: endpoints: platformManager: enabled: true url: "http://axual-governance-platform-manager" organizationManager: enabled: true url: "http://axual-governance-organization-mgmt" topicBrowse: enabled: true url: "http://axual-governance-topic-browse" billing: enabled: false metricsExposer: enabled: false platformUi: enabled: true url: "http://axual-governance-platform-ui" keycloak: enabled: true url: "http://axual-governance-keycloak-http" # This defines the Local Realm for user registration # when UI doesn't provide a Realm header -> LOCAL local: auth: # Outside URL for Authentication Server issuerUrlForValidation: https://axual.<domain>/auth/realms/local # Kubernetes Service Name if running Keycloak jwkSetUri: http://axual-governance-keycloak-http/auth/realms/local/protocol/openid-connect/certs # when UI provides a Realm header -> SSO # Keycloak Authentication Server sso: keycloak: advertisedBaseUrl: https://axual.<domain> internalBaseUrl: http://axual-governance-keycloak-http useInsecureTrustManager: true logging: filter: enabled: false # Only Api Gateway has an active ingress ingress: enabled: true className: "nginx" hosts: - # -- The fully qualified domain name of a network host. host: "axual.<domain>" paths: - # -- Matched against the path of an incoming request. path: "/" # -- Determines the interpretation of the Path matching. # Can be one of the following values: `Exact`, `Prefix`, `ImplementationSpecific`. pathType: "ImplementationSpecific" tls: [ ] -
Determine the domain you want to use throughout the deployment. This domain will be used to access the interfaces of the services you deploy. Set the domain in your shell, it will be used to template a
values.yaml. Replace[YOUR_DOMAIN]with your domain in the example below.export DOMAIN=[YOUR_DOMAIN] -
Apply your domain to the
axual-governance.values.yamlyou downloadedsed -i '' -e "s/<domain>/$DOMAIN/g" axual-governance.values.yamlNote: the example
sedcommand above works withbashonMacOS. Use the correctsedcommand for your shell/OS. -
Install Axual Governance
helm install axual-governance axual-stable/axual-governance --version 0.5.0 -f ./axual-governance.values.yaml -n axual -
Axual Governance needs HashiCorp Vault to securely store the credentials of the Kafka cluster you are onboarding. The following steps will make the installation of Vault a smooth experience.
-
First, create an alias for the Vault CLI which will be reused later and initialize Vault
alias v='kubectl -n axual exec --stdin=true axual-governance-platform-manager-vault-0 -- '
v vault operator init -key-shares=1 -key-threshold=1
Keep the values for Unseal Key and Root Token in a safe place, you will need them later -
Log in to Vault using the Unseal key and Root Token
v vault operator unseal [UNSEAL_KEY] v vault login [ROOT_TOKEN] -
Prepare Vault to be used by the platform
v vault secrets enable -path=governance kv-v2
v vault auth enable approle
echo 'path "governance/*" {capabilities = ["read","create","update","delete"]}' | v vault policy write platform-manager -
v vault write auth/approle/role/platform-manager token_policies="platform-manager"
v vault read auth/approle/role/platform-manager/role-id
v vault write -force auth/approle/role/platform-manager/secret-id
Find the
role_idandsecret_idin the output of the command above and store them in a safe place. -
Update the configuration for
platform-managerinaxual-governance.values.yamlto use therole_idandsecret_idgenerated above and setvault.enabledto trueplatform-manager: governance: vault: enabled: true uri: "http://axual-governance-platform-manager-vault:8200" path: "governance" roleId: "[ROLE_ID]" # Insert the value of `role_id` here (between double quotes) secretId: "[SECRET_ID]" # Insert the value of `secret_id` here (between double quotes) -
Apply the changes to the
axual-governance.values.yamlfilehelm upgrade --install axual-governance axual-stable/axual-governance --version 0.5.0 -f ./axual-governance.values.yaml -n axual
-
-
Finally, log into the Self-Service interface via the following URL:
https://axual.{domain}. The following screen will be shown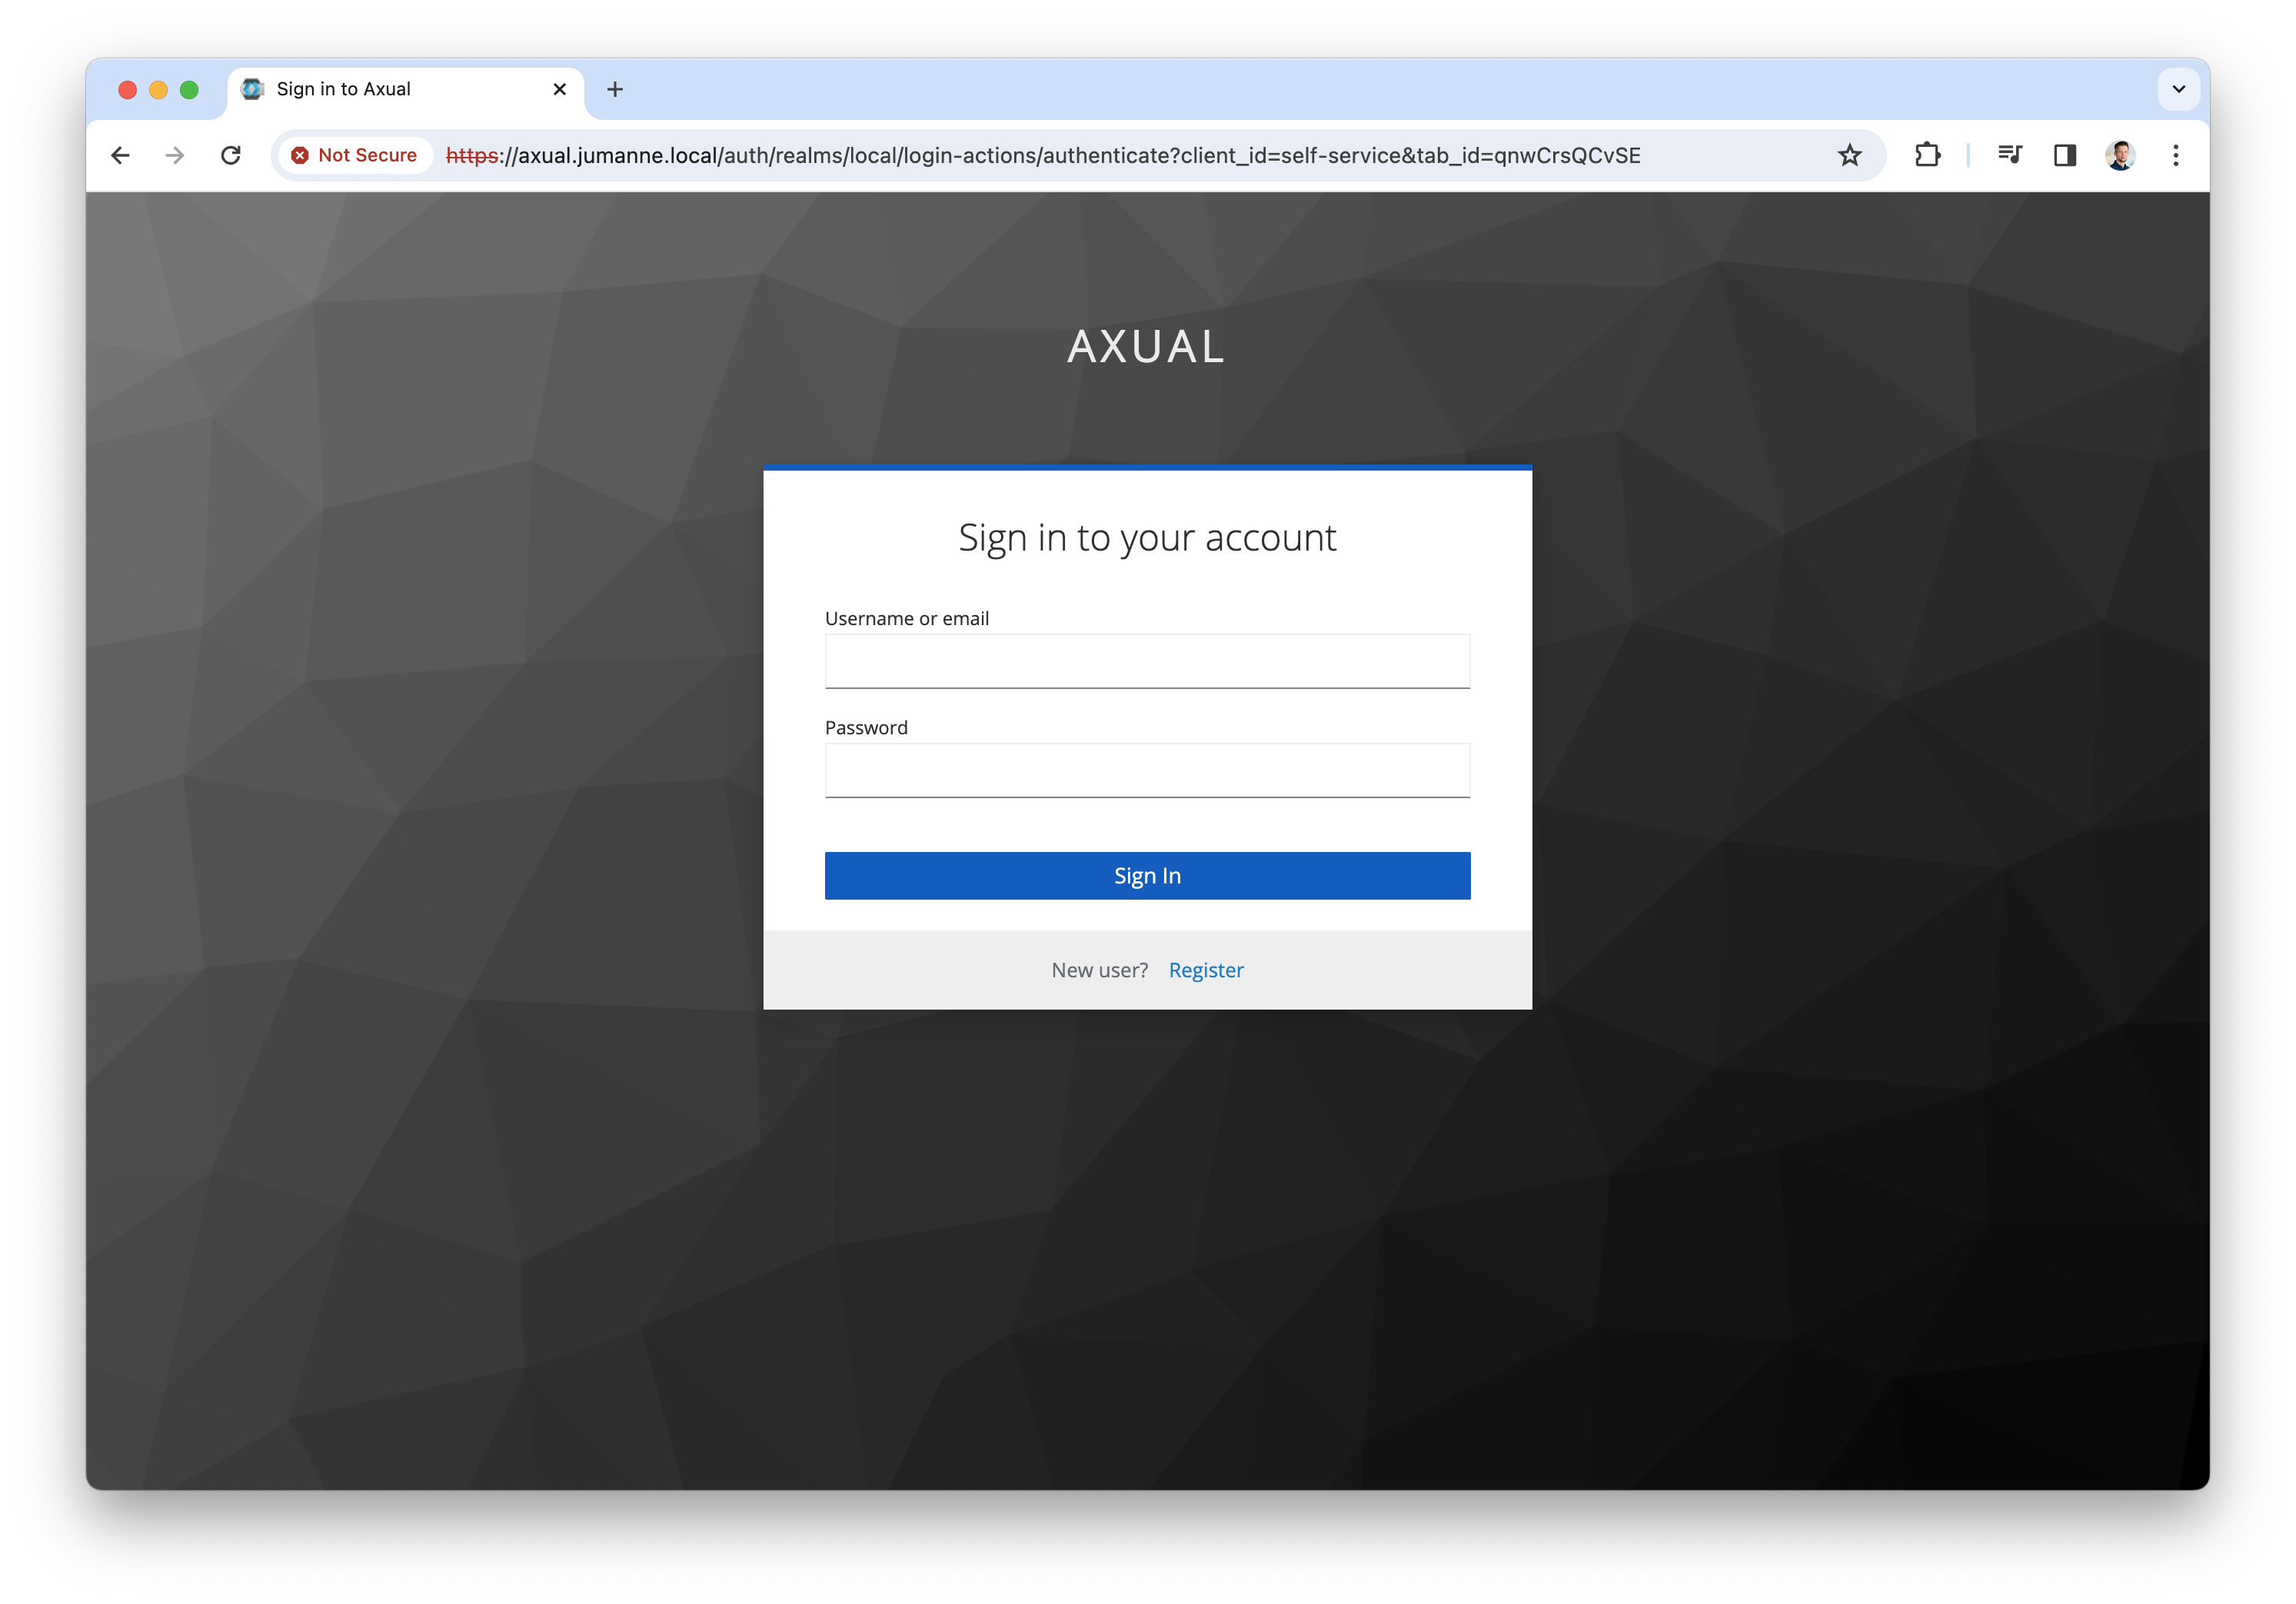
-
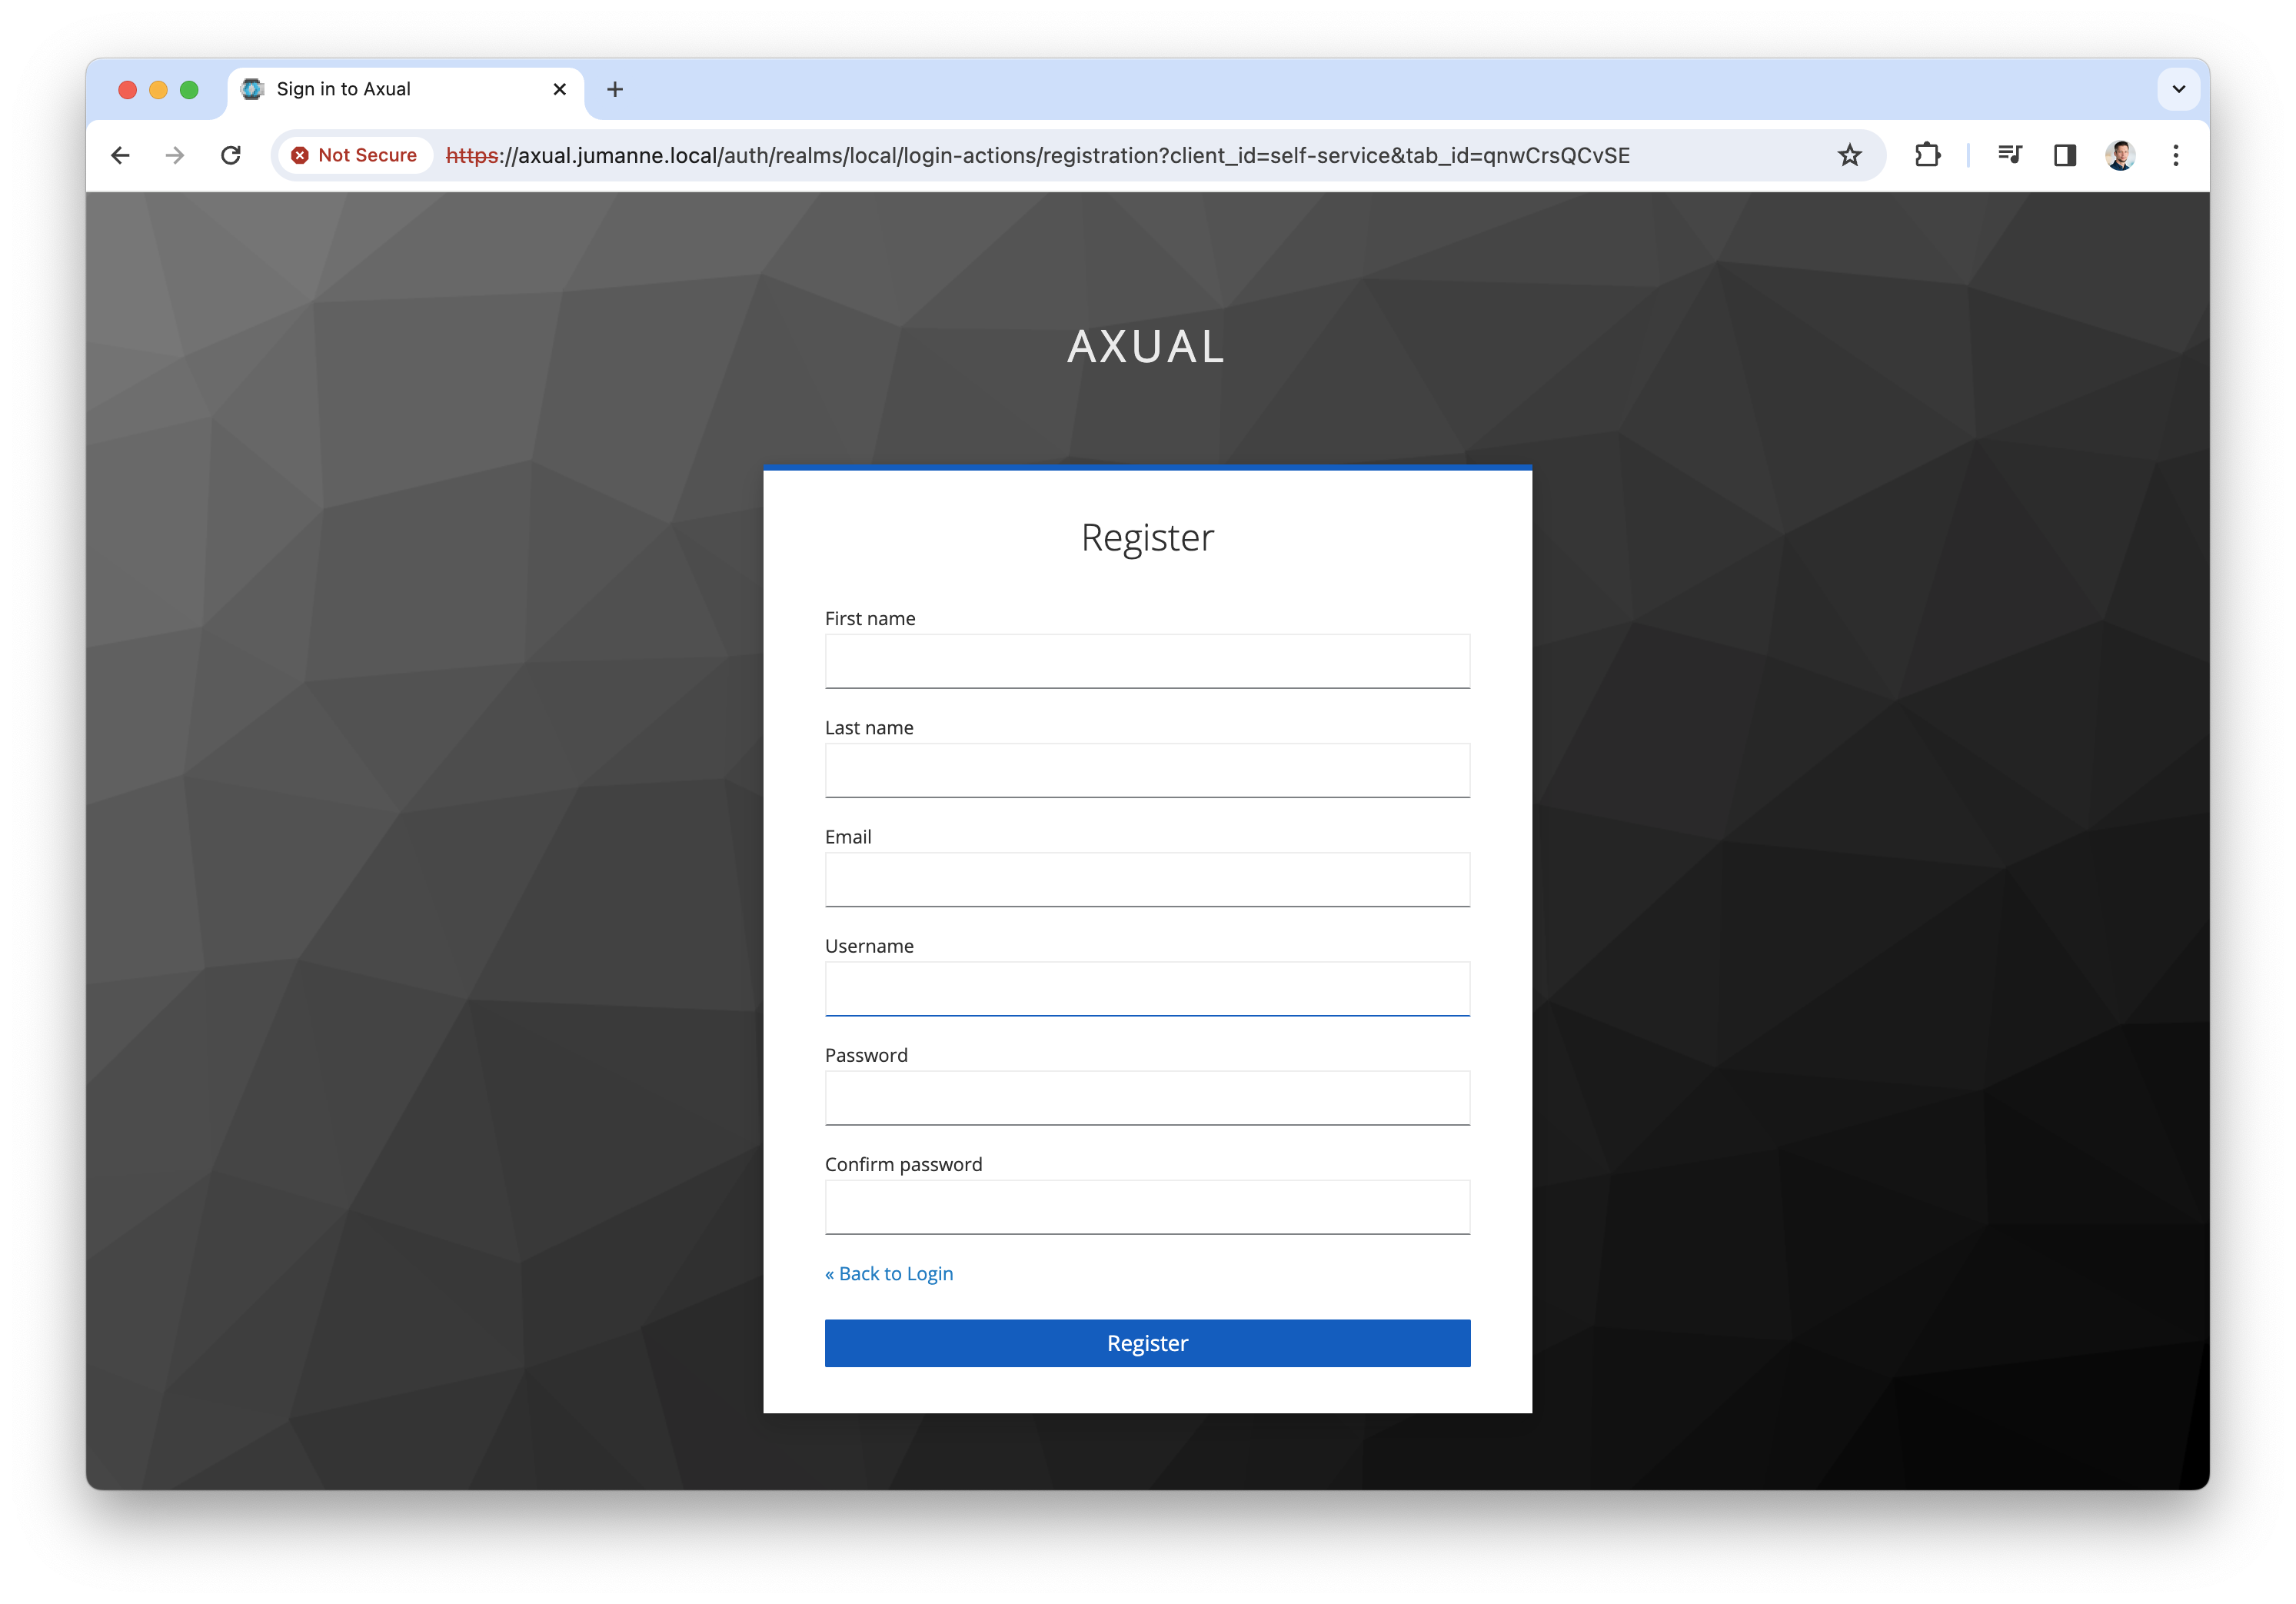
Click "Register user" to register a tenant admin user. This user has administrative privileges on the platform. The following screen will be shown
-
Register the tenant admin on your platform. Enter details for the following fields
-
First name
-
Last name
-
Email
-
Username → you will use this to log in next time
-
Password
-
Confirm password
-
-
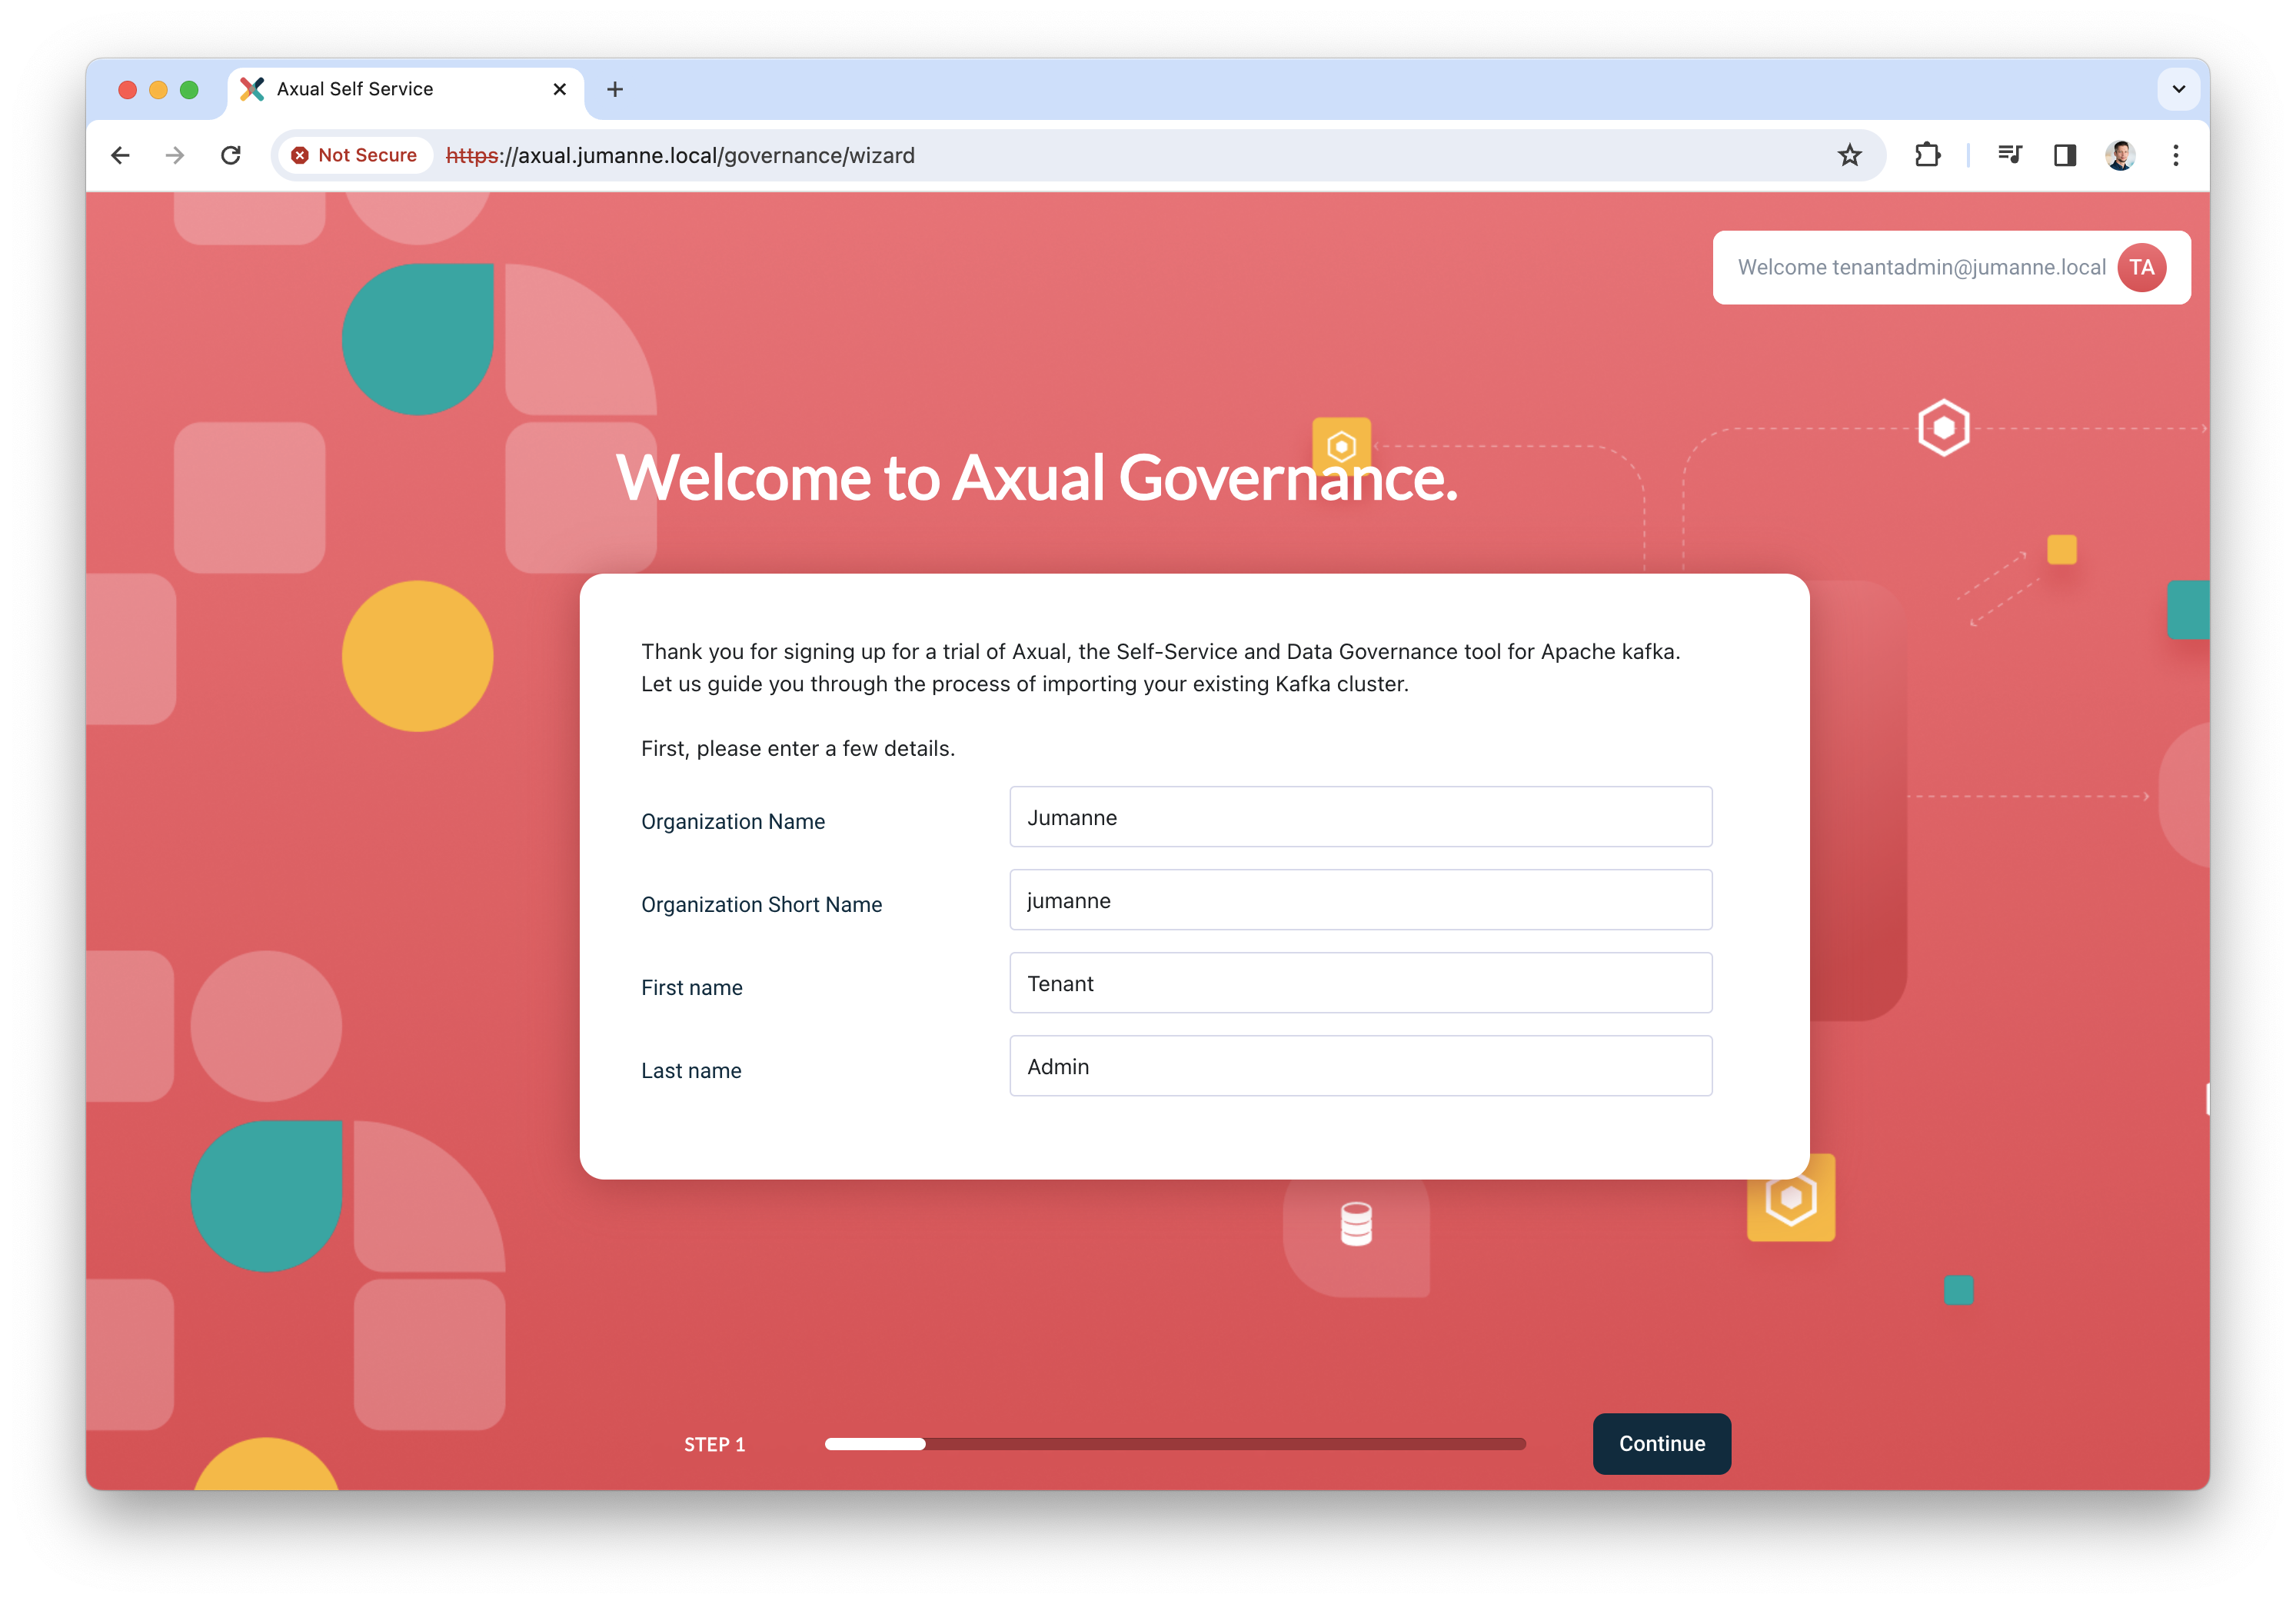
Click "Register" to add the user, the following screen will be shown.
-
Add the details of your organization and click "Continue". You will be redirected to the dashboard.
By completing the steps above, you have deployed Axual Governance and prepared Self-Service to log in as a tenant admin.
You can now continue with Step 5: onboarding Axual Streaming
Step 5: onboarding Axual Streaming
In this step, you are going to onboard the Kafka cluster you deployed as part of Axual Streaming, so you can create and configure topics and authorize applications in a self-service fashion.
Onboarding the cluster
-
Log in to Self-Service using the tenant admin credentials
-
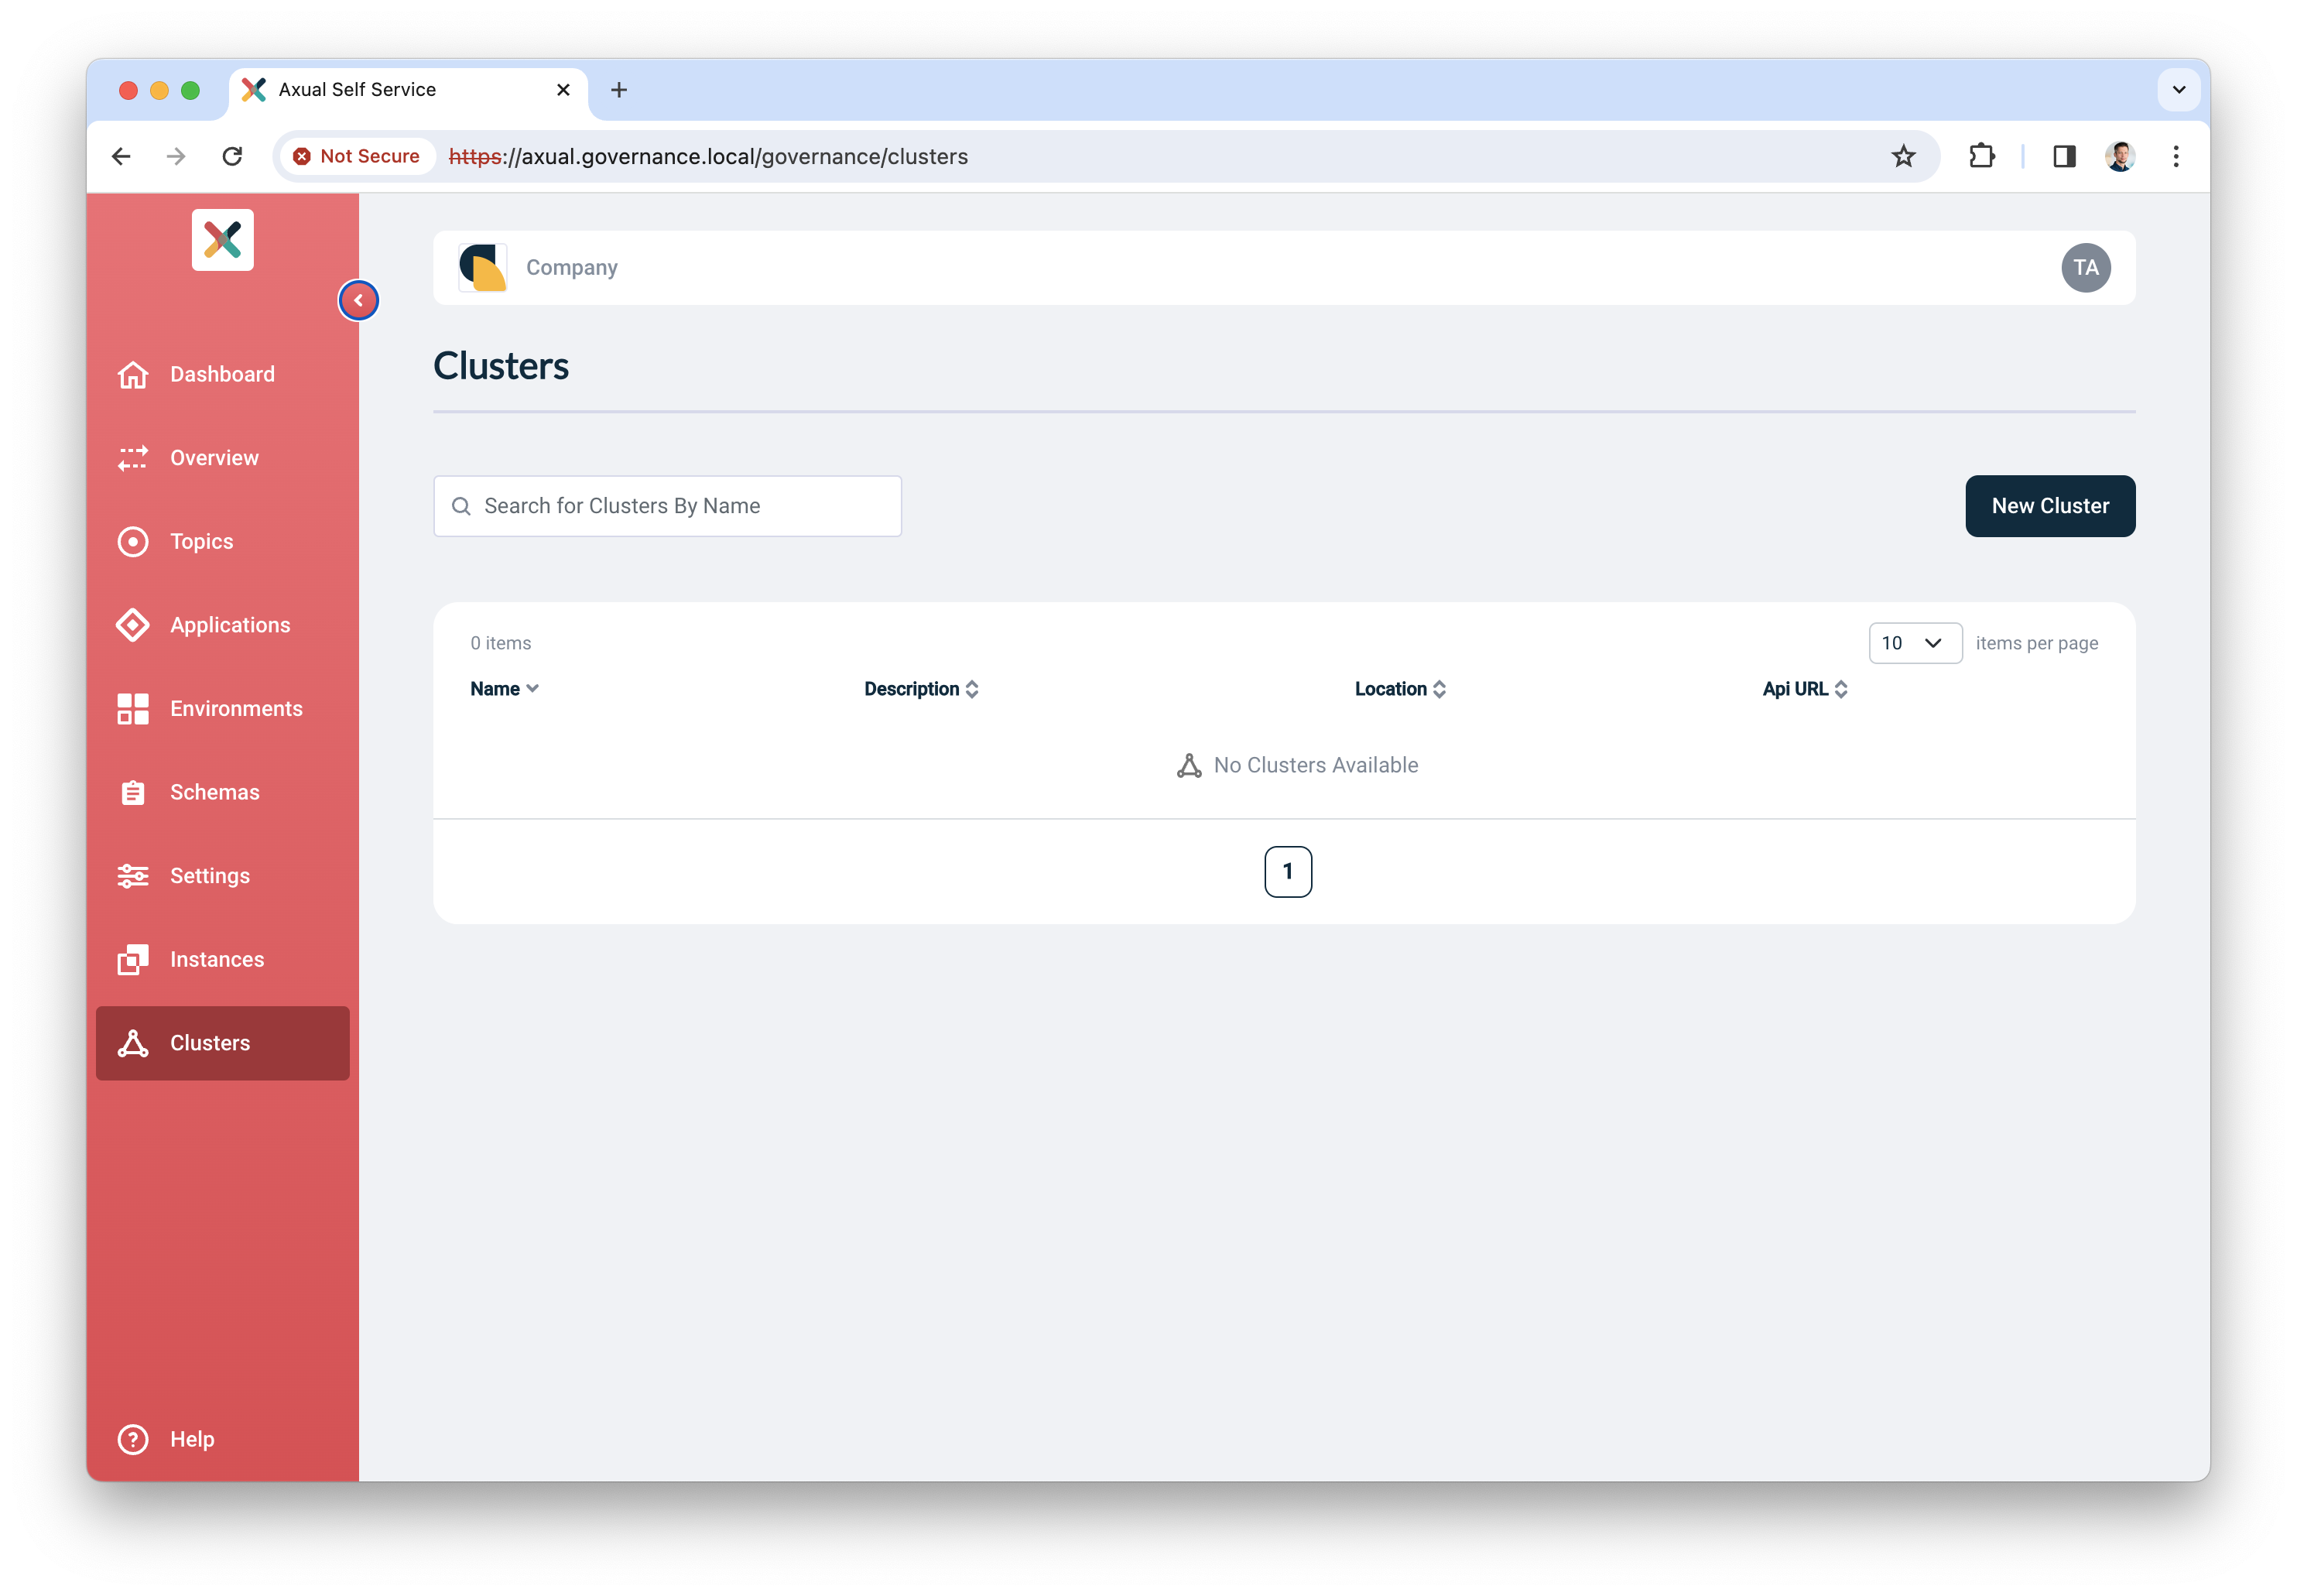
Expand the menu to see all items. The following screen will show:
-
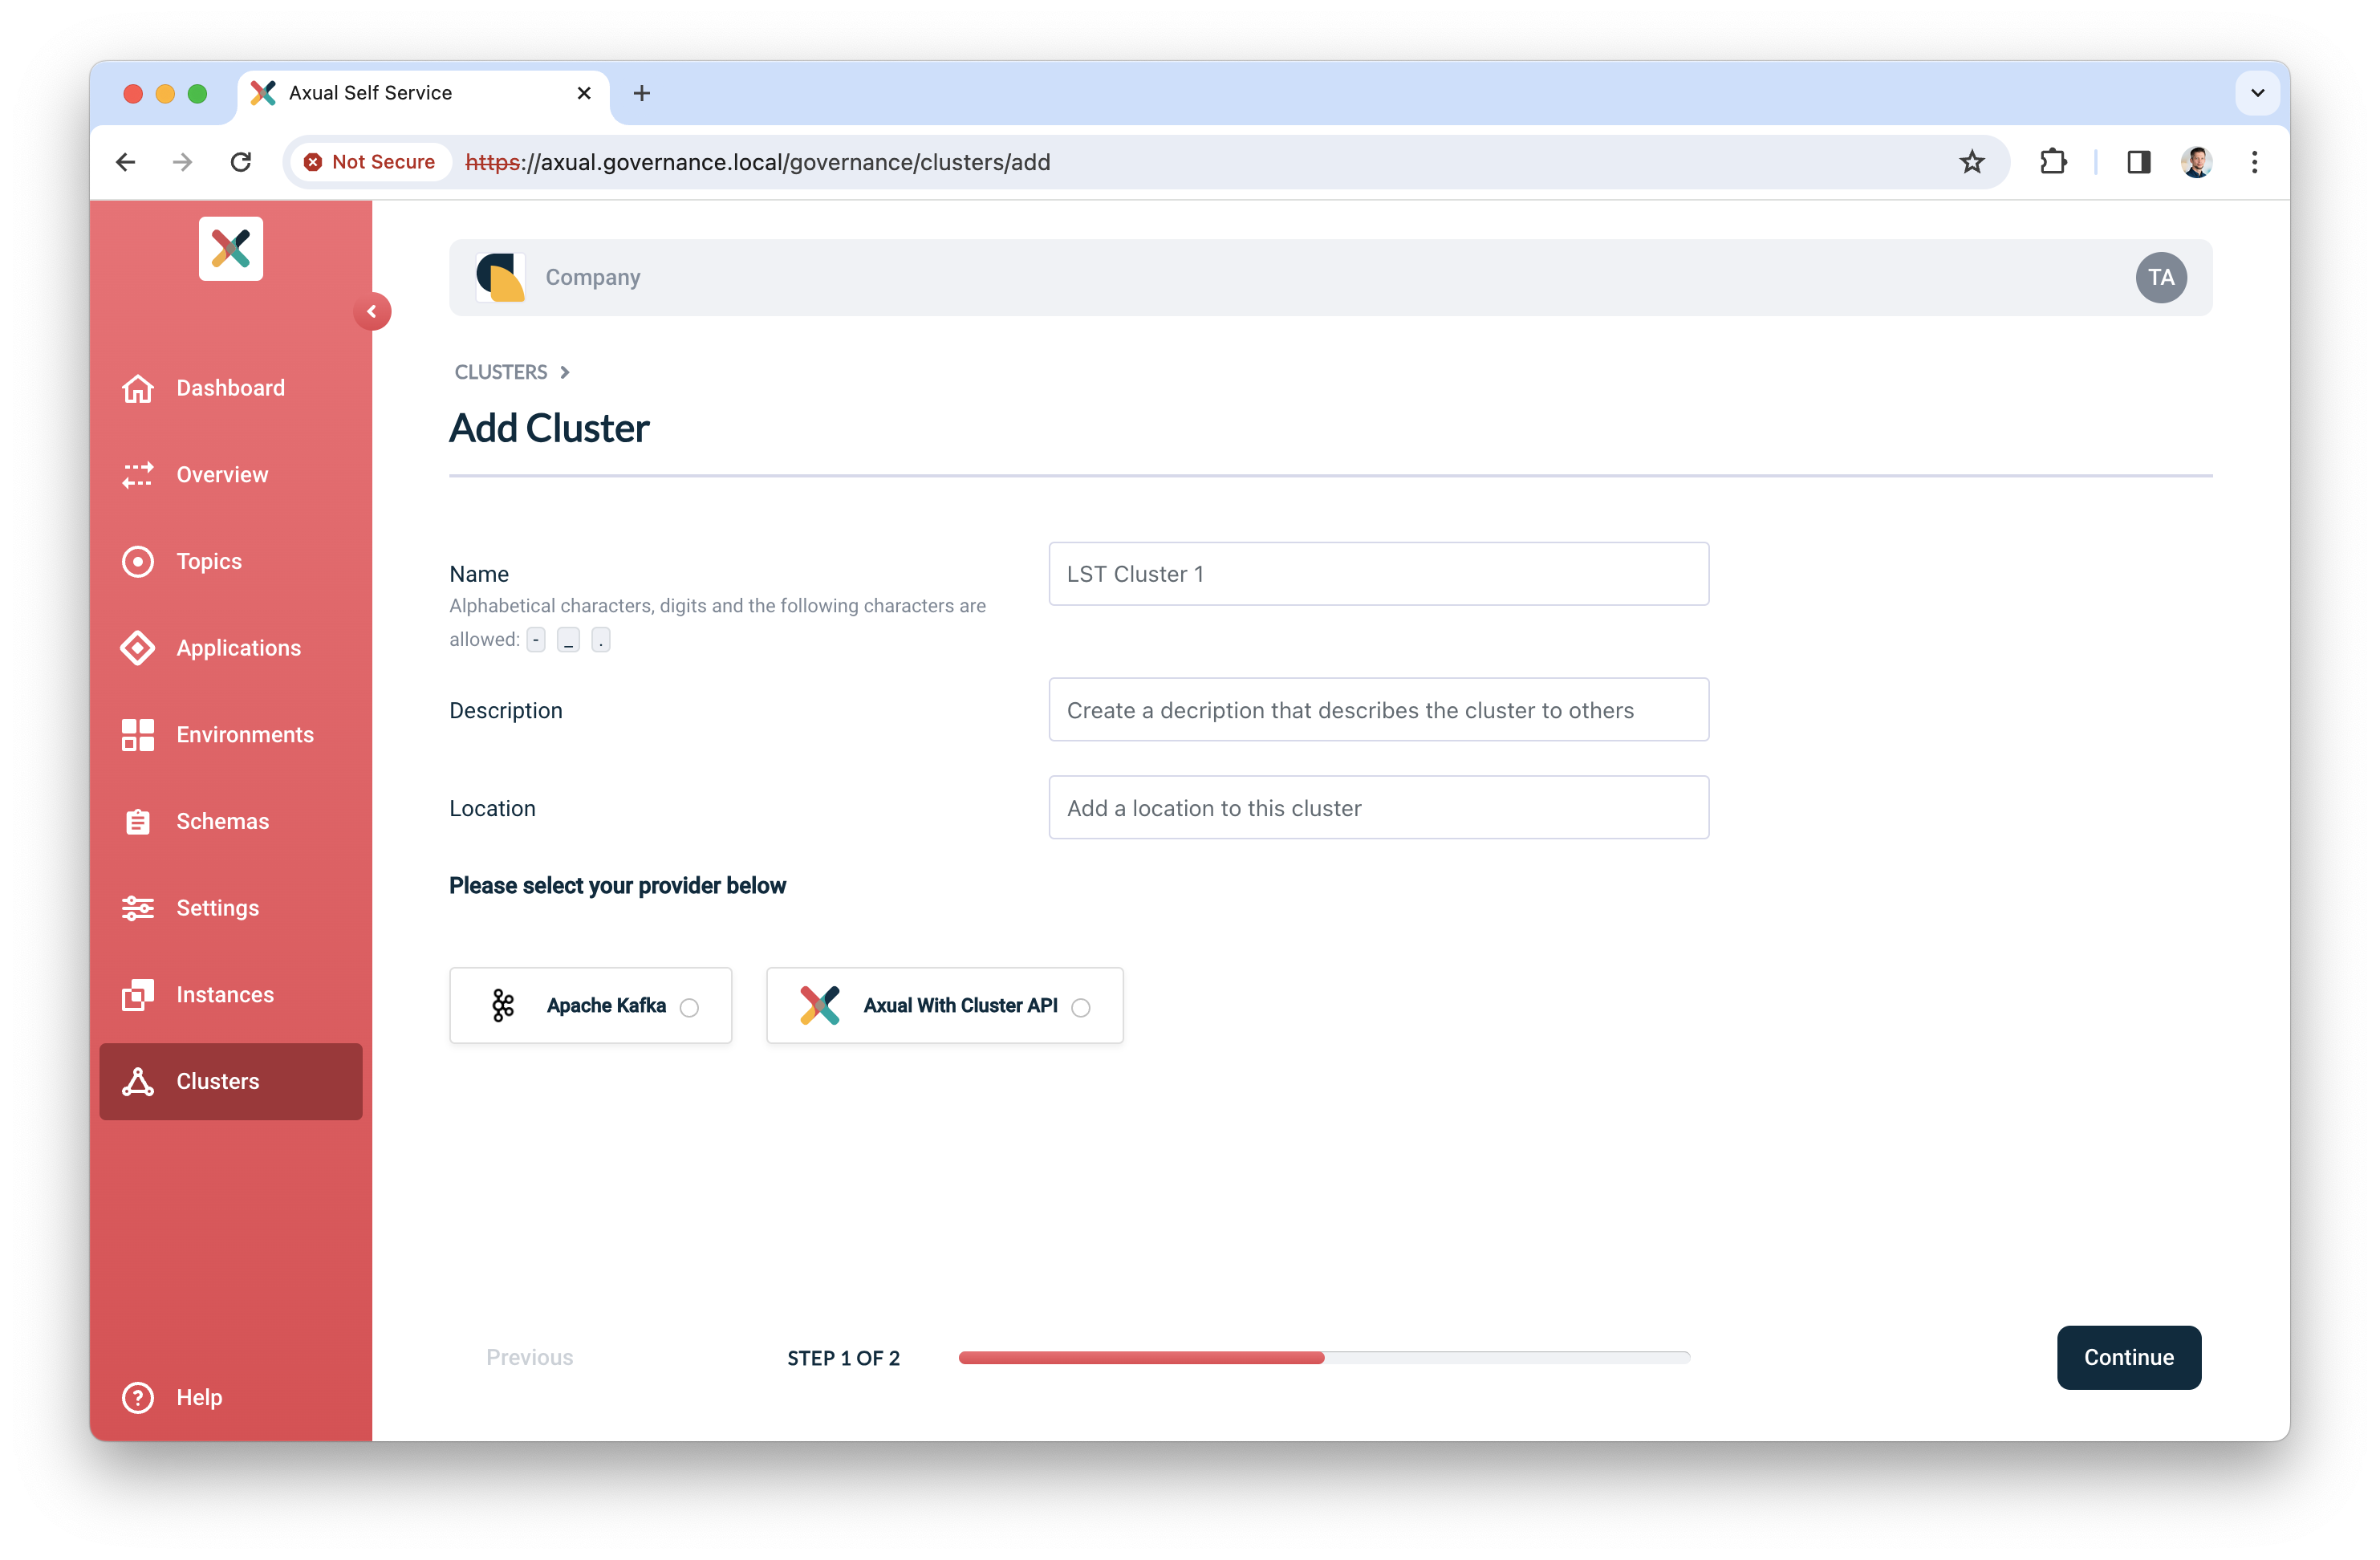
Click "Clusters", followed by "Add cluster". The following screen will show:
-
Fill in the following information for your cluster:
-
Name: use a name to refer to your cluster
-
Description: provide a description for this cluster (e.g. dev)
-
Location: additional metadata which helps you to recognize it
-
-
Select "Apache Kafka" as the provider.
-
Click "Continue".
-
Enter details for the following
-
Kafka bootstrap URL: cluster01-kafka-bootstrap.kafka.svc.cluster.local:9093*
* OR your own <domain> if you specified one
-
Publicly Trusted CA: unchecked
-
CA (PEM): see Axual Streaming certificates » file "cluster-ca.crt"
-
Choose your authentication method.
-
For TLS, upload the following files:
-
Certificate (PEM): see Axual Streaming certificates » file "platform-manager.crt"
-
Private Key: see Axual Streaming certificates » file "platform-manager.key"
-
-
-
-
Click Verify to see whether the provided details are working.Continue when the verify action returns "Broker connection verified"

-
Leave "Shared cluster" as is
-
Use the following patterns for multi-environment support (see Topic, Consumer Group and Transactional ID Patterns for more information)
-
Topic pattern:
{instance}-{environment}-{topic} -
Consumer Group pattern:
{instance}-{environment}-{group} -
Transactional ID pattern:
{instance}-{environment}-{transactional.id}
-
-
Finally, click "Add cluster" to persist all information
Preparing Self-Service
Topics and Applications exist in Environments. In the following steps, you will create an Instance associated with the cluster you just created. Next, you will assign a new environment to this new instance. It is good to know that in the future, you can decide to add more environments to this instance.
Creating an instance
-
In the menu click "Instances", followed by "New instance"
-
Provide the following information:
-
Name: a name to describe your instance (e.g. DTA for Dev, Test, Acceptance or Production)
-
Short name: a short name for your instance. Depending on the topic pattern, this name might end up in your topic name
-
Description: add your own description for this instance.
-
Clusters: click "Select cluster", the following screen will show
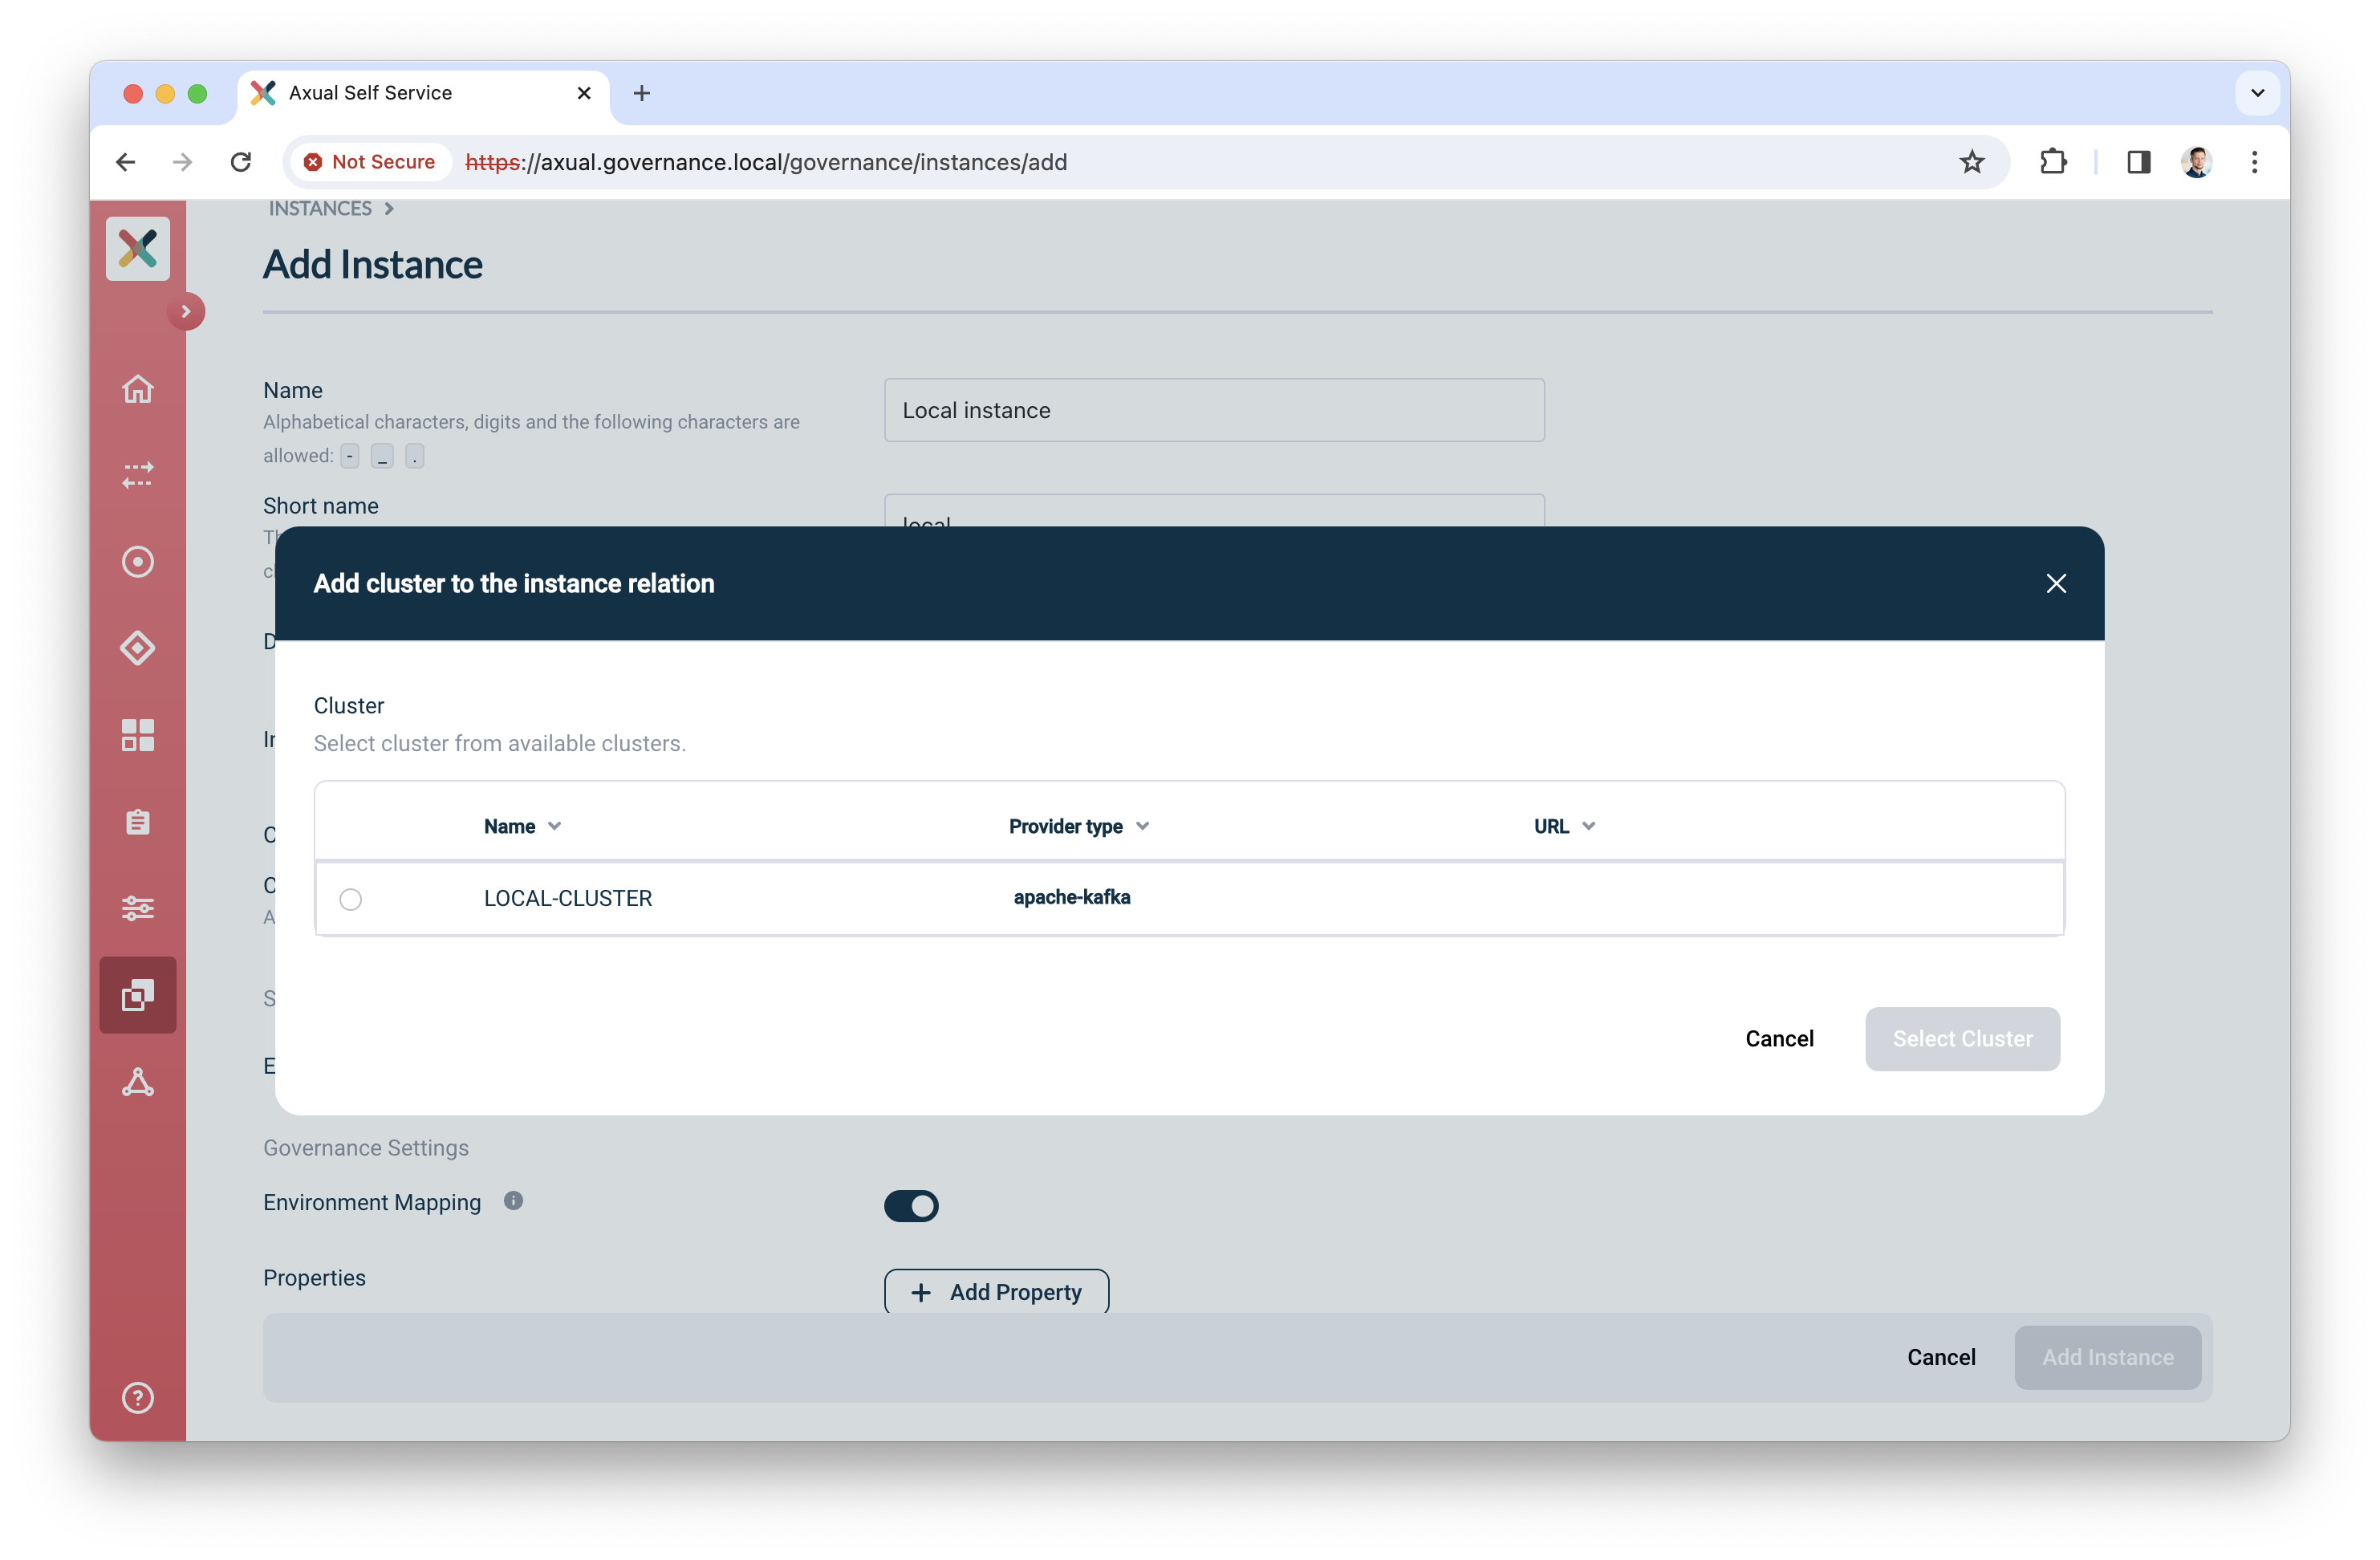
-
Select the cluster you created before
-
Enter the Schema registry URL
-
Select the Authentication method for Schema Registry (No authentication, Basic authentication and TLS are supported)
-
Click "Verify" to check whether the URL and connection details are working
-
Check Publicly trusted CA whenever the certificate of Schema Registry is issued by a publicly trusted CA OR upload the CA used to sign Schema Registry’s certificate.
-
Click "Select cluster" to assign the cluster to the instance
-
-
-
Enable “Environment mapping” to allow anyone with the ENVIRONMENT_AUTHOR role to create, update and edit environments.
-
Leave “Properties” as is.
-
Click “Add Instance” to add the instance.
Creating an environment
-
In the menu click "Environments", followed by "New environment"
-
Provide the following information:
-
Name: a name to describe your environment (e.g. "Development" or "Acceptance")
-
Short name: a short name for your environment. Depending on the topic pattern, this name might end up in your topic name
-
Description: Describe the environment
-
Color: select a color which helps users to identify the environment quickly throughout Self-Service
-
Instance: select the instance you created in the previous step
-
Visibility:
-
Select "Private" if this environment should only be visible by the owner
-
Select "Public" if this environment should be visible by all users
-
-
Authorization issuer: determine who is responsible for authorizing topic access requests:
-
Select "Auto" if access can be granted automatically (e.g. in Test environments)
-
Select "Stream owner" if access needs to be granted by the topic owner
-
-
Owner: click "Select cluster", the following screen will show
-
-
Leave “Properties” as is.
-
Click "Add Environment" to add the environment
Congratulations! you have now concluded the first time setup of Self-Service for topic management. Before you invite anyone in the organization to start using it, complete Step 6: Functional verification.
Step 6: Functional verification
In this step, you are going to:
-
create a topic using the Self-Service interface
-
authorize an application to produce data to it
-
produce messages to the topic you created
-
verify the messages have arrived on the topic
Creating and configuring a topic
-
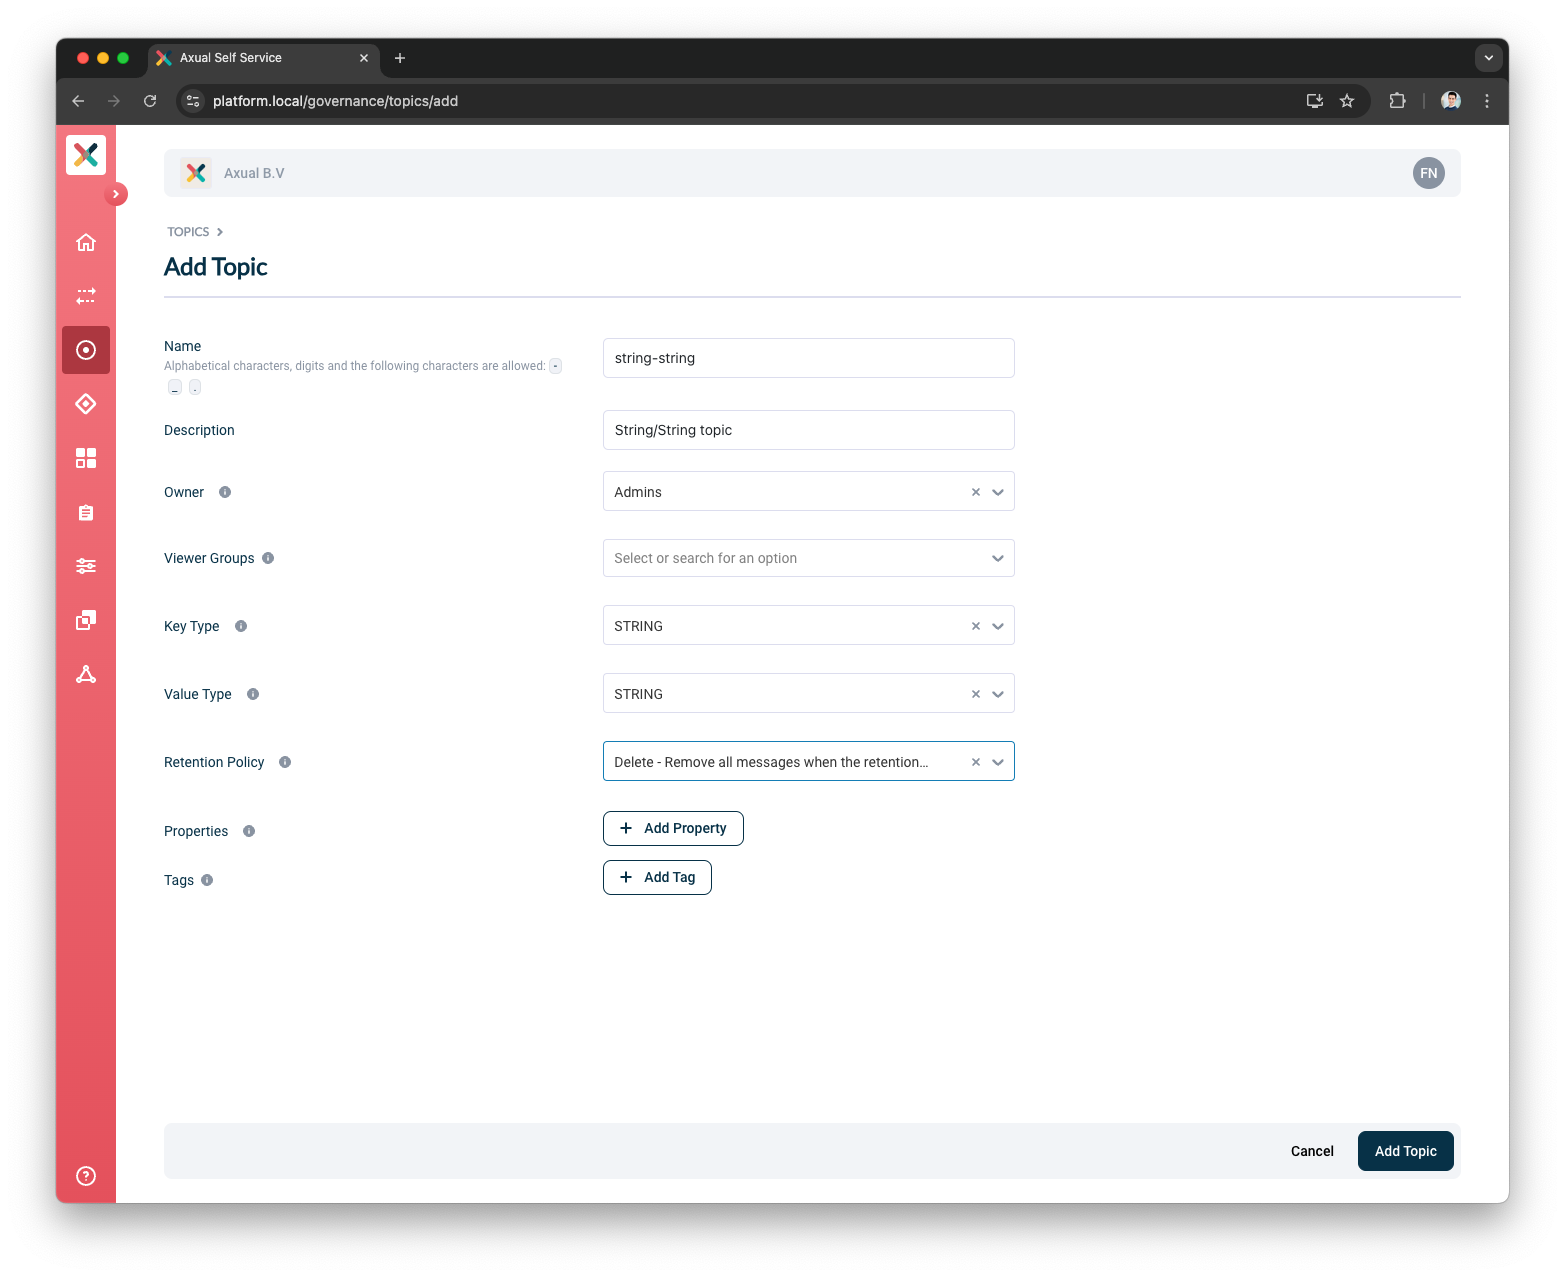
In the menu, click "Topics", followed by "New topic"
-
Provide the following details for the topic:
-
Name: use "mytopic" as the name
-
Description: use something like "Topic for functional verification"
-
Owner: select the team you are member of, "Admins"
-
Key Type: to keep things simple, use "String" as the key type
-
Value Type: to keep things simple, use "String" as the value type
-
Retention Policy: select "Delete"
-
-
Leave "Properties" as is
-
Click "Add Topic" to add the topic
-
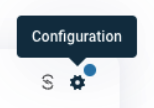
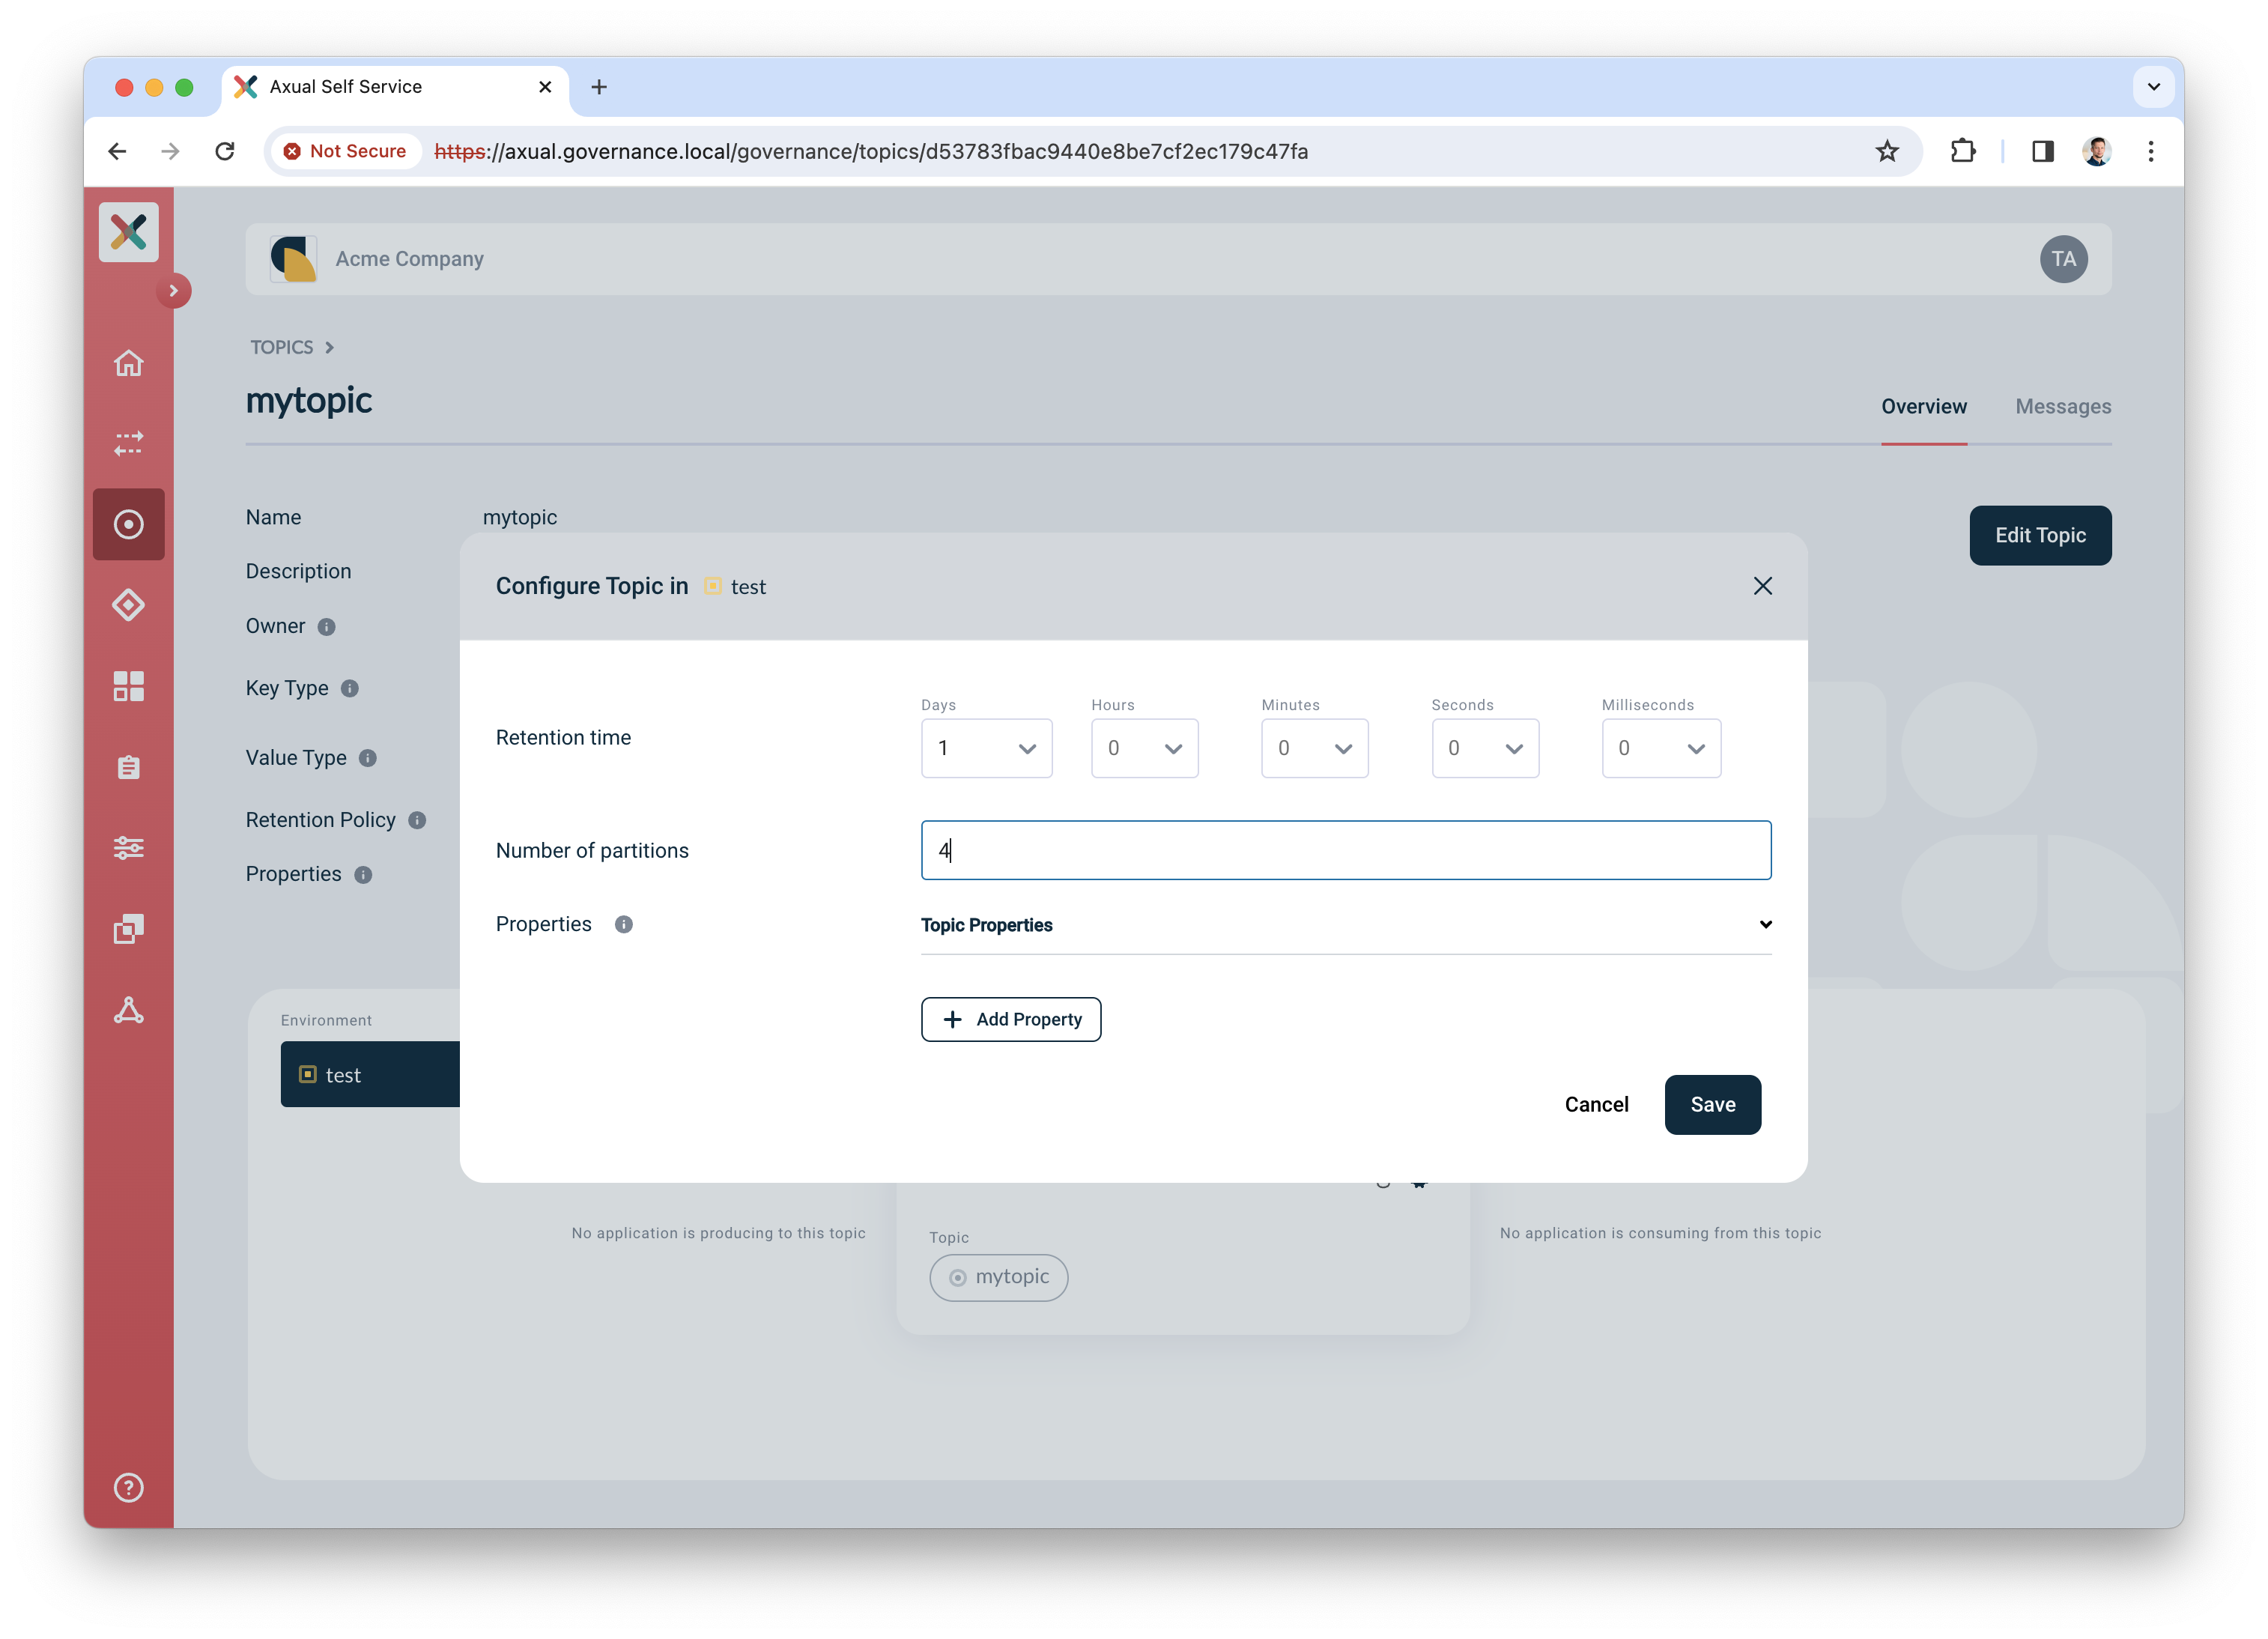
Next, configure the topic, so it is created in the Kafka cluster with appropriate settings. Click the "Configure topic" icon to open the modal with configuration options.
-
In the window that opens, define the following details:
-
Retention time: choose any retention time for this test topic, e.g. "1 day"
-
Number of partitions: use "4"
-
-
Leave "Properties" as is".
-
Click "Save" to create the topic on the Kafka cluster.
Creating and authorizing the application
Next, you will create an application and authorize it to produce to the topic.
-
In the menu, click "Applications", followed by "New application"
-
Provide the following details for the application:
-
ID: use "io.testing.producer"
-
Name: use "Test producer"
-
Short name: use "test_producer"
-
Owner: select "Admins"
-
Application type: select "Custom", followed by "Java"
-
Visibility: select "Public"
-
Description: use "Simple producer app"
-
-
Click "Add application" to add the application
-
Select the environment you created before as part of Preparing Self-Service
-
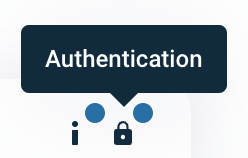
Click the "Authentication" icon to add credentials for the producer app
-
Upload a certificate (PEM) for an application which you want to authorize to produce.
Make sure the application certificate is signed by a Certificate Authority (CA) which is trusted by the broker 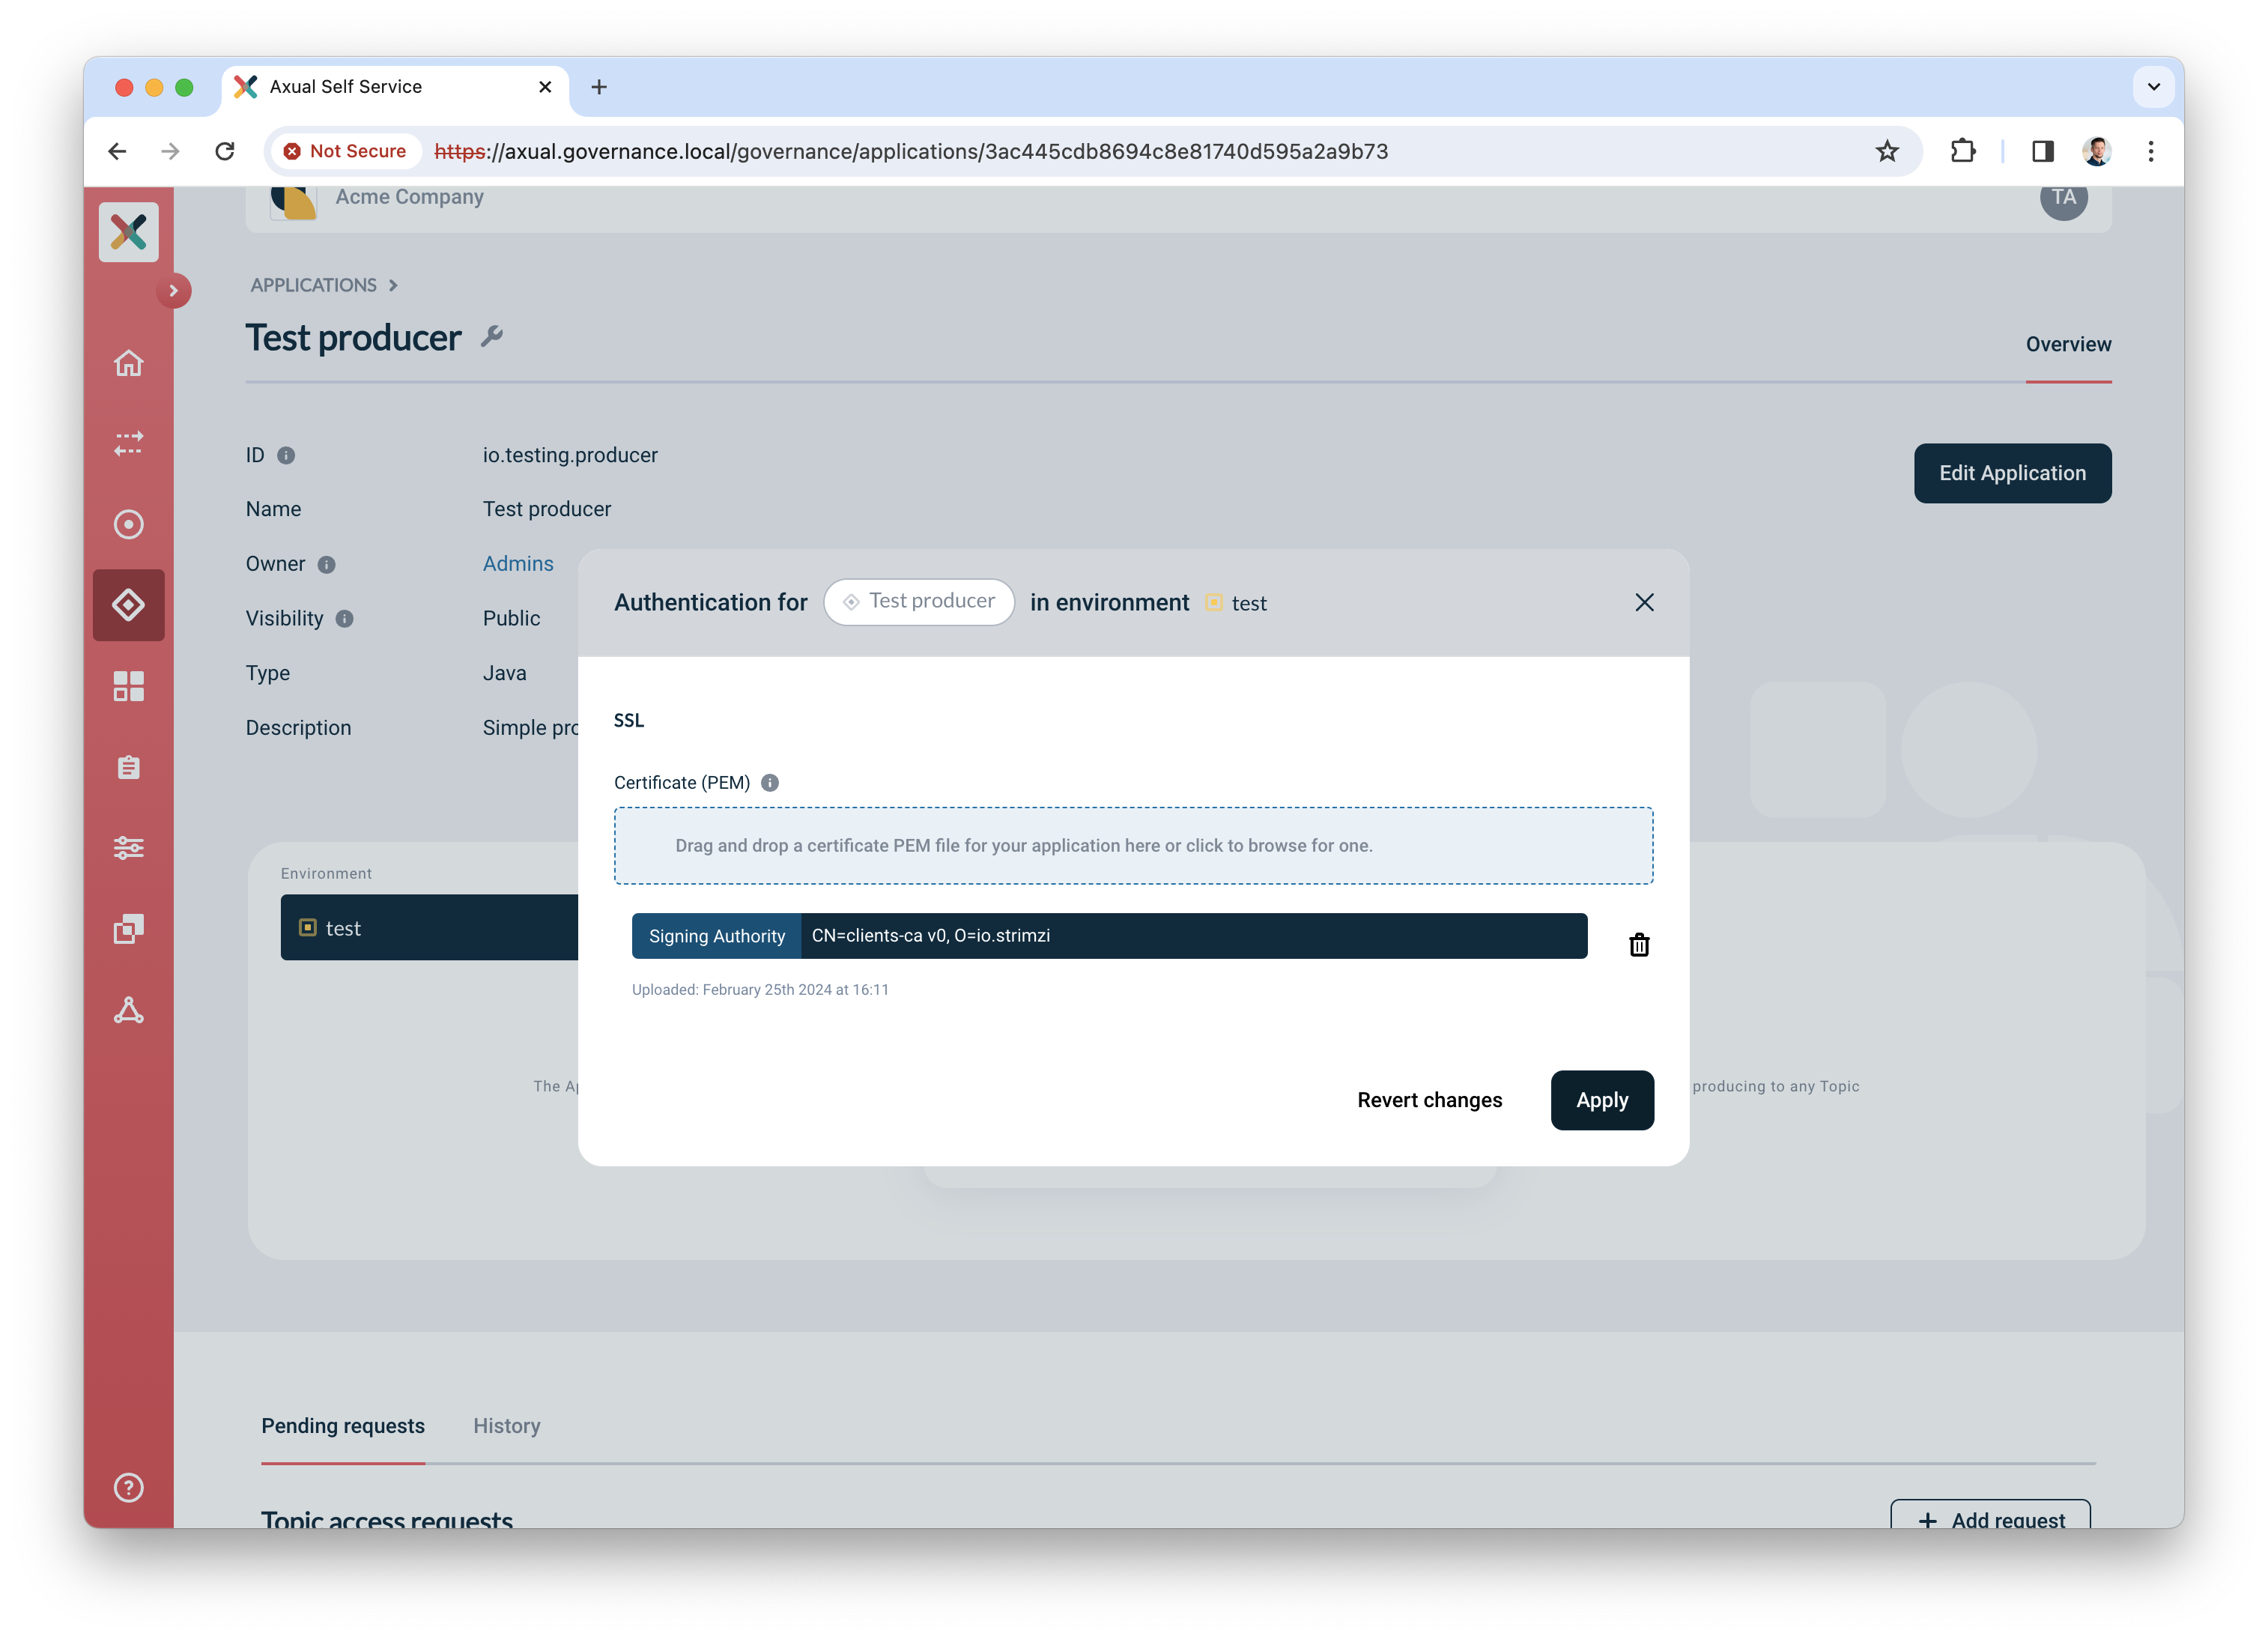
-
Click "Add request" to request produce access on your topic
-
Select "Producer" for produce access
-
Select topic "mytopic"
-
Click "Request approval" to make sure the app with the uploaded certificate can produce
Your app is ready and authorized to produce. Complete your verification by producing some data on the topic.
Producing some data
We are going to use the tool kcat to produce some data to the topic.
-
Install
kcaton your machine. Click here for installation instructions. -
Create a file named
kcat.confwith the following contents# Bootstrap server URL and port bootstrap.servers=kafka-0.kafka.local:443 security.protocol=SSL # For ssl.key.location and ssl.certificate.location, use the private key and certificate of the app (PEM) # It is the same certificate you uploaded in step 6. "Creating and authorizing the application" above ssl.key.location=platform-manager.key ssl.certificate.location=platform-manager.crt # For ssl.ca.location, use the certificate of the CA which signed the broker's certificate ssl.ca.location=cluster-ca.crt -
Produce some messages to the topic with the following command:
echo "Test message contents" | kcat -F kcat.conf -P -t loc-test-mytopic -k "Test key"Be sure to use the topic name which respects the pattern. In the example above you can see that you are producing a message to topic mytopicin environmenttest, instanceloc -
If you managed to produce messages successfully, you will not see any errors.
The final verification is done in Self-Service in the next paragraph.
Self-Service Verification
The last step in the verification process is done in Self-Service, by using topic browse & search.
-
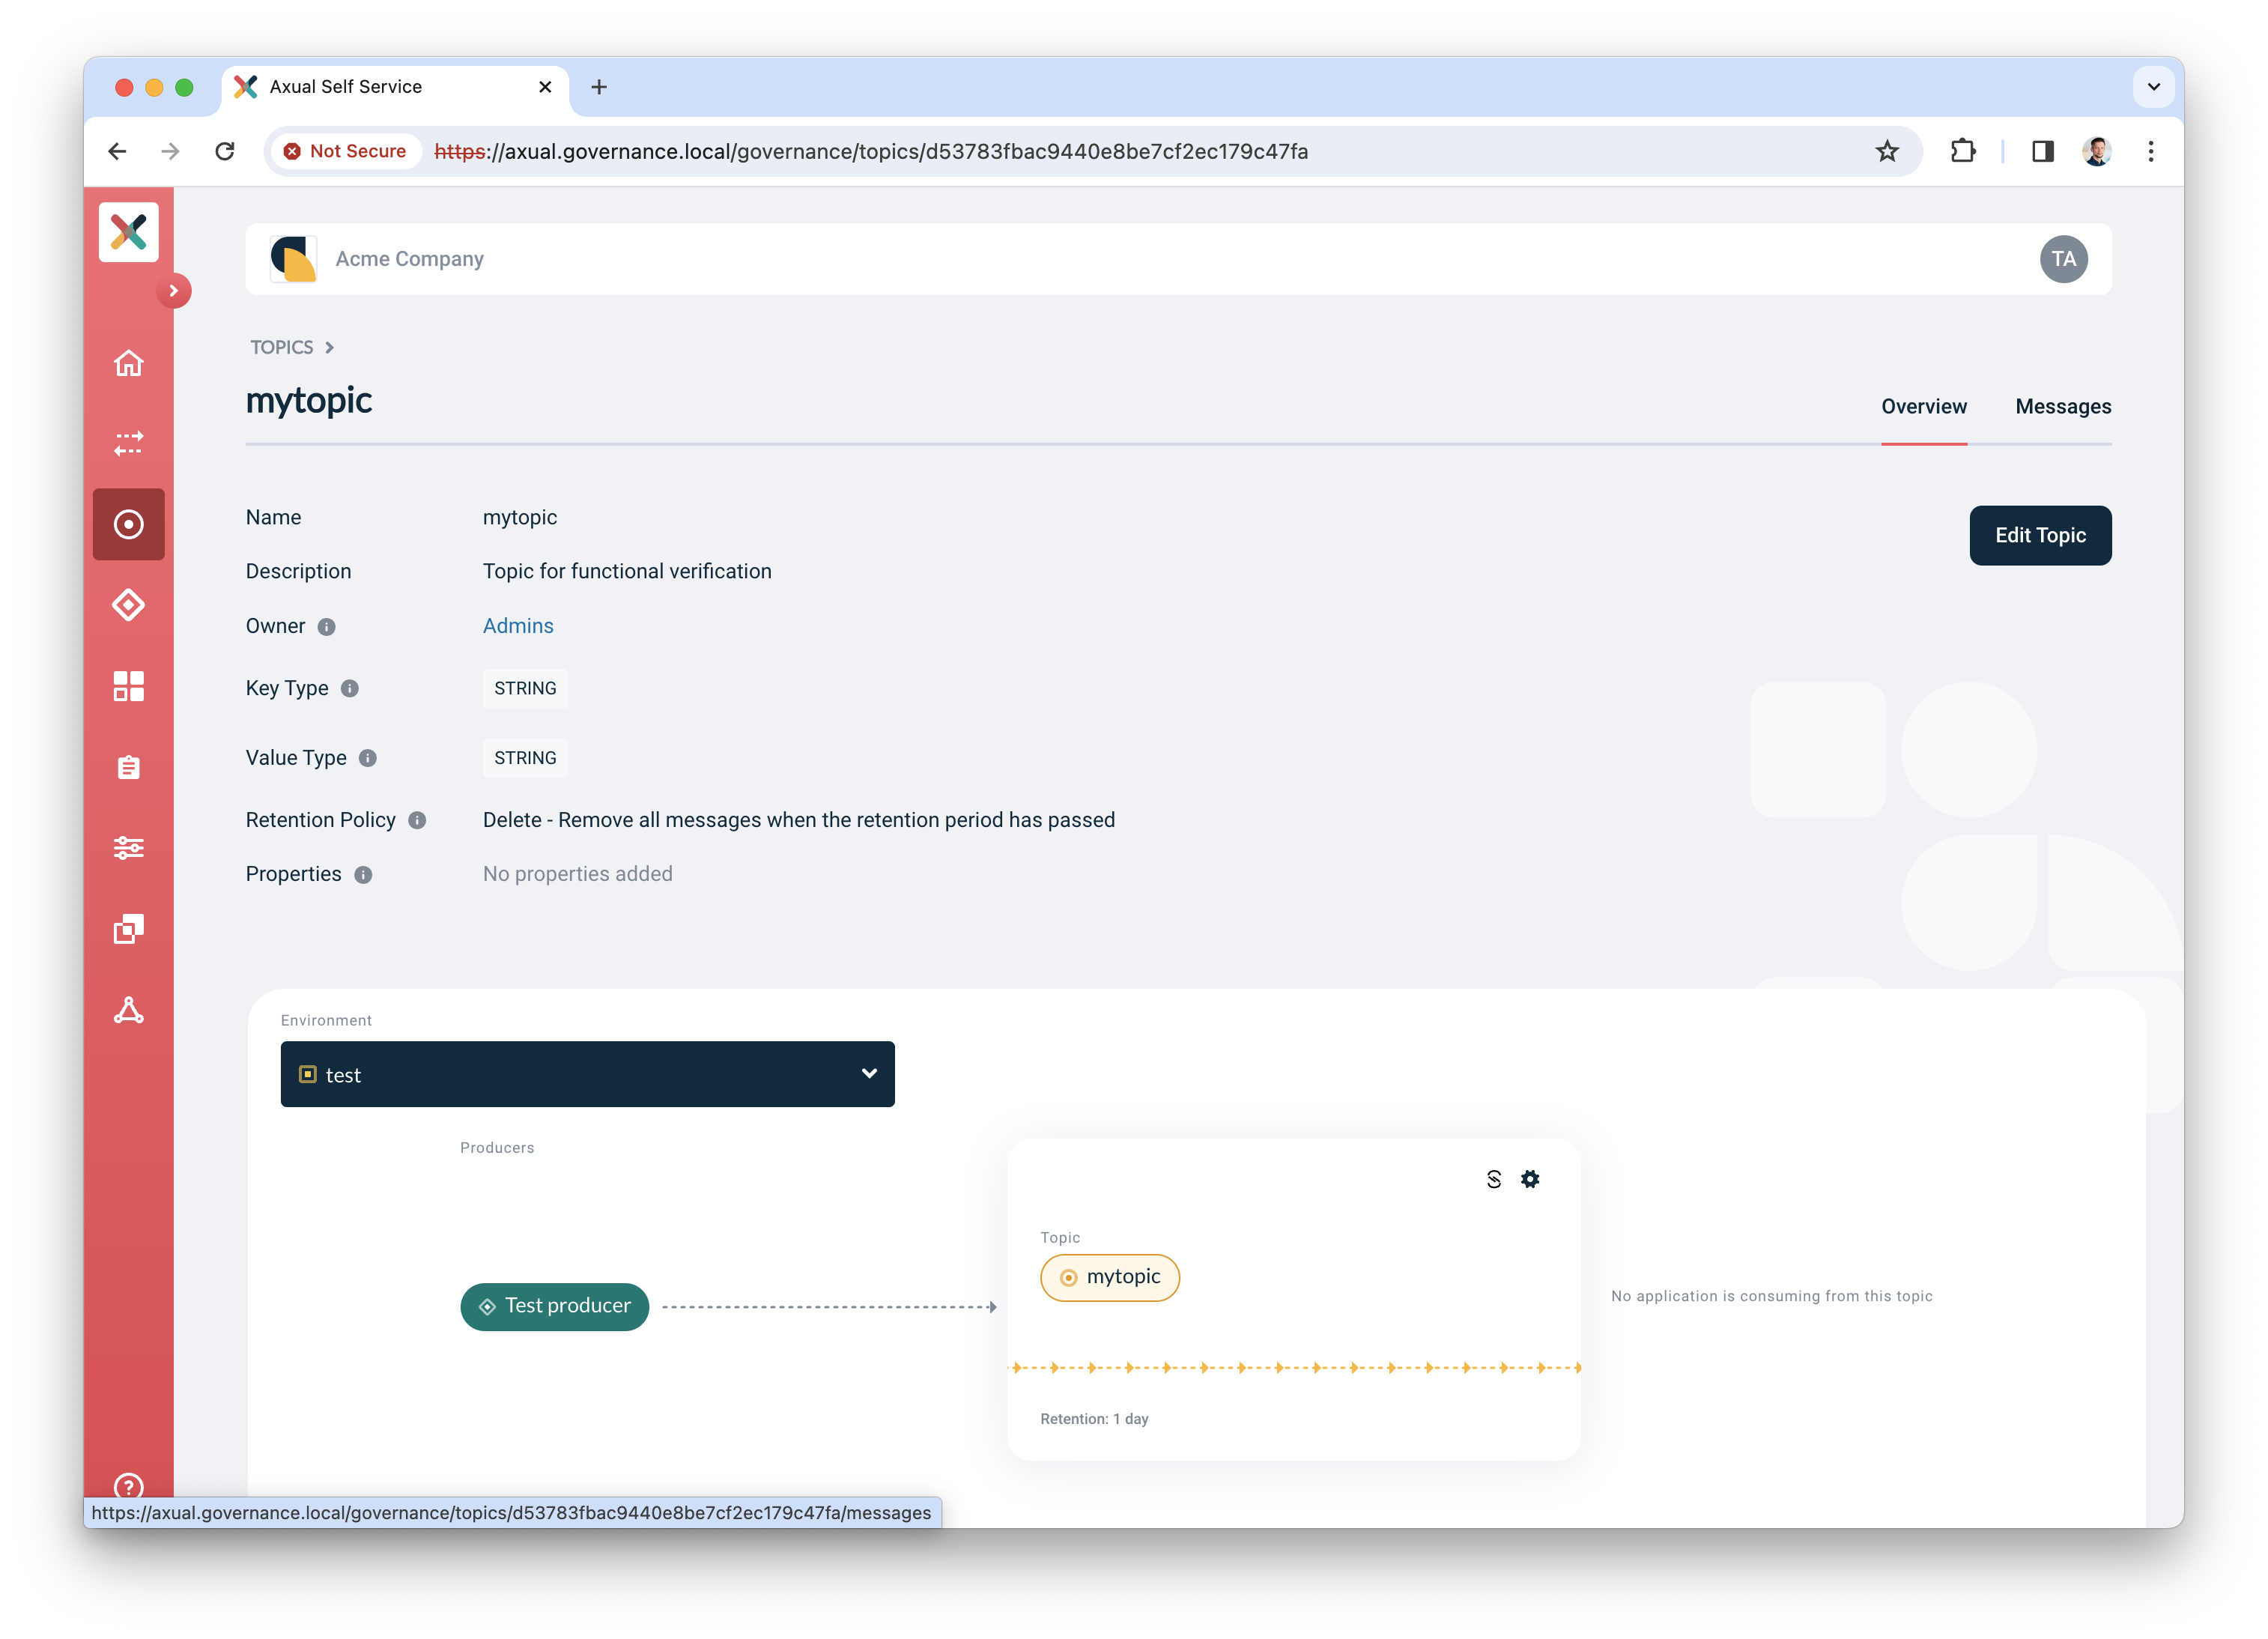
Find the topic in Self-Service and navigate to the topic detail page
-
Click the "Messages" tab
-
Click "Search" to accept the default search options and browse for messages on the topic right away. If everything is configured correctly, the messages should become visible below the search controls.
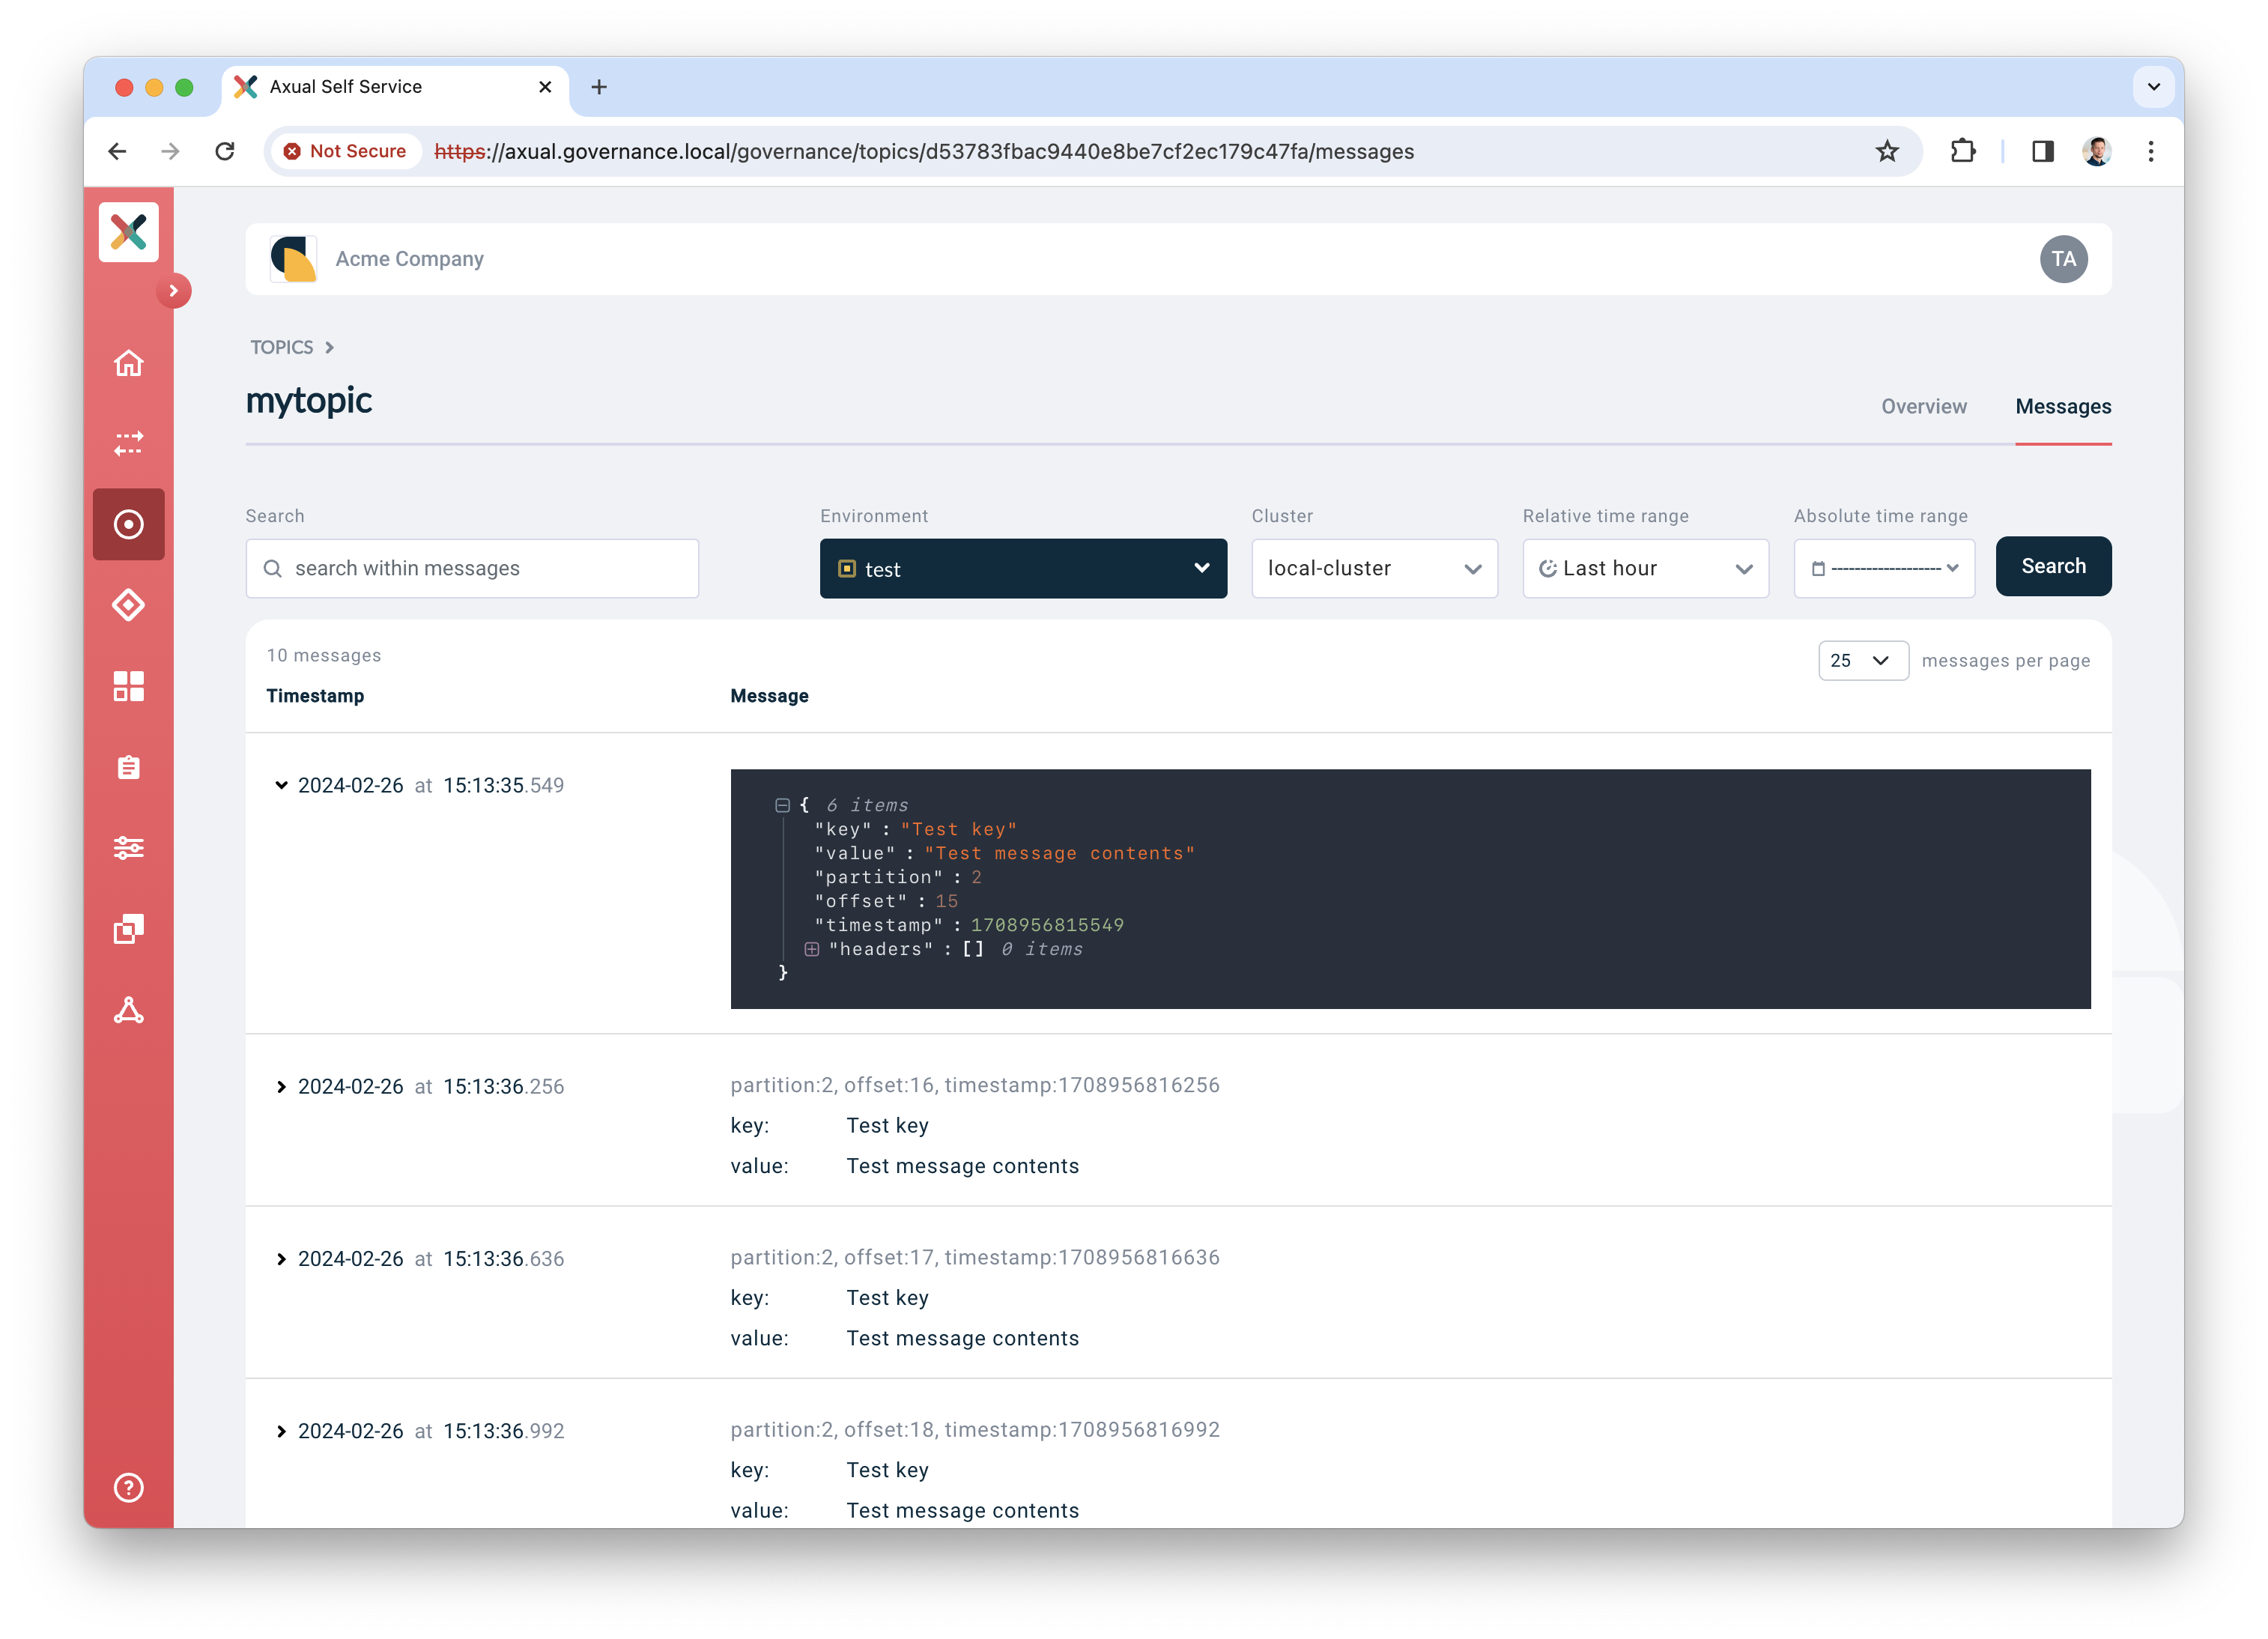
Click a row to expand it and show details for a given message
Next steps
🎉 Congratulations! you have now concluded the first time setup of Self-Service for topic management, and you have verified the integration between Axual Governance and Axual Streaming.
Preparing for a production like setup
For a production like setup, you need to do more advanced configuration of the platform. This falls beyond the scope of this "How-To", but is explained under the following documentation sections:
Connecting a consumer application
Analog to the producer app, you can create a consumer app to process the messages on the topic. Use the following command to consume messages from the topic.
kcat -F kcat.conf -C -t loc-test-mytopic -o -1 -eFor more information about kcat parameters, check the official kcat documentation.
Need support?
Please navigate to our Support portal and select Additional » Product trial questions to submit a support request specifically for your trial.