Step 2: Creating Applications
Creating an application
In this step, you will create your producer and consumer application in the Self-Service portal.
-
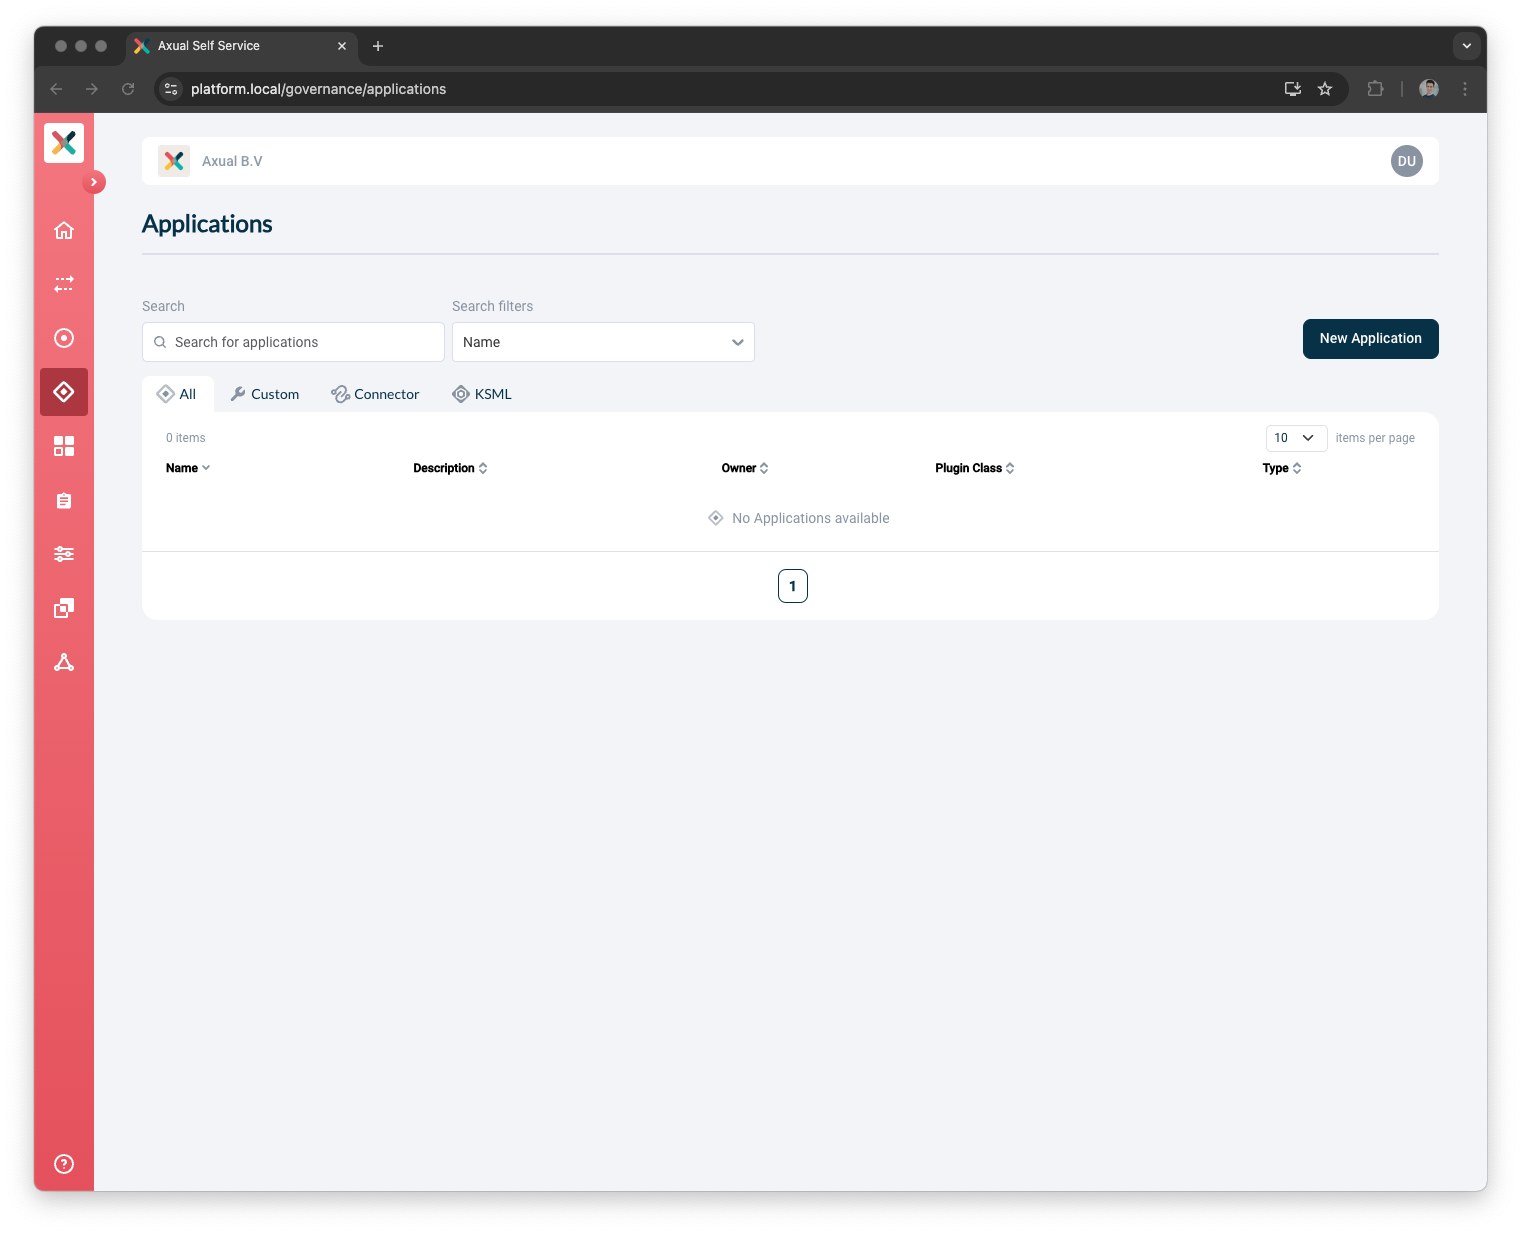
On the left-side menu, click
Applications -
In the top-right corner of the screen, click the
New applicationbutton.
-
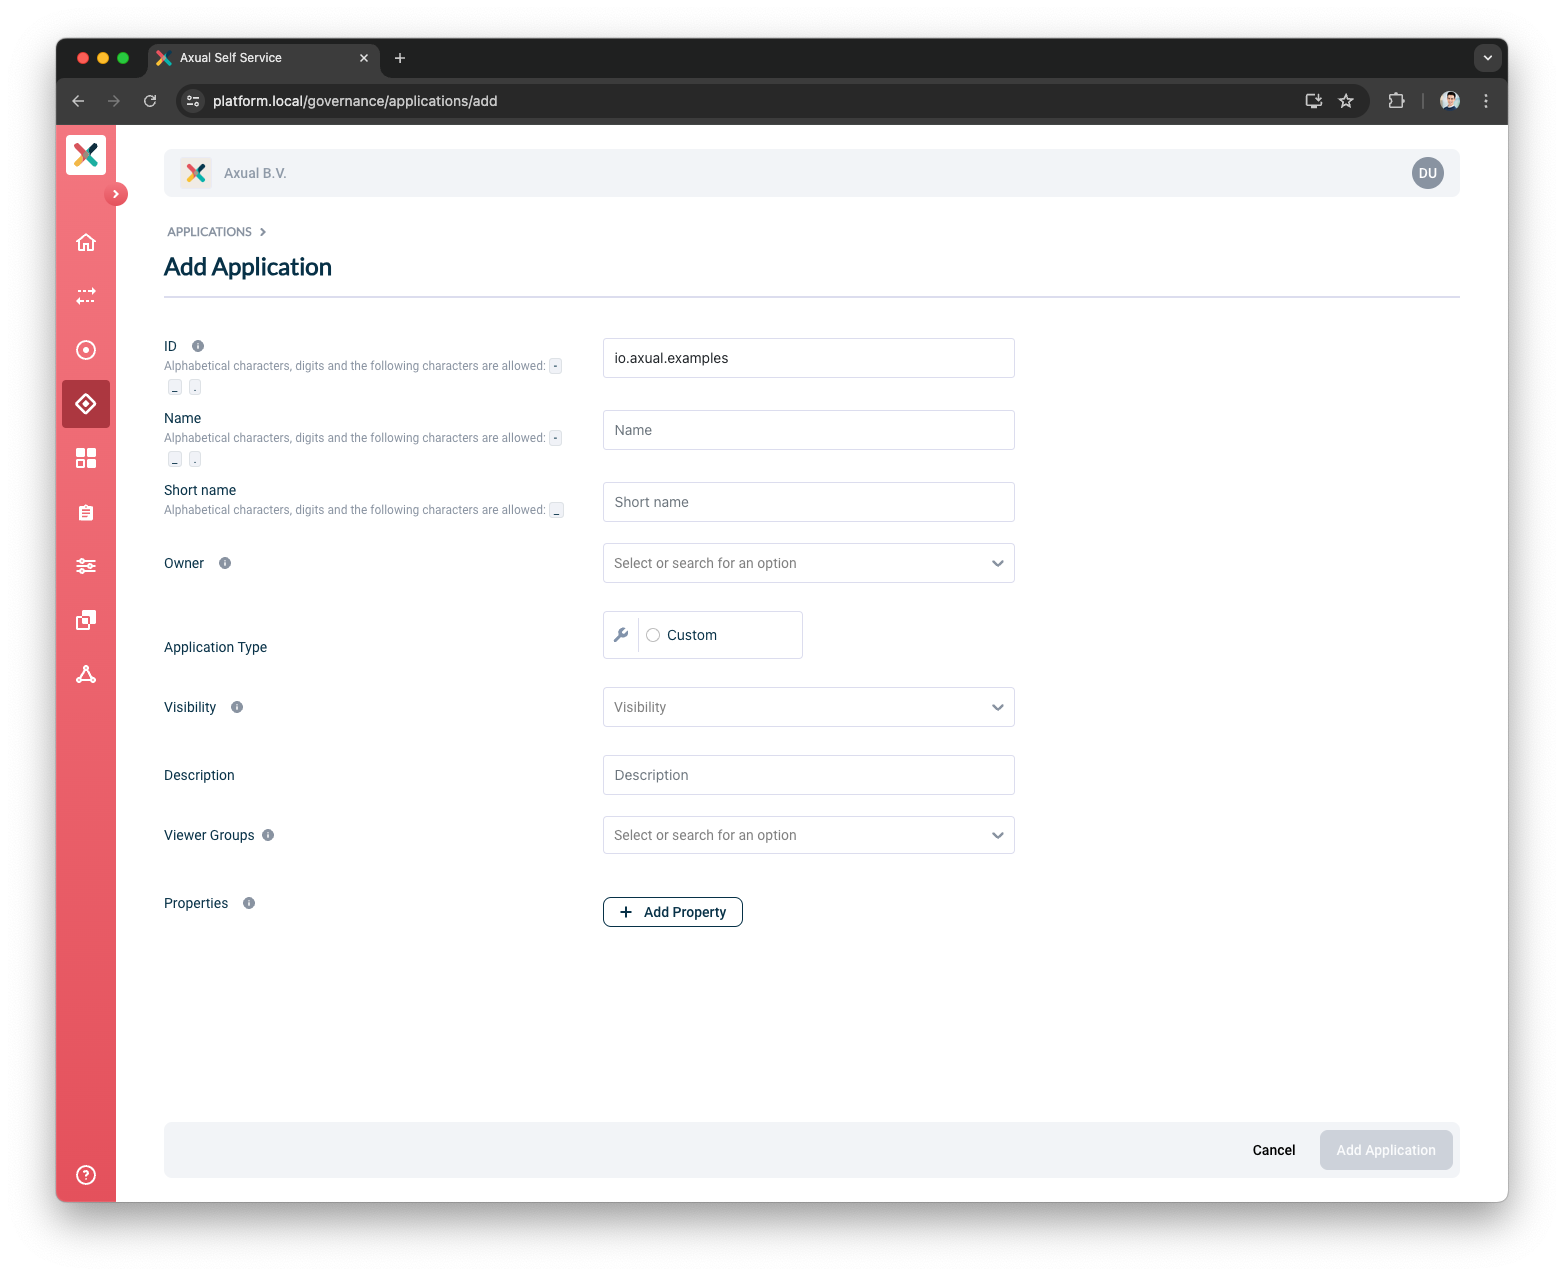
Application ID: Use
io.axual.examples.
| Producers only supply this value as additional metadata. It’s not mandatory for functionality, but it’s recommended to be included. Consumers use this ID field to keep track of events that were already consumed. |
-
Name: Use
Axual Client Examplesas the application mame. -
Short name: Use
axualclientexamplesas the application short name. -
Owner: Select
Adminsfrom the drop-down. -
Type: Select
Customas the type. -
Application Kind: Select
Javafrom the drop-down. -
Visibility: Select
Publicfrom the drop-down -
Description: Enter a Description which helps (future) colleagues understand how this application handles data: i.e. "Creates sample log-events.".
-
Click
Add application, at the bottom-right of the screen
Producer credentials
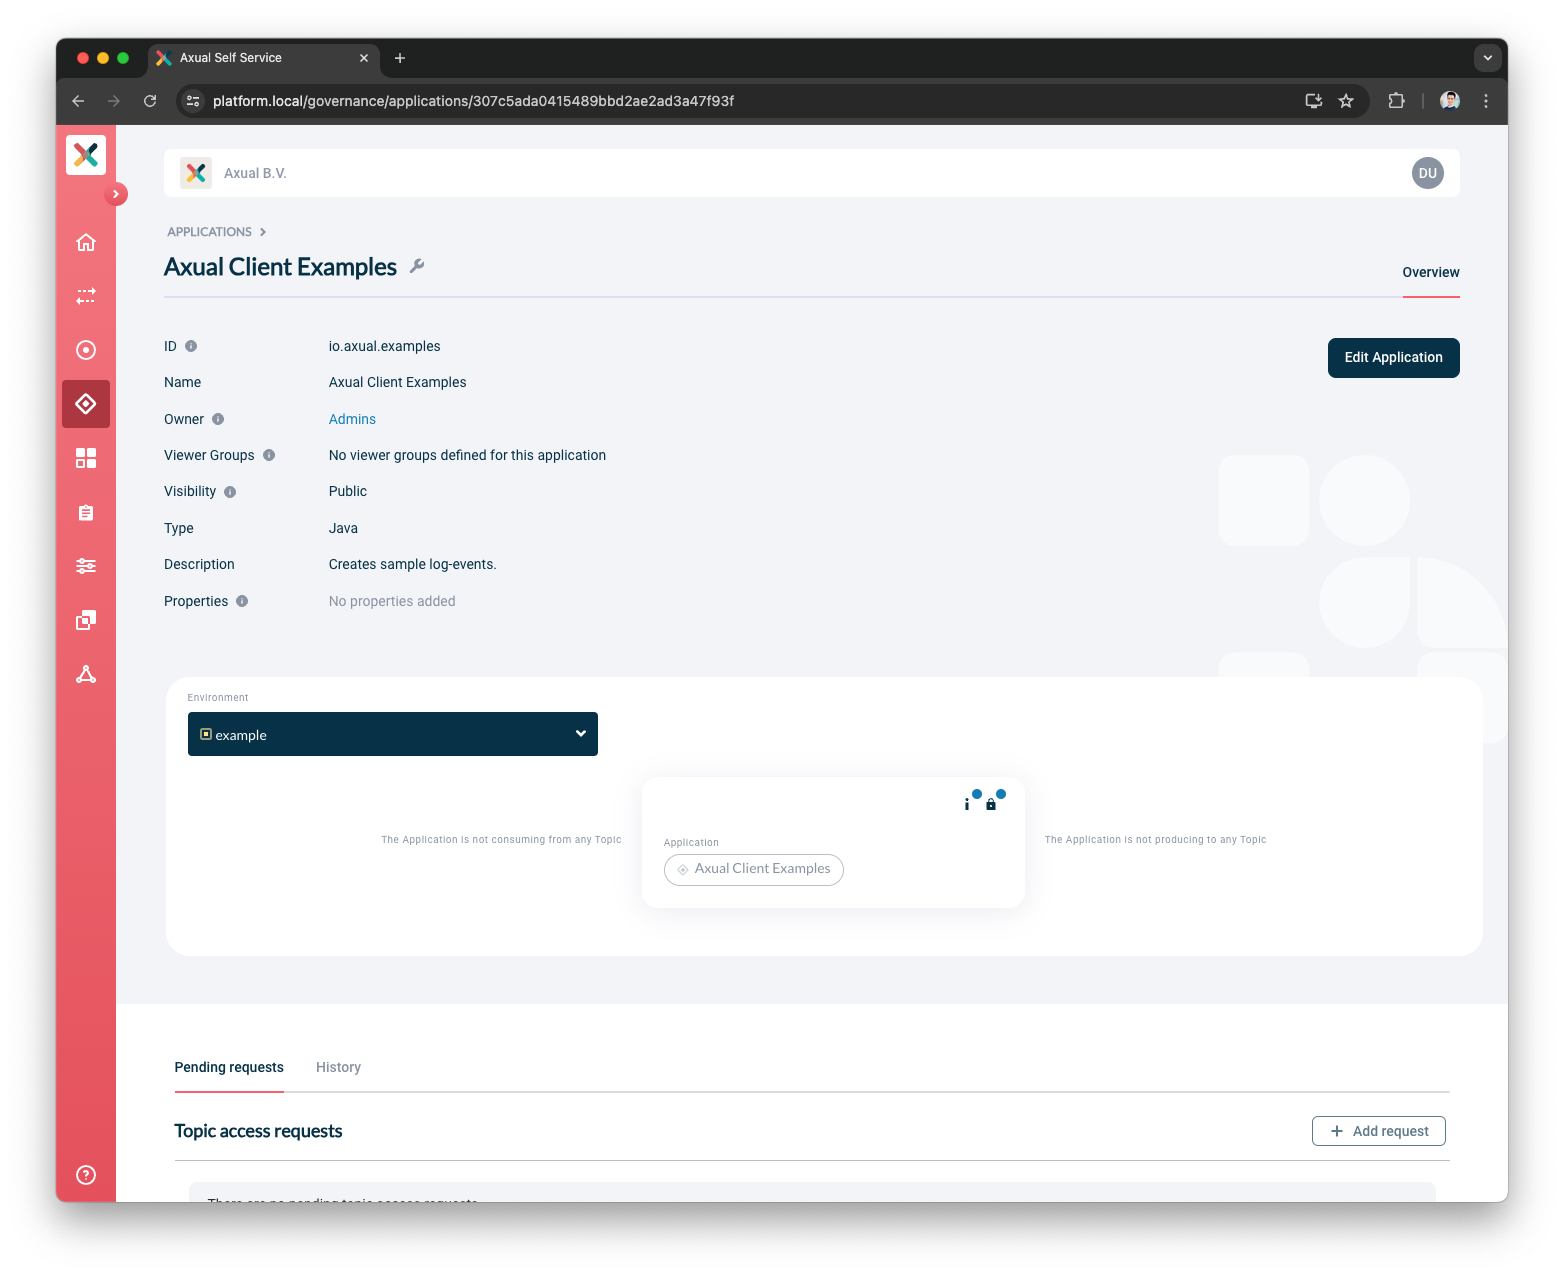
The application is created.
We will now configure authentication credentials for the example environment.
-
From the drop-down on the left, select the
exampleenvironment. -
The application box in the center of the screen has a "lock" icon in its top right corner, and a blue circle indicating that authentication is not set-up for this environment.

-
Click the lock icon.

-
A new modal will be displayed. Click the
+ Generate new pairbutton, under theSASLsection. -
Store the autogenerated credentials in a file for a few minutes: we’ll use them shortly.
-
You can now close the modal
Producer authorization
The application is created and has configured credentials for the default environment.
What’s left is requesting produce permission for a topic.
At the bottom of the page, there are two tabs:
Pending requests and History: the former is already selected.
-
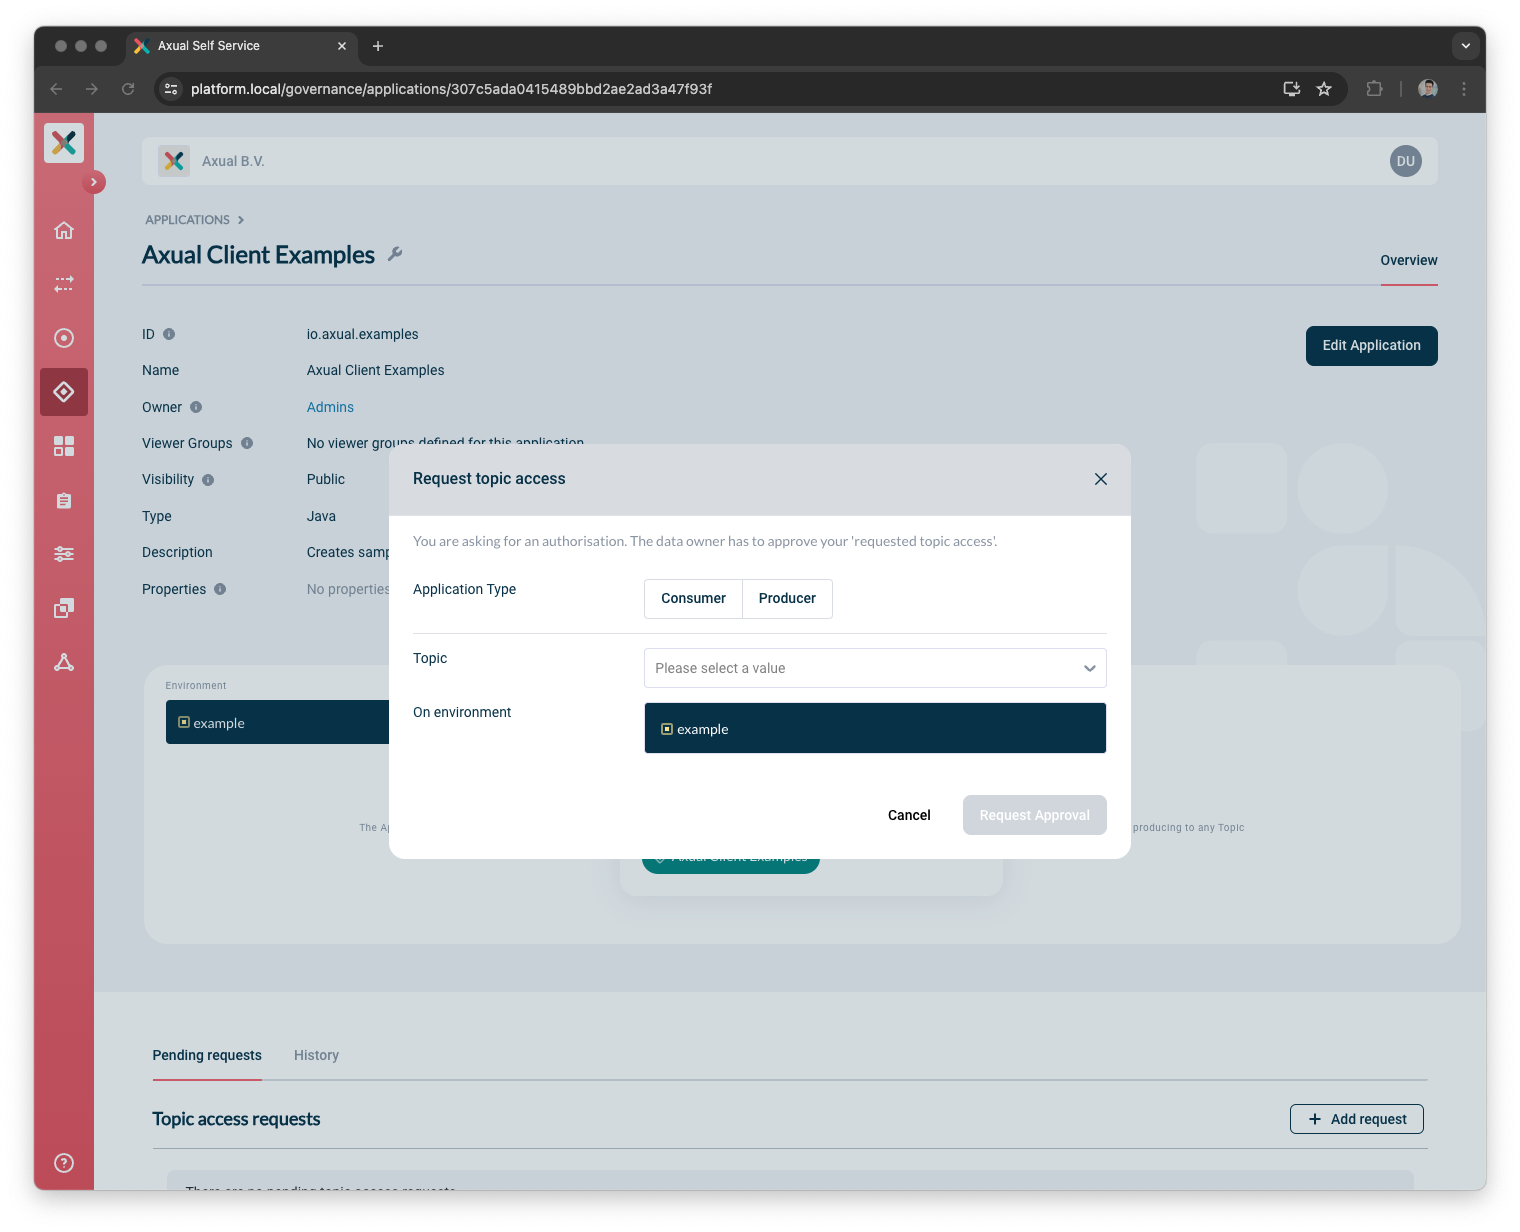
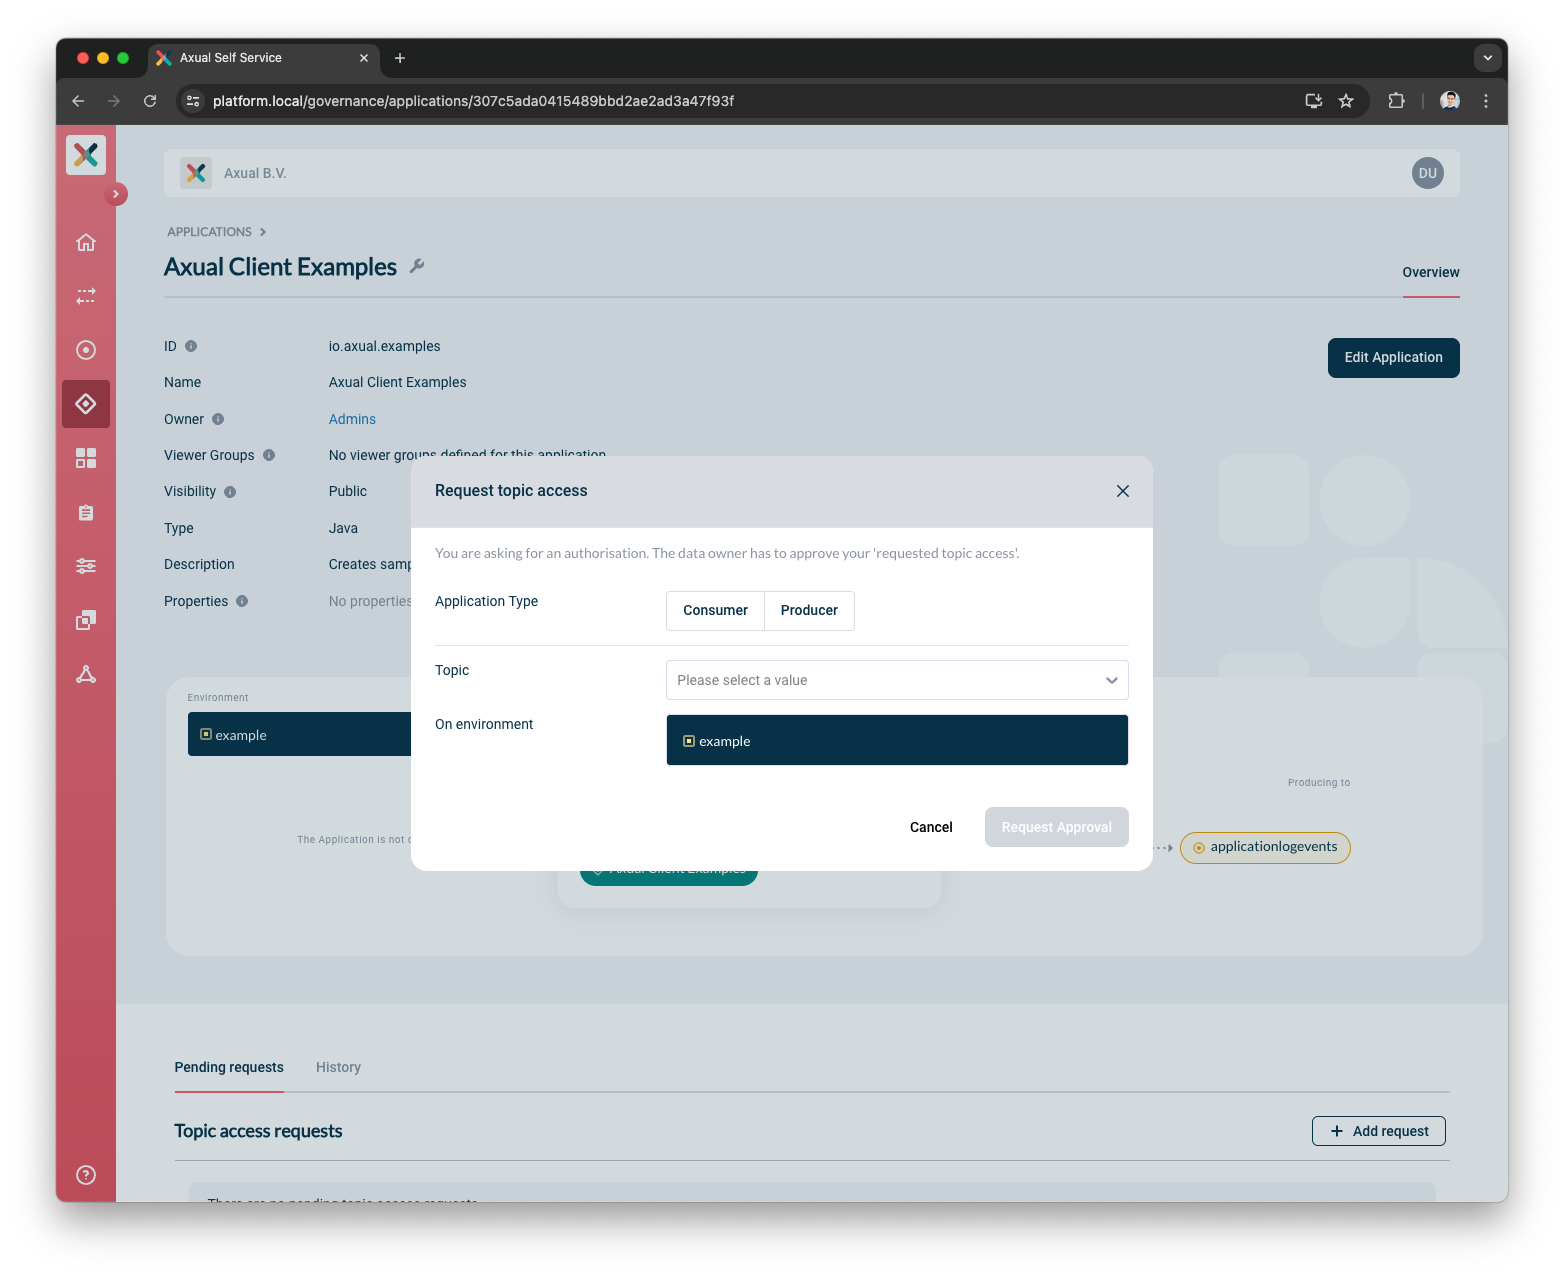
Click
+ Add request, at the bottom-right of the page. A modal will pop-up.
-
Application type: Select
Producer -
Topic: Select
applicationlogeventsfrom the drop-down. -
Click the
Request Approvalbutton in the bottom right.
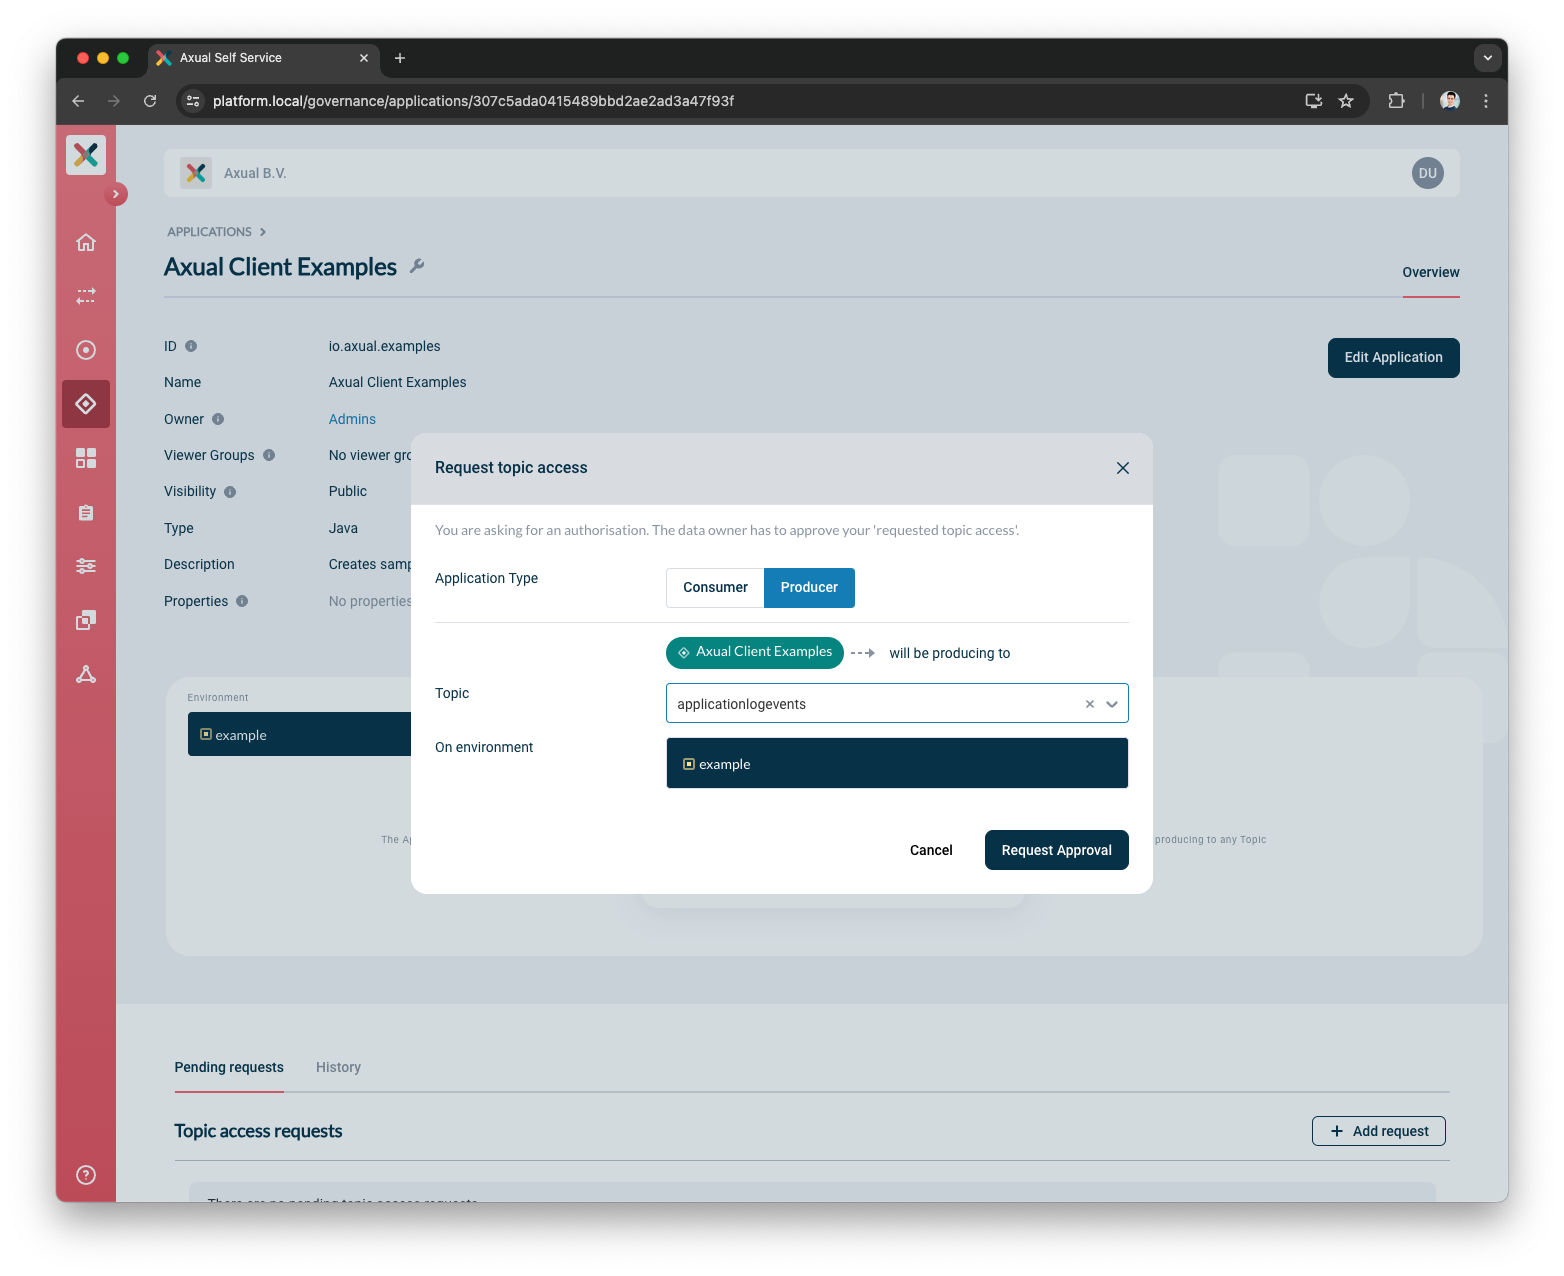
| Since this is a private environment, used for testing purposes only, you do not require explicit approval from the topic owner (which anyway is also yourself). Shared environments will incur an extra step: the topic owner has to approve your request before you gain produce access. Read more about authorizing stream access here. |
Consumer authorization
For simplicity, we’ll reuse the producer application as a consumer, as well. It’s already got a credential registered for the environment, all that’s left is to request consume permission.
-
Click
+ Add request, at the bottom-right of the page. A modal will pop-up.
-
Application type: Select
Consumer -
Topic: Select
applicationlogeventsfrom the drop-down. -
Click the
Request Approvalbutton in the bottom right.
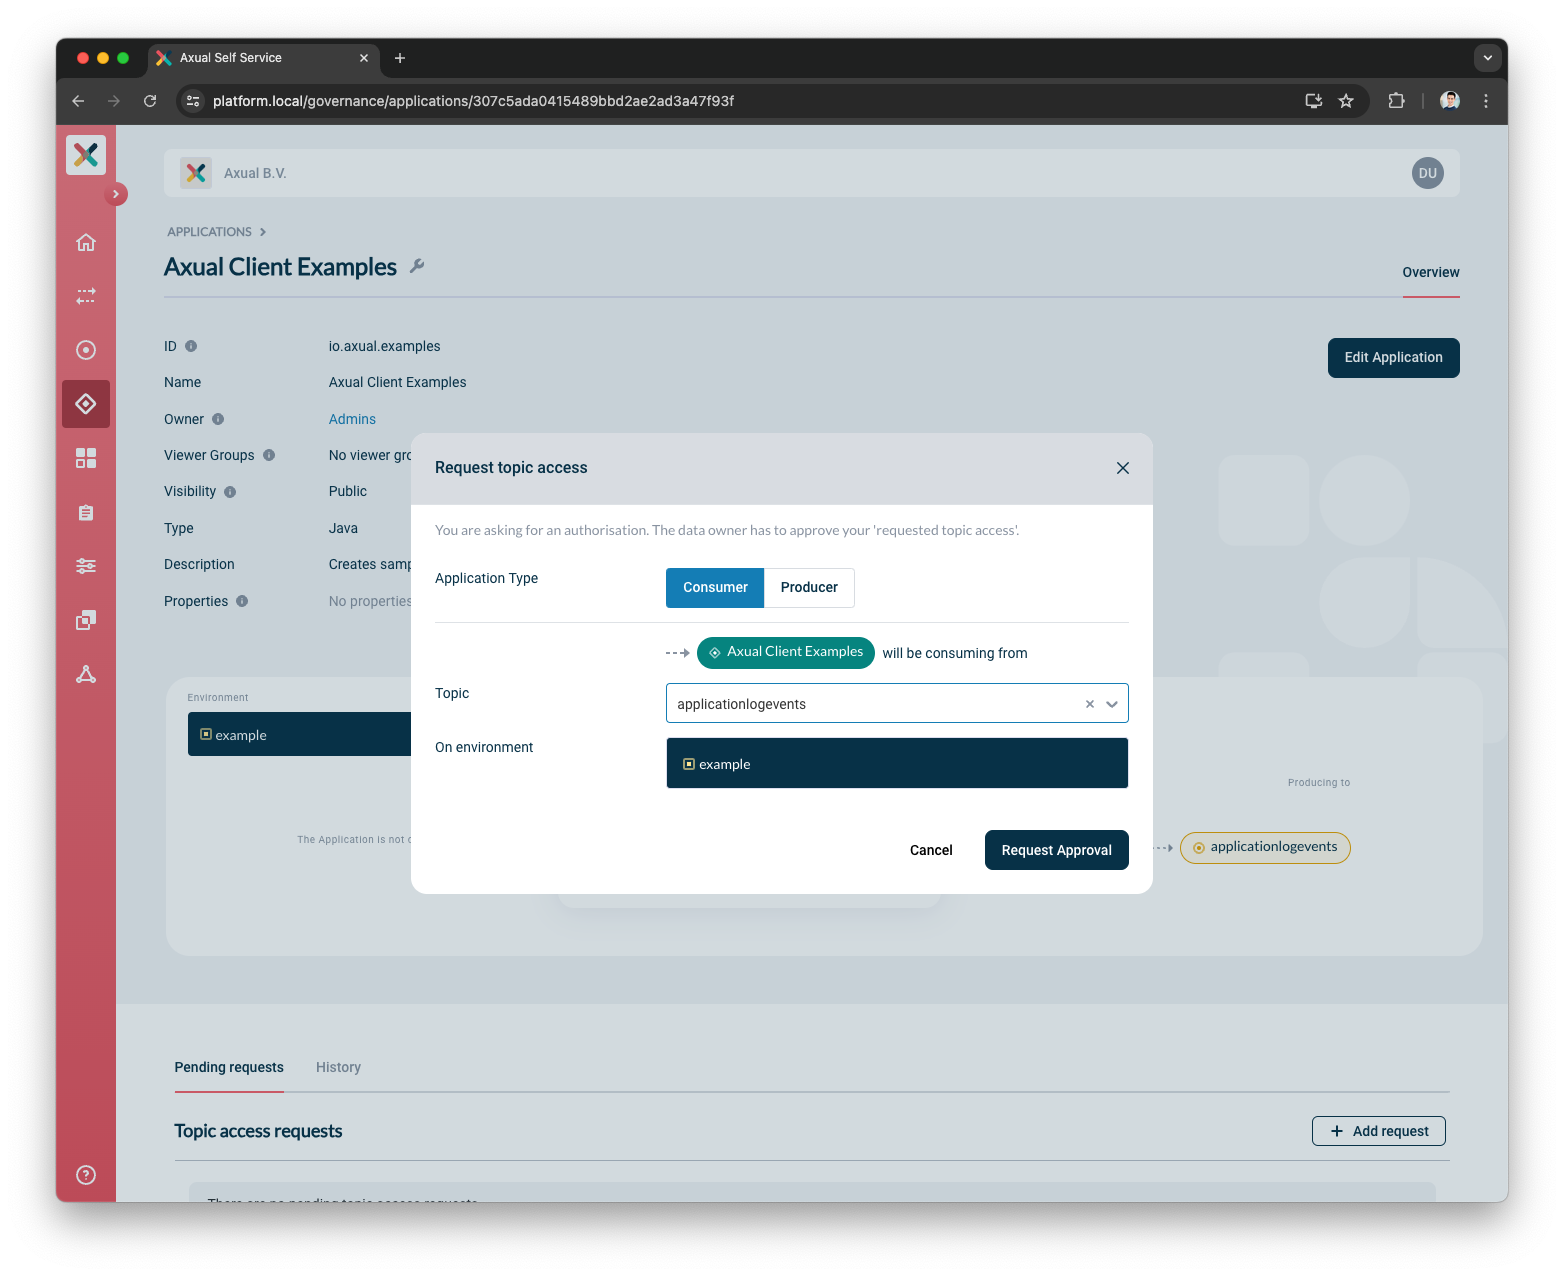
The request is automatically approved, just like the producer.
Next Step: Producing data
In the next step, you will actually start producing some data to the newly created topic.
Proceed to Step 3: Producing data