Keycloak
Configuring Extra Environment Variables
In case you need to override or configure some aspect of Keycloak via environment variables, it is possible to do so
by adding the custom variable to the mgmt.keycloak.extraEnv object, as shown below.
|
mgmt:
  keycloak:
    extraEnv: |
      - name: KEY_1
        value: 'custom-env-var-1'
      - name: KEY_2
        value: 'custom-env-var-1'
After updating the configuration, upgrade the Axual platform release using the above modified values.yaml:
helm upgrade --install platform axual-stable/platform -f values.yaml --version=<helm-chart-version> -n kafkaYou can also configure additional environment variables for Keycloak mapped from a Secret or ConfigMap. To do so,
you can either configure a new secret or use a secret not managed by the Axual platform release. The example below shows
how to create one using the mgmt.keycloak.secrets object:
mgmt:
  keycloak:
    secrets:
      customSecret:
        stringData:
          KEY_1: 'custom-env-var-1'
          KEY_2: 'custom-env-var-1'
    extraEnvFrom: |
      - secretRef:
          name: '{{ include "keycloak.fullname" . }}-customSecret'
After updating the configuration, upgrade the Axual platform release using the above modified values.yaml:
helm upgrade --install platform axual-stable/platform -f values.yaml --version=<helm-chart-version> -n kafkaAll these Keycloak configurations are supported.
Configuring Certificate Authority (CA) to Keycloak’s Truststore
Sometimes custom Certificate Authority (CA) needs to be configured to enable Keycloak to connect to a 3rd party/external service.
To do so, you will need to map the custom CA to Keycloak’s container as well as configure the X509_CA_BUNDLE environment variable as an extra environment variable.
The custom CAs are provided as PEM string, ending with the .crt extension, to the mgmt.keycloak.secrets.ssl-creds secret object,
and the environment variable is configured as part of mgmt.keycloak.extraEnv.
|
A working example looks like the below:
mgmt:
  keycloak:
    secrets:
      ssl-creds:
        stringData:
          your_custom_ca.crt: |
            -----BEGIN CERTIFICATE-----
            MIIFJjCCAw6gAwIBAgIJAINuAirfnRU6MA0GCSqGSIb3DQEBCwUAMCAxHjAcBgNV
            BAMMFUF4dWFsIER1bW15IFJvb3QgMjAxODAeFw0xODA1MjkxMDM0MTRaFw0zODA1
            ...
            okA2uUH/ZuJlR/BEmqbLt5HWPRNT/GgLfPY=
            -----END CERTIFICATE-----
    extraEnv: |
      - name: X509_CA_BUNDLE
        value: "/etc/x509/https/your_custom_ca.crt"
If you need to configure multiple Certificate Authorities, you can do so by informing them by separating them with a blank space, as shown below:
mgmt:
  keycloak:
    secrets:
      ssl-creds:
        stringData:
          your_custom_ca.crt: |
            -----BEGIN CERTIFICATE-----
            MIIFJjCCAw6gAwIBAgIJAINuAirfnRU6MA0GCSqGSIb3DQEBCwUAMCAxHjAcBgNV
            BAMMFUF4dWFsIER1bW15IFJvb3QgMjAxODAeFw0xODA1MjkxMDM0MTRaFw0zODA1
            ...
            okA2uUH/ZuJlR/BEmqbLt5HWPRNT/GgLfPY=
            -----END CERTIFICATE-----
          your_another_custom_ca.crt: |
            -----BEGIN CERTIFICATE-----
            MIIFJjCCAw6gAwIBAgIJAINuAirfnRU6MA0GCSqGSIb3DQEBCwUAMCAxHjAcBgNV
            BAMMFUF4dWFsIER1bW15IFJvb3QgMjAxODAeFw0xODA1MjkxMDM0MTRaFw0zODA1
            ...
            okA2uUH/ZuJlR/BEmqbLt5HWPRNT/GgLfPY=
            -----END CERTIFICATE-----
    extraEnv: |
      - name: X509_CA_BUNDLE
        value: "/etc/x509/https/your_custom_ca.crt /etc/x509/https/your_another_custom_ca.crt"
Note the path of the certificate authority is always /etc/x509/https, and its filename is the same as the secret key name. If you’re using a secret
not managed by Axual platform release, make sure to put the CA files in the /etc/x509/https directory in the container.
After updating the configuration, upgrade the Axual platform release using the above modified values.yaml:
helm upgrade --install platform axual-stable/platform -f values.yaml --version=<helm-chart-version> -n kafkaEnabling SSL/TLS between Keycloak and External Database
To enable TLS between Keycloak and External Database , you have to add custom CAs to Keycloak truststore. The CA certificate that is used to sign database public key, has to be provided to Keycloak, if it doesn’t already exist in Keycloak truststore. Keycloak will then add the custom CA into its truststore and verify the database certificate. This prevents a potential man-in-the-middle attack.
The steps to add the CA to keycloak truststore are exactly the same as "Adding custom CAs in Keycloak truststore". Please follow those steps and come back here.
Now please set values, the path and file name of serverSslCert is given as example in keycloak Chart(platform/charts/mgmt/charts/keycloak/values.yaml):
mgmt:
  keycloak:
    db:
      ssl:
          #Force SSL/TLS on connection. Default false
          enabled: true
          # Only relevant when ssl.enabled=true
          # Path to the server's certificate, which will be added to Keycloak's trustStore. This permits a self-signed certificate to be trusted. No value added by default.
          # To mount server certificate to this folder /etc/x509/https/, please follow these instructions in Readme: "Adding custom CAs in Keycloak truststore"
          serverSslCert: /etc/x509/https/axual_dummy_root.crt
          # Only relevant when ssl.enabled=true
          # Force TLS/SSL protocol to a specific set of TLS versions (comma separated list).
          # Example enabledSslProtocolSuites: TLSv1.2,TLSv1.3
          enabledSslProtocolSuites: TLSv1.2,TLSv1.3
          # Only relevant when ssl.enabled=true
          # When using SSL/TLS, the driver checks the hostname against the server's identity as presented in the server's certificate (checking alternative names or the certificate CN) to prevent man-in-the-middle attacks. This option permits deactivating this validation. Hostname verification is disabled when the trustServerCertificate option is set to true.
          # Default: false
          disableSslHostnameVerification: false
          # Only relevant when ssl.enabled=true
          # If true, when using SSL/TLS, Keycloak will not check DB's server certificate.
          # Default false
          trustServerCertificate: false
Import Keycloak’s realm for the default tenant
If you’re deploying the platform from scratch and you are using Keycloak, you might need to enable the default’s tenant realm creation.
To do so, set the global.mgmt.keycloak.importInitialRealm value to true, as in the example below:
global:
  mgmt:
    keycloak:
      importInitialRealm: true
You will then need to run a helm upgrade command specifying the values.yaml to upgrade the release:
helm upgrade --install platform axual-stable/platform -n kafka -f values.yamlAlternatively, you can override the specific property with the --set option
helm upgrade --install platform axual-stable/platform --set global.mgmt.keycloak.importInitialRealm="true" -n kafkaRestrict Keycloak Admin console Access
If Keycloak is deployed as part of the platform, its admin console will be publicly accessible by default on the same port and hostname as its APIs.
Once the Keycloak is configured, we might not need or want the admin console to be publicly reachable.
To restrict its access, set the global.mgmt.keycloak.publicAdminConsole value to false, as in the example below:
|
global:
  mgmt:
    keycloak:
      publicAdminConsole: false
You will then need to run a helm upgrade command specifying the values.yaml to upgrade the release:
helm upgrade --install platform axual-stable/platform -n kafka -f values.yamlAlternatively, you can override the specific property with the --set option
helm upgrade --install platform axual-stable/platform --set global.mgmt.keycloak.publicAdminConsole="false" -n kafkaRealm Settings
-
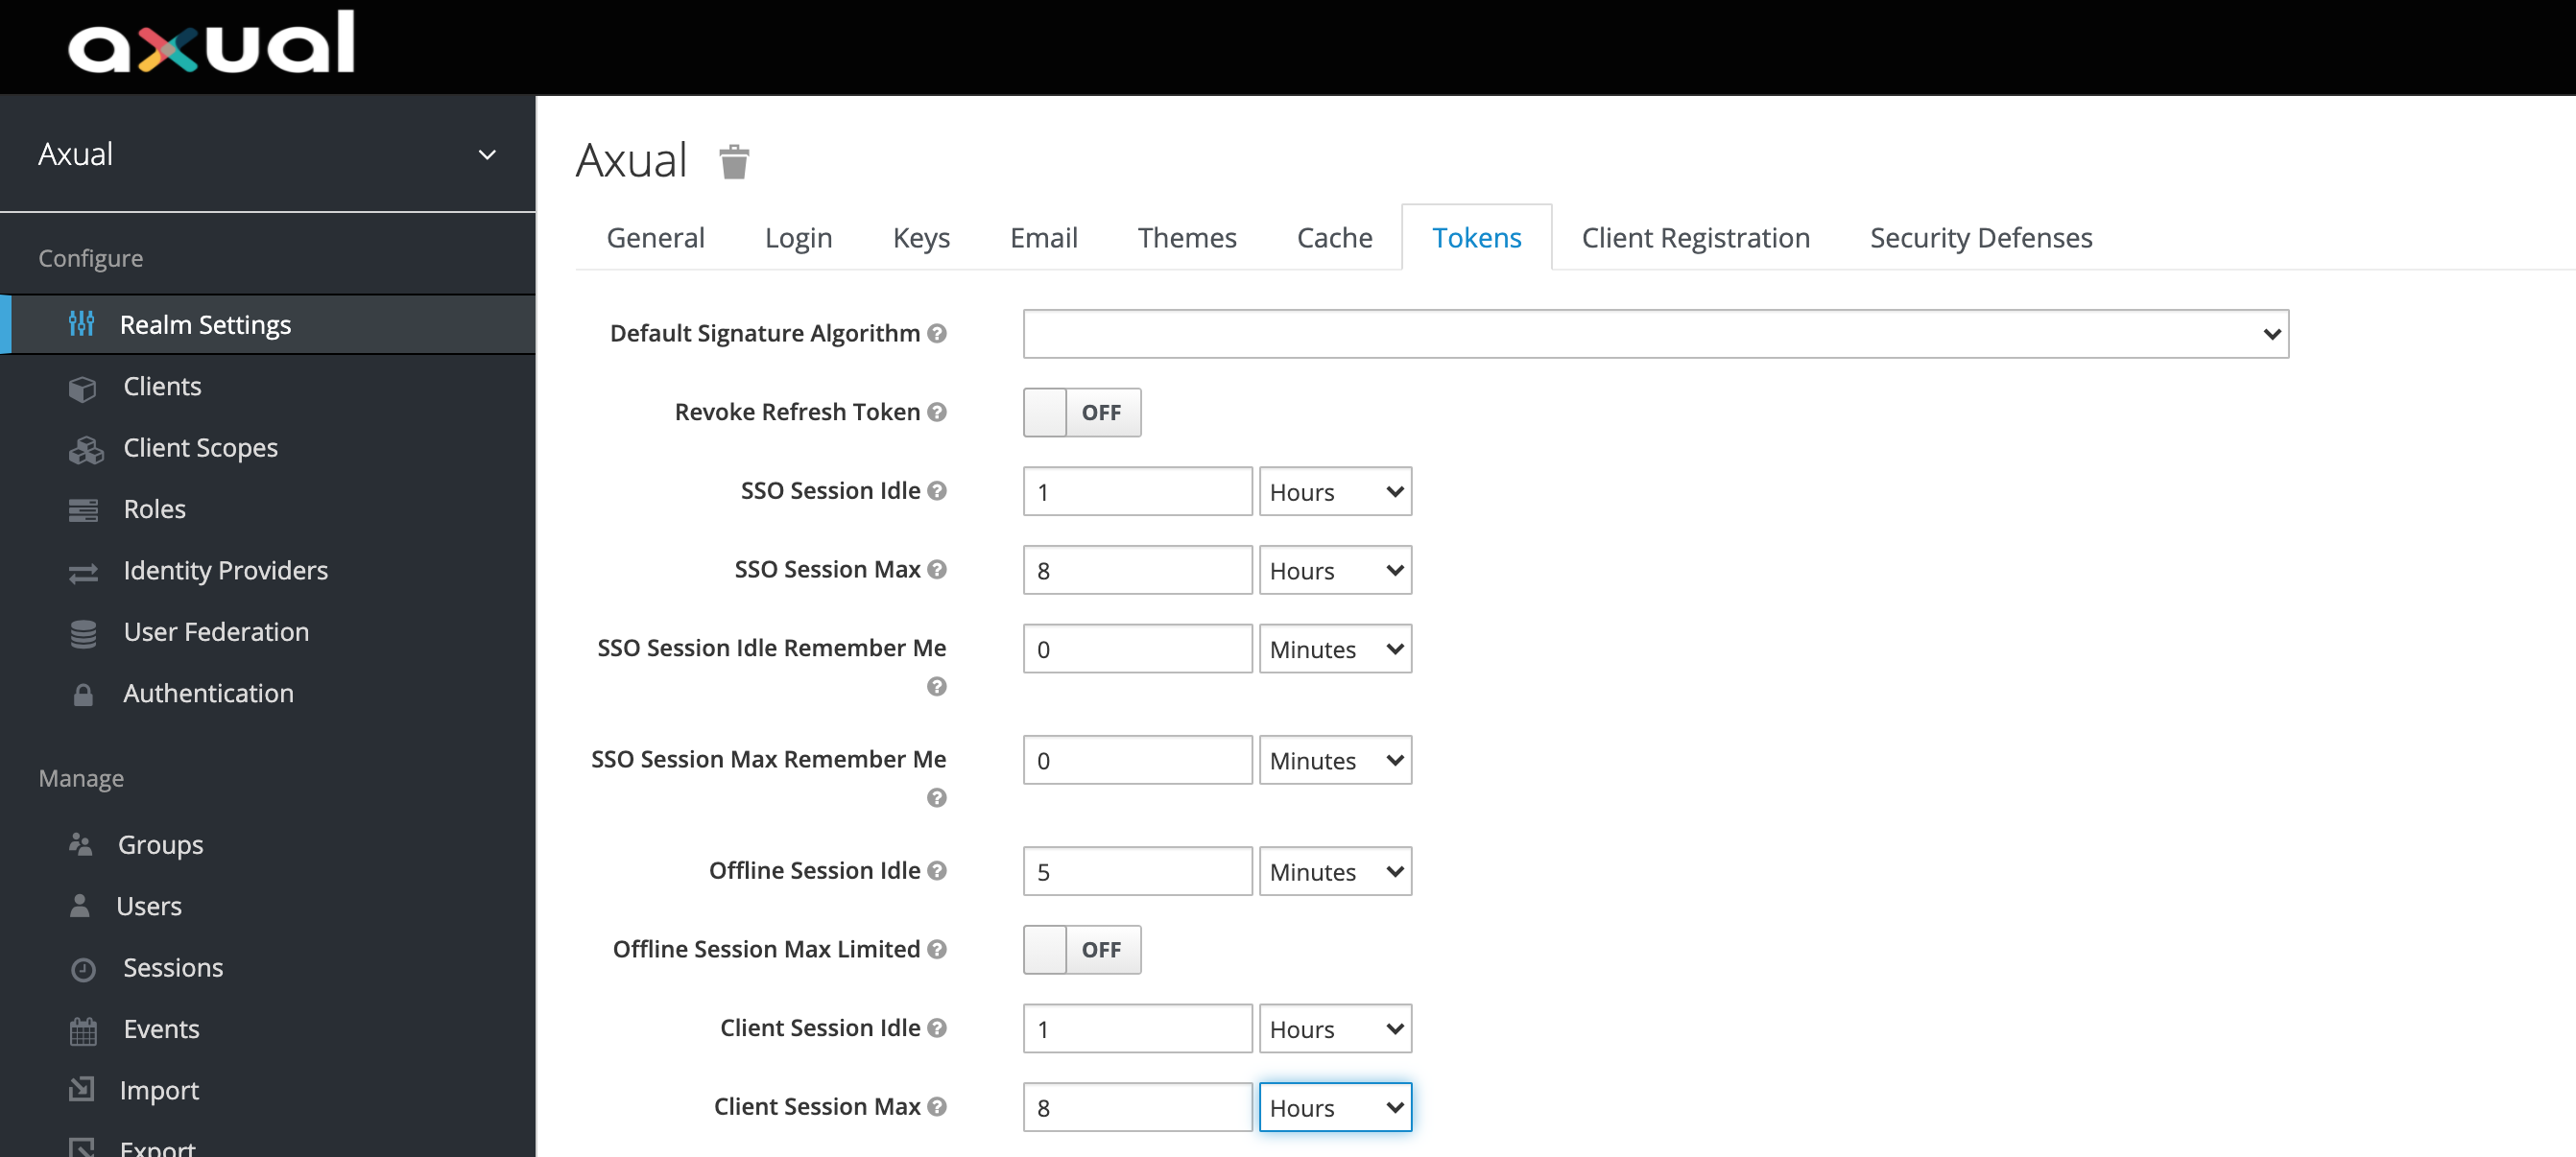
In the Keycloak realm settings you can configure Session Settings.
-
You can go to the realm settings:
-
In the Main Menu, Select Realm Settings
-
In the top Menu, Select Tokens
-
-
You will see the following screen
-
The following timeouts can be adjusted according to your needs, only if the defaults don’t match your needs.
| Parameter | Default | Description |
|---|---|---|
SSO Session Idle |
1 hour |
Time a Session is allowed to be idle |
SSO Session Max |
8 hours |
Maximum length of any session, irrespective of activity |
Client Session Idle |
0 minutes |
Time a Session is allowed to be idle |
Client Session Max |
0 minutes |
Maximum length of a client session, irrespective of activity |
Access Token Lifespan |
5 minutes |
Maximum Time before an access token is expired. This should be short |
| Client Session Max and Client Session Idle are set to 0 and values for SSO Session Max and SSO Session Idle override them respectively. |
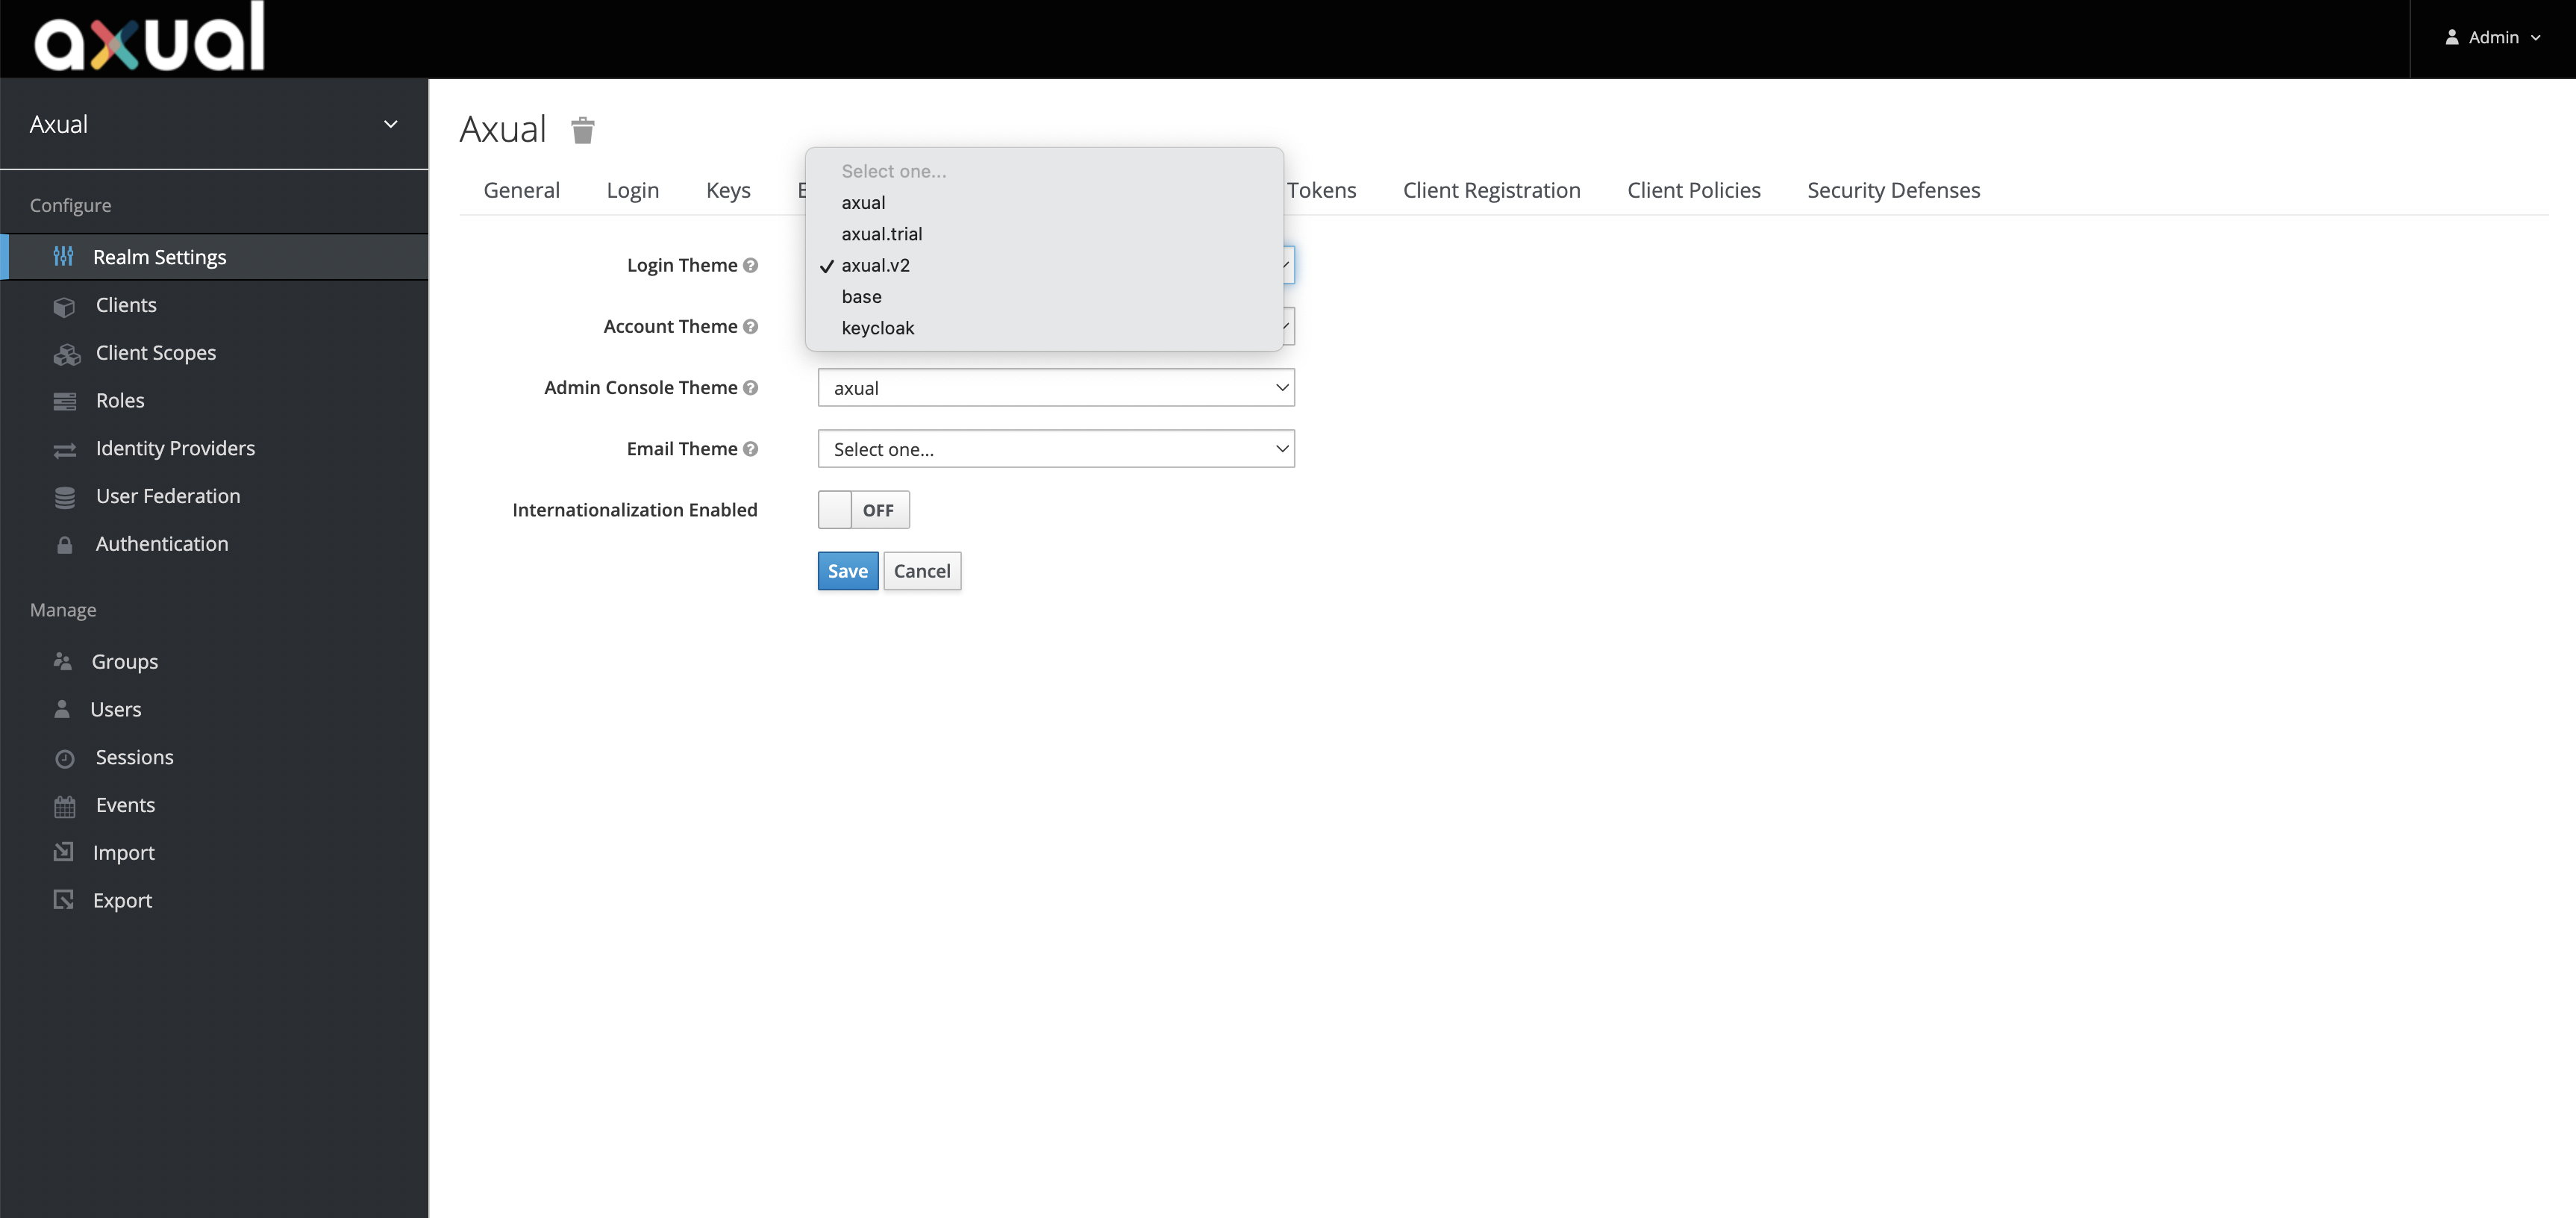
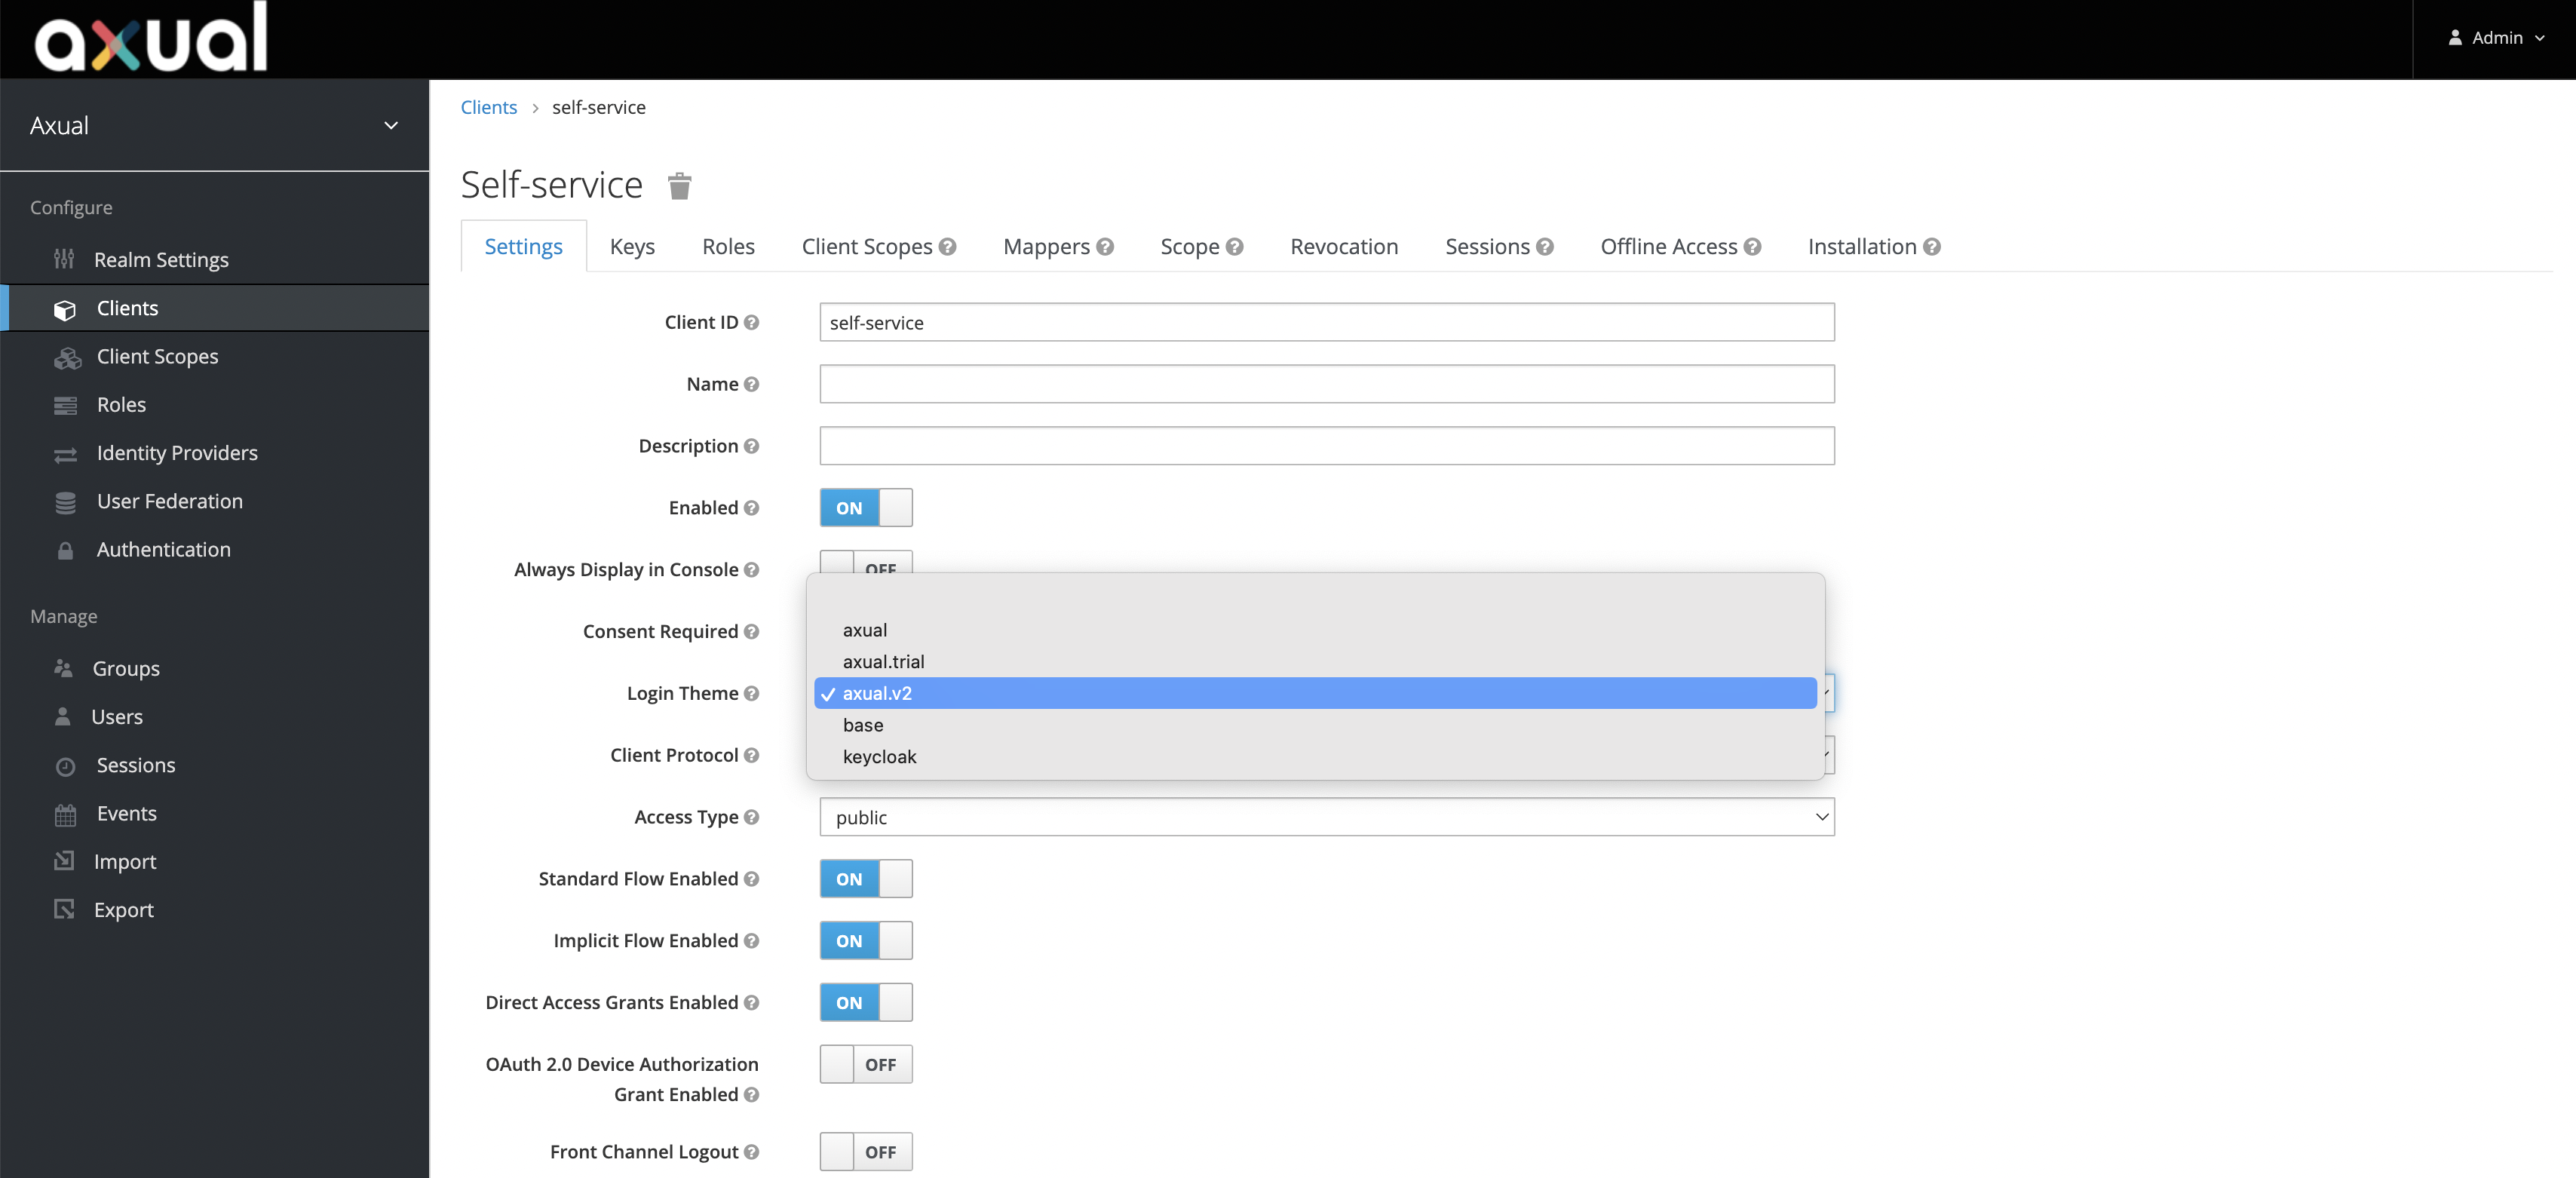
Theme Settings
In the Keycloak Admin Console, you can change the theme globally or specifically for a client