Deploying Axual Governance on Kubernetes
Use the following instructions to deploy Axual Governance on Kubernetes, so you can onboard your own Kafka cluster using the Self-Service interface.
Prerequisites
To install Axual Governance in your own infrastructure, you need:
-
Credentials for the Axual Registry (https://docker.axual.io)
If you do not have credentials yet, please request them here: https://insights.axual.com/credentials -
A Kubernetes cluster (version 1.24 or above) with an Ingress controller
-
Helm (>= version 3)
-
Your favorite terminal
-
For the Kafka cluster you are onboarding:
-
Connectivity information (endpoint, port)
-
Security information (certificates, SASL credentials)
-
Kafka and Schema Registry authentication
Depending on the type of authentication which is enabled on Kafka and Schema Registry, there are additional prerequisites. Check the prerequisites for your type of authentication below.
Kafka authentication
| Mutual TLS (mTLS) | SASL |
|---|---|
If you are using mutual TLS (mTLS) to authenticate to Kafka, there are additional prerequisites:
|
If you are using SASL to authenticate to Kafka, there are additional prerequisites:
|
Schema registry authentication
If you use authentication on the schema registry interface, you need some additional information:
| Basic authentication | TLS |
|---|---|
The username and password to authenticate to Schema Registry |
|
| Axual Governance only supports X.509 certificates in the PEM format and PKCS8 private keys in the PEM format. The extension of certificate and private key can be anything(for example .crt, .pem, .key, .p8 etc). |
Installation procedure
By following the steps below, you will deploy Axual Governance first, after which you will onboard your own Kafka cluster to it and set up resources in Self-Service so that people in your organization can start using the platform.
Step 1: Deploying Axual Governance
-
Create a new namespace for the deployment
kubectl create namespace axual -
Log in to check your credentials are working fine
helm repo add axual-stable https://dev.axual.io/nexus/repository/axual-helm-stable --username [your_username] helm repo update -
Persist the credentials you have received for the Axual Registry, so they can be used by helm charts during deployment:
kubectl -n axual create secret docker-registry axualdockercred \ --docker-server=docker.axual.io \ --docker-username=[AXUAL_REGISTRY_USERNAME] \ --docker-password=[AXUAL_REGISTRY_PASSWORD] -
Download the example "axual-governance.values.yaml"
Click to open axual-governance.values.yaml
global: imageRegistry: "docker.axual.io" imagePullSecrets: - name: axualdockercred platform-manager-mysql: enabled: true platform-manager-vault: enabled: true keycloak-mysql: enabled: true keycloak: enabled: true # -- Axual Components toggles platform-manager: enabled: true platform-ui: enabled: true api-gateway: enabled: true organization-mgmt: enabled: true topic-browse: enabled: true # Component specific configuration ## Keycloak DB keycloak-mysql: fullnameOverride: "axual-keycloak-mysql" auth: rootPassword: "rootpassword" database: "keycloak-db" username: "keycloak" password: "Passw0rd1!" ## Keycloak keycloak: autoscaling: enabled: false database: vendor: "mysql" hostname: "axual-keycloak-mysql" database: "keycloak-db" port: "3306" username: "keycloak" password: "Passw0rd1!" extraEnv: | - name: KEYCLOAK_ADMIN value: "admin" - name: KEYCLOAK_ADMIN_PASSWORD value: "admin123" - name: JAVA_OPTS_APPEND value: -Djgroups.dns.query={{ template "keycloak.serviceDnsName" . }} - name: KC_HTTP_ENABLED value: "true" - name: KC_HOSTNAME_STRICT value: "false" # This control access to the Keycloak Admin Console ingress: enabled: false ingressClassName: "nginx" rules: - # -- The fully qualified domain name of a network host. host: "axual.<domain>" paths: - # -- Matched against the path of an incoming request. path: "/auth" # -- Determines the interpretation of the Path matching. # Can be one of the following values: `Exact`, `Prefix`, `ImplementationSpecific`. pathType: "ImplementationSpecific" tls: [ ] ## Platform Manager DB platform-manager-mysql: fullnameOverride: "axual-platform-manager-mysql" auth: rootPassword: "rootpassword" database: "selfservice-db" username: "fluxmaster" password: "Passw0rd" ## Platform Manager platform-manager: # Enable Remote Debug with Platform Manager debug: enabled: false mtls: enabled: false config: spring: # Spring Datasource datasource: name: "fluxdb" url: "jdbc:mysql://axual-platform-manager-mysql:3306/selfservice-db?useSSL=false&useLegacyDatetimeCode=false&serverTimezone=UTC" username: "fluxmaster" password: "Passw0rd" driver-class-name: "com.mysql.cj.jdbc.Driver" # Spring JPA jpa.database-platform: "org.hibernate.dialect.MySQLDialect" # Flyway Configuration flyway: locations: "classpath:db/migration/mysql" # Axual Platform Manager axual: api.available.auth.methods: "SSL, SCRAM_SHA_512" # Instance Manager Configuration instance-api: available: false # Application Operation Manager Configuration operation-manager: available: false # Connect Configuration connect: instance-connect-credentials: axual-poc: authorizer: "basic" username: "me" password: "notsecret" available: true #Client Configuration client: socket-timeout: 60000 # Security Configuration security: header-based-auth: true # Disable Keycloak and rely on headers passed from API Gateway # Governance Vault Configuration governance: vault: enabled: false uri: "http://axual-governance-platform-manager-vault:8200" path: "governance" roleId: "885d808c-6c58-33fe-fe4f-592b32eaa763" secretId: "efb8dc0a-f16a-913c-6f7c-99dbf77ccce1" # Vault Configuration for Connectors vault: enabled: false connector-vault: enabled: true instances: axual-poc: uri: "http://axual-governance-platform-manager-vault:8200" roleId: "a76c3bf3-2e9a-eb14-968a-bd65c112b5c4" secretId: "ff19752d-7ba5-83d7-d281-8497fa919e52" certChainKeyname: "certificate.chain" privateKeyname: "private.key" connectorsPath: "connectors" # Azure KeyVault Configuration azure: keyVault: enabled: false # Subscription Management Configuration subscription-management: enabled: false #Server Security server: ssl: enabled: false forward-headers-strategy: framework ## Self-Service UI platform-ui: # Auth0 Function Qualified Domain auth0: fqdn: "axual.<domain>" # PlatformManager Function Qualified Domain platformManager: fqdn: "axual-governance-platform-manager" # Window.ENV Configuration config: docsVersion: "2024.1" mgmtApiUrl: "https://axual.<domain>/api" mgmtUiUrl: "https://axual.<domain>/" stripeBillingManagementUrl: "https://billing.stripe.com/p/login/test_00g15x1UV4hKcI8eUU" topicBrowseUrl: 'https://axual.<domain>/api/stream_configs' # Feature Flags billingEnabled: false insightsEnabled: false streamBrowseEnabled: false # This is for deciding on SB/CB(false) or TB(true) topicBrowseEnabled: true dataClassificationEnabled: false connectEnabled: true subscriptionEnabled: false # Keycloak Configuration oidcEndpoint: "https://axual.<domain>" oidcScopes: "openid profile email" configurationType: "remote" responseTypes: "code" clientId: "self-service" clientSecret: "notSecret" # OM Configuration organizationManagerUrl: 'https://axual.<domain>/api/organizations' organizationShortNameEditEnabled: true # Wizard Providers Configuration enabledKafkaProviders: - confluent_cloud - aiven - apache_kafka # CSP Extra Values csp: extra: # To allow loading UserFlow script scriptSrc: "https://*.userflow.com" mediaSrc: "https://*.userflow.com https://storage.googleapis.com/studio1-prod-blob/" imageSrc: "https://*.userflow.com https://storage.googleapis.com/studio1-prod-blob/" styleSrc: "https://*.userflow.com" connectSrc: "https://*.userflow.com wss://e.userflow.com" ## Organization Manager organization-mgmt: config: # Keycloak Configuration authStrategy: "keycloak" # Issue with API GW -> Keycloak # keycloakDomain: "https://platform.local" keycloakDomain: "http://axual-governance-keycloak-http" keycloakCLIUsername: "admin" keycloakCLIPassword: "admin123" # -- To disable tls verification in the http-client tlsVerification: false ## Api GateWay api-gateway: debug: enabled: false # -- Configuration passed to the container. # Contents get injected to a ConfigMap, which gets mounted as an `application.yml` file. config: spring: cloud: gateway: httpclient: ssl: use-insecure-trust-manager: true permissions-api: url: "http://axual-governance-platform-manager/api/auth" topic-browse-config-api: url: "http://axual-governance-platform-manager/api/stream_configs/{id}/browse-config" gateway: endpoints: platformManager: enabled: true url: "http://axual-governance-platform-manager" organizationManager: enabled: true url: "http://axual-governance-organization-mgmt" topicBrowse: enabled: true url: "http://axual-governance-topic-browse" billing: enabled: false metricsExposer: enabled: false platformUi: enabled: true url: "http://axual-governance-platform-ui" keycloak: enabled: true url: "http://axual-governance-keycloak-http" # This defines the Local Realm for user registration # when UI doesn't provide a Realm header -> LOCAL local: auth: # Outside URL for Authentication Server issuerUrlForValidation: https://axual.<domain>/auth/realms/local # Kubernetes Service Name if running Keycloak jwkSetUri: http://axual-governance-keycloak-http/auth/realms/local/protocol/openid-connect/certs # when UI provides a Realm header -> SSO # Keycloak Authentication Server sso: keycloak: advertisedBaseUrl: https://axual.<domain> internalBaseUrl: http://axual-governance-keycloak-http useInsecureTrustManager: true logging: filter: enabled: false # Only Api Gateway has an active ingress ingress: enabled: true className: "nginx" hosts: - # -- The fully qualified domain name of a network host. host: "axual.<domain>" paths: - # -- Matched against the path of an incoming request. path: "/" # -- Determines the interpretation of the Path matching. # Can be one of the following values: `Exact`, `Prefix`, `ImplementationSpecific`. pathType: "ImplementationSpecific" tls: [ ] -
Determine the domain you want to use throughout the deployment. This domain will be used to access the interfaces of the services you deploy. Set the domain in your shell, it will be used to template a
values.yaml. Replace[YOUR_DOMAIN]with your domain in the example below.export DOMAIN=[YOUR_DOMAIN] -
Apply your domain to the "axual-governance.values.yaml" you downloaded
sed -i '' -e "s/<domain>/$DOMAIN/g" axual-governance.values.yamlNote: the example
sedcommand above works withbashonMacOS. Use the correctsedcommand for your shell/OS. -
Install Axual Governance
helm install axual-governance axual-stable/axual-governance --version 0.5.0 -f ./axual-governance.values.yaml -n axual -
Axual Governance needs HashiCorp Vault to securely store the credentials of the Kafka cluster you are onboarding. The following steps will make the installation of Vault a smooth experience.
-
First, create an alias for the Vault CLI which will be reused later and initialize Vault
alias v='kubectl -n axual exec --stdin=true axual-governance-platform-manager-vault-0 -- '
v vault operator init -key-shares=1 -key-threshold=1
Keep the values for Unseal Key and Root Token in a safe place, you will need them later -
Log in to Vault using the Unseal key and Root Token
v vault operator unseal [UNSEAL_KEY] v vault login [ROOT_TOKEN] -
Prepare Vault to be used by the platform. Copy the commands below:
v vault secrets enable -path=governance kv-v2
v vault auth enable approle
echo 'path "governance/*" {capabilities = ["read","create","update","delete"]}' | v vault policy write platform-manager -
v vault write auth/approle/role/platform-manager token_policies="platform-manager"
v vault read auth/approle/role/platform-manager/role-id
v vault write -force auth/approle/role/platform-manager/secret-id
Find the
role_idandsecret_idin the output of the command above and store them in a safe place. -
Update the configuration for
platform-managerin "axual-governance.values.yaml" to use therole_idandsecret_idgenerated above and setvault.enabledto trueplatform-manager: governance: vault: enabled: true uri: "http://axual-governance-platform-manager-vault:8200" path: "governance" roleId: "[ROLE_ID]" # Insert the value of `role_id` here (between double quotes) secretId: "[SECRET_ID]" # Insert the value of `secret_id` here (between double quotes) -
Apply the changes to the "axual-governance.values.yaml" file
helm upgrade --install axual-governance axual-stable/axual-governance --version 0.5.0 -f ./axual-governance.values.yaml -n axual
-
-
Finally, log into the Self-Service interface via the following URL:
https://axual.{domain}. The following screen will be shown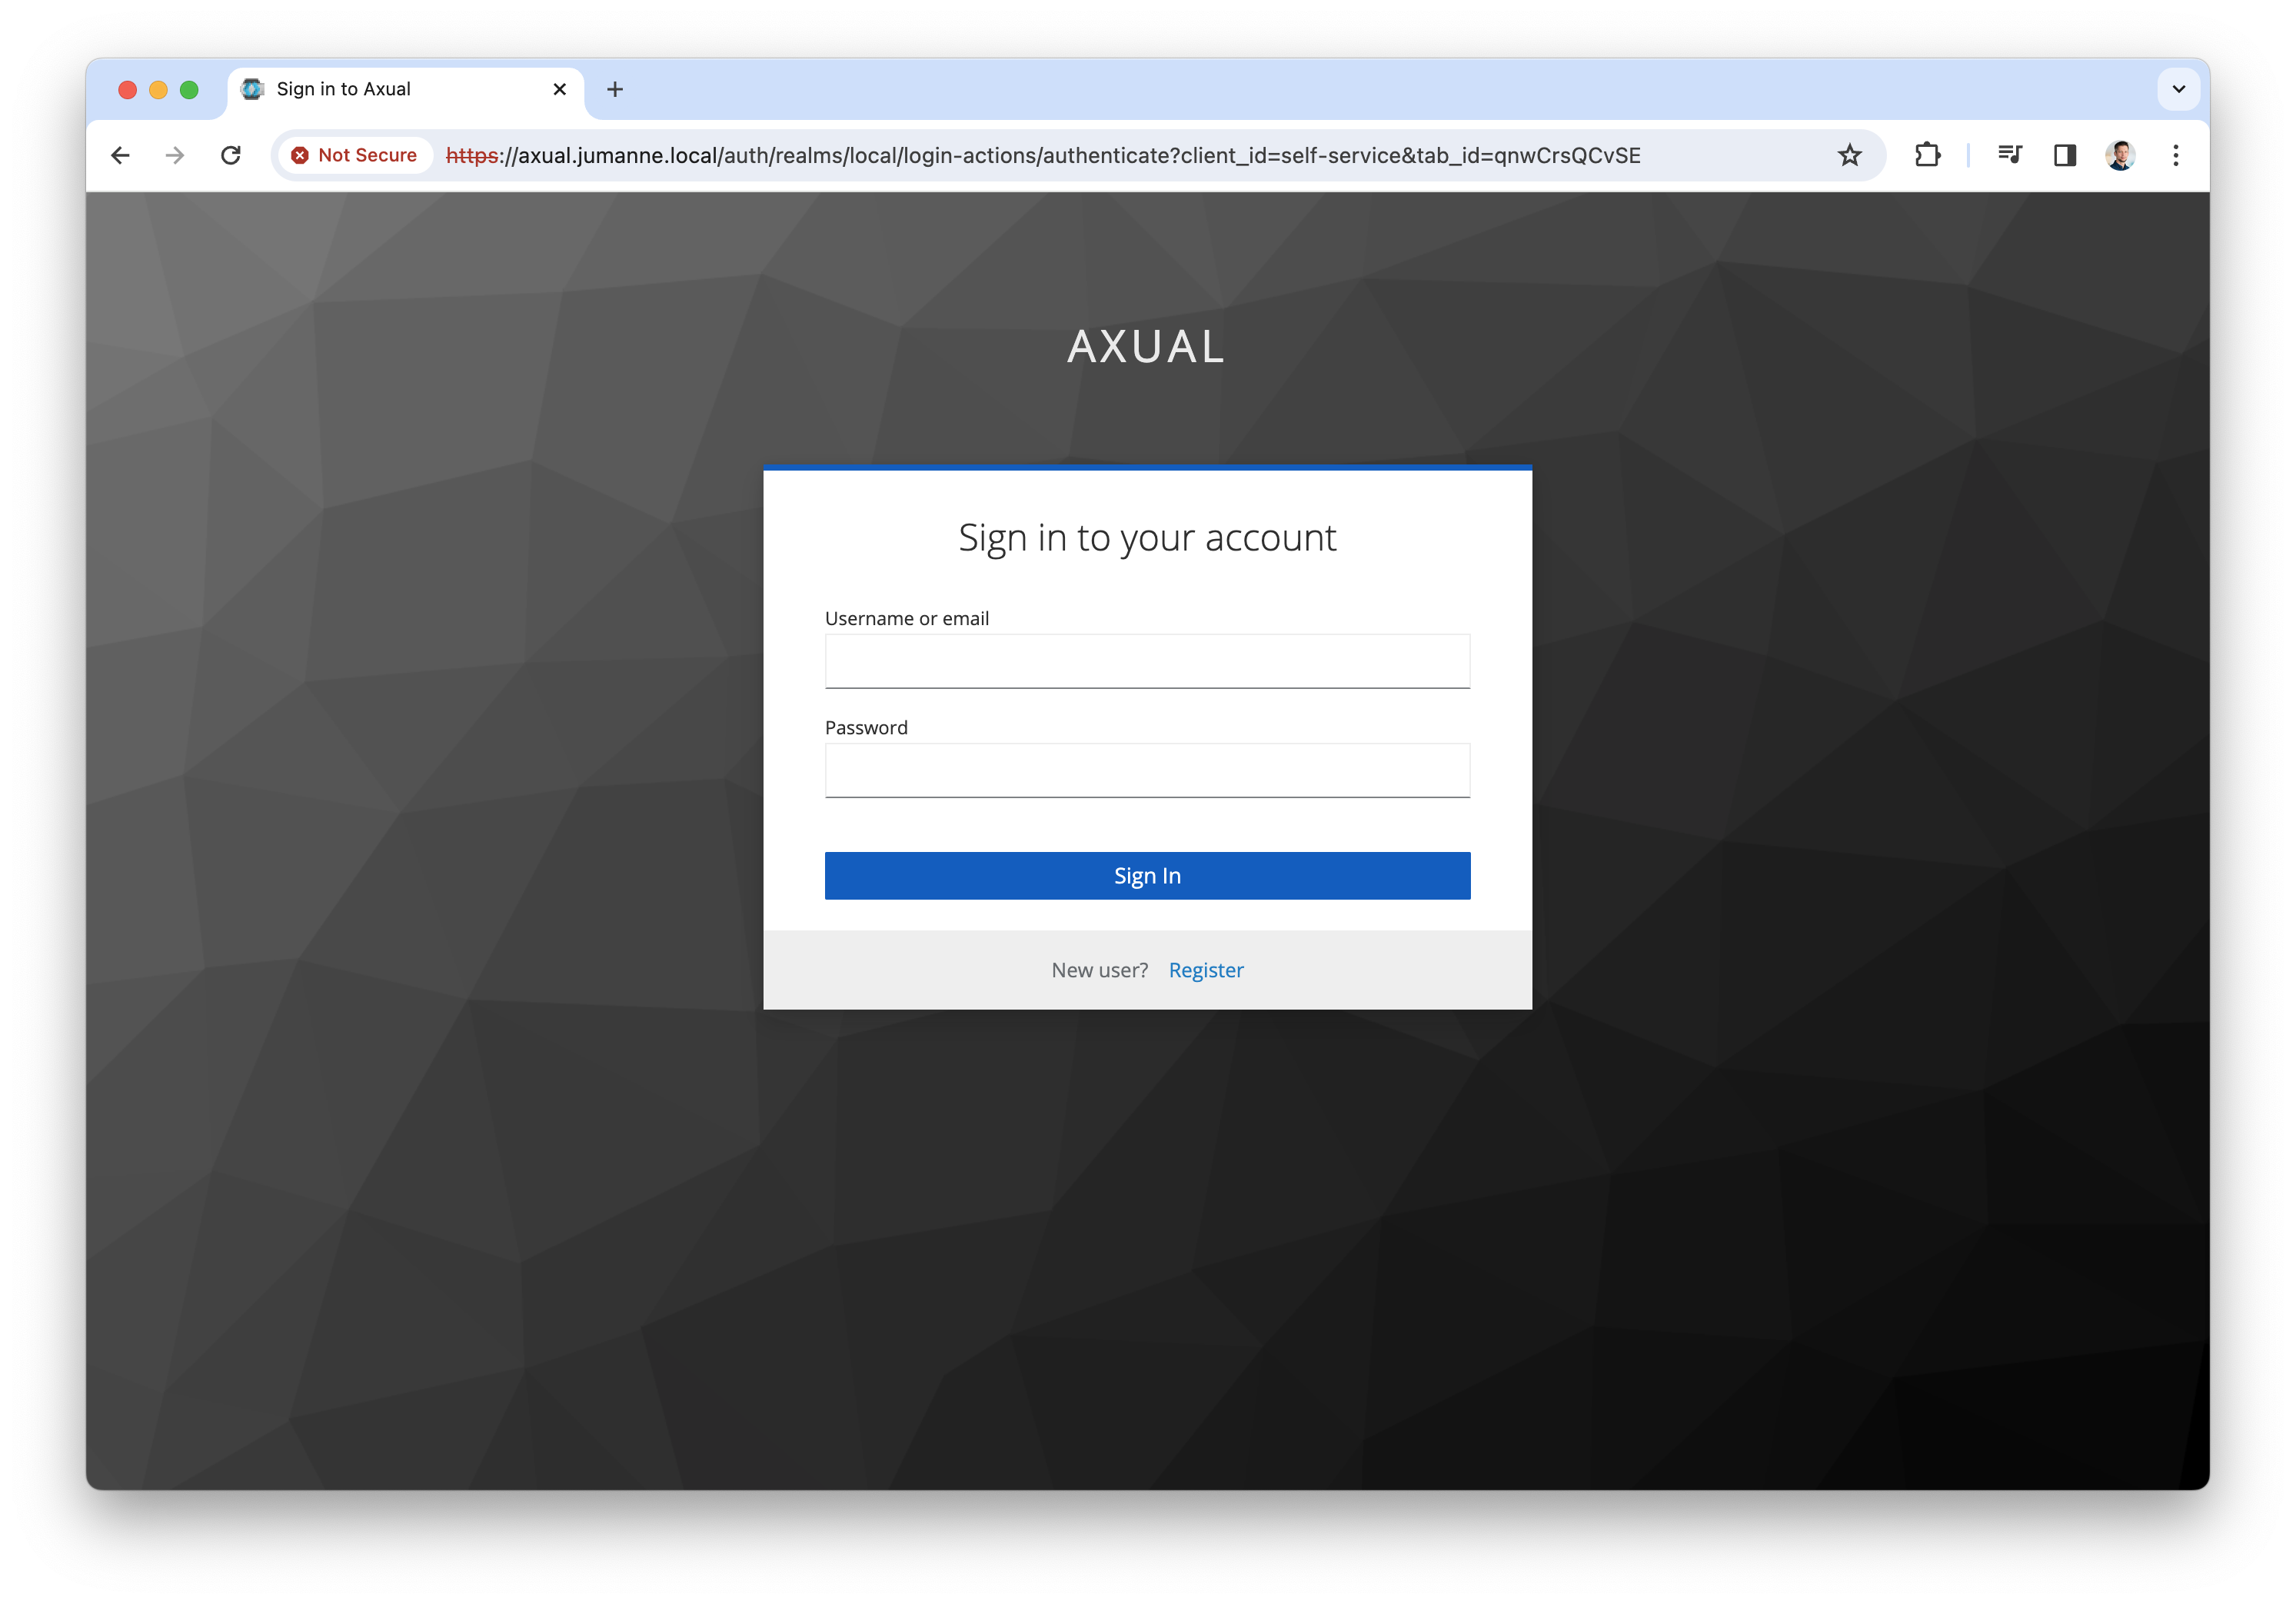
-
Click "Register user" to register a tenant admin user. This user has administrative privileges on the platform. The following screen will be shown
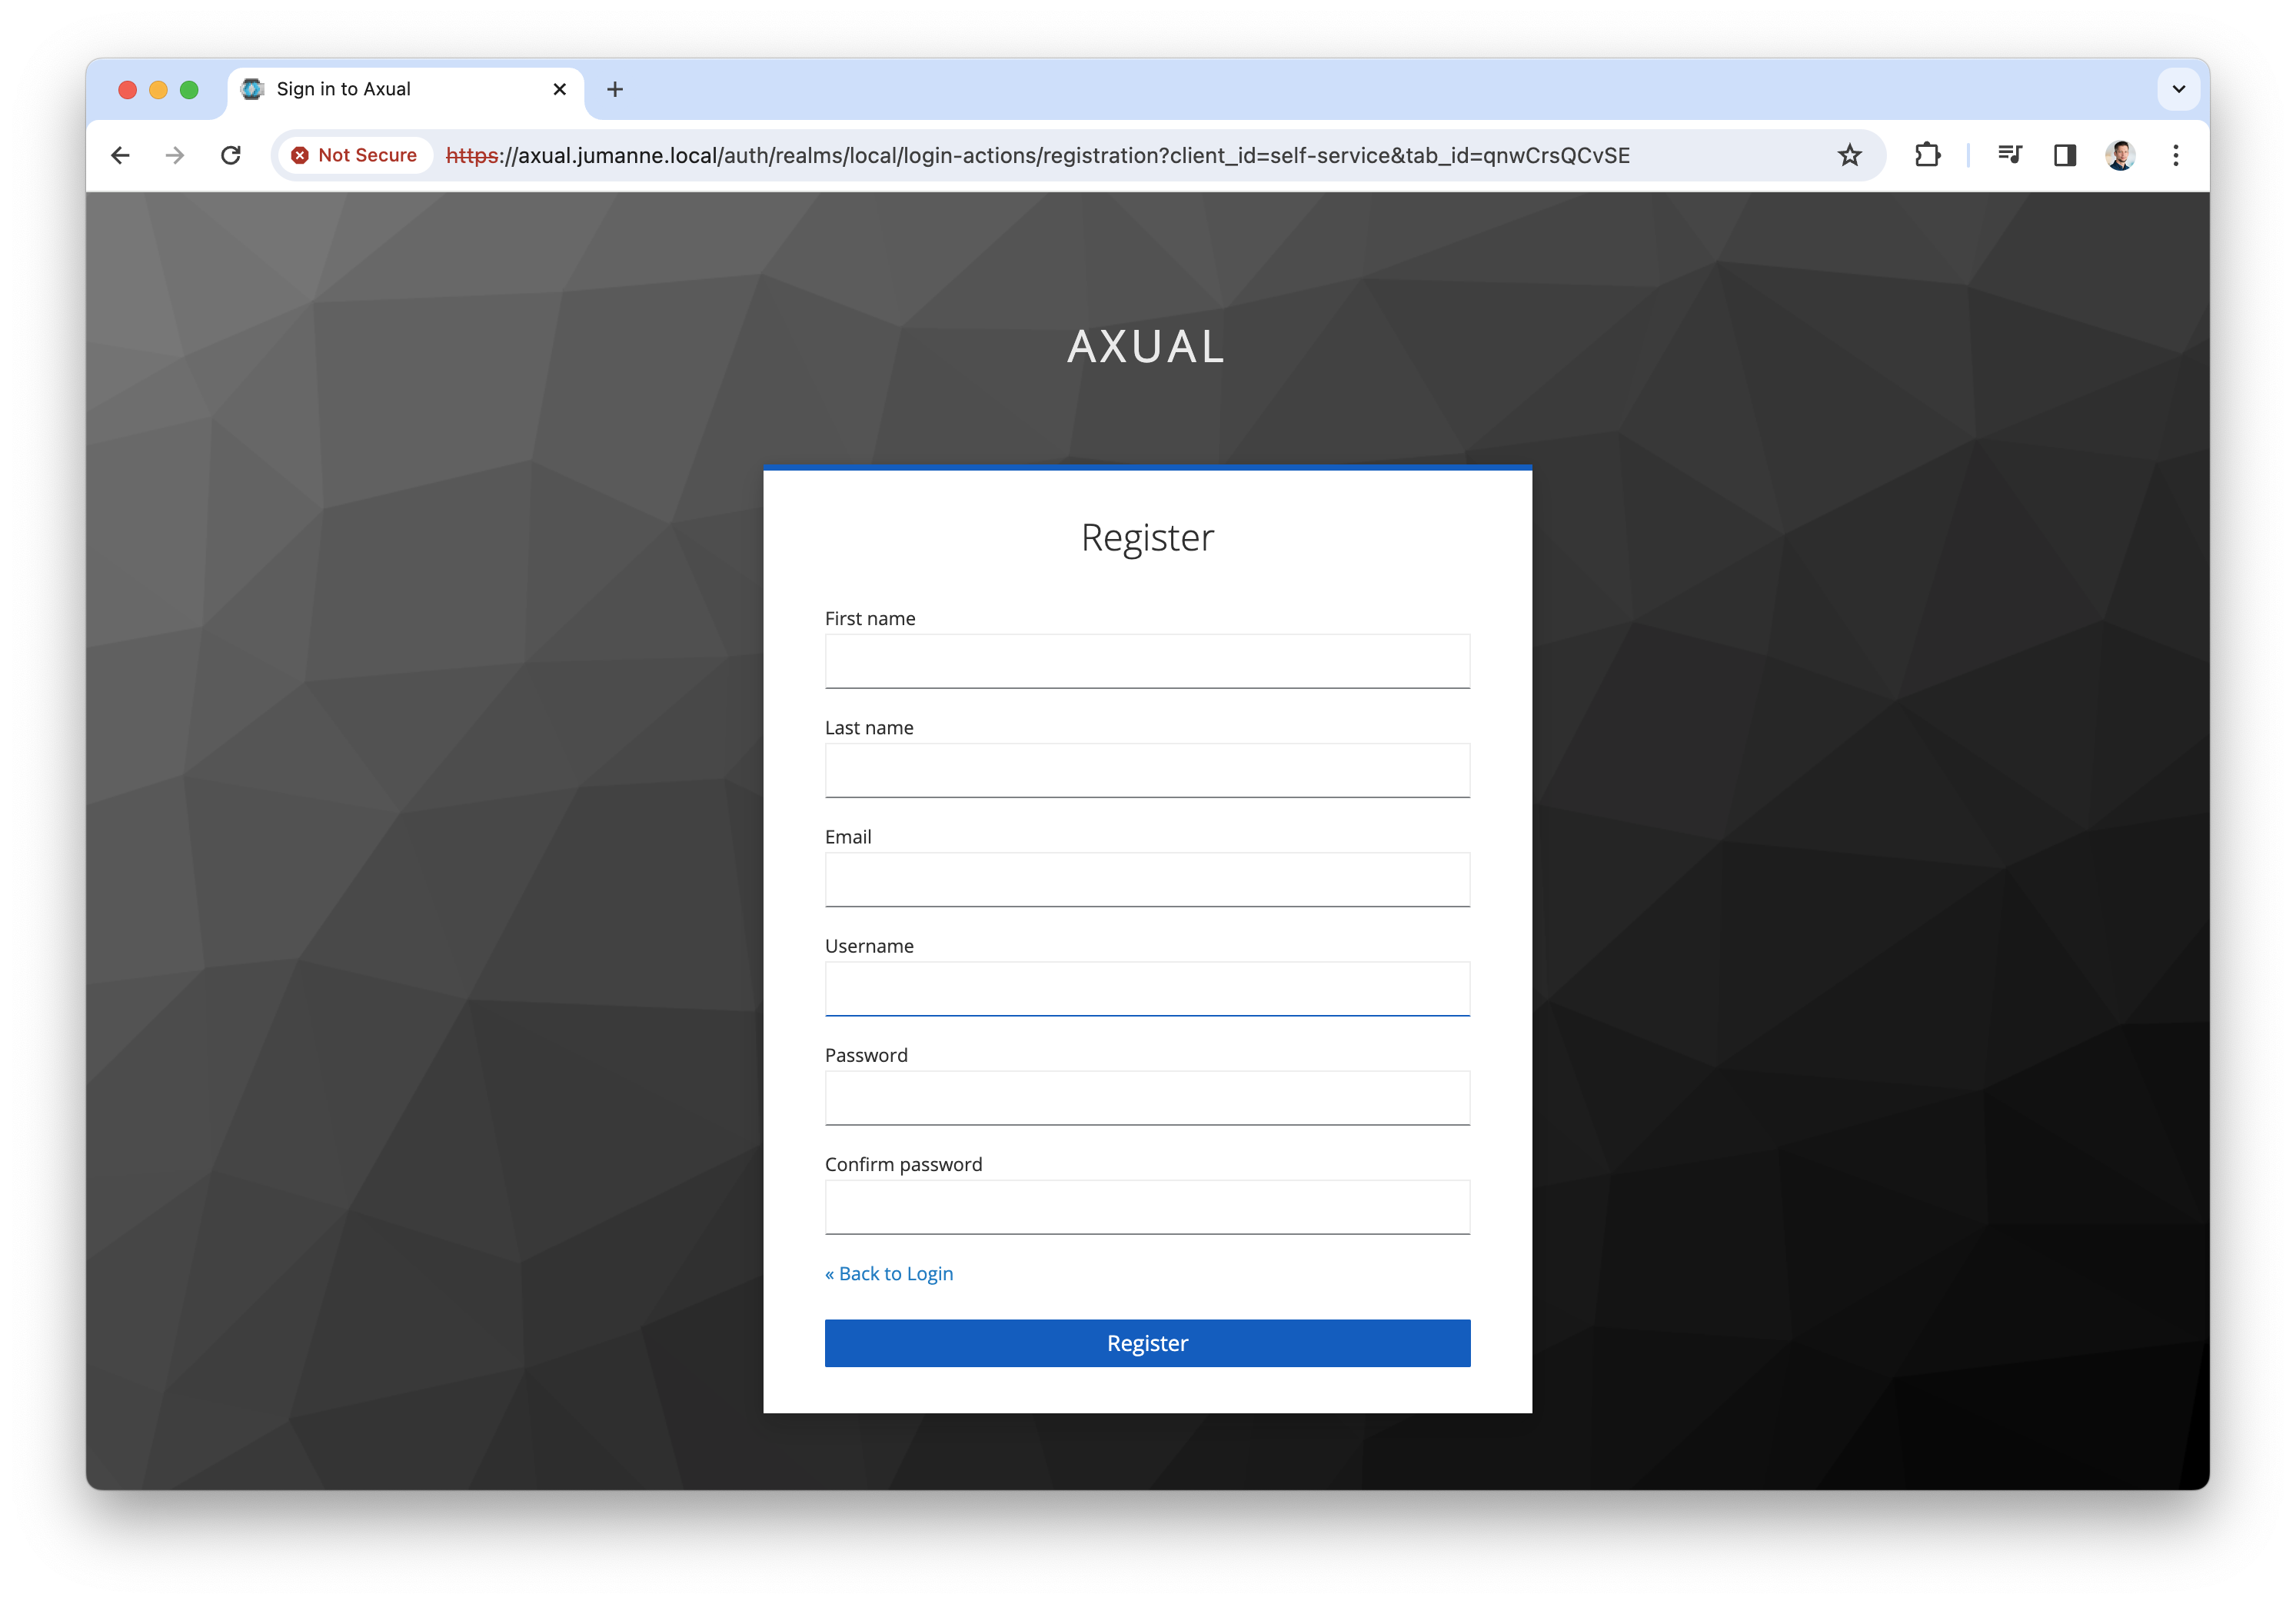
-
Register the tenant admin on your platform. Enter details for the following fields
-
First name
-
Last name
-
Email
-
Username → you will use this to log in next time
-
Password
-
Confirm password
-
-
Click "Register" to add the user, the following screen will be shown.

-
Add the details of your organization and click "Continue". You will be redirected to the dashboard.
By completing the steps above, you have deployed Axual Governance and prepared Self-Service to log in as a tenant admin.
You can now continue with Step 2: Onboarding your own Kafka cluster
Step 2: Onboarding your own Kafka cluster
In this step, you are going to onboard your own Kafka cluster in Axual Governance, so you can create and configure topics and authorize applications in a self-service fashion.
| This onboarding procedure only supports onboarding an existing Kafka cluster to be used for new topics and ACLs. |
|
Only continue the onboarding when the following prerequisites are met:
|
Onboarding the cluster
-
Log in to Self-Service using the tenant admin credentials
-
Expand the menu to see all items in the menu.
-
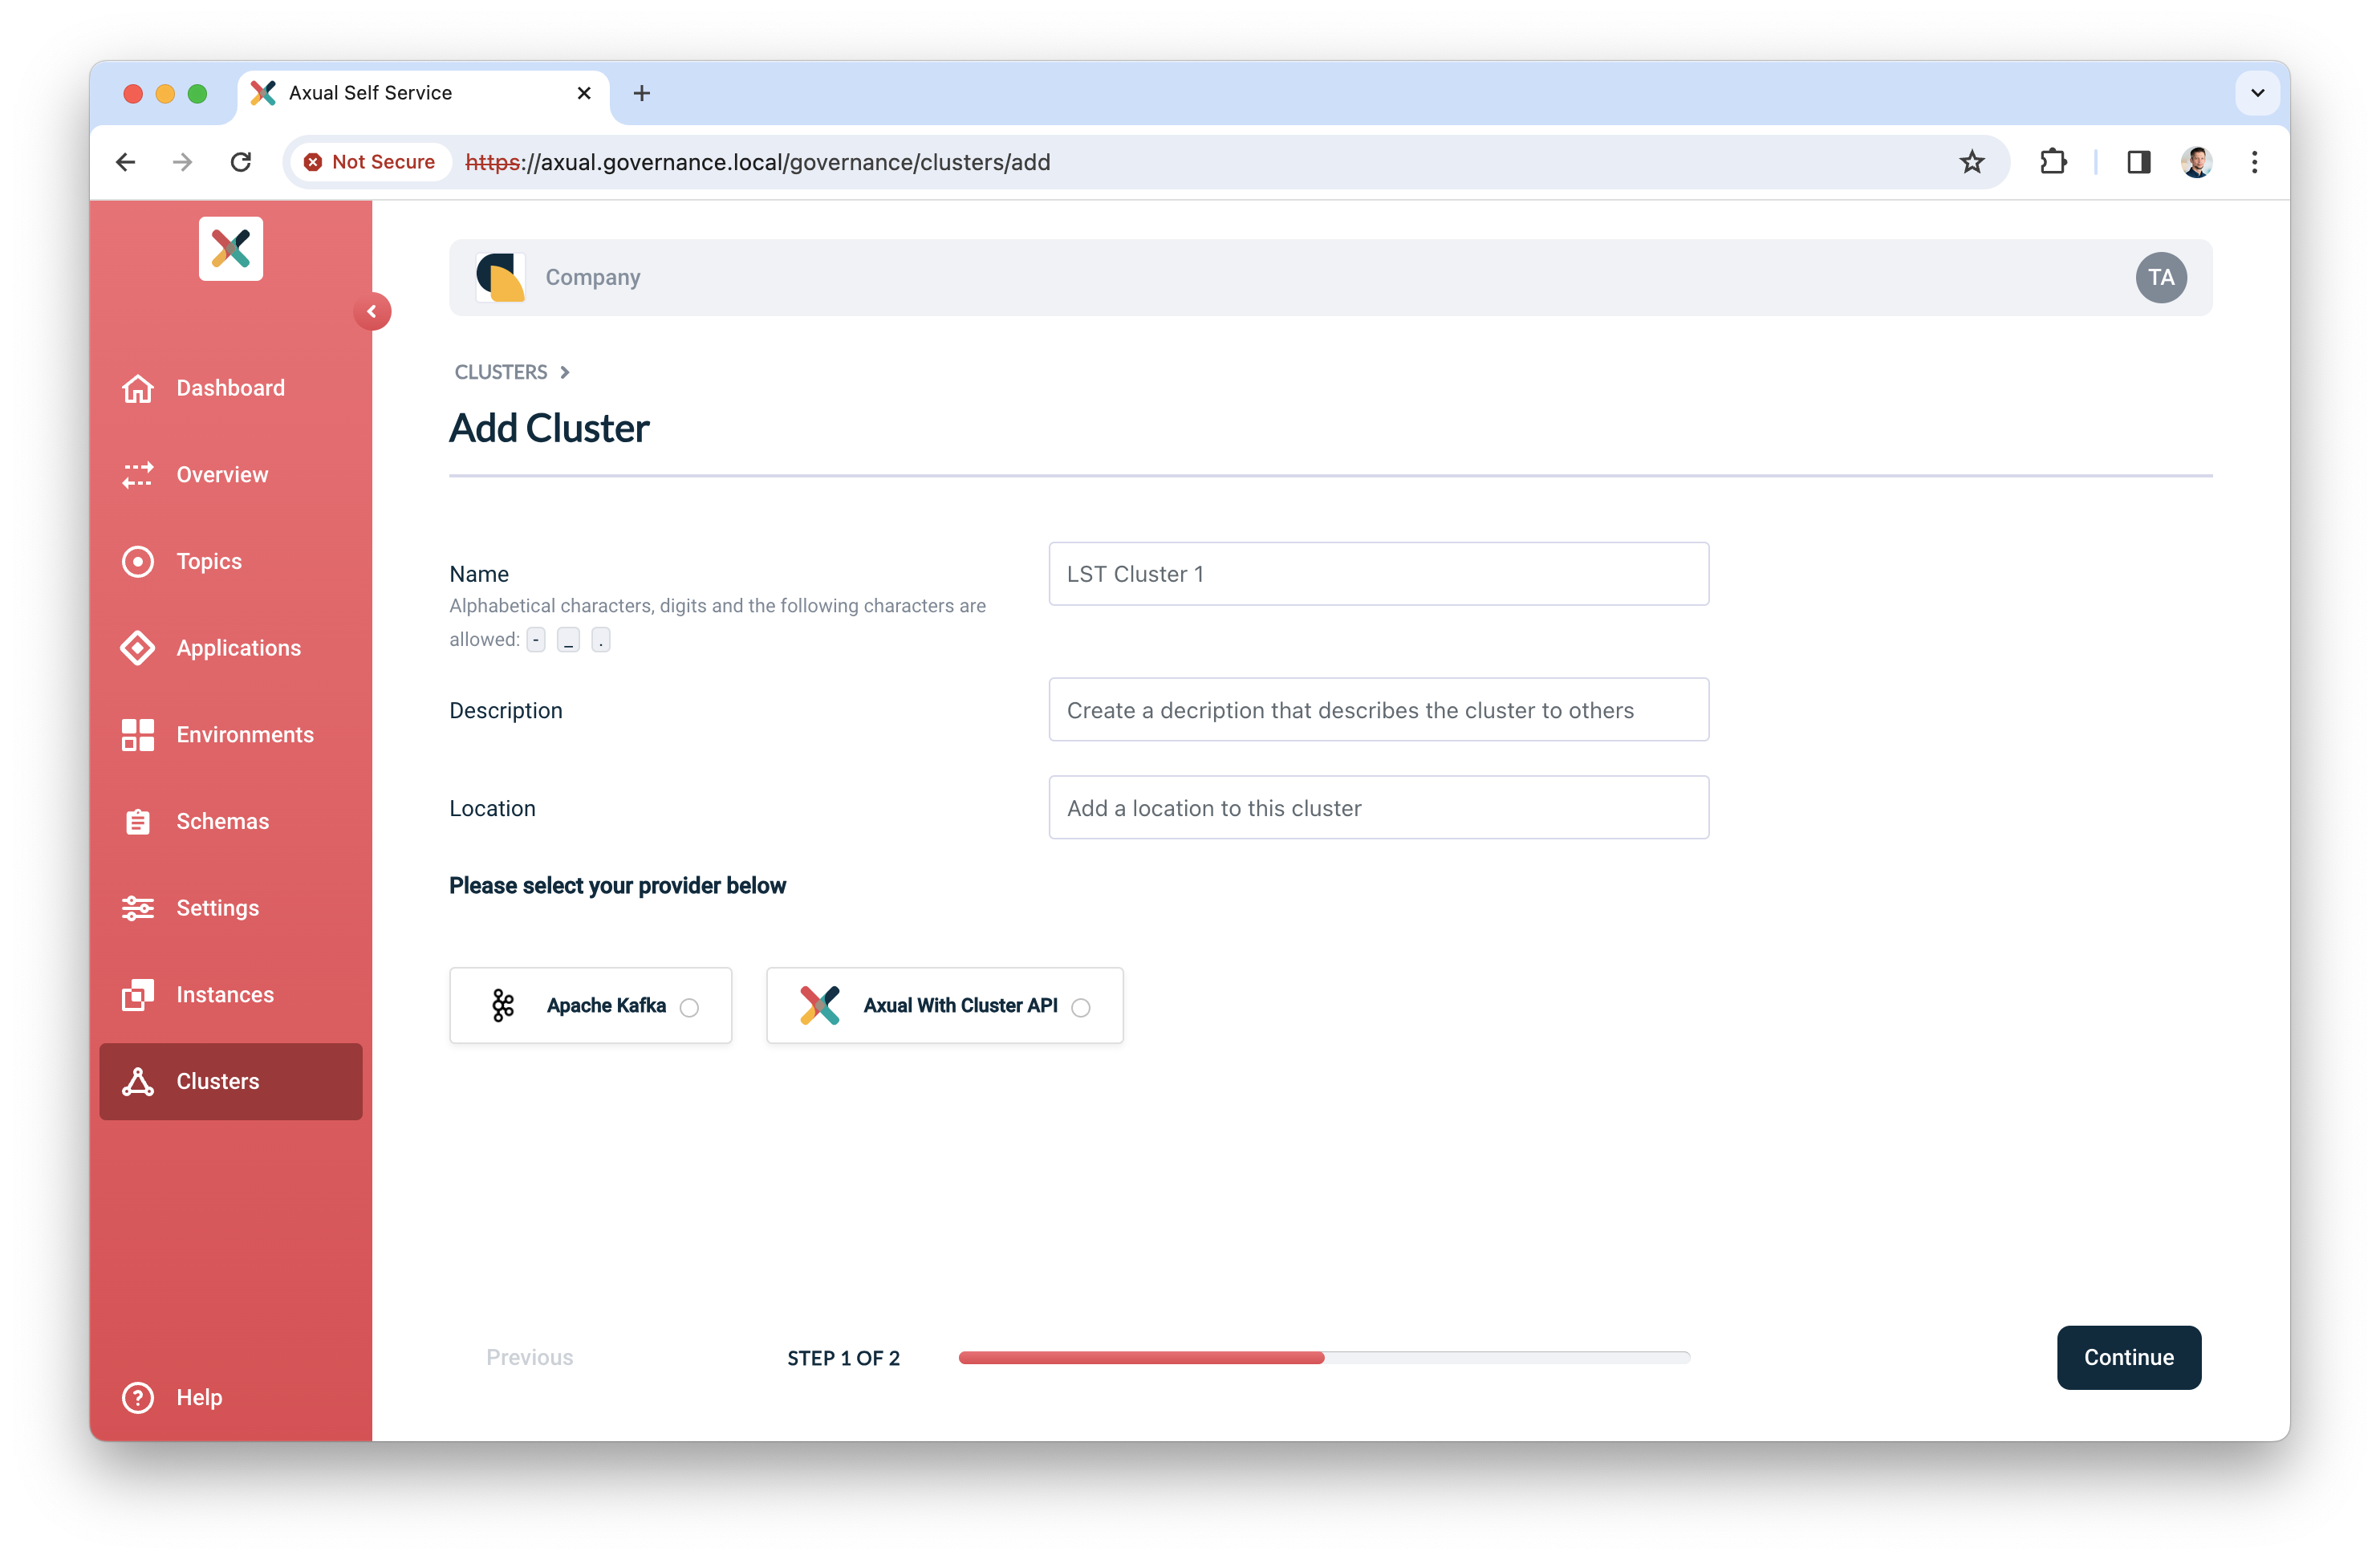
Click "Clusters", followed by "Add cluster". The following screen will show:
-
Fill in the following information for your cluster:
-
Name: use a name to refer to your cluster
-
Description: provide a description for this cluster (e.g. dev)
-
Location: additional metadata which helps you to recognize it
-
-
Select "Apache Kafka" as the provider.
-
Click "Continue".

-
Provide the following information:
-
Kafka bootstrap URL: use the URL and port on which Platform Manager can reach the brokers
-
Publicly Trusted CA: select this if the CA of the brokers is publicly trusted OR provide the CA (PEM)
-
CA (PEM): The PEM file of the CA certificate which is used to sign the broker’s certificate
-
-
Choose your authentication method.
-
For TLS, provide the Certificate (PEM) and associated Private Key which Platform Manager uses to authenticate to the brokers
-
For SASL:
-
Select the SASL mechanism (
PLAIN,SCRAM_SHA_256andSCRAM_SHA_512are supported) -
Provide the Username and Password
-
-
-
Click Verify to see whether the provided details are working.Continue when the verify action returns "Broker connection verified"
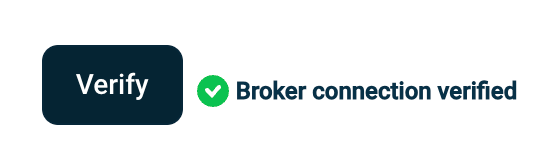
-
Leave "Shared cluster" as is
-
Use the following patterns for multi-environment support (see Topic, Consumer Group and Transactional ID Patterns for more information)
-
Topic pattern:
{instance}-{environment}-{topic} -
Consumer Group pattern:
{instance}-{environment}-{group} -
Transactional ID pattern:
{instance}-{environment}-{transactional.id}
-
-
Finally, click "Add cluster" to persist all information
Preparing Self-Service
Topics and Applications exist in Environments. In the following steps, you will create an Instance associated with the cluster you just created. Next, you will assign a new environment to this new instance. It is good to know that in the future, you can decide to add more environments to this instance.
Creating an instance
-
In the menu click "Instances", followed by "New instance"
-
Provide the following information:
-
Name: a name to describe your instance (e.g. DTA for Dev, Test, Acceptance or Production)
-
Short name: a short name for your instance. Depending on the topic pattern, this name might end up in your topic name
-
Description: add your own description for this instance.
-
Clusters: click "Select cluster", the following screen will show
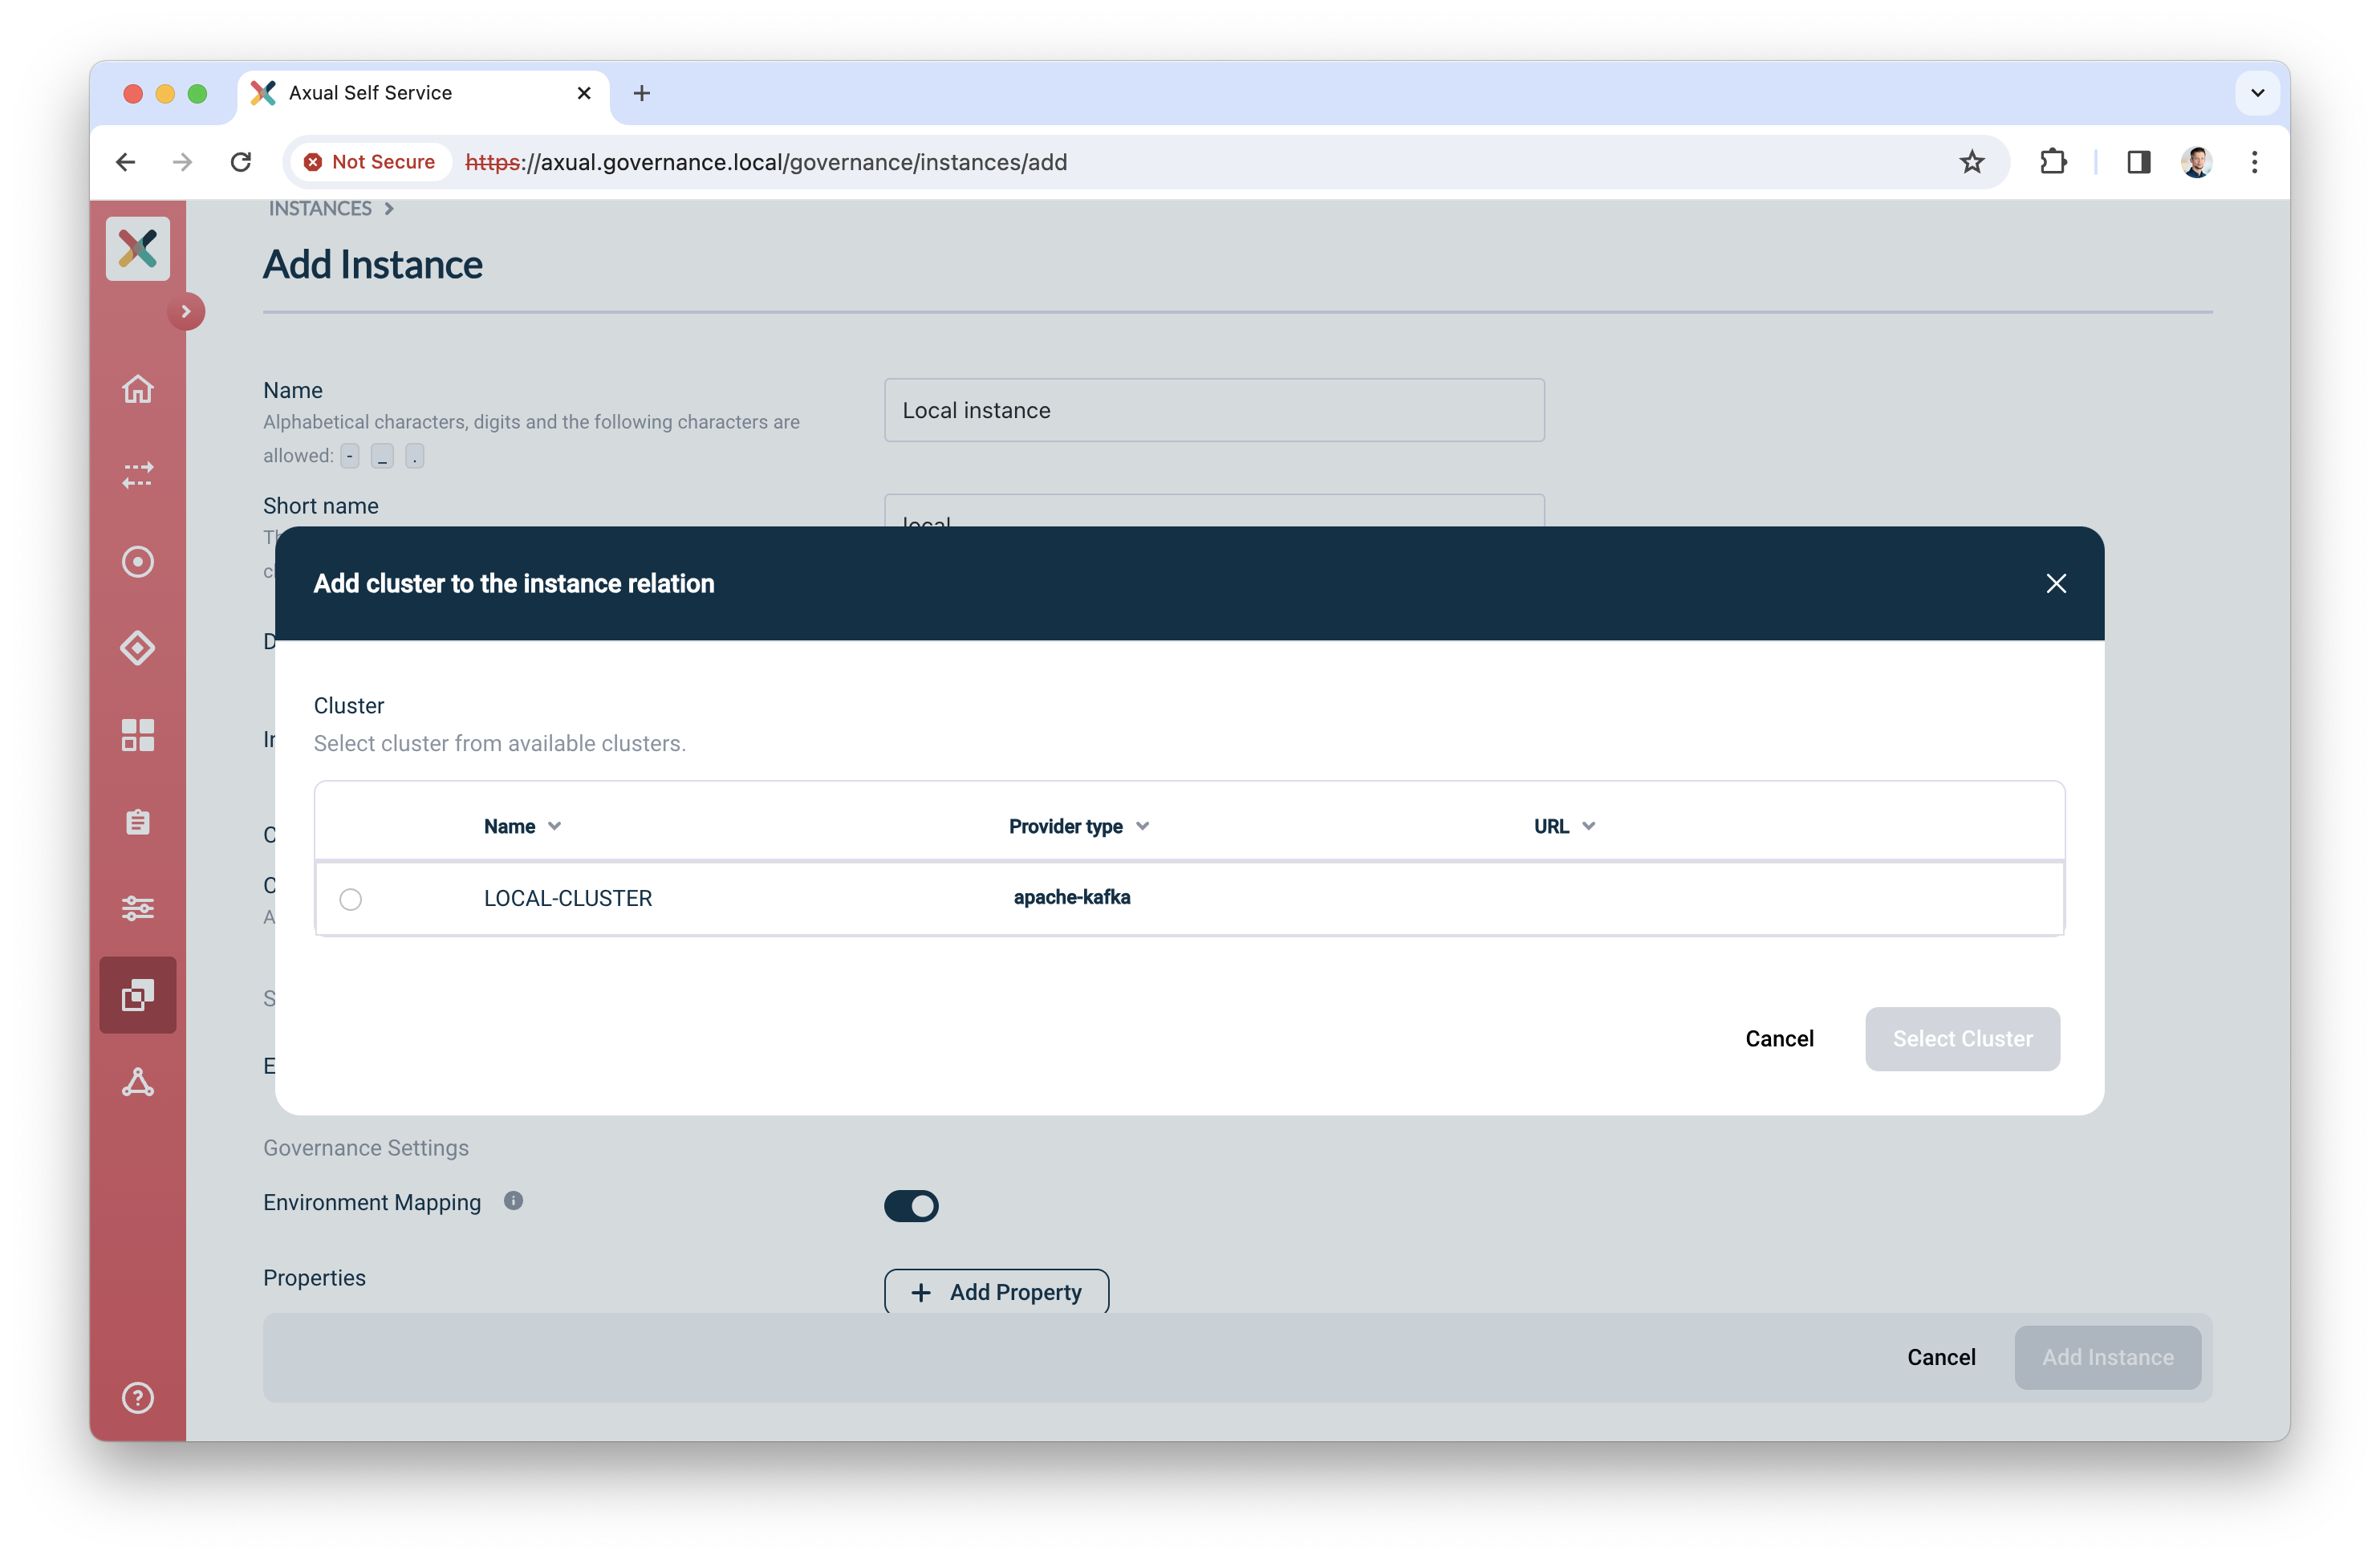
-
Select the cluster you created before
-
Enter the Schema registry URL
-
Select the Authentication method for Schema Registry (No authentication, Basic authentication and TLS are supported)
-
Click "Verify" to check whether the URL and connection details are working
-
Check Publicly trusted CA whenever the certificate of Schema Registry is issued by a publicly trusted CA OR upload the CA used to sign Schema Registry’s certificate.
-
Click "Select cluster" to assign the cluster to the instance
-
-
-
Enable “Environment mapping” to allow anyone with the ENVIRONMENT_AUTHOR role to create, update and edit environments.
-
Leave “Properties” as is.
-
Click “Add Instance” to add the instance.
Creating an environment
-
In the menu click "Environments", followed by "New environment"
-
Provide the following information:
-
Name: a name to describe your environment (e.g. "Development" or "Acceptance")
-
Short name: a short name for your environment. Depending on the topic pattern, this name might end up in your topic name
-
Description: Describe the environment
-
Color: select a color which helps users to identify the environment quickly throughout Self-Service
-
Instance: select the instance you created in the previous step
-
Visibility:
-
Select "Private" if this environment should only be visible by the owner
-
Select "Public" if this environment should be visible by all users
-
-
Authorization issuer: determine who is responsible for authorizing topic access requests:
-
Select "Auto" if access can be granted automatically (e.g. in Test environments)
-
Select "Stream owner" if access needs to be granted by the topic owner
-
-
Owner: click "Select cluster", the following screen will show
-
-
Leave “Properties” as is.
-
Click "Add Environment" to add the environment
🎉 Congratulations! you have now concluded the first time setup of Self-Service for topic management. Before you invite anyone in the organization to start using it, complete Step 3: Functional verification.
Step 3: Functional verification
In this step, you are going to:
-
create a topic using the Self-Service interface
-
authorize an application to produce data to it
-
produce messages to the topic you created
-
verify the messages have arrived on the topic
Creating and configuring a topic
-
In the menu, click "Topics", followed by "New topic"
-
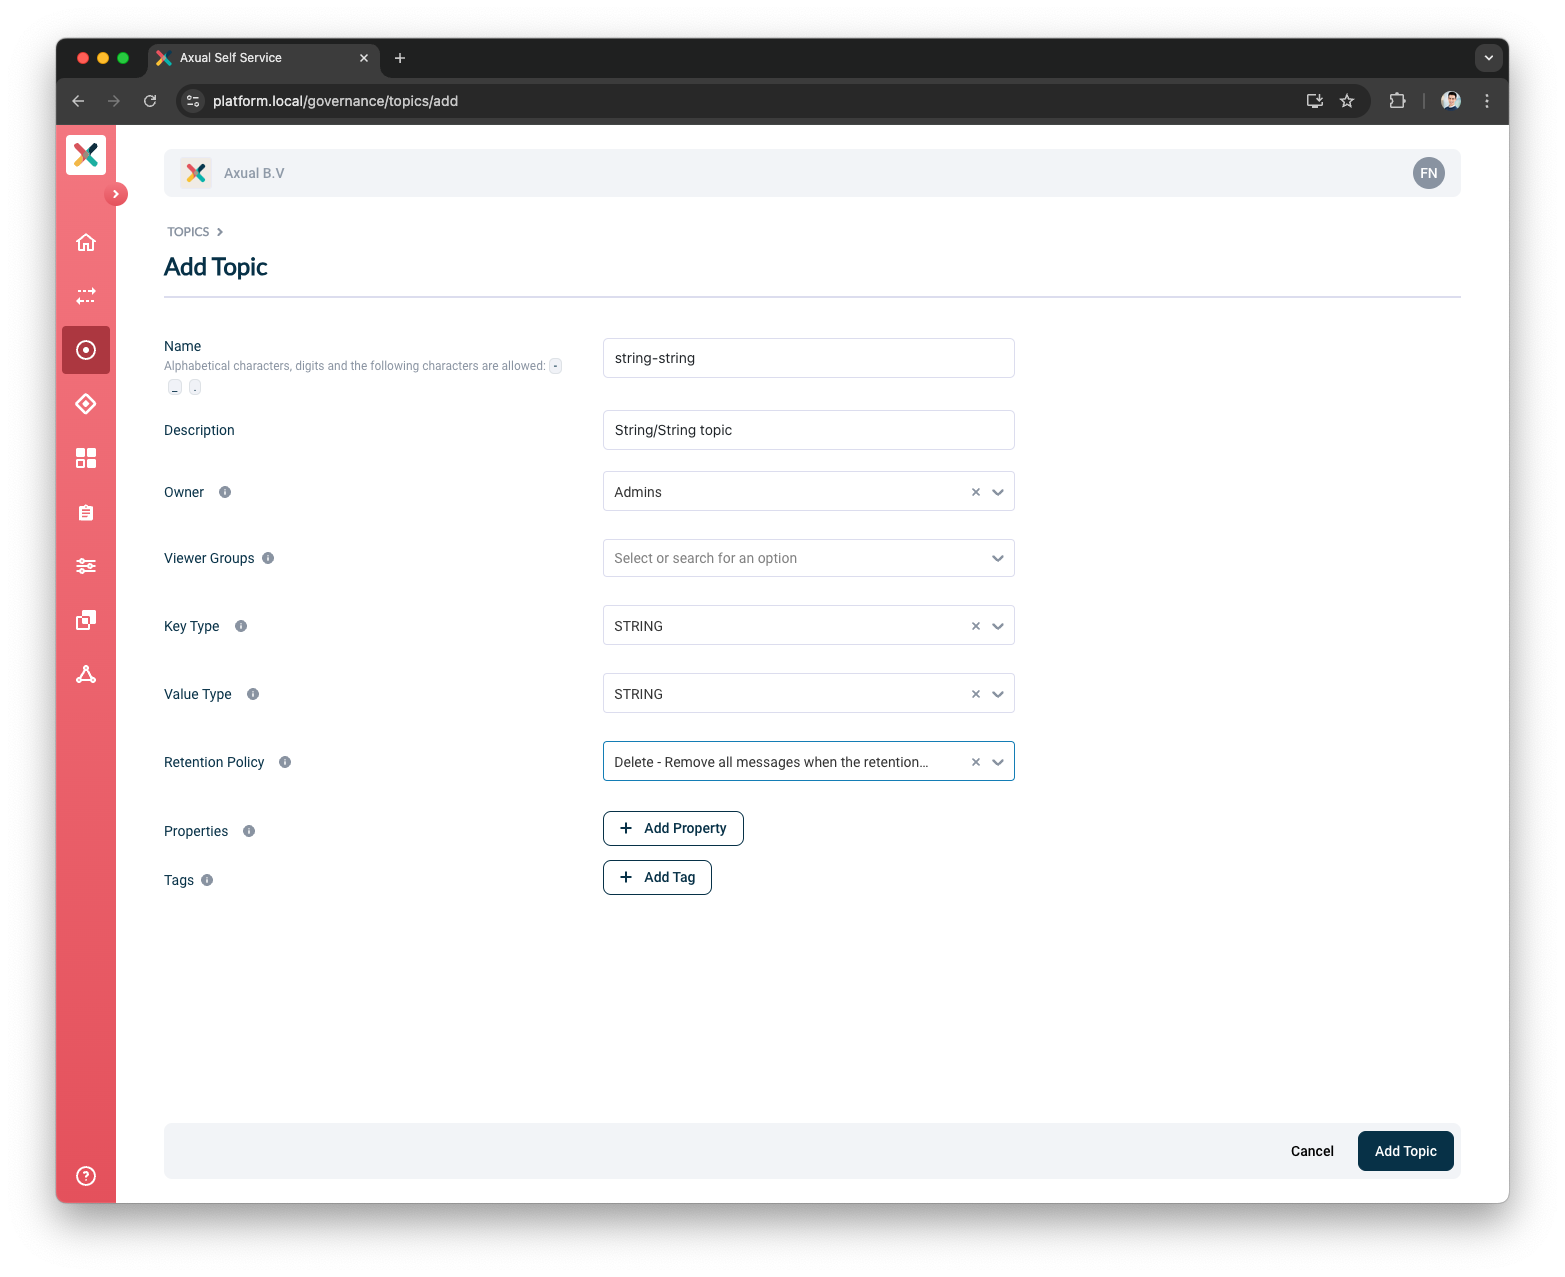
Provide the following details for the topic:
-
Name: use "mytopic" as the name
-
Description: use something like "Topic for functional verification"
-
Owner: select the team you are a member of, "Admins"
-
Key Type: to keep things simple, use "String" as the key type
-
Value Type: to keep things simple, use "String" as the value type
-
Retention Policy: select "Delete"
-
-
Leave "Properties" as is
-
Click "Add Topic" to add the topic
-
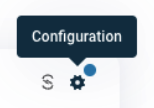
Next, configure the topic, so it is created in the Kafka cluster with appropriate settings. Click the "Configure topic" icon to open the modal with configuration options.
-
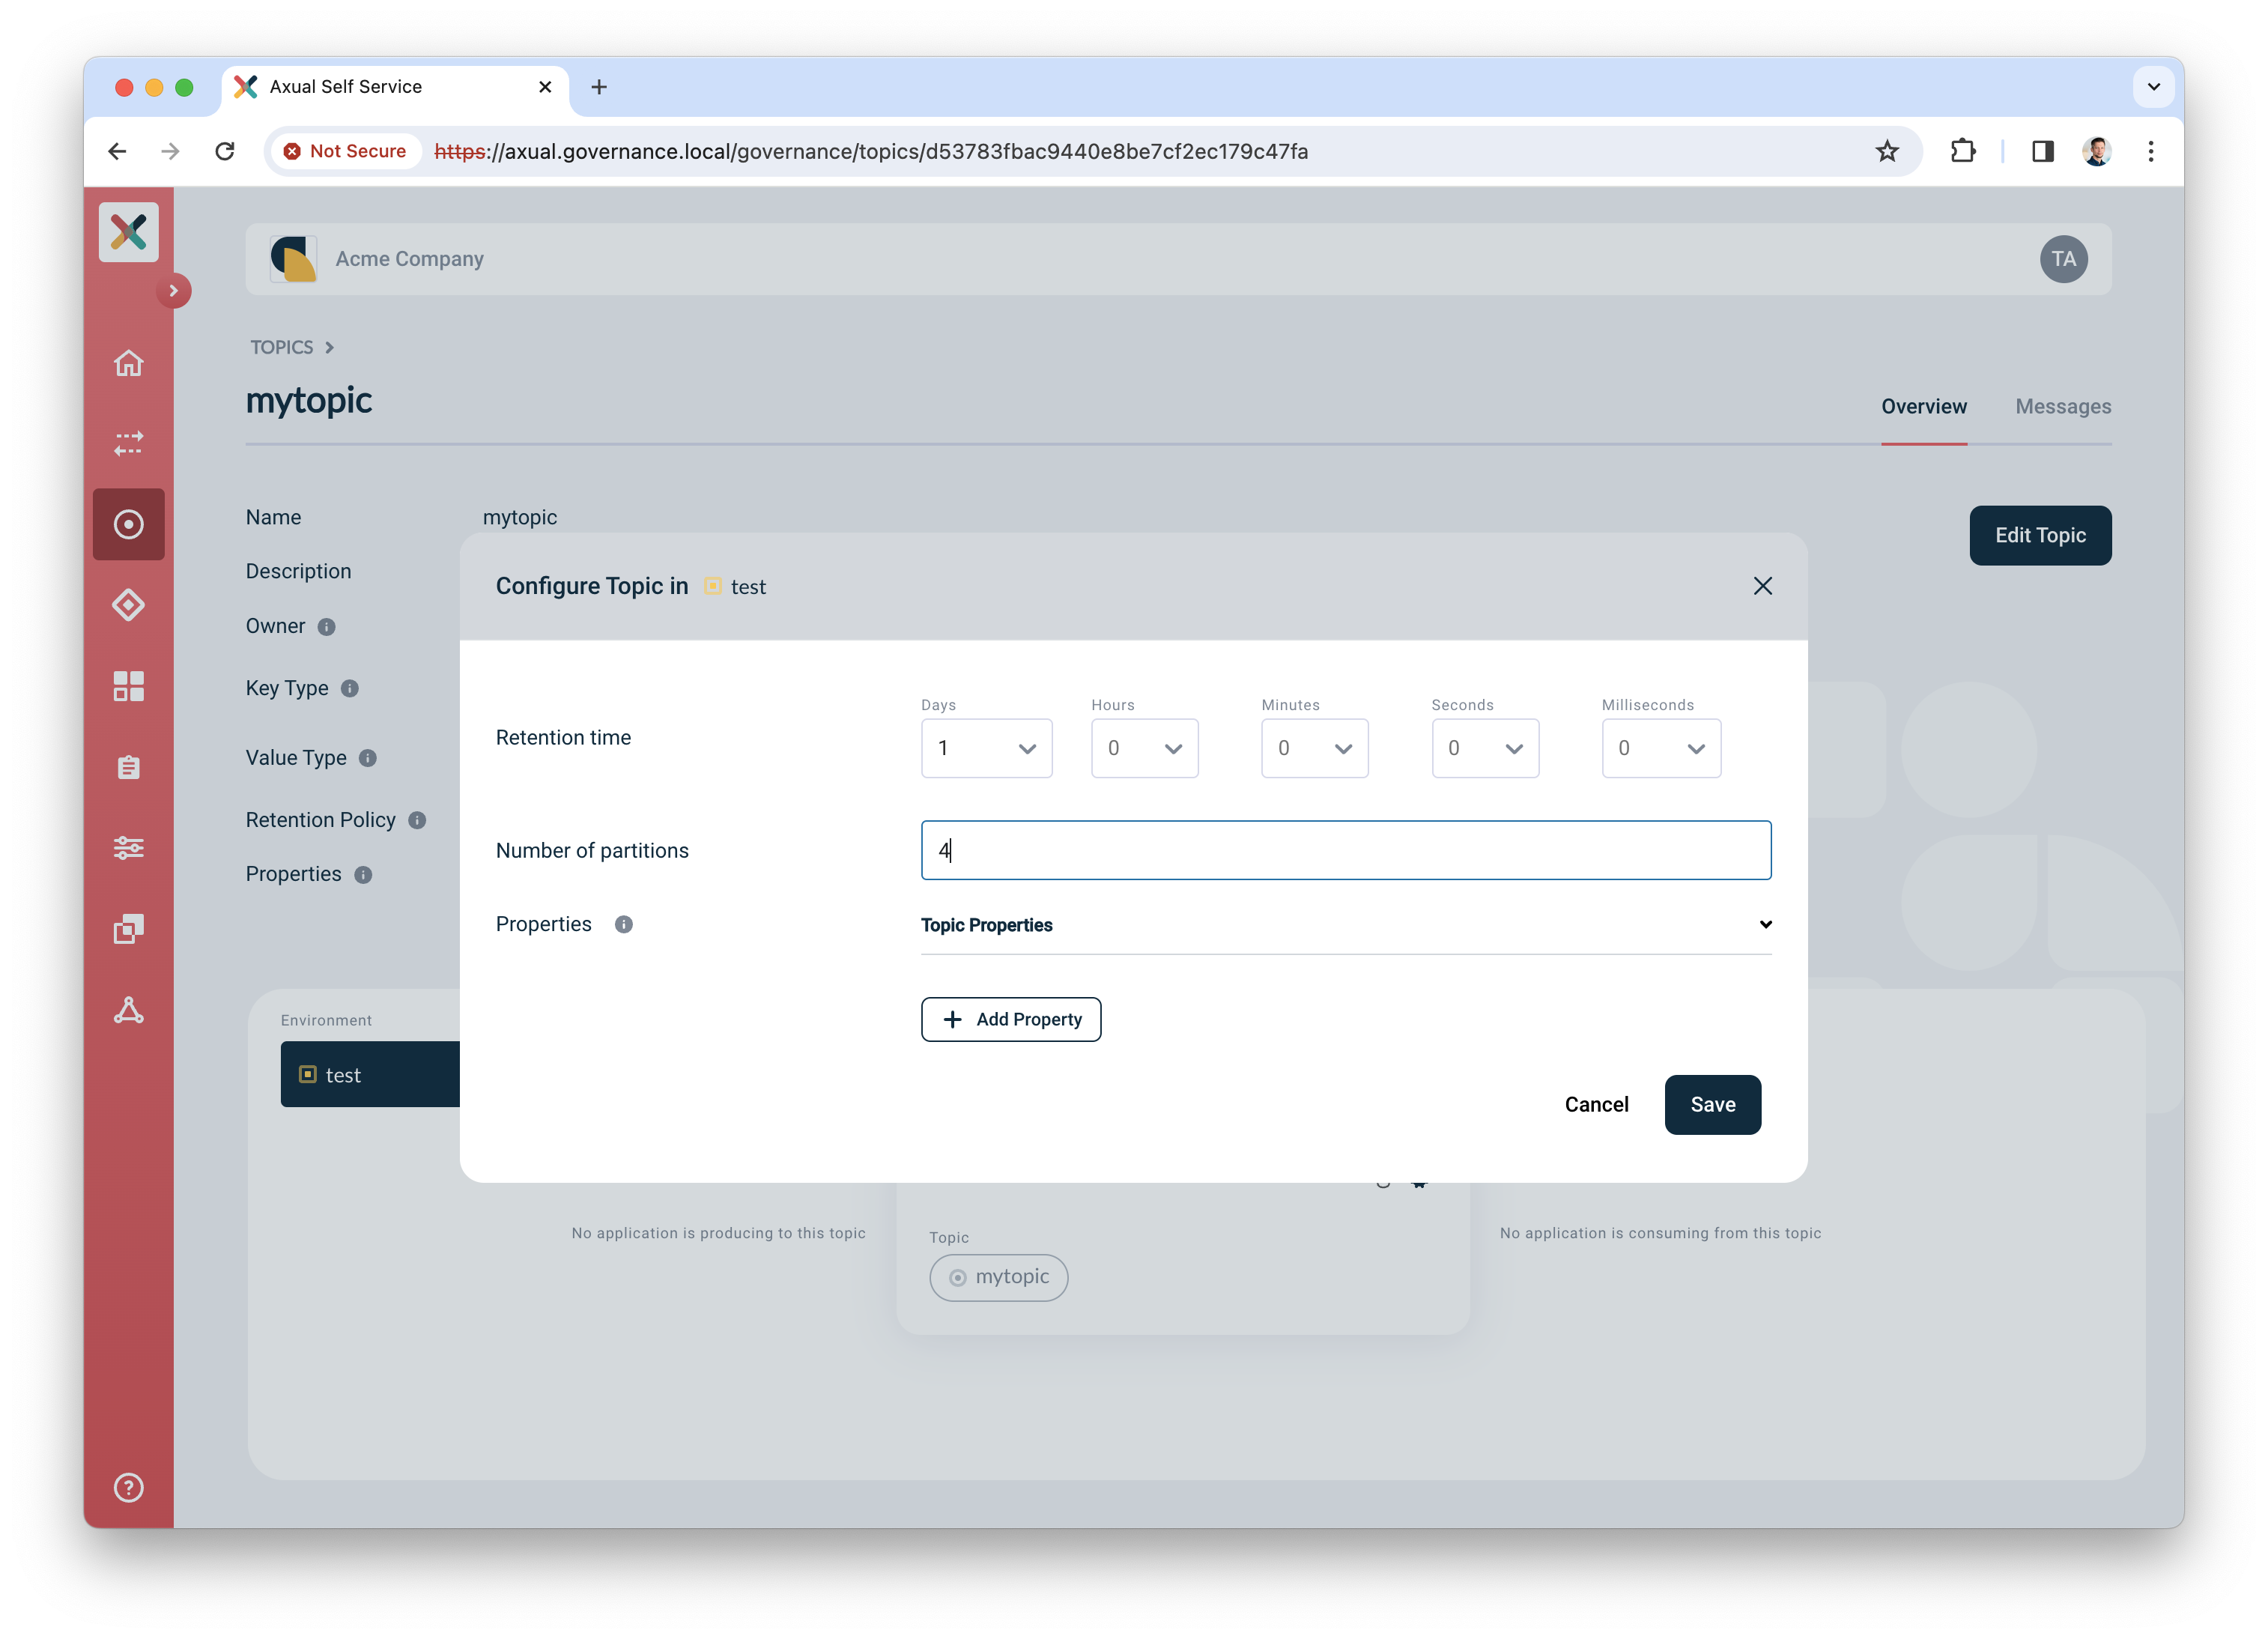
In the window that opens, define the following details:
-
Retention time: choose any retention time for this test topic, e.g. "1 day"
-
Number of partitions: use "4"
-
-
Leave "Properties" as is".
-
Click "Save" to create the topic on the Kafka cluster.
Creating and authorizing the application
Next, you will create an application and authorize it to produce to the topic.
-
In the menu, click "Applications", followed by "New application"
-
Provide the following details for the application:
-
ID: use "io.testing.producer"
-
Name: use "Test producer"
-
Short name: use "test_producer"
-
Owner: select "Admins"
-
Application type: select "Custom", followed by "Java"
-
Visibility: select "Public"
-
Description: use "Simple producer app"
-
-
Click "Add application" to add the application
-
Select the environment you created before as part of Preparing Self-Service
-
Click the "Authentication" icon to add credentials for the producer app
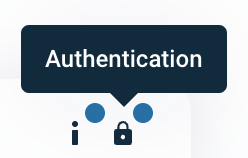
-
Upload a certificate (PEM) for an application which you want to authorize to produce.
Make sure the application certificate is signed by a Certificate Authority (CA) which is trusted by the broker 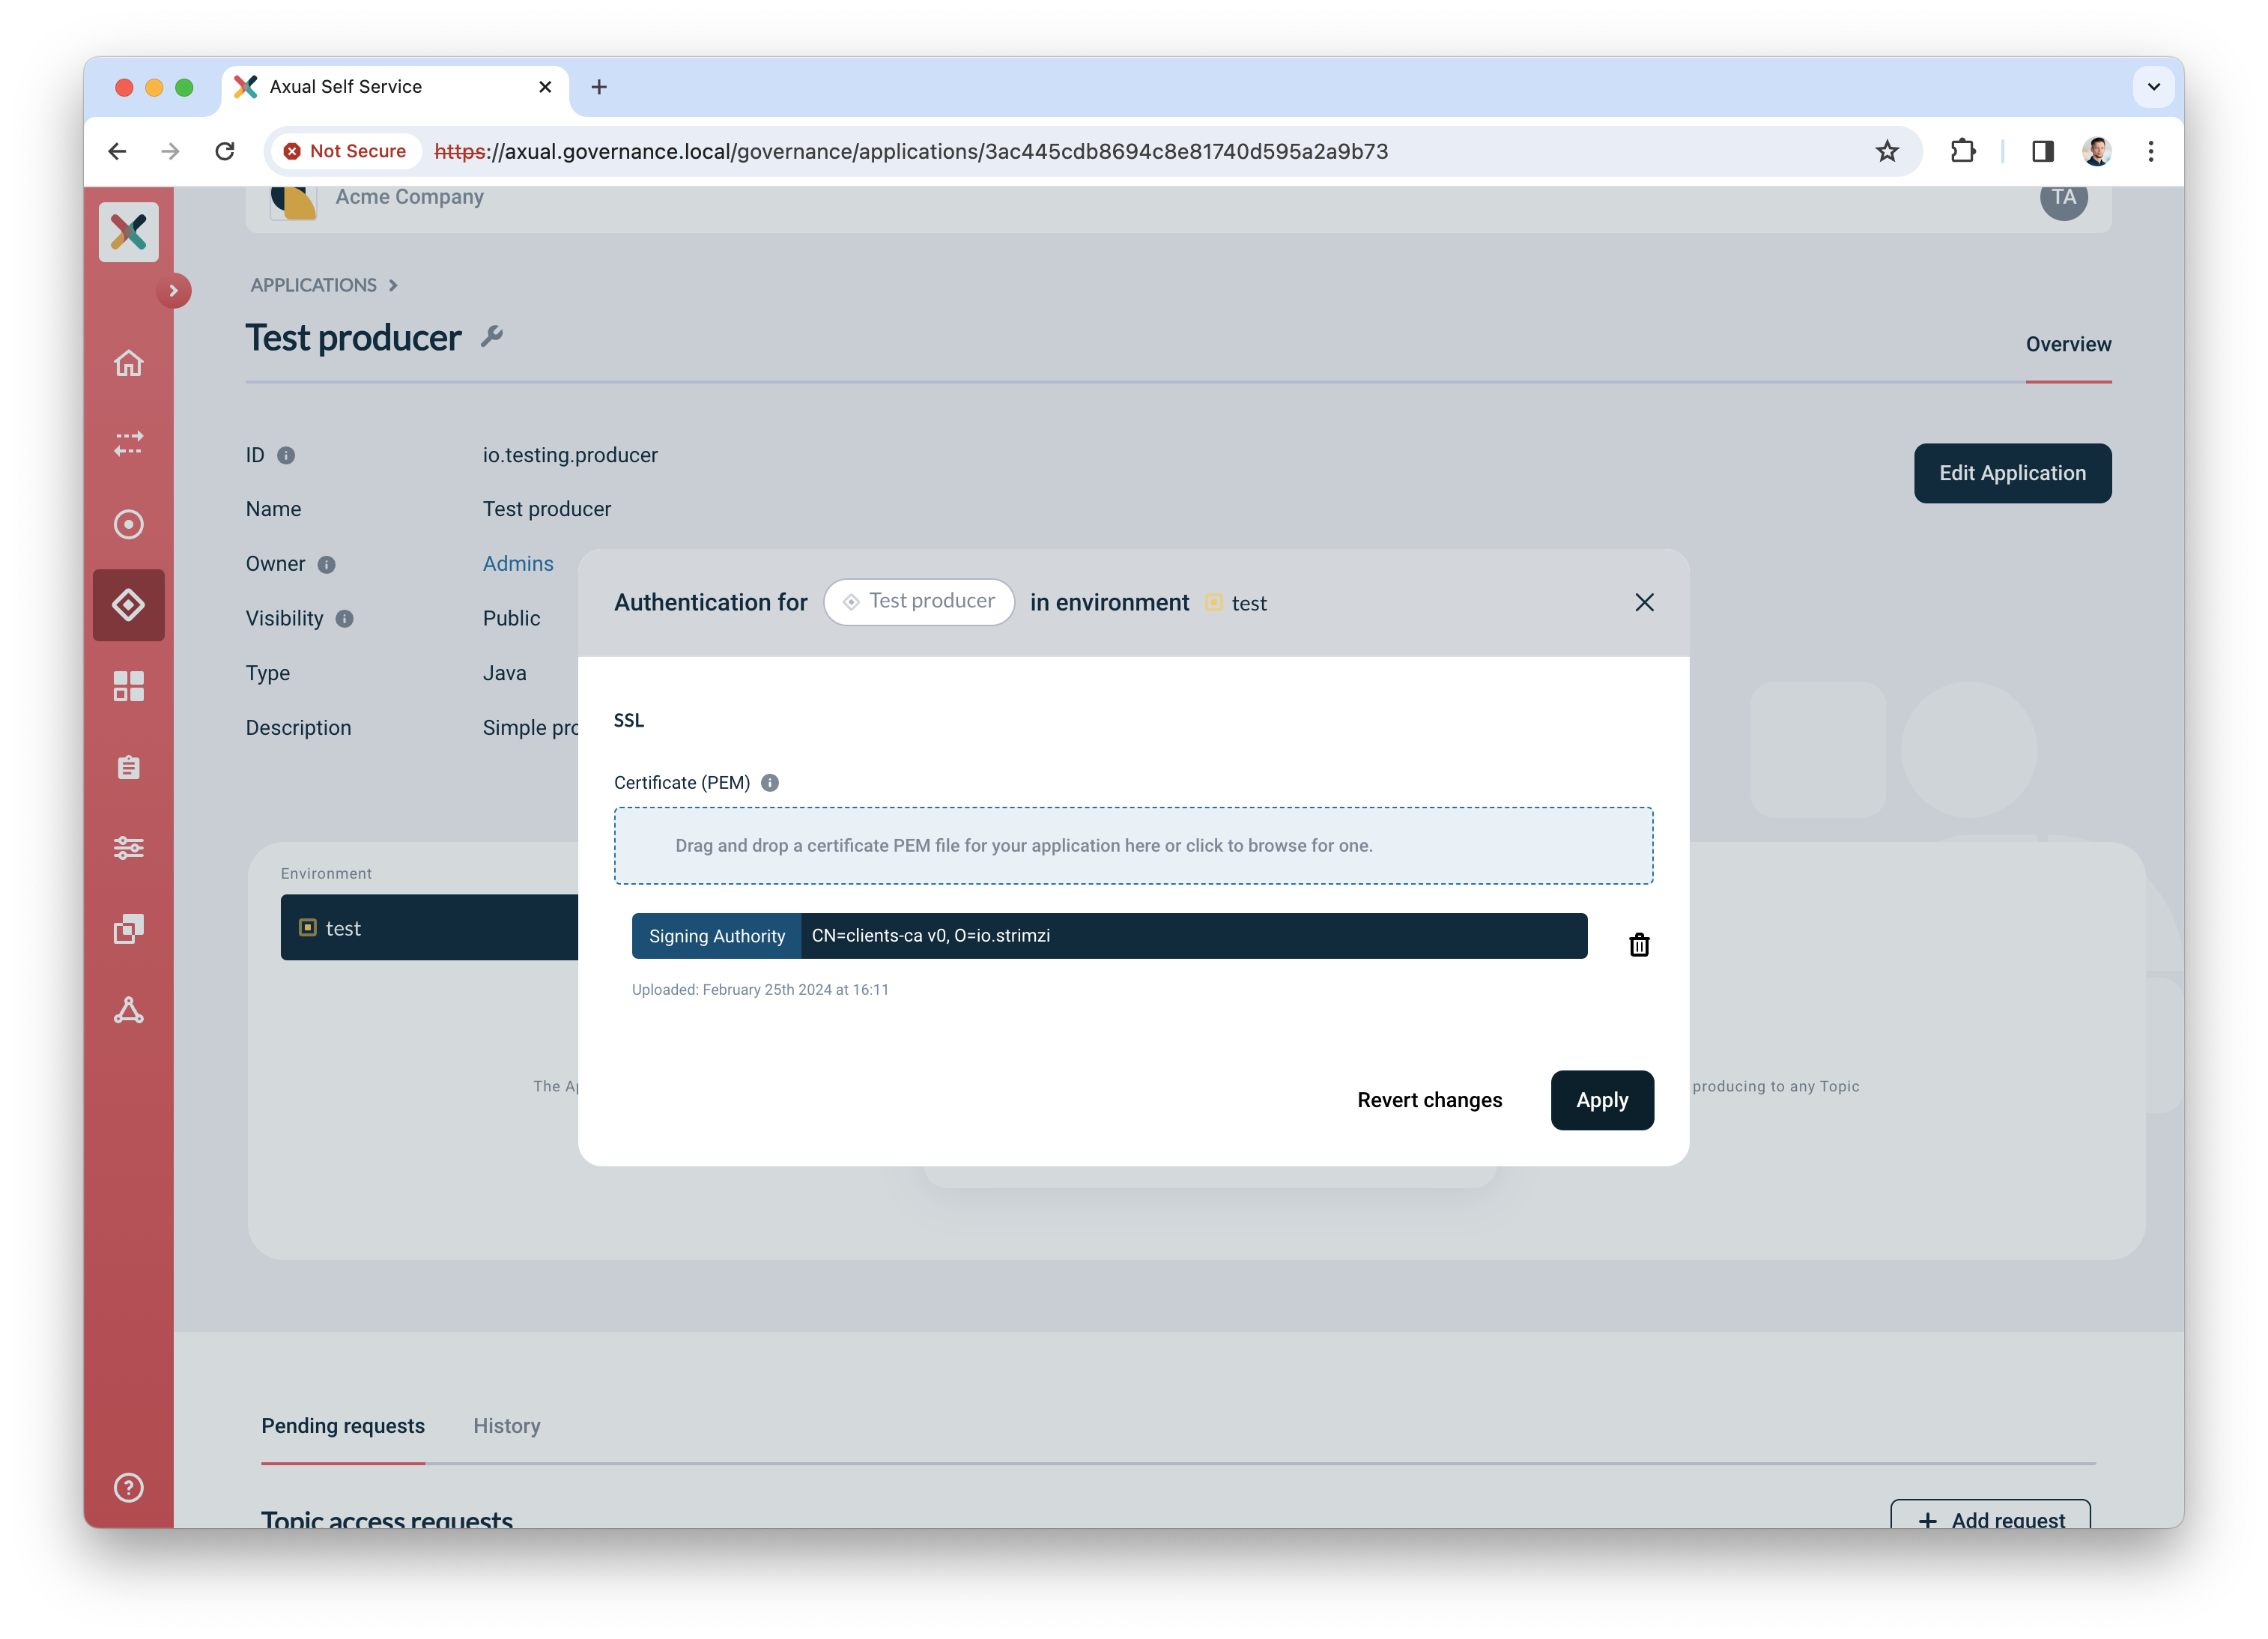
-
Click "Add request" to request produce access on your topic
-
Select "Producer" for produce access
-
Select topic "mytopic"
-
Click "Request approval" to make sure the app with the uploaded certificate can produce
Your app is ready and authorized to produce. Complete your verification by producing some data on the topic.
Producing some data
We are going to use the tool kcat to produce some data to the topic.
-
Install
kcaton your machine. Click here for installation instructions. -
Create a file named
kcat.confwith the following contents# Bootstrap server URL and port bootstrap.servers=bootstrap.servers.url:port security.protocol=SSL # For ssl.key.location and ssl.certificate.location, use the private key and certificate of the app (PEM) # It is the same certificate you uploaded in step 6. "Creating and authorizing the application" above ssl.key.location=clients-ca.key ssl.certificate.location=clients-ca.crt # For ssl.ca.location, use the certificate of the CA which signed the broker's certificate ssl.ca.location=cluster-ca.crt -
Produce some messages to the topic with the following command:
echo "Test message contents" | kcat -F kcat.conf -P -t loc-test-mytopic -k "Test key"Be sure to use the topic name which respects the pattern. In the example above you can see that you are producing a message to topic mytopicin environmenttest, instanceloc -
If you managed to produce messages successfully, you will not see any errors. The final verification is done in Self-Service in the next paragraph.
Verification
The last step in the verification process is done in Self-Service, by using topic browse & search.
-
Find the topic in Self-Service and navigate to the topic detail page
-
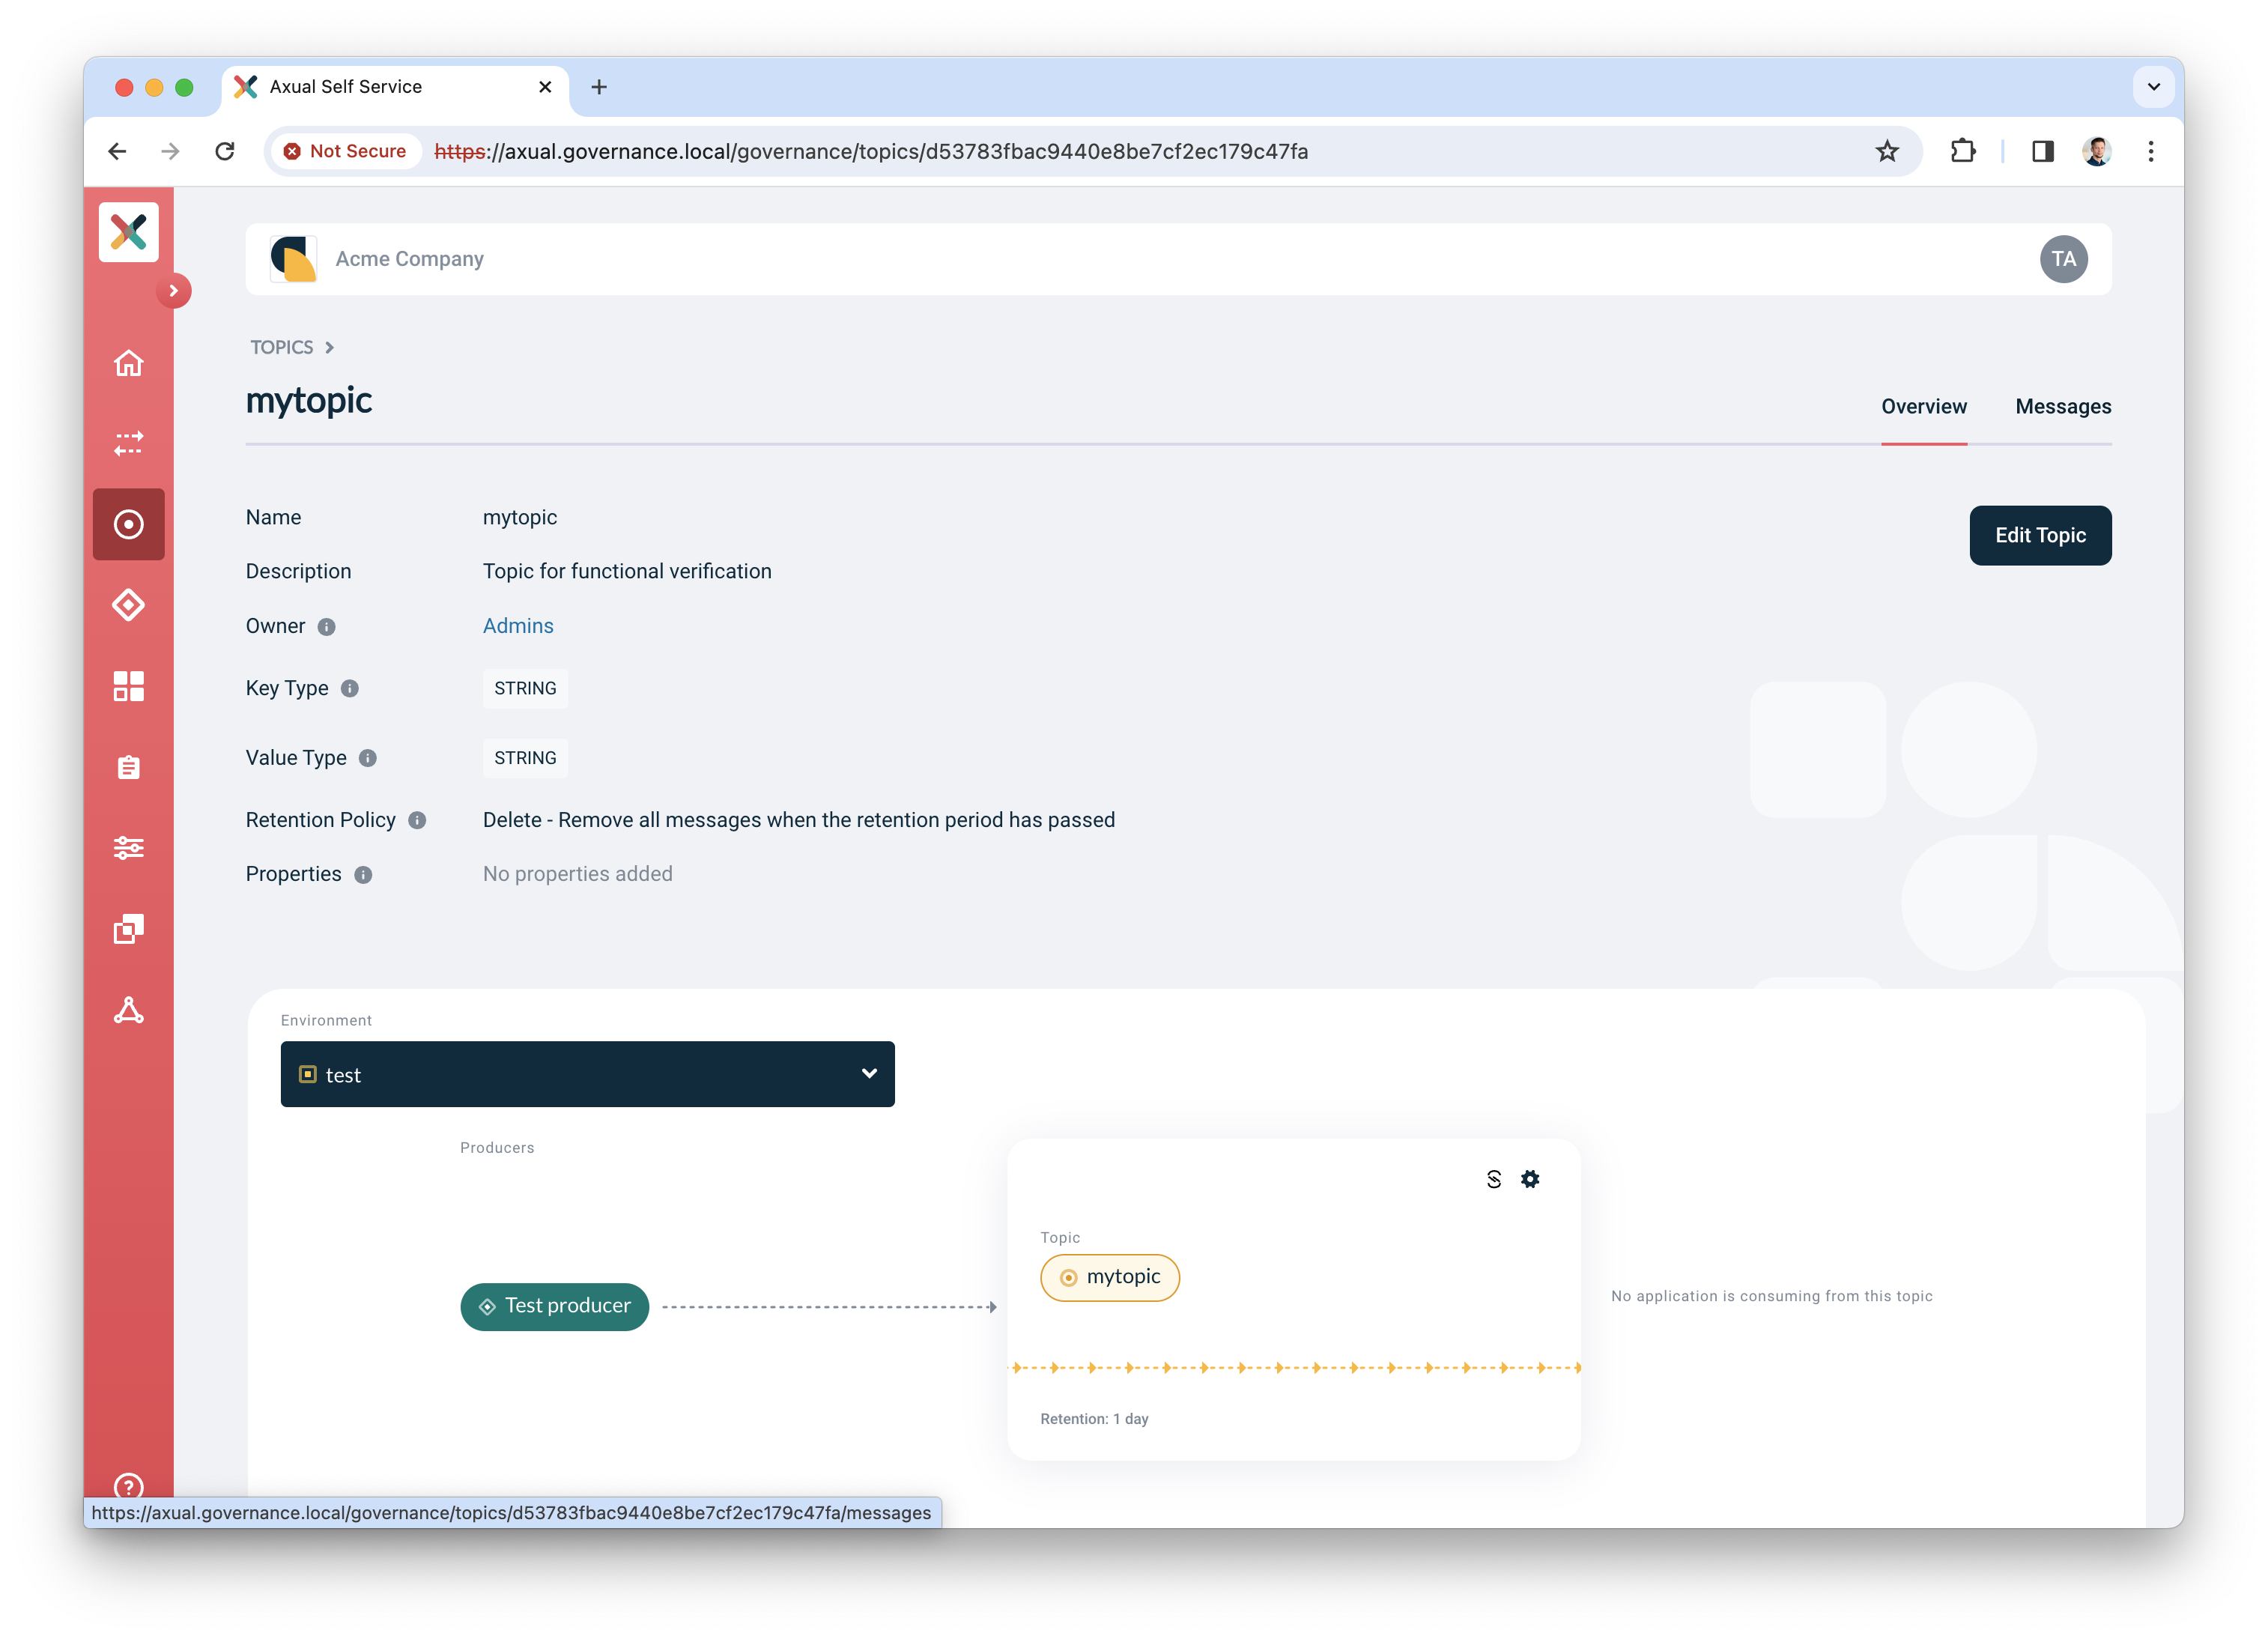
Click the "Messages" tab
-
Click "Search" to accept the default search options and browse for messages on the topic right away. If everything is configured correctly, the messages should become visible below the search controls.
Click a row to expand it and show details for a given message
Conclusion
You have now concluded the first time setup of Self-Service for topic management on Kubernetes, and you have verified the integration between Axual Governance and your Kafka cluster.
Preparing for a production like setup
For a production like setup, you need to do more advanced configuration of the platform. This falls beyond the scope of this "How-To", but is explained under the in the Install the Axual Governance chapter.
Need support?
Please navigate to our Support portal and select Additional » Product trial questions to submit a support request specifically for your trial.