Schema Registry
Apicurio Schema Registry
Apicurio is the alternative solution to Axual schema registry offering. It is only supported in Axual helm charts.
If you are currently on Confluent Schema Registry and want to migrate your schemas to Apicurio it is recommended you follow the migration guide.
Authentication
Apicurio supports anonymous reads over mutual TLS authentication.
Open your values.yaml for your instance and add the following configuration.
platform:
  instance:
    apicurio-registry:
      clientMutualTLS: "REQUIRED"
There are 3 possible values for this configuration:
-
REQUEST: If the client presents its certificate during the connection creation, it’ll be authenticated. If not, the client will still be allowed to connect -
REQUIRED: The client needs to present its certificates. Otherwise, the connection will be rejected -
NONE: No client authentication using mTLS
|
By default, this will be set to |
Authorised Access
If authorization is not enabled, Apicurio allows read/write access of subjects and versions to any type of client communication (example: Producer). But this can create inconsistencies with Axual Self Service applications. So it is recommended to enable client authorization.
In order to enable authorization together with HTTP Basic authentication (for write access), Apicurio requires a Keycloak instance. This can be achieved either by configuring an existing Keycloak installation to cater to Apicurio or by running a dedicated Keycloak instance provided by the helm charts.
Client Authorization Using External Keycloak Installation
Assuming the installation of Apicurio has an external Keycloak instance we will walk through the realm configuration needed by Apicurio.
In the Keycloak Admin Console create two new clients, in this example we name those apicurio-api, apicurio-web.
-
apicurio-api:-
Client ID:
apicurio-api -
Client Protocol: openid-connect
-
Access Type: bearer-only
-
Enable
Service Accountssince that will be used -
rest is defaults
-
Go to
Rolestab and add rolessr-admin,sr-developer, andsr-readonly -
Then go to
Service Account Rolesand make suresr-adminis assigned to the service account role. -
Lastly to
Credentialstab and get the generated secret for the client. It will be needed later.
-
-
apicurio-web:-
Client ID:
apicurio-web -
Client Protocol: openid-connect
-
Access Type: public
-
Web Origins:
* -
Valid redirect urls:
* -
rest is defaults
-
Go to
Rolestab and add rolessr-admin,sr-developer, andsr-readonly
-
The first will be used for write operations (used by instance-manager for schema uploads on topic applies). The second is used to access Apicurio’s UI from the browser.
The configuration of Keycloak for Apicurio is well documented within their product documentation further details can be found in their website (ref 1 section Configuring Apicurio Registry authentication and authorization with Keycloak, 2).
|
Once Keycloak has been configured as required you can proceed to configuring Apicurio itself as follows:
global:
  instance:
    apicurio:
      enabled: true
      keycloak:
        enabled: false  (1)

instance:
  apicurio-registry:
    security:
      authentication:
        enabled: true  (2)
      keycloak:
        realmOverride: "axual"  (3)
        url: "https://external-keycloak:8443/auth"  (4)
        apiClientId: "apicurio-api"
        webClientId: "apicurio-web"
    initKeycloakRealmJob:
enabled: false (5)| 1 | Disable dedicated keycloak since we are using an external instance |
| 2 | Enable auth for Apicurio access |
| 3 | Name of the realm in which the clients have been defined |
| 4 | URL of keycloak ending in /auth |
| 5 | Disable automatic realm initialization since the realm was edited to contain the required clients manually |
Lastly you will need to configure instance manager such that it can authenticate against Keycloak in order to reach Apicurio.
instance:
  instanceapi:
    schemaRegistryMasterHostOverride: "axual-local-apicurio-registry"
    schemaRegistryMasterPortOverride: "20500"
    schemaRegistryMasterContextPathOverride: "/apis/ccompat/v6"
    schemaRegistryMasterUsernameOverride: "apicurio-api"
    schemaRegistryMasterPasswordOverride: ""  (1)
schemaRegistryMasterAuthEnabled: "true"| 1 | Secret obtained from the last step of configuration apicurio-api |
Client Authorization Using Internal Keycloak Installation
In case you prefer to have a dedicated Keycloak instance that runs together with other instance level components, Axual Helm Charts can install a new Keycloak instance alongside with Apicurio. Following is an example configuration
|
This Keycloak installation currently requires a Postgres database. Postgres is not shipped with Axual Helm Charts. It is best to use a managed (cloud) or on-prem Postgres instance for this. |
instance:
apicurio-registry:
keycloak:
persistence:
dbHostaddress: my-postgresql
dbPort: 5432
secrets:
database-creds:
stringData:
user: <user>
password: <password>
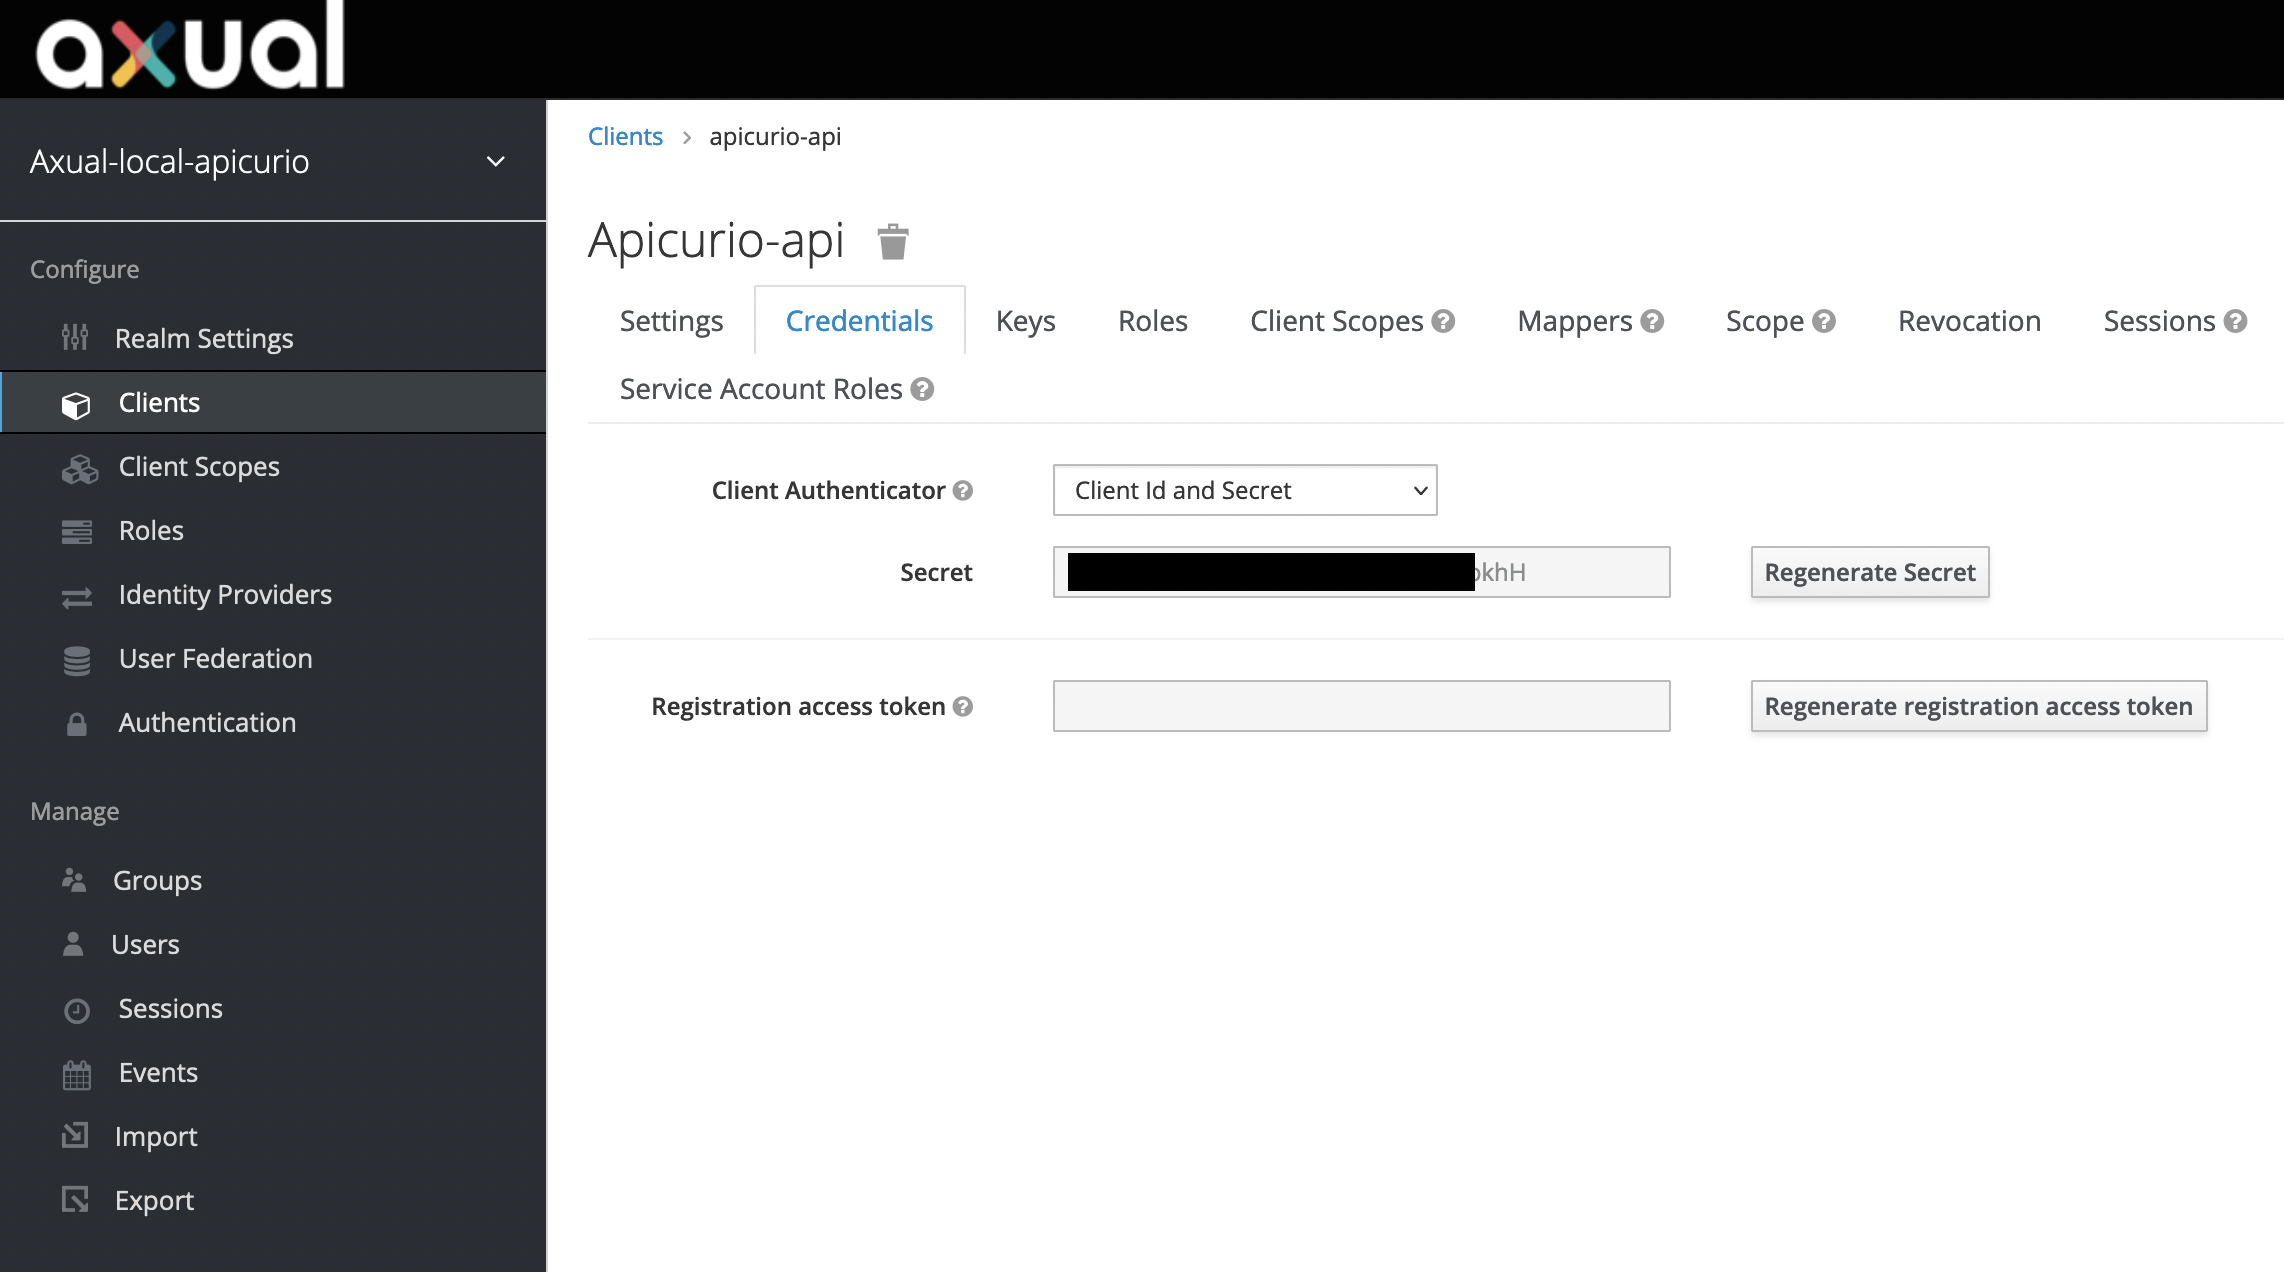
database: <database name>Extracting Client Credentials for Apicurio API Write Access
Once the initKeycloakRealmJob runs, it should populate the necessary Keycloak clients and default client credentials.
This can be used to communicate with Apicurio make write calls to it. By default, the configuration will allow anonymous users
to make read calls to Apicurio APIs (mTLS can be enabled for read calls).
Following is a sample screenshot of how client credentials were configured in Apicurio API Client.