Initialize Management Services with Axual CLI
Management Configuration
After starting your cluster and instance services, it is time to set up the management services.
Create the databases for Keycloak and Platform Manager
Remote DB
If you have a MariaDB or MySQL external instance, you must manually create the databases and the grant accesses.
Start the Management Database (mgmt-db)
If you have decided to run MariaDB as an internal service, you can automatically create the databases and access grants with Axual CLI.
-
Create a
platform-config/clusters/[your-cluster]/mgmt-db.shfile that contain the MariaDB root password.
# Location at which the database is stored on the host machine disk
MGMT_DB_VOLUME=[path-to-your-location]
# Optional property to pass root password of the MariaDB instance
DB_ROOT_PASSWORD=[your-db-root-password]-
axual.sh start mgmt mgmt-db
Create Keycloak Database and Access User
-
Create a
platform-config/clusters/[your-cluster]/keycloak.shfile with the Keycloak configuration for connecting tomgmt-db.
KEYCLOAK_DB_DATABASE=[keycloak-db-name]
KEYCLOAK_DB_USER=[keycloak-db-username]
KEYCLOAK_DB_PASSWORD=[keycloak-db-password]-
Edit your
platform-config/clusters/[your-cluster]/nodes.shfile by addingkeycloak-create-dbbeforemgmt-keycloakto your MGMT_SERVICES.
| This service will create the database and the user to access the database. You must execute the service on the node that runs the mgmt-db. |
...
NODE1_MGMT_SERVICES=node-1:[..],keycloak-create-db,mgmt-keycloak,[..]
...-
axual.sh start mgmt keycloak-create-db
You can remove the keycloak-create-db from your platform-config/clusters/[your-cluster]/nodes.sh file after successfully creating the Keycloak database and user.
Create Self-Service Database and Access User
-
Create a
platform-config/clusters/[your-cluster]/mgmt-api.shfile with the Management API configuration for connecting tomgmt-db.
# The name of the database which MGMT-API can use to persist data to
MGMT_API_DB_NAME=[mgmt-api-db-name]
# The user which has full privileges on the MGMT_API_DB_NAME database.
MGMT_API_DB_USERNAME=[mgmt-api-db-username]
# The password of the user with full privileges on the MGMT-API database.
MGMT_API_DB_PASSWORD=[mgmt-api-db-password]-
Edit your
platform-config/clusters/[your-cluster]/nodes.shfile by addingmgmt-api-create-dbbeforemgmt-apito your MGMT_SERVICES.
| This service will create the database and the user owner. You must execute the service on the node running the mgmt-db. |
...
NODE1_MGMT_SERVICES=node-1:[..],mgmt-api-create-db,mgmt-api,[..]
...-
axual.sh start mgmt mgmt-api-create-db
You can remove mgmt-api-create-db from your platform-config/clusters/[your-cluster]/nodes.sh file after creating the Management API DB and user.
| We can now start mgmt-keycloak and mgmt-api. |
Configure Keycloak Realm
To configure your first Realm, you need to start Keycloak.
Configure keycloak.sh with valid DB credentials
-
Edit your
platform-config/clusters/[your-cluster]/keycloak.shfile with information regarding the DB credentials and Keycloak Admin credentials
KEYCLOAK_DB_VENDOR=[mariadb or mysql, based on your mgmt-db]
KEYCLOAK_DB_ADDR=[your mgmt-db address]
KEYCLOAK_DB_PORT=[your mgmt-db port, usually 3306]

KEYCLOAK_HOSTNAME=[keycloak-address]
# Port to listen on
KEYCLOAK_PORT=[keycloak-auth-port]

# Admin user of keycloak
KEYCLOAK_USER=[keycloak-admin-user]
# Admin password of keycloak
KEYCLOAK_PASSWORD=[keycloak-admin-password]-
axual.sh start mgmt mgmt-keycloak
Access the Admin console
Now that Keycloak has started, we can access the Admin Console using the Admin credentials defined in your platform-config/clusters/[your-cluster]/keycloak.sh file.
-
Open your favourite web browser and access
https://[keycloak-address]:[keycloak-auth-port]/authand login with the Admin credentials -
From the Realm selection, press
Add realmbutton -
Provide a name to the new Realm, and press
save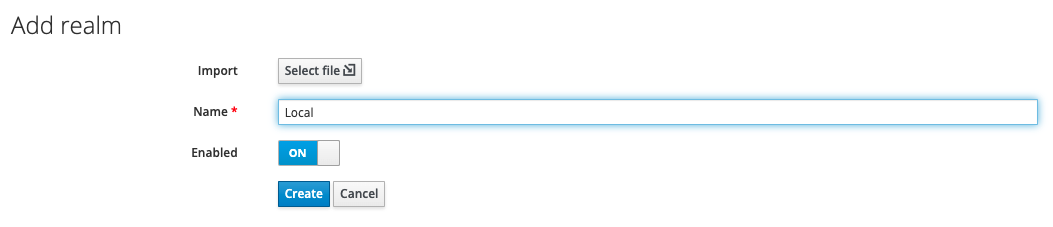
In case you have already a realm.json you can import here -
Click
Security Defenses -
Click
Brute Force Detection -
Enable the
Brute Force Detention. This is used to protect Keycloak from brute force login attempts -
Press
Save -
Go to the
Clientspage using the sidebar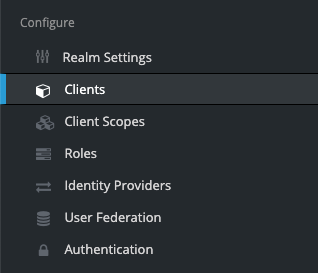
-
Click on
Create -
Fill in the
Client IDasself-serviceand theRoot URLas the domain where the Self-Service can be accessible -
Click
Save -
Check that
Valid Redirect URLsandWeb Originsmatches the URL of the Self-Service -
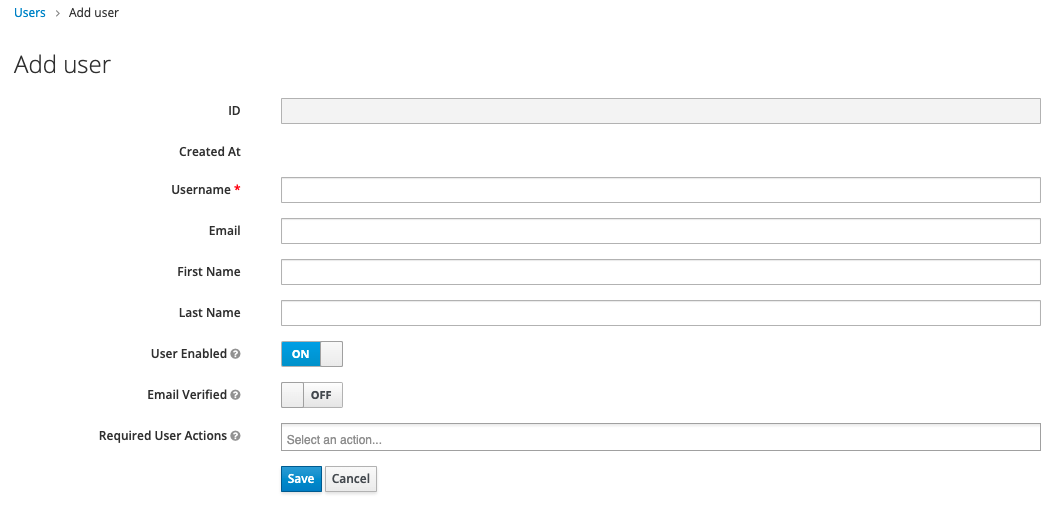
Go to the
Userspage using the sidebar
-
Click
Add User -
Fill in the form
-
Press
Save
Initialize Platform Manager
Now that we have configured the Realm, we can start the mgmt-api and initialize the first tenant in your Platform Manager.
Configure mgmt-api.sh with valid DB credentials
First, let’s start mgmt-api service.
-
Edit your
platform-config/clusters/[your-cluster]/keycloak.shfile with information regarding the DB credentials and Keycloak Admin credentials
# The port on which the MGMT-API is mapped on the HOST machine (internally, the container hosts it on 8080)
# This port can be used when configuring a proxy
MGMT_API_PORT=8090
# The port on which the MGMT-API-MANAGEMENT-PORT is mapped on the HOST machine (internally, the container hosts it on 8086)
MGMT_API_MGMT_PORT=8096

# The URL which should be used by the MGMT-UI running in the same cluster as this MGMT-API
# to access the MGMT API
MGMT_API_URL=https://192.168.99.100:8090/api

# Is the MGMT-DB not part of this cluster's configuration?
# "true" or "false"
# If "true", you must provide the MGMT_API_DB_HOST variable
MGMT_API_REMOTE_DB=[true or false]

# The name of the database which MGMT-API can use to persist data to
MGMT_API_DB_NAME=[mgmt-api-db-name]
# The user which has full privileges on the MGMT_API_DB_NAME database.
MGMT_API_DB_USERNAME=[mgmt-api-db-username]
# The password of the user with full privileges on the MGMT-API database.
MGMT_API_DB_PASSWORD=[mgmt-api-db-password]

# This URL will be whitelisted in the Content Security Policy of MGMT-UI.
# If MGMT-API is behind a proxy or load balancer, use that URL.
MGMT_API_HOST=[mgmt-api-host-with-port]


##############
# SERVER SSL #
##############

# Server SSL enable/disable flag. "true" or "false"
# When true, a keystore is expected to exist at security/mgmt-api.server.keystore.jks on the host machine
MGMT_API_SERVER_SSL_ENABLED=true

# Enable HTTP/2 support in MGMT-API. If true, SSL must also be enabled.
MGMT_API_SERVER_HTTP2_ENABLED=false

# The password of the keystore located at security/mgmt-api.server.keystore.jks on the host machine
MGMT_API_SERVER_SSL_KEY_STORE_PASSWORD=[your-password]

# The alias of the private key which MGMT-API will be using from the keystore
MGMT_API_SERVER_SSL_KEY_ALIAS=[your-key-alias]

# The password of the key located at security/mgmt-api.server.keystore.jks on the host machine
MGMT_API_SERVER_SSL_KEY_PASSWORD=[your-password]

MGMT_API_TRUSTSTORE_PASSWORD=[your-password]

##############
# CLIENT TLS #
##############

MGMT_API_INSTANCE_API_KEY_PASSWORD=[your-password]
MGMT_API_INSTANCE_API_KEY_STORE_PASSWORD=[your-password]
MGMT_API_INSTANCE_API_TRUST_STORE_PASSWORD=[your-password]

MGMT_API_OPERATION_MANAGER_KEY_PASSWORD=[your-password]
MGMT_API_OPERATION_MANAGER_KEY_STORE_PASSWORD=[your-password]
MGMT_API_OPERATION_MANAGER_TRUST_STORE_PASSWORD=[your-password]-
axual.sh start mgmt mgmt-api
Initialize the first Tenant in the Platform Manager
Now that mgmt-api has started, we need to initialize the first tenant
-
Edit your
platform-config/clusters/[your-cluster]/keycloak.shfile withKEYCLOAK_RESTRICT_ADMIN=FALSEso that Platform Manager can access Keycloak to perform some integrity checks
KEYCLOAK_RESTRICT_ADMIN=FALSE-
axual.sh restart mgmt mgmt-keycloak -
Make a POST curl request to Platform Manager to initialize the tenant
curl --request POST \
  --url https://[mgmt-api-host:mgmt-api-port]/api/initialize \
  --header 'Content-Type: application/json' \
  --data '{
  "tenantName" : [your-tenant-name],
  "tenantShortName" : [your-realm-name],
  "tenantUserEmail" : [email address of the user you have created in the realm]
}'
The user identified with the tenantUserEmail will get created in the Platform Manager DB, and it will receive SUPER_ADMIN role. This user has the highest access rights in Self-Service.
|
-
After received a
204 No Contentresponse, you can proceed to next step to start the Self-Service UI
You can now restore KEYCLOAK_RESTRICT_ADMIN=TRUE and restart mgmt-keycloak
|
Start the Self-Service UI
Configure mgmt-ui.sh
First, let’s c mgmt-api service.
-
Create a
platform-config/clusters/[your-cluster]/mgmt-ui.shfile with information regarding the OIDC and CSP configuration
#########
# PORTS #
#########

# The port on which the MGMT-UI is mapped on the HOST machine (internally, the container hosts it on 8443)
MGMT_UI_PORT=8095


#################
# CONFIGURATION #
#################

MGMT_DOMAIN=[self-service domain]

MGMT_UI_CONFIGURATION_TYPE="remote"
MGMT_UI_CLIENT_ID="self-service"
MGMT_UI_SCOPES="openid profile"
MGMT_UI_CLIENT_SECRET="notSecret"
MGMT_UI_URL=[mgmt-ui-host:mgmt-ui-port]

# This URL will be whitelisted in the Content Security Policy of MGMT-UI.
# If MGMT-UI is behind a proxy or load balancer, use that URL.
MGMT_UI_HOST=[mgmt-ui-host:mgmt-ui-port]

# Base URL for stream browse url
MGMT_STREAM_BROWSE_URL="[stream-browse-host:stream-browse-port]/api/browse"-
Start the Self-Service UI
axual.sh start mgmt mgmt-ui