Step 1: Running Axual
Running Axual locally
By following the steps below you can run Axual locally and follow the remainder of the Getting Started.
Prerequisites
Before starting, there are a few things required to setup:
| Make sure that your docker daemon has at least 3GB of RAM and 6 CPU cores |
Downloading Axual
-
login into Axual’s docker repository with
docker login docker.axual.iousing the credentials provided by Axual. -
download the local installation of Axual using the same docker credentials.
Package contents
The example setup of Axual Deploy contains the following:
-
Deployment scripts (scripts that start/stop the platform services)
-
Platform configuration (cluster, instance and tenant configuration)
-
Security folder with dummy Keystores for components in order to enable SSL communication
-
The initial-setup.sh script
-
The axual.sh script
Initial setup (first time only)
| The following steps are only necessary the first time. After you have completed these steps, your machine is setup and prepared to run Axual multiple times |
Firstly, start your terminal application. Use your favorite text editor to append the following line at the bottom of your /etc/hosts file: "192.168.99.100 platform.local".
192.168.99.100 platform.localNext, we will unzip the previously downloaded tar file in a newly made directory.
mkdir ~/local-axual-directory
tar -xvf ~/Downloads/axual-platform-local-2020-2.tar.gz -C ~/local-axual-directory
Before running Axual for the first time, it is required to run the initial-setup.sh script to prepare your machine. You will be prompted for the sudo password for make a local modification to your hosts file.
| You will also be prompted to create a password for a local (Dockerized) database. Please use the same password for all questions. |
~/local-axual-directory/setup.sh -runYou should see the following output (or similar):
Writing the host file at /Users/[YOUR HOST]/host.sh
Creating local data directory at /Users/[YOUR HOST]/axual_local_data
The SQL file which contains demo statements already exists at /Users/[YOUR HOST]/.../initial-data.sql. Skipping creation...
The realm.json file which contains demo statements for Keycloak already exists at /Users/[YOUR HOST]/.../local-config/clusters/local/configuration/keycloak/realm.json. Skipping creation...

Starting an unsealed and configured Vault container.
Cannot connect to the Docker daemon at unix:///var/run/docker.sock. Is the docker daemon running?
docker: Cannot connect to the Docker daemon at unix:///var/run/docker.sock. Is the docker daemon running?.
See 'docker run --help'.
Local Vault started

URL        : http://localhost:8200
root token : [TOKEN]
Key 1      : [KEY}

Remember: This container is used for the local test installation, need to be stop and remove with docker commands
docker stop mgmt-local-vault && docker rm -f mgmt-vault-local
Setup complete.
###############

Start the platform with './axual.sh [-v] start' (optional argument '-v' stands for verbose)
You will be prompted to insert the DB root password.

After the platform starts, login into the self-service portal using the following credentials:
URL: https://192.168.99.100:8095/login/demo
Username: 'demo@axualdemo.nl'
Password: 'password'

Use the following configuration for your application to connect to this Axual platform deployment:
Discovery Endpoint = https://192.168.99.100:443
Tenant = demo
Environment =localenv
The key principal to be used in self service application registration and keystores can be found at /Users/sunny/development/local-config/security/application/
Truststores in PKCS12, JKS and PEM format can be found at /Users/.../local-config/security/application/common-truststore
All keystore, truststore and key passwords are 'notsecret'
The application ID and version are chosen by the developer and registered via self service

You can run './setup.sh -run' again to display this screen

In case your UI is not showing anything, check the console error of browser. There should be an error like:
CSP invalid.
In this case, copy the SHA value from the console and add it to /clusters/local/mgmt-ui.sh
inside MGMT_UI_SMALLCHAT_SHA variable.
Customization is possible, run the script with -help instead of -run for more information.
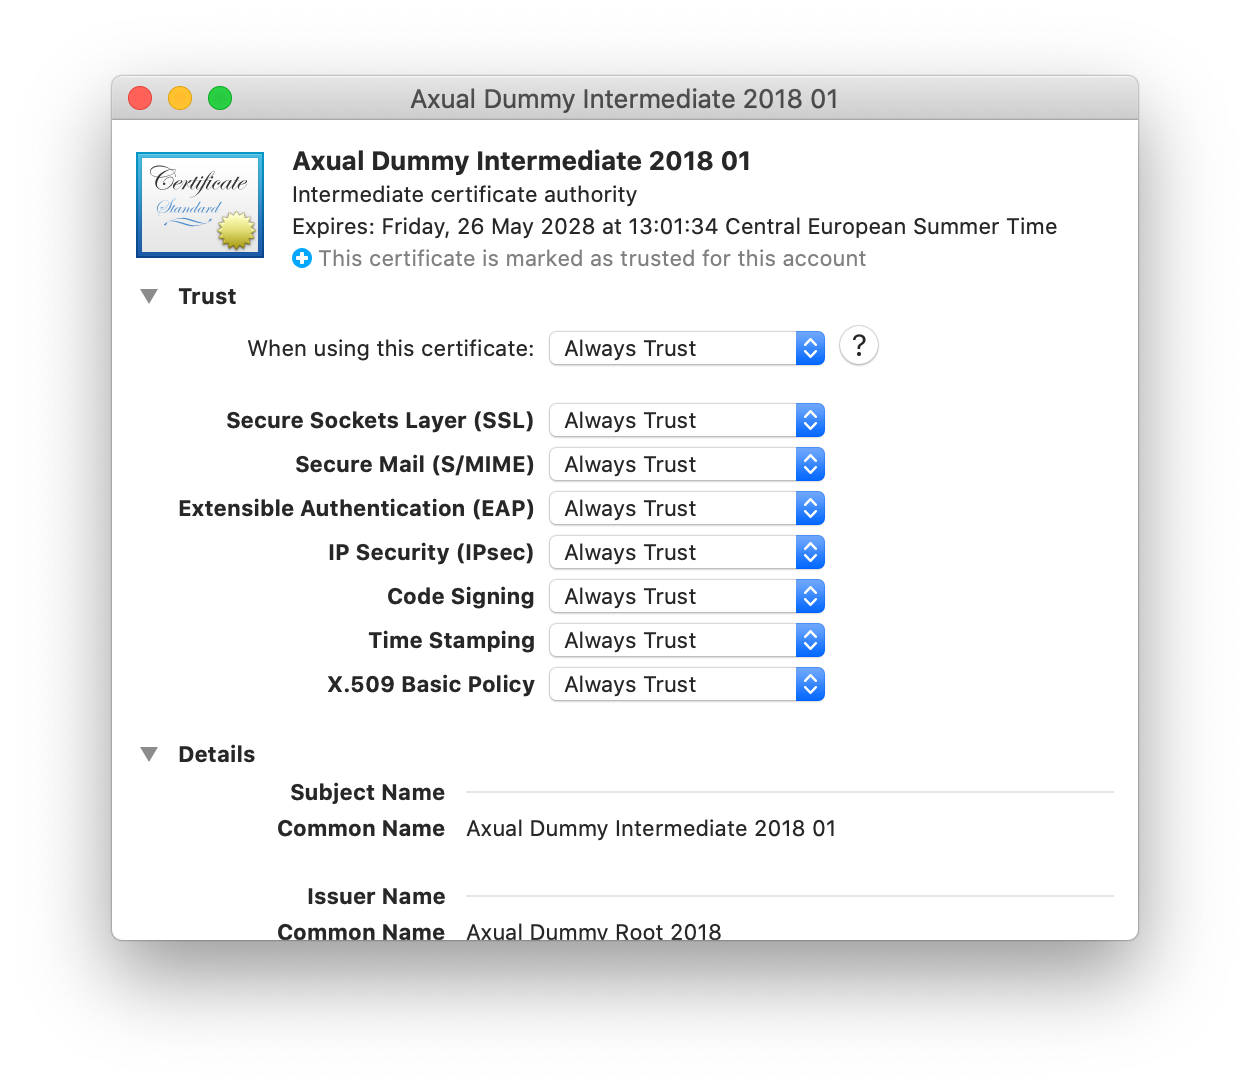
Trusting our Certificate Authority
In the local setup of the platform, we use a lot of certificates signed by "Axual Dummy Intermediate 01". In order to prevent browser warnings, you have to import that certificate in your local keychain (MacBook) and mark it as trusted.
-
Download the Axual Dummy Intermediate 2018 01 certificate file
-
Double click it, "KeyChain Access" will open.
-
Mark the certificate as "Always Trusted" as indicated in the screenshot below
Running the platform
To simply start the platform, run the following command:
~/local-axual-directory/axual.sh startIf everything went successfully, a similar output should be present in the console:
Configuring cluster services for node localhost in cluster LOCAL
Preparing exhibitor: Done
Starting exhibitor: Done
Waiting for exhibitor on 192.168.99.100
Connected to exhibitor on 192.168.99.100
Preparing broker: Done
Starting broker: Done
Waiting for broker on 192.168.99.100
Connected to broker on 192.168.99.100
Preparing cluster-api: Done
Starting cluster-api: Done
Preparing distributor: Done
Starting distributor: Done
Deploying topic _company-local-environments: Done
Deploying topic _company-local-schemas: Done
Configuring instance services for company-local in cluster LOCAL
Stopping distributors with prefix company-local-message-distributor-from-: Done
Stopping distributors with prefix company-local-offset-distributor-from-: Done
Stopping distributors with prefix company-local-schema-distributor-: Done
Preparing company-local-sr-master: Done
Starting company-local-sr-master: Done
Preparing company-local-sr-slave: Done
Starting company-local-sr-slave: Done
Running copy-config-company-local-discovery-api: Done
Preparing company-local-discovery-api: Done
Done
Starting company-local-discovery-api: Done
Preparing company-local-instance-api: Done
Cluster servers are https://platform.local:9080
Done
Starting company-local-instance-api: Done
Configuring mgmt services for node localhost in cluster LOCAL
Running clean-config-prometheus: /config/prometheus
Done
Generating prometheus targets...
Generating prometheus configuration...
Running create-config-prometheus: Done
Running copy-config-prometheus: Done
Starting prometheus: Done
Provisioning grafana dashboards...
Running copy-config-grafana: Done
After the platform starts, login into the self-service portal using the following credentials:
| Please make sure to use a supported browser |
URL: https://192.168.99.100:8095/login/demo
Username: 'demo@axualdemo.nl'
Password: 'password'
To stop the platform, run the following command:
~/local-axual-directory/axual.sh stopNext step: Creating A Stream
You are now ready to move on to the next step 2. Creating a stream to make sure you can connect to the platform securely and your application(s) can be authorized to access the stream.